Page 2 - Welcome to the Danby family.; You must keep the original proof
1 Welcome to the Danby family. We are proud of our quality products and we believe in dependable service. We suggest that you read this owner’s manual before plugging in your new appliance as it contains important operation information, safety information, troubleshooting, and maintenance tips to en...
Page 3 - CAUTION: RISK OF FIRE; SAFETY REQUIREMENTS; Do not connect your appliance to extension; Important Safety Information; READ AND FOLLOW ALL SAFETY INSTRUCTIONS; SAVE THESE INSTRUCTIONS!
2 CAUTION: RISK OF FIRE Flammable refrigerant used. When maintaining or disposing of the air conditioner, the refrigerant must not be allowed to vent into the open air. SAFETY REQUIREMENTS DANGER: Risk of fi re or explosion. Flammable refrigerant used. Do not damage the refrigerant circuit. • Ensure ...
Page 4 - Information on ser vicing
Important Safety Information READ AND FOLLOW ALL SAFETY INSTRUCTIONS Any person involved with working on the refrigerant circuit should hold a current, valid certifi cate from an industry accredited assessment authority which authorizes their competence to handle refrigerants safely in accordance wit...
Page 5 - Repairs to sealed components
Important Safety Information READ AND FOLLOW ALL SAFETY INSTRUCTIONS The following checks shall be applied to installations using fl ammable refrigerants: • The charge size is in accordance with the room size within which the refrigerant containing parts are installed. • The ventilation machinery and...
Page 6 - Removal and evacuation
Important Safety Information READ AND FOLLOW ALL SAFETY INSTRUCTIONS Removal and evacuation When breaking into the refrigerant circuit to make repairs or for any other purpose conventional procedures shall be used. However, it is important that the best practice is followed since fl ammability is a c...
Page 7 - Decommissioning
Important Safety Information READ AND FOLLOW ALL SAFETY INSTRUCTIONS Decommissioning Before carrying out this procedure, it is essential that the technician is completely familiar with the equipment in all its detail. It is recommended good practice that all refrigerants are recovered safely. Prior ...
Page 8 - INSTALLATION INSTRUCTIONS; ACCESSORIES; Important
INSTALLATION INSTRUCTIONS 7 ACCESSORIES 1. Air outlet adapter 2. Exhaust hose 3. Window slider adapter 4. 8 Bolts 5. Window slider A and B 6. Window slider B and C 7. Foam seal A and B (adhesive) 8. Foam seal C (non-adhesive) 9. Drain hose 10. Remote control and batteries 1 2 3 4 5 6 7 8 9 10 2 3 1 ...
Page 9 - INSTALLING THE WINDOW KIT; IMPORTANT WARNING
INSTALLATION INSTRUCTIONS 8 INSTALLING THE WINDOW KIT The window kit can be used in either a hung window or a sliding window application. The images at the right are for a hung window. The steps for a sliding window are the same. 1. Cut the adhesive foam seals A and B to the correct length for the w...
Page 10 - OPERATING INSTRUCTIONS
9 FEATURES 1. Control panel2. Louver3. Display4. Handle (both sides)5. Casters6. Air intake7. Remote control holder8. Power cord9. Intake grille10. Condenser drain11. Plug fi xer12. Air outlet grille LOCATION Place the air conditioner on a smooth, level fl oor that is strong enough to support it and a...
Page 11 - CONTROL PANEL
OPERATING INSTRUCTIONS 10 CONTROL PANEL 1. Fan button: Used to set the fan speed; low, medium, high or auto. 2. Decrease button: Used to decrease the set temperature. 3. Increase button: Used to increase the set temperature. 4. Mode button: Used to choose the mode; cool, heat, fan or dry. 5. Power b...
Page 13 - TIMER
OPERATING INSTRUCTIONS 12 TIMER The timer function can be used to turn the appliance on or off after a period of time to conserve energy. To set the timer to turn the appliance off: 1. While the appliance is running, press the timer button. The time display will fl ash. 2. Press the timer button to c...
Page 14 - FOLLOW ME
OPERATING INSTRUCTIONS 13 FOLLOW ME The follow me feature can only be activated from the remote control. The remote control has a thermostat inside of it. Keep the remote control will you and the air conditioner will automatically adjust the set temperature based on the ambient temperature at your l...
Page 15 - REMOTE CONTROL
OPERATING INSTRUCTIONS 14 REMOTE CONTROL 1. Power button: Used to turn the appliance on or off. 2. Turbo button: The turbo feature is not available on this model. 3. Temperature control buttons: Used to increase or decrease the set temperature. 4. Timer button: Used to set the timer function. 5. Mod...
Page 16 - IMPORTANT
OPERATING INSTRUCTIONS 15 IMPORTANT Do not dispose of batteries as unsorted municipal waste. Refer to local laws for proper disposal of batteries. This equipment has been tested and found to comply with the limits for a Class B digital device, pursuant to Part 15 of the FCC Rules. These limits are d...
Page 17 - WATER DRAINAGE
OPERATING INSTRUCTIONS 16 2. Continuous Drain During the dry mode, you may wish to set up the continuous drain option so that the appliance will automatically drain collected water. Ensure that the appliance is turned off and unplugged from the power source before setting up the drain hose. Remove t...
Page 18 - PF
CARE & MAINTENANCE CLEANING • Unplug the appliance before cleaning or servicing. • Clean the cabinet with a lukewarm damp cloth and neutral detergent. Dry the cabinet with a lint-free dry cloth. • Do not use gasoline, paint thinner or other chemicals to clean the appliance. • Do not wash the app...
Page 19 - FREQUENTLY ASKED QUESTIONS; This is not recommended.
18 FREQUENTLY ASKED QUESTIONS Can I leave my AC in place through the winter? This is not recommended. What are the standard wattage and amps used? Information pertaining to watts and amps can be found on the rating plate located on the side of the unit. When should I use the exhaust hose? The exhaus...
Page 20 - TROUBLESHOOTING; Appliance will not operate; • Air; Noise
TROUBLESHOOTING 19 Appliance will not operate • Plug is not fully inserted into the wall outlet• Blown fuse or circuit breaker Insuffi cient cooling • Air fi lter is dirty • Blocked air fl ow• Appliance size is too small for application Noise • The ground is not level• The air fi lter is dirty or blocke...
Page 21 - LIMITED IN-HOME APPLIANCE WARRANTY; LIMITED “IN HOME” WARRANTY
LIMITED IN-HOME APPLIANCE WARRANTY This quality product is warranted to be free from manufacturer’s defects in material and workmanship, provided that the unit is used under the normal operating conditions intended by the manufacturer.This warranty is available only to the person to whom the unit wa...
Page 22 - Bienvenue dans la famille Danby.; PROLONGATION DE GARANTIE
21 Bienvenue dans la famille Danby. Nous sommes fi ers de nos produits de qualité et nous croyons en un service fi able. Nous vous suggérons de lire ce manuel du propriétaire avant de brancher votre nouvel appareil car il contient des informations de fonctionnement importantes, des informations de séc...
Page 23 - GARDEZ CES INSTRUCTIONS!; ATTENTION: RISQUE D’INCENDIE; INSTRUCTIONS DE MISE À LA TERRE; Ne branchez pas votre appareil à des rallonges; Consignes de sécurité importantes; LIRE ET SUIVRE TOUTES LES INSTRUCTIONS DE SÉCURITÉ
22 GARDEZ CES INSTRUCTIONS! ATTENTION: RISQUE D’INCENDIE Fluide frigorigène infl ammable utilisé. Lors de l’entretien ou de la mise au rebut du climatiseur, le réfrigérant ne doit pas pouvoir s’échapper à l’air libre. INSTRUCTIONS DE MISE À LA TERRE Cet appareil doit être mis à la terre. La mise à la...
Page 26 - Enlèvement et évacuation
Consignes de sécurité importantes LIRE ET SUIVRE TOUTES LES INSTRUCTIONS DE SÉCURITÉ Enlèvement et évacuation Lorsque vous pénétrez dans le circuit de fl uide frigorigène pour effectuer des réparations ou à toute autre fi n, vous devez utiliser des procédures classiques. Cependant, il est important qu...
Page 27 - Déclassement
Consignes de sécurité importantes LIRE ET SUIVRE TOUTES LES INSTRUCTIONS DE SÉCURITÉ Déclassement Avant d’effectuer cette procédure, il est essentiel que le technicien connaisse parfaitement l’équipement dans tous ses détails. Il est recommandé, conformément aux bonnes pratiques, que tous les réfrig...
Page 28 - INSTRUCTIONS D’INSTALLATION; ACCESSOIRES
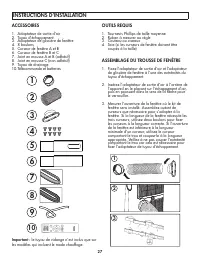
INSTRUCTIONS D’INSTALLATION 27 ACCESSOIRES 1. Adaptateur de sortie d’air 2. Tuyau d’échappement 3. Adaptateur de glissière de fenêtre 4. 8 boulons 5. Curseur de fenêtre A et B 6. Curseur de fenêtre B et C 7. Joint en mousse A et B (adhésif) 8. Joint en mousse C (non adhésif) 9. Tuyau de drainage 10....
Page 29 - INSTALLATION DU TROUSSE DE FENÊTRE; AVERTISSEMENT IMPORTANT
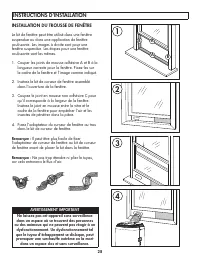
INSTRUCTIONS D’INSTALLATION 28 INSTALLATION DU TROUSSE DE FENÊTRE Le kit de fenêtre peut être utilisé dans une fenêtre suspendue ou dans une application de fenêtre coulissante. Les images à droite sont pour une fenêtre suspendue. Les étapes pour une fenêtre coulissante sont les mêmes. 1. Couper les ...
Page 30 - INSTRUCTIONS D’UTILISATION
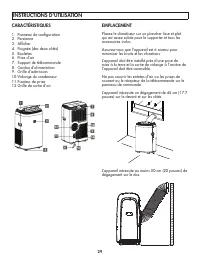
29 EMPLACEMENT Placez le climatiseur sur un plancher lisse et plat qui est assez solide pour le supporter et tous les accessoires inclus. Assurez-vous que l’appareil est à niveau pour minimiser les bruits et les vibrations. L’appareil doit être installé près d’une prise de mise à la terre et la sort...
Page 31 - PANNEAU DE CONTRÔLE
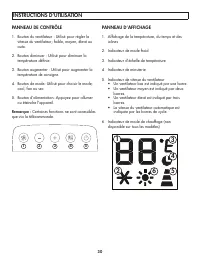
INSTRUCTIONS D’UTILISATION 30 PANNEAU DE CONTRÔLE 1. Bouton du ventilateur : Utilisé pour régler la vitesse du ventilateur; faible, moyen, élevé ou auto. 2. Bouton diminuer : Utilisé pour diminuer la température défi nie. 3. Bouton augmenter : Utilisé pour augmenter la température de consigne. 4. Bou...
Page 32 - MODES DE FONCTIONNEMENT
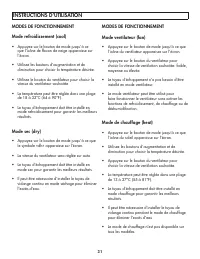
INSTRUCTIONS D’UTILISATION 31 MODES DE FONCTIONNEMENT Mode refroidissement (cool) • Appuyez sur le bouton de mode jusqu’à ce que l’icône de fl ocon de neige apparaisse sur l’écran. • Utilisez les boutons d’augmentation et de diminution pour choisir la température désirée. • Utilisez le bouton du vent...
Page 33 - FONCTION DE MINUTERIE
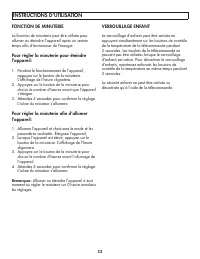
INSTRUCTIONS D’UTILISATION 32 FONCTION DE MINUTERIE La fonction de minuterie peut être utilisée pour allumer ou éteindre l’appareil après un certain temps afi n d’économiser de l’énergie. Pour régler la minuterie pour éteindre l’appareil: 1. Pendant le fonctionnement de l’appareil, appuyez sur le bou...
Page 34 - FONCTION DE VEILLE
33 INSTRUCTIONS D’UTILISATION FONCTION DE VEILLE La fonction de veille peut être utilisée pour économiser de l’énergie pendant les heures de sommeil. Cette fonction peut être utilisée en mode refroidissement et chauffage. Lorsqu’elle est sélectionnée en mode refroidissement, la température réglée au...
Page 35 - TÉLÉCOMMANDE
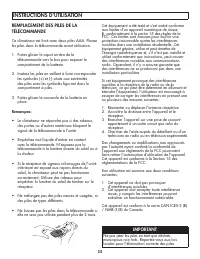
34 INSTRUCTIONS D’UTILISATION TÉLÉCOMMANDE 1. Bouton d’alimentation : utilisé pour allumer ou éteindre l’appareil. 2. Bouton turbo : la fonction turbo n’est pas disponible sur ce modèle. 3. Boutons de contrôle de température : utilisés pour augmenter ou diminuer la température de consigne. 4. Bouton...
Page 38 - SOINS ET MAINTENANCE; NETTOYAGE
SOINS ET MAINTENANCE 37 NETTOYAGE • Débranchez l’appareil avant de le nettoyer ou de l’entretenir. • Nettoyez l’armoire avec un chiffon humide tiède et un détergent neutre. Séchez l’armoire avec un chiffon sec sans peluches. • N’utilisez pas d’essence, de diluant ou d’autres produits chimiques pour ...
Page 39 - QUESTIONS FRÉQUEMMENT POSÉES; Ce n’est pas recommandé.
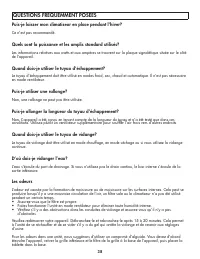
38 QUESTIONS FRÉQUEMMENT POSÉES Puis-je laisser mon climatiseur en place pendant l’hiver? Ce n’est pas recommandé. Quels sont la puissance et les amplis standard utilisés? Les informations relatives aux watts et aux ampères se trouvent sur la plaque signalétique située sur le côté de l’appareil. Qua...
Page 40 - DÉPANNAGE; L’appareil ne fonctionnera pas
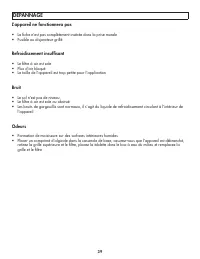
DÉPANNAGE 39 L’appareil ne fonctionnera pas • La fi che n’est pas complètement insérée dans la prise murale • Fusible ou disjoncteur grillé Refroidissement insuffi sant • Le fi ltre à air est sale • Flux d’air bloqué• La taille de l’appareil est trop petite pour l’application Bruit • Le sol n’est pas d...
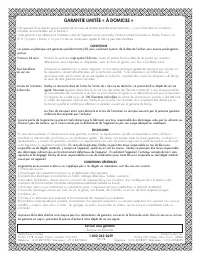
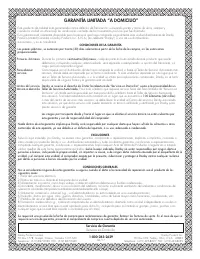
Page 41 - GARANTIE LIMITÉE « À DOMICILE »
LIMITED IN-HOME APPLIANCE WARRANTY This quality product is warranted to be free from manufacturer’s defects in material and workmanship, provided that the unit is used under the normal operating conditions intended by the manufacturer.This warranty is available only to the person to whom the unit wa...
Page 42 - Bienvenido a la familia Danby.; Debe conser var el comprobante
41 Bienvenido a la familia Danby. Estamos orgullosos de nuestros productos de calidad y creemos en un servicio confi able. Le sugerimos que lea este manual del propietario antes de enchufar su nuevo electrodoméstico, ya que contiene información importante de funcionamiento, información de seguridad, ...
Page 43 - ¡GUARDE ESTAS INSTRUCCIONES!; PRECAUCIÓN: RIESGO DE INCENDIO; INSTRUCCIONES DE CONEXION A TIERRA; No conecte el aparato a los cables de extensión ni; Importantes Instrucciones de Seguridad; LEA Y SIGA TODAS LAS INSTRUCCIONES DE SEGURIDAD
42 ¡GUARDE ESTAS INSTRUCCIONES! PRECAUCIÓN: RIESGO DE INCENDIO Refrigerante infl amable utilizado. Al mantener o desechar el acondicionador de aire, no se debe permitir que el refrigerante se ventile al aire libre. INSTRUCCIONES DE CONEXION A TIERRA Este aparato debe estar conectado a tierra. La pues...
Page 44 - Información sobre mantenimiento
Importantes Instrucciones de Seguridad LEA Y SIGA TODAS LAS INSTRUCCIONES DE SEGURIDAD Cualquier persona involucrada en trabajar en el circuito de refrigerante debe tener un certifi cado válido y vigente de una autoridad de evaluación acreditada de la industria que autorice su competencia para maneja...
Page 45 - Reparaciones a componentes sellados.
Importantes Instrucciones de Seguridad LEA Y SIGA TODAS LAS INSTRUCCIONES DE SEGURIDAD Se aplicarán los siguientes controles a las instalaciones que utilizan refrigerantes infl amables: • El tamaño de carga está de acuerdo con el tamaño de la habitación dentro de la cual se instalan las piezas que co...
Page 46 - Traslado y evacuación
Importantes Instrucciones de Seguridad LEA Y SIGA TODAS LAS INSTRUCCIONES DE SEGURIDAD Traslado y evacuación Al entrar en el circuito de refrigerante para realizar reparaciones o para cualquier otro propósito, se deben utilizar procedimientos convencionales. Sin embargo, es importante que se sigan l...
Page 47 - Desmantelamiento
Importantes Instrucciones de Seguridad LEA Y SIGA TODAS LAS INSTRUCCIONES DE SEGURIDAD Desmantelamiento Antes de llevar a cabo este procedimiento, es esencial que el técnico esté completamente familiarizado con el equipo en todo su detalle. Se recomienda una buena práctica que todos los refrigerante...
Page 48 - INSTRUCCIONES DE INSTALACIÓN; ACCESORIOS
INSTRUCCIONES DE INSTALACIÓN 47 ACCESORIOS 1. Adaptador de salida de aire2. Manguera de escape3. Adaptador deslizante de la ventana4. 8 tornillos5. Ventana deslizante A y B6. Ventana deslizante B y C7. Junta de espuma A y B (adhesivo)8. Junta de espuma C (no adhesiva)9. Manguera de drenaje10. Contro...
Page 49 - ADVERTENCIA IMPORTANTE; INSTALAR EL KIT DE VENTANA
ADVERTENCIA IMPORTANTE No deje este aparato desatendido en un espacio donde se encuentren personas o animales que no puedan reaccionar ante un mal funcionamiento. Un mal funcionamiento, como que la manguera de escape se disloque, puede causar un sobrecalentamiento extremo o la muerte en un espacio c...
Page 50 - INSTRUCCIONES DE OPERACIÓN
49 UBICACIÓN Coloque el acondicionador de aire en un piso liso y nivelado que sea lo sufi cientemente fuerte para soportarla y todos los accesorios incluidos. Asegúrese de que el aparato esté nivelado para minimizar el ruido y las vibraciones. El electrodoméstico debe instalarse cerca de un receptácu...
Page 51 - PANEL DE CONTROL
INSTRUCCIONES DE OPERACIÓN 50 PANEL DE CONTROL 1. Botón del ventilador: Se utiliza para establecer la velocidad del ventilador; bajo, medio, alto o auto. 2. Botón de disminución: Se utiliza para disminuir la temperatura establecida. 3. Botón de aumento: Se utiliza para aumentar la temperatura establ...
Page 52 - MODOS DE FUNCIONAMIENTO
INSTRUCCIONES DE OPERACIÓN 51 MODOS DE FUNCIONAMIENTO Modo frío (cool) • Presione el botón de modo hasta que aparezca el icono del copo de nieve en la pantalla. • Use los botones de aumento y disminución para elegir la temperatura deseada. • Utilice el botón del ventilador para elegir la velocidad d...
Page 53 - BLOQUEO INFANTIL
INSTRUCCIONES DE OPERACIÓN 52 BLOQUEO INFANTIL El bloqueo para niños se puede activar presionando los botones de control de temperatura en el control remoto al mismo tiempo durante 3 segundos. Los botones del control remoto no se pueden usar mientras el bloqueo para niños está activo. Para desactiva...
Page 54 - FUNCIÓN SÍGUEME
53 INSTRUCCIONES DE OPERACIÓN FUNCIÓN SÍGUEME La función Sígueme solo se puede activar desde el control remoto. El control remoto tiene un termostato en su interior. Mantenga el control remoto y el aire acondicionado ajustará automáticamente la temperatura establecida en función de la temperatura am...
Page 55 - CONTROL REMOTO
54 INSTRUCCIONES DE OPERACIÓN CONTROL REMOTO 1. Botón de encendido: se utiliza para encender o apagar el dispositivo. 2. Botón Turbo: la función turbo no está disponible en este modelo. 3. Botones de control de temperatura: se utilizan para aumentar o disminuir la temperatura establecida. 4. Botón d...
Page 56 - IMPORTANTE
INSTRUCCIONES DE OPERACIÓN 55 Este equipo ha sido probado y cumple con los límites para un dispositivo digital de Clase B, de acuerdo con la Parte 15 de las Reglas de la FCC. Estos límites están diseñados para proporcionar una protección razonable contra interferencias dañinas en una instalación res...
Page 57 - EL DRENAJE DEL AGUA
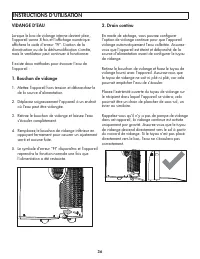
2. Drenaje Continuo Durante el modo de secado, es posible que desee confi gurar la opción de drenaje continuo para que el aparato drene automáticamente el agua recolectada. Asegúrese de que el aparato esté apagado y desenchufado de la fuente de alimentación antes de instalar la manguera de drenaje. R...
Page 58 - LIMPIEZA; CUIDADO Y MANTENIMIENTO
57 ALMACENAMIENTO A LARGO PLAZO 1. Vacíe todo el agua del aparato.2. Haga funcionar el aparato en modo ventilador durante medio día en una habitación caliente para secar el interior del aparato y evitar la formación de moho. 3. Apague el aparato y desenchúfelo, enrolle el cable y fíjelo con cinta ad...
Page 59 - PREGUNTAS FRECUENTES; en el costado de la unidad.
58 PREGUNTAS FRECUENTES ¿Puedo dejar mi aire acondicionado en su lugar durante el invierno? No se recomienda. ¿Cuáles son las potencias y amperios estándar que se utilizan? La información relacionada con vatios y amperios se puede encontrar en la placa de clasifi cación ubicada en el costado de la un...
Page 60 - SOLUCIÓN DE PROBLEMAS; El aparato no funciona; • El; Ruido; fi ltro de aire está sucio o bloqueado; Olores
SOLUCIÓN DE PROBLEMAS 59 El aparato no funciona • El enchufe no está completamente insertado en el tomacorriente de pared• Fusible o disyuntor quemado Refrigeración insufi ciente • El fi ltro de aire está sucio • Flujo de aire bloqueado• El tamaño del aparato es demasiado pequeño para la aplicación Ru...
Page 61 - GARANTÍA LIMITADA “A DOMICILIO”
LIMITED IN-HOME APPLIANCE WARRANTY This quality product is warranted to be free from manufacturer’s defects in material and workmanship, provided that the unit is used under the normal operating conditions intended by the manufacturer.This warranty is available only to the person to whom the unit wa...


 Danby DAC050MB1WDB
User Manual
Danby DAC050MB1WDB
User Manual
 Danby DAC050ME1WDB
User Manual
Danby DAC050ME1WDB
User Manual
 Danby DAC060EE1WDB
User Manual
Danby DAC060EE1WDB
User Manual
 Danby DAC080B5WDB
User Manual
Danby DAC080B5WDB
User Manual
 Danby DAC080B7IWDB-6
User Manual
Danby DAC080B7IWDB-6
User Manual
 Danby DAC080B8IWDB-6
User Manual
Danby DAC080B8IWDB-6
User Manual
 Danby DAC080EB6WDB
User Manual
Danby DAC080EB6WDB
User Manual
 Danby DAC080EE2WDB
User Manual
Danby DAC080EE2WDB
User Manual
 Danby DAC100B6WDB
User Manual
Danby DAC100B6WDB
User Manual
 Danby DAC120B5WDB-6
User Manual
Danby DAC120B5WDB-6
User Manual
 Danby DAC120EB8WDB
User Manual
Danby DAC120EB8WDB
User Manual
 Danby DAC120EB9WDB-6
User Manual
Danby DAC120EB9WDB-6
User Manual
 Danby DAC145EB6WDB-6
User Manual
Danby DAC145EB6WDB-6
User Manual
 Danby DAS170GBHWDB
User Manual
Danby DAS170GBHWDB
User Manual
 Danby DPA050B7WDB
User Manual
Danby DPA050B7WDB
User Manual
 Danby DPA050E2BDB-6
User Manual
Danby DPA050E2BDB-6
User Manual
 Danby DPA060B1WDB
User Manual
Danby DPA060B1WDB
User Manual
 Danby DPA065B6WDB-6
User Manual
Danby DPA065B6WDB-6
User Manual
 Danby DPA070B4WDB
User Manual
Danby DPA070B4WDB
User Manual
 Danby DPA072B8WDB-6
User Manual
Danby DPA072B8WDB-6
User Manual