Page 2 - Welcome; Visit; Read this owner’s manual:; will help you solve common problems that may occur.
1 Welcome Welcome to the Danby family. We are proud of our quality products and we believe in dependable service. We suggest that you read this owner’s manual before plugging in your new appliance as it contains important operation information, safety information, troubleshooting and maintenance tip...
Page 3 - CAUTION: RISK OF FIRE; SAFETY REQUIREMENTS; Do not connect your appliance to extension; Important Safety Information; READ AND FOLLOW ALL SAFETY INSTRUCTIONS; SAVE THESE INSTRUCTIONS!
2 CAUTION: RISK OF FIRE Flammable refrigerant used. When maintaining or disposing of the air conditioner, the refrigerant must not be allowed to vent into the open air. SAFETY REQUIREMENTS DANGER: Risk of fi re or explosion. Flammable refrigerant used. Do not damage the refrigerant circuit. • Ensure ...
Page 4 - Information on ser vicing
Important Safety Information READ AND FOLLOW ALL SAFETY INSTRUCTIONS Any person involved with working on the refrigerant circuit should hold a current, valid certifi cate from an industry accredited assessment authority which authorizes their competence to handle refrigerants safely in accordance wit...
Page 5 - Repairs to sealed components
Important Safety Information READ AND FOLLOW ALL SAFETY INSTRUCTIONS The following checks shall be applied to installations using fl ammable refrigerants: • The charge size is in accordance with the room size within which the refrigerant containing parts are installed. • The ventilation machinery and...
Page 6 - Removal and evacuation
Important Safety Information READ AND FOLLOW ALL SAFETY INSTRUCTIONS Removal and evacuation When breaking into the refrigerant circuit to make repairs or for any other purpose conventional procedures shall be used. However, it is important that the best practice is followed since fl ammability is a c...
Page 7 - Decommissioning
Important Safety Information READ AND FOLLOW ALL SAFETY INSTRUCTIONS Decommissioning Before carrying out this procedure, it is essential that the technician is completely familiar with the equipment in all its detail. It is recommended good practice that all refrigerants are recovered safely. Prior ...
Page 8 - LOCATION; INSTALLATION INSTRUCTIONS
7 LOCATION This air conditioner is designed for easy installation in single or double hung windows. Since window designs vary, it may be necessary to make some modifi cations for safe installation. This air conditioner is not designed for vertical, slider type windows or “through the wall” installati...
Page 9 - Install the “L” Shaped Bracket
8 ELECTRIC SHOCK HAZARD To avoid the possibility of personal injury, disconnect power to the appliance before installing or servicing. REQUIRED TOOLS • Screwdrivers: Phillips and fl at head. • Power Drill: 3.2mm (1/8 inch) diameter drill bit • Pencil • Measuring Tape • Scissors • Carpenter’s Level No...
Page 10 - INSTALLATION; Check the Tilt Angle; CAUTION
9 INSTALLATION Place the air conditioner into the window with the “L” shaped mounting bracket positioned in front of the upper sash. The bottom of the cabinet should be positioned on the recessed portion of the window frame. Pull the upper window sash down until it rests just behind the front fl ange...
Page 11 - OPERATING INSTRUCTIONS; FEATURES
10 OPERATING INSTRUCTIONS FEATURES 1. Control Panel 2. Interior Air Inlet 3. Interior Air Outlet 4. Exterior Air Inlet 5. Air Filter (not pictured) CONTROL PANEL 1. Thermostat dial: Used to choose the level of cooling. • The lower numbers indicate warmer settings. • The higher numbers indicate colde...
Page 13 - TROUBLESHOOTING; PROBLEM
TROUBLESHOOTING Danby Consumer Care: 1-800-263-2629 Hours of operation: Monday to Thursday 8:30 am - 6:00 pm Eastern Standard Time Friday 8:30 am - 4:00 pm Eastern Standard Time Information in this manual is subject to change without notice. PROBLEM POSSIBLE CAUSE Appliance will not operate • Plug i...
Page 14 - LIMITED IN-HOME APPLIANCE WARRANTY; LIMITED “CARRY IN” WARRANTY
LIMITED IN-HOME APPLIANCE WARRANTY This quality product is warranted to be free from manufacturer’s defects in material and workmanship, provided that the unit is used under the normal operating conditions intended by the manufacturer.This warranty is available only to the person to whom the unit wa...
Page 15 - Bienvenue; Visitez; ser vice sous garantie.; aider à mieux vous servir.; Lire ce manuel du propriétaire :
14 Bienvenue Bienvenue à la famille Danby. Nous sommes fi ers de la qualité de nos produits et nous croyons au service fi able. Nous vous suggérons de lire ce manual d’utilisation avant de brancher votre nouvel appareil, car il contient des informations inportantes sur l’utilisation, la sécurité, le d...
Page 16 - GARDEZ CES INSTRUCTIONS!; ATTENTION: RISQUE D’INCENDIE; INSTRUCTIONS DE MISE À LA TERRE; Ne branchez pas votre appareil à des rallonges; Consignes de sécurité importantes; LIRE ET SUIVRE TOUTES LES INSTRUCTIONS DE SÉCURITÉ
15 GARDEZ CES INSTRUCTIONS! ATTENTION: RISQUE D’INCENDIE Fluide frigorigène infl ammable utilisé. Lors de l’entretien ou de la mise au rebut du climatiseur, le réfrigérant ne doit pas pouvoir s’échapper à l’air libre. INSTRUCTIONS DE MISE À LA TERRE Cet appareil doit être mis à la terre. La mise à la...
Page 19 - Enlèvement et évacuation
Consignes de sécurité importantes LIRE ET SUIVRE TOUTES LES INSTRUCTIONS DE SÉCURITÉ Enlèvement et évacuation Lorsque vous pénétrez dans le circuit de fl uide frigorigène pour effectuer des réparations ou à toute autre fi n, vous devez utiliser des procédures classiques. Cependant, il est important qu...
Page 20 - Déclassement
Consignes de sécurité importantes LIRE ET SUIVRE TOUTES LES INSTRUCTIONS DE SÉCURITÉ Déclassement Avant d’effectuer cette procédure, il est essentiel que le technicien connaisse parfaitement l’équipement dans tous ses détails. Il est recommandé, conformément aux bonnes pratiques, que tous les réfrig...
Page 21 - INSTRUCTIONS D'INSTALLATION; EMPLACEMENT
20 INSTRUCTIONS D'INSTALLATION EMPLACEMENT Ce climatiseur est conçu pour une installation facile dans des fenêtres à guillotine simple ou double. Comme les conceptions de fenêtres varient, il peut être nécessaire d’apporter certaines modifi cations pour une installation en toute sécurité. Ce climatis...
Page 22 - Installez le support en forme “L”
DANGER DE CHOC ÉLECTRIQUE Pour éviter tout risque de blessure, débranchez l’appareil avant de l’installer ou de le réparer. OUTILS REQUIS • Tournevis: Phillips et tête plate. • Perceuse électrique: mèche de diamètre 3,2mm (1/8 pouce) • Crayon • Mètre ruban • Les ciseaux • Niveau de charpentier Remar...
Page 23 - Vérifi ez l’angle d’inclinaison
22 PRÉCAUTION Le compresseur est situé sur le côté gauche de l’appareil, du même côté que les commandes. Ce côté de l’appareil sera plus lourd et plus diffi cile à manipuler. Un support inadéquat du côté contrôle de l’appareil peut entraîner des blessures et des dommages à l’appareil et à vos biens. ...
Page 24 - INSTRUCTIONS D’UTILISATION
23 CARACTÉRISTIQUES 1. Panneau de contrôle 2. Entrée d’air intérieur 3. Sortie d’air intérieur 4. Entrée d’air extérieur 5. Filtre à air (non illustré) PANNEAU DE CONTRÔLE 1. Cadran du thermostat: Utilisé pour choisir le niveau de refroidissement. • Les chiffres inférieurs indiquent des paramètres p...
Page 25 - SOINS ET ENTRETIEN; FILTRE À AIR
SOINS ET ENTRETIEN FILTRE À AIR Le fi ltre à air doit être nettoyé environ toutes les 2 semaines. Le fi ltre à air peut nécessiter un nettoyage plus fréquent s’il y a des squames ou de la fourrure dans l’air. Suivez les étapes ci-dessous pour nettoyer le fi ltre et remettre l’appareil en marche. Assure...
Page 26 - DÉPANNAGE; PROBLÈME
DÉPANNAGE 25 Danby soins du consommateur : 1-800-263-2629 Heures d’ouverture : Du lundi au jeudi, de 8 h 30 à 18 h, heure de l’Est Vendredi, de 8 h 30 à 16 h, heure de l’Est Les informations contenues dans ce manuel sont sujettes à modifi cation sans préavis. PROBLÈME CAUSE POSSIBLE L’appareil ne fon...
Page 27 - GARANTIE LIMITÉE « EN ATELIER »
LIMITED IN-HOME APPLIANCE WARRANTY This quality product is warranted to be free from manufacturer’s defects in material and workmanship, provided that the unit is used under the normal operating conditions intended by the manufacturer.This warranty is available only to the person to whom the unit wa...
Page 28 - Bienvenido; Visite; Lea este manual del propietario:
27 1-800-26- Danby (1-800-263-2629) Bienvenido Bienvenido a la familia Danby. Estamos orgullosos de nuestros productos de calidad y creemos en un servicio confi able. Sugerimos que lea este manual del propietario antes de conectar el nuevo aparato ya que contiene información importante sobre la opera...
Page 29 - ¡GUARDE ESTAS INSTRUCCIONES!; PRECAUCIÓN: RIESGO DE INCENDIO; INSTRUCCIONES DE CONEXION A TIERRA; No conecte el aparato a los cables de extensión ni; Importantes Instrucciones de Seguridad; LEA Y SIGA TODAS LAS INSTRUCCIONES DE SEGURIDAD
28 ¡GUARDE ESTAS INSTRUCCIONES! PRECAUCIÓN: RIESGO DE INCENDIO Refrigerante infl amable utilizado. Al mantener o desechar el acondicionador de aire, no se debe permitir que el refrigerante se ventile al aire libre. INSTRUCCIONES DE CONEXION A TIERRA Este aparato debe estar conectado a tierra. La pues...
Page 30 - Información sobre mantenimiento
Importantes Instrucciones de Seguridad LEA Y SIGA TODAS LAS INSTRUCCIONES DE SEGURIDAD Cualquier persona involucrada en trabajar en el circuito de refrigerante debe tener un certifi cado válido y vigente de una autoridad de evaluación acreditada de la industria que autorice su competencia para maneja...
Page 31 - Reparaciones a componentes sellados.
Importantes Instrucciones de Seguridad LEA Y SIGA TODAS LAS INSTRUCCIONES DE SEGURIDAD Se aplicarán los siguientes controles a las instalaciones que utilizan refrigerantes infl amables: • El tamaño de carga está de acuerdo con el tamaño de la habitación dentro de la cual se instalan las piezas que co...
Page 32 - Traslado y evacuación
Importantes Instrucciones de Seguridad LEA Y SIGA TODAS LAS INSTRUCCIONES DE SEGURIDAD Traslado y evacuación Al entrar en el circuito de refrigerante para realizar reparaciones o para cualquier otro propósito, se deben utilizar procedimientos convencionales. Sin embargo, es importante que se sigan l...
Page 33 - Desmantelamiento
Importantes Instrucciones de Seguridad LEA Y SIGA TODAS LAS INSTRUCCIONES DE SEGURIDAD Desmantelamiento Antes de llevar a cabo este procedimiento, es esencial que el técnico esté completamente familiarizado con el equipo en todo su detalle. Se recomienda una buena práctica que todos los refrigerante...
Page 34 - INSTRUCCIONES DE INSTALACIÓN; UBICACIÓN
33 INSTRUCCIONES DE INSTALACIÓN UBICACIÓN Este acondicionador de aire está diseñado para una fácil instalación en ventanas colgadas simples o dobles. Como los diseños de las ventanas varían, puede ser necesario hacer algunas modifi caciones para una instalación segura. Este acondicionador de aire no ...
Page 35 - Instale el soporte en forma de “L”
34 PELIGRO DE CHOQUE ELÉCTRICO Para evitar la posibilidad de lesiones personales, desconecte la alimentación del electrodoméstico antes de instalar o reparar. HERRAMIENTAS REQUERIDAS • Destornilladores: Phillips y cabeza plana. • Taladro eléctrico: broca de diámetro de 3.2 mm (1/8 pulgada) • Lápiz •...
Page 36 - Compruebe el ángulo de inclinación
35 PRECAUCIÓN El compresor está ubicado en el lado izquierdo del dispositivo, en el mismo lado que los controles. Este lado del aparato será más pesado y más incómodo de manipular. Un soporte inadecuado en el lado de control del electrodoméstico puede provocar lesiones personales y daños al electrod...
Page 37 - INSTRUCCIONES DE OPERACIÓN; CARACTERISTICAS
36 INSTRUCCIONES DE OPERACIÓN CARACTERISTICAS 1. Panel de control 2. Entrada de aire interior 3. Salida de aire interior 4. Entrada de aire exterior 5. Filtro de aire (no en la foto) PANEL DE CONTROL 1. Dial de termostato: se usa para elegir el nivel de enfriamiento. • Los números más bajos indican ...
Page 38 - CUIDADO Y MANTENIMIENTO; FILTRO DE AIRE
CUIDADO Y MANTENIMIENTO FILTRO DE AIRE El fi ltro de aire debe limpiarse aproximadamente cada 2 semanas. El fi ltro de aire puede requerir una limpieza más frecuente si hay caspa o pelo en el aire. Siga los pasos a continuación para limpiar el fi ltro y regresar el aparato al funcionamiento normal. Ase...
Page 39 - SOLUCIÓN DE PROBLEMAS; PROBLEMA
SOLUCIÓN DE PROBLEMAS 38 Danby cuidado del consumidor: 1-800-263-2629 Horas de operación: Lunes a Jueves 8:30 am - 6:00 pm Hora estándar del este Viernes 8:30 am - 4:00 pm Hora estándar del este La información de este manual está sujeta a cambios sin previo aviso. PROBLEMA CAUSA POSIBLE El aparato n...
Page 40 - GARANTÍA LIMITADA “ACARREADO SOLAMENTE”
LIMITED IN-HOME APPLIANCE WARRANTY This quality product is warranted to be free from manufacturer’s defects in material and workmanship, provided that the unit is used under the normal operating conditions intended by the manufacturer.This warranty is available only to the person to whom the unit wa...
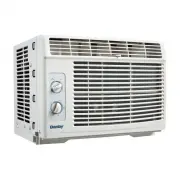
Page 44 - MODEL • MODÈLE • MODELO
MODEL • MODÈLE • MODELO Printed in ChinaImprimé en Chine Impreso en China Danby Products Limited, Guelph, ON, Canada N1H 6Z9 Danby Products Inc., Findlay, Ohio, USA 45840 DAC050MB1WDB