Ryobi P20150 - User Manual

Ryobi P20150 Grass Trimmer – User Manual, read for free online in PDF format. We hope this helps you resolve any issues you may have. If you have further questions, please contact us through the contact form.


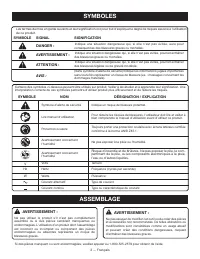
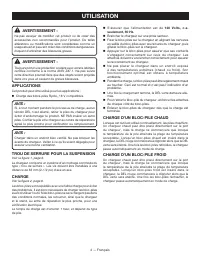


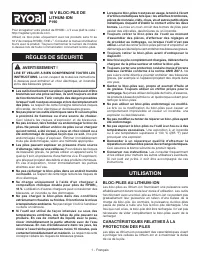


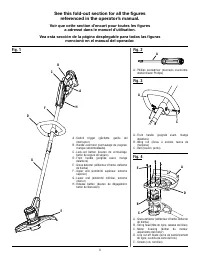

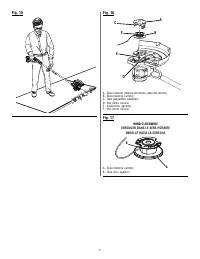


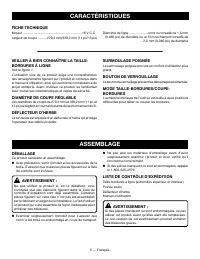
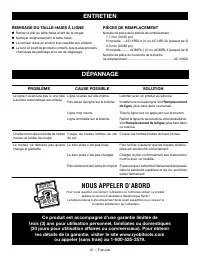


Table of Contents:
- Page 2 – SAFETY RULES FOR CHARGER; IMPORTANT SAFETY INSTRUCTIONS; SAVE THESE INSTRUCTIONS - DANGER: TO REDUCE RISK OF FIRE
- Page 3 – SYMBOLS; NOTICE; ASSEMBLY
- Page 4 – OPERATION; APPLICATIONS
- Page 5 – LED FUNCTION OF CHARGER; GENERAL MAINTENANCE; NOTE: ILLUSTRATIONS START ON PAGE 6 AFTER FRENCH AND SPANISH
- Page 6 – RÈGLES DE SÉCURITÉ CONCERNANT LE CHARGEUR; INSTRUCTIONS IMPORTANTES CONCERNANT LA SÉCURITÉ
- Page 7 – SYMBOLES; ASSEMBLAGE
- Page 8 – UTILISATION; CHARGE D’UN BLOC-PILE CHAUD
- Page 9 – SIGNAUX DES TÉMOINS DEL DU CHARGEUR; ENTRETIEN; ENTRETIEN GÉNÉRAL; NOTE : ILLUSTRATIONS COMMENÇANT SUR 6 DE PAGE
- Page 10 – REGLAS DE SEGURIDAD PARA EL EMPLEO DEL CARGADOR; INSTRUCCIONES DE SEGURIDAD IMPORTANTES
- Page 11 – SÍMBOLOS; SÍMBOLO; ARMADO
- Page 12 – FUNCIONAMIENTO; APLICACIONES
- Page 13 – FUNCIONAMIENTO DE LOS DIODOS LUMINISCENTES DEL CARGADOR; MANTENIMIENTO; MANTENIMIENTO GENERAL
- Page 16 – OPERATOR’S MANUAL/BATTERY CHARGER; ou en téléphonant au
- Page 17 – SAFETY RULES; LITHIUM-ION BATTERY PACKS
- Page 18 – MAINTENANCE; COLD WEATHER OPERATION; SAVE THESE
- Page 19 – RÈGLES DE SÉCURITÉ
- Page 20 – CONSERVER; CHARGE D’UN BLOC-PILES FROID; CHARGE D’UN PILE CHAUD; AVERTISSEMENT
- Page 21 – REGLAS DE SEGURIDAD
- Page 22 – CÓMO CARGAR LA BATERÍA CUANDO ESTÁ; CUANDO ESTÁ CALIENTE
- Page 25 – OPERATOR’S MANUAL; 8 VOLT STRING TRIMMER
- Page 26 – See this fold-out section for all the figures; Voir que cette section d’encart pour toutes les figures
- Page 30 – READ ALL INSTRUCTIONS
- Page 34 – ASSEMBLING THE TOOL
- Page 35 – INSTALLING/REMOVING BATTERY PACK
- Page 36 – EDGING; CUTTING TIPS
- Page 38 – CALL US FIRST; For any questions about operating or maintaining your product,; PROBLEM; STORING THE TRIMMER; This product has a Three-year Limited Warranty for personal,
- Page 39 – NOTES
- Page 40 – LIRE TOUTES LES INSTRUCTIONS
- Page 44 – ENSEMBLE L’OUTIL; INSTALLATION DE LA POIGNÉE AVANT
- Page 45 – MISE EN MARCHE ET ARRÊT DU TAILLE-; UTILISATION DU TAILLE-BORDURES
- Page 46 – TAILLE DES BORDURES
- Page 48 – PIÈCES DE REMPLACEMENT; DÉPANNAGE; PROBLÈME; NOUS APPELER D’ABORD; Ce produit est accompagné d’une garantie limitée de
- Page 50 – LEA TODAS LAS INSTRUCCIONES
- Page 53 – CARACTERÍSTICAS; DIÁMETRO DE CORTE AJUSTABLE
- Page 54 – ARMANDO DE LA HERRAMIENTA
- Page 55 – ENCENDIDO Y APAGADO DE LA RECORTADORA; MANEJO DE LA RECORTADORA DE HILO
- Page 56 – RECORTE DE BORDES; RECOMENDACIONES DE CORTE
- Page 58 – PIÈCES DE RECHANGE; CORRECCIÓN DE PROBLEMAS; PROBLEMA; familiares o domésticos (30 días para usos trabajo; LLÁMENOS PRIMERO
- Page 59 – NOTAS
- Page 60 – TECHTRONIC INDUSTRIES POWER EQUIPMENT; MANUEL D’UTILISATION / MANUAL DEL OPERADOR
OPERATOR’S MANUAL
MANUEL D’UTILISATION
MANUAL DEL OPERADOR
18 VOLT BATTERY CHARGER
CHARGEUR DE PILES DE 18 V
CARGADOR DE BATERÍA DE 18 V
P118B
Safety Rules for Charger .................... 2
Symbols .............................................. 3
Assembly ............................................ 3
Operation .........................................4-5
Maintenance ....................................... 5
Illustrations ......................................... 6
Parts Ordering/Service ........Back page
Règles de sécurité pour le chargeur .. 2
Symboles ............................................ 3
Assemblage ........................................ 3
Utilisation .........................................4-5
Entretien ............................................. 5
Illustrations ......................................... 6
Commande de pièces
et réparation ......................Page arrière
WARNING:
To reduce the
risk of injury, the user must read and
understand the operator’s manual
before using this product.
Reglas de seguridad para el
empleo del cargador .......................... 2
Símbolos ............................................ 3
Armado .............................................. 3
Funcionamiento .............................. 4-5
Mantenimiento ................................... 5
Ilustraciones ...................................... 6
Pedidos de piezas
y servicio ........................Pág. posterior
ADVERTENCIA:
Para reducir
el riesgo de lesiones, el usuario debe leer
y comprender el manual del operador
antes de usar este producto.
AVERTISSEMENT :
Pour
réduire les risques de blessures,
l’utilisateur doit lire et veiller à bien
comprendre le manuel d’utilisation avant
d’employer ce produit.
TABLE DES MATIÈRES
ÍNDICE DE CONTENIDO
TABLE OF CONTENTS
****************
****************
****************
SAVE THIS MANUAL FOR
FUTURE REFERENCE
CONSERVER CE MANUEL
POUR FUTURE RÉFÉRENCE
GUARDE ESTE MANUAL
PARA FUTURAS CONSULTAS
"Loading the manual" means you need to wait until the file loads and becomes available for online reading. Some manuals are very large, and the time they take to appear depends on your internet speed.
Summary
2 — English Keep cord and charger from heat to prevent damage to housing or internal parts. Do not let gasoline, oils, petroleum-based products, etc. come in contact with plastic parts. They contain chemicals that can damage, weaken, or destroy plastic. Always wear eye protection with side shi...
3 — English Some of the following symbols may be used on this product. Please study them and learn their meaning. Proper interpretation of these symbols will allow you to operate the product better and safer. Safety Alert Indicates a potential personal injury hazard. Read Operator’s Manual To reduce...
4 — English OPERATION WARNING: Do not allow familiarity with products to make you careless. Remember that a careless fraction of a second is sufficient to inflict serious injury. WARNING: Always wear eye protection with side shields marked to comply with ANSI Z87.1. Failure to do so could result in ...