Page 2 - GENERAL POWER TOOL SAFETY WARNINGS; PERSONAL SAFETY
2 - English WARNING: Read all safety warnings, instructions, illus- trations and specifications provided with this power tool. Failure to follow all instructions listed below may result in electric shock, fire and/or serious injury. Save all warnings and instructions for future reference. The term “...
Page 3 - POWER TOOL USE AND CARE; Maintenance
3 - English GENERAL POWER TOOL SAFETY WARNINGS POWER TOOL USE AND CARE Do not force the power tool. Use the correct power tool for your application. The correct power tool will do the job better and safer at the rate for which it was designed. Do not use the power tool if the switch does not tur...
Page 4 - CHAIN SAW SAFETY WARNINGS; Keep handles and grasping surfaces dry,; Slippery
4 - English CHAIN SAW SAFETY WARNINGS Keep all parts of the body away from the saw chain when the chain saw is operating. Before you start the chain saw, make sure the saw chain is not contacting anything. A moment of inattention while operating chain saws may cause entanglement of your clothing o...
Page 6 - When clearing jammed material or servicing
6 - English CHAIN SAW SAFETY WARNINGS Maintain the unit with care. Keep the cutting edge sharp and clean for best performance and to reduce the risk of injury. Follow instructions for lubricating and changing accessories. Do not operate a chain saw with one hand! Use a firm grip with thumbs and ...
Page 7 - KICKBACK; The following precautions should be followed
7 - English CHAIN SAW SAFETY WARNINGS KICKBACK See Figures 1 - 3. WARNING: Kickback may occur when the moving chain contacts an object at the upper portion of the tip of the guide bar or when the wood closes in and pinches the saw chain in the cut. Contact at the upper portion of the tip of the guid...
Page 8 - GUIDE BARS; Save these instructions. Refer to them frequent-
8 - English CHAIN SAW SAFETY WARNINGS must be ready to control the PULL when cutting on the bottom edge of the bar, and PUSH when cutting along the top edge. See Figure 3. UNDERSTANDING YOUR CHAIN SAW SAFETY DEVICESLOW KICKBACK SAW CHAIN The rakers (depth gauges) ahead of each cutter can minimize th...
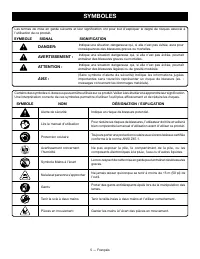
Page 9 - SYMBOLS
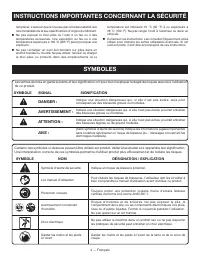
9 - English Some of the following symbols may be used on this product. Please study them and learn their mean-ing. Proper interpretation of these symbols will allow you to operate the product better and safer. SYMBOL NAME DESIGNATION/EXPLANATION Safety Alert Indicates a potential personal injury haz...
Page 10 - SYMBOL
10 - English SYMBOLS Some of the following symbols may be used on this product. Please study them and learn their mean-ing. Proper interpretation of these symbols will allow you to operate the product better and safer. SYMBOL NAME DESIGNATION/EXPLANATION Kickback DANGER! BEWARE OF KICKBACK. Bar Nose...
Page 11 - GLOSSARY OF TERMS; A chain saw without the saw chain and guide bar.
11 - English GLOSSARY OF TERMS Bucking The process of cross cutting a felled tree or log into lengths. Chain Saw Power Head A chain saw without the saw chain and guide bar. Drive Sprocket or Sprocket The toothed part that drives the saw chain. Felling The process of cutting down a tree. Felling Back...
Page 12 - FEATURES; PRODUCT SPECIFICATIONS; This saw was designed for occasional light; KNOW YOUR CHAIN SAW
12 - English FEATURES PRODUCT SPECIFICATIONS Motor .................................................. 18 Volt DCBar Length .................................................. 10 in. NOTE: This saw was designed for occasional light duty use and has some limitations as to what it can cut. KNOW YOUR CHA...
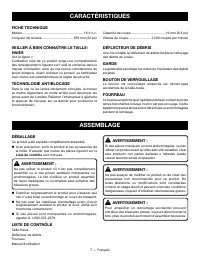
Page 13 - ASSEMBLY; UNPACKING; Carefully remove the product and any acces-; PACKING LIST; OPERATION
13 - English WARNING: If any parts are damaged or missing do not operate this product until the parts are replaced. Use of this product with damaged or missing parts could result in serious personal injury. WARNING: Do not attempt to modify this product or create accessories not recommended for use ...
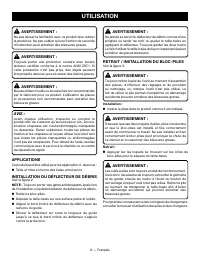
Page 14 - APPLICATIONS; TO INSTALL/REMOVE BATTERY PACK
14 - English WARNING: Do not allow familiarity with this product to make you careless. Remember that a careless fraction of a second is sufficient to inflict seri-ous injury. WARNING: Always wear eye protection with side shields marked to comply with ANSI Z87.1, along with hearing and head protectio...
Page 15 - CHAIN LUBRICATION SYSTEM; Adjusting the Chain Tension
15 - English To remove: Locate latches on side of battery pack and depress both sides to release the battery pack from the chain saw.For complete charging instructions, see the opera-tor’s manuals for your battery pack and charger. NOTICE: When placing battery pack in your chain saw, be sure raised ...
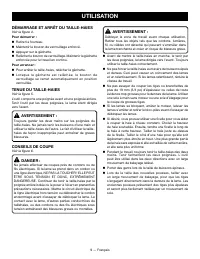
Page 16 - STARTING/STOPPING THE CHAIN SAW; Starting the chain saw:; Important Safety Instructions
16 - English WARNING: Never use a left-handed (cross-handed) grip, or any stance which would place your body or arm across the chain line. Improper operation of the chain saw could result in serious personal injury. STARTING/STOPPING THE CHAIN SAW See Figure 7. WARNING: Keep body to the left of the ...
Page 20 - BUCKING; Kickback
20 - English OPERATION On large diameter trees, stop the back cut before it is deep enough for the tree to either fall or settle back on the stump. Then insert soft wooden or plastic wedges into the cut so they do not touch the chain. The wedges can be driven in, little by little, to help jack the...
Page 21 - BUCKING LOGS UNDER STRESS; LIMBING
21 - English OPERATION BUCKING LOGS UNDER STRESS See Figures 18 - 19. When the log is supported along its entire length, it should be cut from the top or overbucking.When the log is supported on one end, cut 1/3 the diameter from the underside or underbuck-ing. Then make the finishing cut by overbuc...
Page 22 - PRUNING; SPRINGPOLE
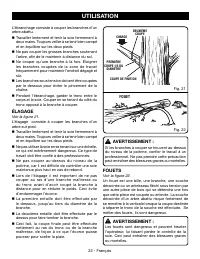
22 - English OPERATION PRUNING See Figure 21. Pruning is trimming limbs from a live tree. Work slowly, keeping both hands on the chain saw with a firm grip. Always make sure your footing is secure and your weight is distributed evenly on both feet. Do not cut from a ladder, this is extremely dan...
Page 23 - MAINTENANCE
23 - English GENERAL MAINTENANCE Avoid using solvents when cleaning plastic parts. Most plastics are susceptible to damage from various types of commercial solvents and may be damaged by their use. Use clean cloths to remove dirt, dust, oil, grease, etc. WARNING: Do not at any time let brake fluids,...
Page 25 - ADJUSTING CHAIN TENSION
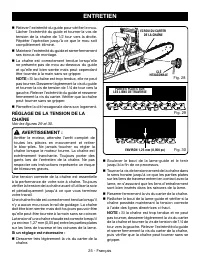
25 - English Fig. 30 If adjustment is needed: Loosen the chain cover screw to finger tight. Raise the tip of the guide bar and continue to hold up until the end of this procedure. Turn the chain tensioning screw clockwise until the flats on the tie straps of the chain contact the bar, making s...
Page 27 - TOP PLATE FILING ANGLE; SIDE PLATE ANGLE
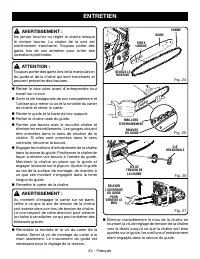
27 - English WARNING: The saw chain is very sharp, always wear pro-tective gloves when performing maintenance to the chain to prevent serious personal injury. Properly tension the chain prior to sharpening. Refer to Adjusting the Chain Tension earlier in this manual. Do all of your filing at the m...
Page 28 - DEPTH GAUGE CLEARANCE; A bar with any of the following faults should be
28 - English MAINTENANCE DEPTH GAUGE CLEARANCE See Figure 37 - 39. The depth gauge should be maintained at a clearance of .025 in. Use a depth gauge tool for checking the depth gauge clearances. Every time the chain is filed, check the depth gauge clearance. Use a flat file and a depth gauge joi...
Page 29 - TRANSPORTING AND STORING
29 - English TRANSPORTING AND STORING See Figure 41. WARNING: Always remove the battery pack before trans-porting or storing chain saw. Place battery pack indoors in a dry, secure location out of the reach of children when storing. Failure to follow these instructions may lead to accidental starting...
Page 30 - TROUBLESHOOTING; CALL US FIRST; For any questions about operating or maintaining your product,; or household use (90 days for business or commercial use). For; BAR AND CHAIN COMBINATIONS; PROBLEM; Tension chain. Refer to
30 - English TROUBLESHOOTING 1-800-525-2579 CALL US FIRST For any questions about operating or maintaining your product, call the RYOBI Help Line! Your product has been fully tested prior to shipment to ensure your complete satisfaction. This product has a Three-year Limited Warranty for personal, f...
Page 31 - AVERTISSEMENTS RÈGLES DE SÉCURITÉ; SÉCURITÉ PERSONNELLE
2 - Français AVERTISSEMENT Lire les avertissements de sécurité, les instructions et les précisions et consulter les illustrations fournis avec cet outil électrique. Le fait de ne pas se conformer à l’ensemble des consignes présentées ci-dessous risque d’entraîner des décharges électriques, un incend...
Page 32 - UTILISATION ET ENTRETIEN DES
3 - Français AVERTISSEMENTS RÈGLES DE SÉCURITÉ RELATIVES AUX OUTILS ÉLECTRIQUES amples, bijoux et cheveux longs peuvent se prendre dans les pièces en mouvement. Si les outils sont équipés de dispositifs de dépoussiérage, s’assurer qu’ils sont connectés et correctement utilisés. L’ u s a g e d e c ...
Page 33 - Toujours garder les pieds bien appuyés et faire
4 - Français des pièces identiques à celles d’origine. Ceci assurera le maintien de la sécurité de l’outil. Ne réparez jamais de blocs-piles endommagés. Seuls le fabricant et les fournisseurs de service autorisés doivent effectuer la réparation ou l’entretien des blocs-piles. AVERTISSEMENTS RÈGLES...
Page 34 - AVERTISSEMENTS DE SÉCURITÉ RELATIFS AU SCIE À CHAÎNE; CAUSES DU REBOND ET
5 - Français AVERTISSEMENTS DE SÉCURITÉ RELATIFS AU SCIE À CHAÎNE matériau coincé ou de l’entretien peut entraîner des blessures graves. Transporter la scie à chaîne par la poignée avant, avec l’interrupteur positionné à éteint et éloignée du corps. Toujours installer le couvercle du guide-chaîne ...
Page 35 - Le port d’un vêtement de protection lourd; Au moment de dégager les matériaux coincés
6 - Français RÈGLES SPECIFIQUES DE SÉCURITÉ AVERTISSEMENTS DE SÉCURITÉ RELATIFS AU SCIE À CHAÎNE épais pour assurer une bonne prise et protéger les mains. Ne pas porter de bijoux, shorts, sandales et ne pas travailler pieds nus. Ne pas porter des vêtements amples qui pourraient être happés dans le m...
Page 36 - REBOND; Voir les figures 1 à 3.; Pour minimaliser le risque de rebond, prendre; RÈGLES SPECIFIQUES DE SÉCURITÉ
7 - Français REBOND Voir les figures 1 à 3. AVERTISSEMENT : Le rebond se produit lorsque la chaîne en rotation heurte un objet dans la partie supérieure de l’extrémité du guide ou lorsque l’entaille se referme et pince la chaîne dans le bois. Le contact de la partie supérieure de l’extrémité du guid...
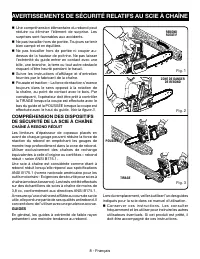
Page 37 - COMPRÉHENSION DES DISPOSITIFS; CHAÎNE À REBOND RÉDUIT
8 - Français POUSSÉE Fig. 3 RÈGLES SPECIFIQUES DE SÉCURITÉ AVERTISSEMENTS DE SÉCURITÉ RELATIFS AU SCIE À CHAÎNE Une compréhension élémentaire du rebond peut réduire ou éliminer l’élément de surprise. Les surprises sont favorables aux accidents. Ne pas travailler hors de portée. Toujours se tenir...
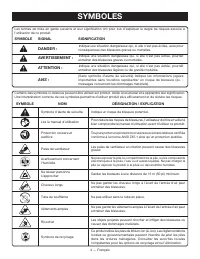
Page 38 - SYMBOLES; AVERTISSEMENT
9 - Français SYMBOLES Certains des symboles ci-dessous peuvent être utilisés sur ce produit. Veiller à les étudier et à apprendre leur signification. Une interprétation correcte de ces symboles permettra d’utiliser ce produit plus efficacement et de réduire les risques. SYMBOLE NOM DÉSIGNATION / EXP...
Page 40 - GLOSSAIRE; Scie à chaîne sans la chaîne et le guide.; Bouton de verrouillage de gâchette; Positions utilisées pour le tronçonnage et l’abattage.; Commutateur
11 - Français GLOSSAIRE Tronçonnage Coupe transversale d’un arbre abattu ou d’une bille de bois pour le débiter en tronçons. Bloc moteur de scie à chaîne Scie à chaîne sans la chaîne et le guide. Pignon d’entraînement Roue dentée entraînant la chaîne. Abattage Opération de coupe d’un arbre pour le f...
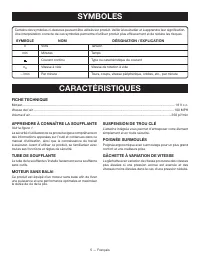
Page 41 - CARACTÉRISTIQUES; FICHE TECHNIQUE; Cette scie est conçue pour des travaux; VEILLER À BIEN CONNAÎTRE LA SCIE
12 - Français CARACTÉRISTIQUES FICHE TECHNIQUE Moteur ..................................................... 18 V c.c.Longueurs de guide ..................... 254 mm (10 po) NOTE : Cette scie est conçue pour des travaux occasionnels légers et sa capacité de coupe présente certaines limites. VEILLER À...
Page 42 - DÉBALLAGE; Ce produit a été expédié complètement assemblé.; LISTE DE CONTRÔLE D’EXPÉDITION; ASSEMBLAGE
13 - Français AVERTISSEMENT : Si des pièces manquent ou sont endommagées, ne pas utiliser ce produit avant qu’elles aient été remplacées. Le fait d’utiliser ce produit même s’il contient des pièces endommagées ou s’il lui manque des pièces peut entraîner des blessures graves. AVERTISSEMENT : Ne pas ...
Page 43 - UTILISATION
14 - Français AVERTISSEMENT : Ne pas laisser la familiarité avec ce produit faire oublier la prudence. Ne pas oublier qu’une fraction de seconde d’inattention peut entraîner des blessures graves. AVERTISSEMENT : Toujours porter une protection oculaire avec écrans latéraux certifiée conforme à la nor...
Page 44 - SYSTÈME DE LUBRIFICATION DE LA; Ajuster la tension de; Entretien; DÉMARRAGE ET ARRÊT DE LA SCIE À; Démarrage de la scie à chaîne :
15 - Français UTILISATION Retrait : Appuyer sur les deux loquets se trouvant sur les côtés du bloc-piles pour le séparer de la scie à chaîne.Pour prendre connaissance des consignes de chargement, consulter le manuel d’utilisation des piles et des chargeurs. AVIS : Lors de l’installation du bloc-pile...
Page 45 - Arrêt de la scie à chaîne :; POIGNÉES; Voir les figures 8 á 10.
16 - Français P o u r l e f o n c t i o n n e m e n t c o n t i n u , a p p u y e r sur la commutateur , désengager le bouton de verrouillage et maintenir la commutateur enfoncée. Arrêt de la scie à chaîne : Pour arrêter la scie, relâcher la commutateur . Lorsque la commutateur est relâchée, l...
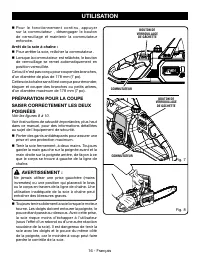
Page 46 - POSITION DE COUPE CORRECTE
17 - Français UTILISATION LIGNE DE CHAÎNE Fig. 10 Fig. 9 AVERTISSEMENT : Ne pas actionner la commutateur avec la main gauche en tenant la poignée avant avec la main droite. Ne jamais laisser une partie du corps quelconque se trouver dans la ligne de chaîne pendant l’utilisation de la scie. Une utili...
Page 47 - SITUATIONS DANGEREUSES
18 - Français Laisser la scie effectuer le travail, ne la pousser que légèrement vers le bas. Une force excessive pourrait endommager la chaîne, le guide ou le moteur. Relâcher la commutateur dès que la coupe a été effectuée et attendre que la chaîne s’immobilise. Le fonctionnement sans charge d...
Page 48 - Abattage – Lorsque deux personnes ou plus; Entaille de dessous.; Pratiquer une entaille
19 - Français UTILISATION être poussés ou tirés à terre par un engin de chantier lourd avant d’être débités. Ne pas abattre d’arbres se trouvant à proximité de lignes électriques ou de bâtiments. Regarder si l’arbre comporte des branches mortes ou endommagées, risquant de tomber et de heurte...
Page 49 - Voir les; TRONÇONNAGE
20 - Français Entaille d’abattage. L’entaille d’abattage doit toujours être de niveau et horizontale et effectuée à au moins 51 mm (2 po) au-dessus de l’entaille horizontale du sifflet. Voir les figures 13 et 14. Ne jamais couper jusqu’au sifflet. Toujours laisser une épaisseur de bois d’environ...
Page 50 - pourrait causer un rebond. Voir; Rebond; Lors du tronçonnage sur une pente, toujours se; TRONÇONNAGE DE BILLES SOUS; tendance à pousser vers l’utilisateur. Être préparé; ÉBRANCHAGE
21 - Français UTILISATION pourrait causer un rebond. Voir Rebond , plus haut dans ce manuel. Lors du tronçonnage sur une pente, toujours se tenir en amont de la bille. En fin de coupe, réduire la pression exercée sur la scie, sans relâcher la prise des deux mains sur les poignées afin de garder ...
Page 51 - FOUET
22 - Français AVERTISSEMENT : Si les branches à couper se trouvent au-dessus du niveau de la poitrine, confier le travail à un professionnel. Ne pas prendre cette précaution peut entraîner des blessures graves ou mortelles. FOUETS Voir la figure 22. Un fouet est une bille, une branche, une souche dé...
Page 52 - ENTRETIEN
23 - Français AVERTISSEMENT : Pour empêcher un démarrage accidentel pouvant entraîner des blessures graves, toujours retirer le piles de l’produit avant tout nettoyage ou entretien. AVERTISSEMENT : Toujours porter une protection oculaire avec écrans latéraux certifiée conforme à la norme ANSI Z87.1 ...
Page 54 - RÉGLAGE DE LA TENSION DE LA; Si un réglage est nécessaire :
25 - Français ENTRETIEN Relever l’extrémité du guide pour vérifier le mou. Lâcher l’extrémité du guide et tourner la vos de tension de la chaîne de 1/2 tour vers la droite. Répéter l’opération jusqu’à ce que le mou soit complètement éliminé. Maintenir l’extrémité du guide et serrer fermement ses...
Page 55 - ENTRETIEN DE LA CHAÎNE
26 - Français ENTRETIEN NOTE : Les chaînes neuves ont tendance à s’étirer. Il convient donc de vérifier fréquemment leur tension et de la corriger le cas échéant. AVIS : Une chaîne réglée à chaud peut présenter une tension excessive une fois refroidie. Vérifier la « tension à froid » avant l’utilisa...
Page 56 - ANGLE D’AFFÛTAGE DE LA PLAQUE
27 - Français AVERTISSEMENT : La chaîne de la scie est extrêmement tranchante. Toujours porter des gants lors de son entretien pour éviter des blessures graves. Tendre la chaîne correctement avant de l’affûter. Voir la section Réglage de la tension de la chaîne plus haut dans ce manuel. Tout le li...
Page 57 - ANGLE DE PLAQUE LATÉRALE; DÉGAGEMENT DE JAUGE DE; ENTRETIEN DU GUIDE
28 - Français ANGLE DE PLAQUE LATÉRALE Voir la figure 36. CORRECT - 80° - Obtenu automatiquement si une lime de taille appropriée est placée dans le porte-lime. CROCHET - « Accroche » le bois et s’émousse rapidement. Accroît le risque de REBOND . Résulte de l’emploi d’une lime de trop petit diam...
Page 58 - TRANSPORT ET REMISAGE
29 - Français Un entretien adéquat maximisera la durée de vie utile du guide. Chaque journée d’utilisation : Nettoyéz et inspecté Le guide en vue d’usure ou de dommage. Les amincissements et ébarbures sur les rails du guide font partie de l’usure normale, mais ces défauts doivent être limés dès qu’i...
Page 59 - DÉPANNAGE; NOUS APPELER D’ABORD; Pour toute question concernant l’utilisation ou l’entretien; BESOIN D’AID; Ce produit est accompagné d’une garantie limitée; PROBLÈME; Réglage de la tension de la; COMBINAISONS DE GUIDE ET CHAÎNE
30 - Français DÉPANNAGE NOUS APPELER D’ABORD Pour toute question concernant l’utilisation ou l’entretien utiliser ce produit, appeler le service d’assistance téléphonique RYOBI ! Le taille-bordures à été entièrement testé avant expédition pour assurer la complète satisfaction de l’utilisateur. 1-800...
Page 60 - ADVERTENCIAS DE SEGURIDAD
2 - Español ADVERTENCIA Lea todas las advertencias de seguridad, instrucciones, ilustraciones y especificaciones p ro p o rc i o n a d a s c o n e s t a h e r r a m i e n t a eléctrica. No seguir las instrucciones indicadas a continuación puede provocar descargas eléctricas, incendios o lesiones gra...
Page 61 - EMPLEO Y CUIDADO DE LA
3 - Español ADVERTENCIAS DE SEGURIDAD PARA HERRAMIENTAS ELÉCTRICAS Retire toda llave o herramienta de ajuste antes de encender la herramienta eléctrica. Toda llave o herramienta de ajuste dejada en una pieza giratoria de la herramienta eléctrica puede causar lesiones. No estire el cuerpo para al...
Page 62 - SERVICIO
4 - Español Si se maltratan las baterías, puede derramarse líquido de las mismas; evite todo contacto con éste. En caso de contacto, lávese con agua. Si el líquido llega a tocar los ojos, además busque atención médica. El líquido de las baterías puede causar irritación y quemaduras. No utilice u...
Page 63 - ADVERTENCIAS DE SEGURIDAD DE LA MOTOSIERRA; Por ejemplo: no use la motosierra para; CAUSAS Y PREVENCIÓN DEL
5 - Español ADVERTENCIAS DE SEGURIDAD DE LA MOTOSIERRA aumentar el riesgo de lesiones personales graves. Siempre mantenga un buen apoyo y utilice la motosierra únicamente sobre superficies fijas, firmes y niveladas. Las superficies resbaladizas o inestables como las escaleras pueden hacerle perder...
Page 64 - S i g a l a s i n s t r u c c i o n e s d e a f i l a d o y
6 - Español ADVERTENCIAS DE SEGURIDAD DE LA MOTOSIERRA que la cadena se rompa o que se produzcan contragolpes. S i g a l a s i n s t r u c c i o n e s d e a f i l a d o y mantenimiento de la cadena de la sierra que provee el fabricante. Disminuir la altura del calibrador de profundidad puede aumen...
Page 65 - Cuando extraiga material atascado o repare
7 - Español ADVERTENCIAS DE SEGURIDAD DE LA MOTOSIERRA Protege contra descargas eléctricas – Evite tocar con el cuerpo objetos conectados a tierra, como los tubos de metal y las cercas de alambre. Existe un mayor riesgo de descargas eléctricas si su cuerpo está en contacto con tierra. No utilice...
Page 66 - CONTRAGOLPE; Vea las figuras 1 a 3.; Deben seguirse las siguientes medidas
8 - Español CONTRAGOLPE Vea las figuras 1 a 3. ADVERTENCIA: El contragolpe ocurre cuando la cadena en movimiento hace contacto con un objeto en la parte superior de la punta de la barra, o cuando la madera se cierra y pellizca la cadena de la sierra en el punto de corte. El contacto de la parte supe...
Page 67 - No trate de cortar objetos fuera de su alcance,; EXPLICACIÓN DE LOS DISPOSITIVOS; Guarde estas instrucciones. Consúltelas con
9 - Español ADVERTENCIAS DE SEGURIDAD DE LA MOTOSIERRA No trate de cortar objetos fuera de su alcance, ni arriba de la altura del pecho. No permita que la punta de la barra guía entre en contacto con ningún tronco, rama, la tierra, o cualquier otra obstrucción al estar operando la sierra. Siga l...
Page 68 - SÍMBOLOS
10 - Español Es posible que se empleen en este producto algunos de los siguientes símbolos. Le suplicamos estudiarlos y aprender su significado. Una correcta interpretación de estos símbolos le permitirá utilizar mejor y de manera más segura la producto. SÍMBOLO NOMBRE DENOMINACIÓN / EXPLICACIÓN Ale...
Page 70 - GLOSARIO DE TÉRMINOS; Barra guía
12 - Español GLOSARIO DE TÉRMINOS Tronzado Es el proceso de cortar transversalmente un árbol o tronco talado en tramos. Cabeza motriz de la motosierra Es la motosierra sin la cadena de aserrar ni la barra guía. Rueda dentada de impulsión Es la pieza dentada que impulsa la cadena de la sierra. Talar ...
Page 71 - CARACTERÍSTICAS; ESPECIFICACIONES DEL PRODUCTO; Esta sierra fue diseñada para uso ligero; FAMILIARÍCESE CON EL MOTOSIERRA
13 - Español CARACTERÍSTICAS ESPECIFICACIONES DEL PRODUCTO Motor ............................................. 18 voltios C.C.Longitud de la barra ................. 254 mm (10 pulg.) NOTA: Esta sierra fue diseñada para uso ligero ocasional, y tiene algunas limitaciones en cuanto a lo que puede corta...
Page 72 - LISTA DE EMPAQUETADO; ARMADO; DESEMPAQUETADO; FUNCIONAMIENTO
14 - Español LISTA DE EMPAQUETADO Motosierra con fundaLlaveManual del operador ADVERTENCIA: Si falta o está dañada alguna pieza, no utilice este producto sin haber reemplazado la pieza. Usar este producto con partes dañadas o faltantes puede causar lesiones serias al operador. ADVERTENCIA: No intent...
Page 73 - APLICACIONES; Operaciones básicas de desramado, tala y corte; PARA DESMONTAR Y MONTAR EL; Para evitar lesiones corporales serias,
15 - Español ADVERTENCIA: No permita que su familarización con este producto lo vuelva descuidado. Tenga presente que un descuido de un instante es suficiente para causar una lesión grave. ADVERTENCIA: Siempre póngase protección para los ojos con la marca de cumplimiento de la norma ANSI Z87.1, así ...
Page 74 - SISTEMA LUBRICACIÓN DE LA CADENA; Ajuste de la tensión; en la sección de; ENCENDIDO Y APAGADO DE LA; Encendido de la motosierra:
16 - Español Para obtener instrucciones específicas de carga, lea el manual del operador que se incluye con el cargador y la batería. AVISO: Al colocar el paquete de baterías en la motosierra, asegúrese de que la costilla realzada del mismo quede alineada con la ranura interior del receptáculo para ...
Page 75 - Apagado de la motosierra:; MANGOS; Vea las figuras 8 a 10.
17 - Español Apagado de la motosierra: Suelte el gatillo del interruptor cuando desee apagar la motosierra. Al soltar el gatillo del interruptor, el botón de seguro del gatillo regresa automáticamente a la posición de inmovilización de este último. Esta motosierra inalámbrica no está diseñada pa...
Page 76 - POSTURA CORRECTA PARA EL
18 - Español FUNCIONAMIENTO ADVERTENCIA: No accione el gatillo del interruptor con la mano izquierda, sujetando el mango delantero con la mano derecha. Nunca permita que ninguna parte del cuerpo cruce el plano de la cadena mientras esté funcionando la sierra. El uso inadecuado de la motosierra puede...
Page 77 - PRECAUCIONES EN EL ÁREA DE; CONDICIONES PELIGROSAS
19 - Español ADVERTENCIA: Controle con cuidado que no haya ramas rotas o muertas que puedan caer mientras tala, y no tale cerca de edificios o cables eléctricos si no sabe en qué dirección caerá el árbol. No tale de noche o con malas condiciones climáticas como lluvia, nieve o fuertes vientos, porqu...
Page 78 - Corte trasero de tala.
20 - Español FUNCIONAMIENTO ■ Periódicamente eche un vistazo a la copa del árbol durante el corte trasero, para asegurarse de que caiga en la dirección deseada. Si el árbol comienza a caer en una dirección equivocada, o si la sierra se pellizca o queda colgada en el tronco durante la caída del á...
Page 79 - Vea las figuras 13; TRONZADO; Contragolpe
21 - Español FUNCIONAMIENTO deslizamiento, el torcimiento o la separación violenta del árbol de su cepa. Vea las figuras 13 y 14. En árboles de diámetro grande, detenga el corte trasero antes de que esté tan profundo que el árbol pudiese caer o asentarse en la cepa. Después introduzca cuñas de mad...
Page 80 - TIPOS DE CORTE EFECTUADOS; DESRAMADO
22 - Español TRONZADO DE TRONCOS BAJO TENSIÓN Vea las figuras 18 y 19. Cuando el tronco está sostenido a lo largo de toda su longitud, debe cortarse a partir de la parte superior, o sea tronzado por arriba.Cuando el tronco está sostenido por un extremo, corte 1/3 del diámetro a partir de la parte in...
Page 81 - PÉRTIGA
23 - Español PÉRTIGAS Vea la figura 22. Una pértiga es cualquier tronco, rama, cepa enraizada o árbol joven que ha sido doblado por la presión de otro árbol o rama, de manera que azota si se corta o se elimina el elemento que lo detiene. Con la cepa enraizada de un árbol caído hay un gran peligro de...
Page 82 - MANTENIMIENTO; REEMPLAZO DE LA BARRA Y DE LA
24 - Español Fig. 23 MANTENIMIENTO resultar dañados. Utilice paños limpios para eliminar la suciedad, el polvo, el aceite, la grasa, etc. ADVERTENCIA: No permita en ningún momento que fluidos para frenos, gasolina, productos a base de petróleo, aceites penetrantes, etc., lleguen a tocar las piezas d...
Page 84 - Si es necesario un ajuste:
26 - Español LLAVE HEXAGONAL en la barra, con los eslabones de impulsión dentro de la ranura de la misma. Levante la punta de la barra guía para revisar la holgura de la cadena.Suelte la punta de la barra guía y gire 1/2 vuelta hacia la derecha el tornillo de tensado de la cadena. Repita este proc...
Page 85 - MANTENIMIENTO DE LA CADENA
27 - Español la izquierda el tornillo de ajuste de la tensión. Levante la punta de la barra guía y vuelva a apretar firmemente el tornillo de tensado de la cadena de dicha barra. Asegúrese de que la cadena se desplace sin atorarse. NOTA: Las cadenas nuevas tienden a estirarse; revise frecuentemente ...
Page 86 - ÁNGULO DE LIMADURA DE LA PLACA; ÁNGULO CORRECTO: 30o - Los mangos de
28 - Español FORMA DE AFILAR LOS DIENTES DE CORTE Vea las figuras 33 y 34. Tenga cuidado de limar todos los dientes de corte a los ángulos especificados y a la misma longitud, ya que sólo puede lograrse un corte rápido cuando están uniformes todos los dientes de corte. ADVERTENCIA: La cadena de la s...
Page 87 - MANTENIMIENTO DE LA BARRA GUÍA; ÁNGULO DE LA PLACA LATERAL; Á N G U L O C O R R E C T O : 8 0 o; P E N D I E N T E H A C I A AT R Á S - S e n e c e s i t a; ESPACIO LIBRE DEL CALIBRE DE
29 - Español Fig. 39 MANTENIMIENTO DE LA BARRA GUÍA Vea la figura 40. PRECAUCIÓN: Asegúrese de que se haya detenido la cadena y el paquete de baterías se ha sacado antes de ponerse a trabajar con la cadena para evitar el arranque accidental o contacto con la cadena en movimiento que puede ocasionar ...
Page 88 - Debe cambiarse toda barra que presente; TRANSPORTE Y ALMACENAMIENTO
30 - Español MANTENIMIENTO Cada día de uso: Limpie la barra y inspeccione para ver el desgaste y los posibles daños. La formación de minúsculos surcos y protuberancias en los rieles de la barra es un proceso normal de desgaste de la misma, pero tales fallas deben alisarse con una lima tan pronto com...
Page 89 - CORRECIÓN DE PROBLEMAS; LLÁMENOS PRIMERO; ¿NECESITA A; Este producto tiene una garantía limitada de tres años para fines; PROBLEMA; Ajuste; COMBINACIONES DE BARRA Y CADENA; Especificaciones de la cadena:; rueda impulsora de 5 dientes.
31 - Español CORRECIÓN DE PROBLEMAS LLÁMENOS PRIMERO Si tiene preguntas sobre el funcionamiento o el mantenimiento este producto,llame al teléfono de atención al consumidor de RYOBI! La recortadora ha sido probada enteramente antes de embarcarse para asegurar la satisfacción del consumidor. 1-800-52...
Page 92 - OPERATOR’S MANUAL; MANUEL D’UTILISATION / MANUAL DEL OPERADOR; 8 VOLT CHAIN SAW; TECHTRONIC INDUSTRIES POWER EQUIPMENT
9980003579-23-20 (REV:02) OPERATOR’S MANUAL MANUEL D’UTILISATION / MANUAL DEL OPERADOR 18 VOLT CHAIN SAW SCIE À CHAÎNE DE 18 V / MOTOSIERRA DE 18 VP2502 RYOBI is a registered trademark of Ryobi Limited and is used pursuant to a license granted by Ryobi Limited. TECHTRONIC INDUSTRIES POWER EQUIPMENT ...
Page 93 - SIN ESCOBILLAS DE 18 V
OPERATOR’S MANUAL MANUEL D’UTILISATIONMANUAL DEL OPERADOR 18 VOLT BRUSHLESS HEDGE TRIMMER TAILLE-HAIES SANS BALAIS DE 18 VPODADORA DE SETOS SIN ESCOBILLAS DE 18 V P2608 WARNING: To reduce the risk of injury, the user must read and understand the operator’s manual before using this product. TABLE OF ...
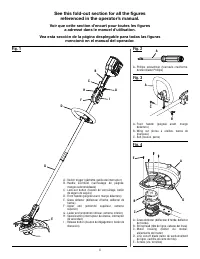
Page 94 - See this fold-out section for all of the figures referenced; dans le manuel d’utilisation.
ii See this fold-out section for all of the figures referenced in the operator’s manual. Consulter l’encart à volets afin d’examiner toutes les figures mentionnées dans le manuel d’utilisation. Consulte esta sección desplegable para ver todas las figuras a las que se hace referencia en el manual del...
Page 96 - WORK AREA SAFETY; ELECTRICAL SAFETY
2 — English WARNING! Read all safety warnings and all instructions. Failure to follow the warnings and instructions may result in electric shock, fire and/or serious injury Save all warnings and instructions for future reference. The term “power tool” in the warnings refers to your mains-operated (c...
Page 97 - BATTERY TOOL USE AND CARE
3 — English POWER TOOL USE AND CARE Do not force the power tool. Use the correct power tool for your application. The correct power tool will do the job better and safer at the rate for which it was designed. Do not use the power tool if the switch does not turn it on and off. Any power tool tha...
Page 98 - HEDGE TRIMMER SAFETY WARNINGS
4 — English Keep all parts of the body away from the blade. Do not remove cut material or hold material to be cut when blades are moving. Blades continue to move after the switch is turned off. A moment of inattention while oper-ating the hedge trimmer may result in serious personal injury. Carr...
Page 99 - SYMBOL SIGNAL
5 — English Some of the following symbols may be used on this product. Please study them and learn their meaning. Proper interpretation of these symbols will allow you to operate the product better and safer. SYMBOL NAME EXPLANATION Safety Alert Symbol Indicates a potential personal injury hazard. R...
Page 104 - GENERAL MAINTENANCE
10 — English MAINTENANCE WARNING: To avoid serious personal injury, always remove the battery pack from the product before inspecting, cleaning or performing any maintenance. WARNING: Always wear eye protection with side shields marked to comply with ANSI Z87.1. If operation is dusty, also wear a du...
Page 105 - CLEANING THE HEDGE TRIMMER; This product has a Three-year Limited Warranty for personal,
11 — English MAINTENANCE CLEANING THE HEDGE TRIMMER Remove the battery pack. Slide the scabbard over the blade. Clean dirt and debris from the body of the hedge trimmer, using a damp cloth with a mild detergent. NOTE: Do not use any strong detergents on the plastic housing or the handle. They ...
Page 106 - SÉCURITÉ DU LIEU DE TRAVAIL; SÉCURITÉ ÉLECTRIQUE; AVERTISSEMENTS DE SÉCURITÉ GÉNÉRAUX
2 — Français AVERTISSEMENT ! Lire tous les avertissements et toutes les instructions. Ne pas suivre l’ensemble des avertissements et des instructions peut entraîner une électrocution, un incendie ou des blessures graves. Conserver les avertissements et les instructions à des fins de référence ultéri...
Page 107 - UTILISATION ET ENTRETIEN DE LA PILE
3 — Français Porter des pantalons longs et épais, des manches longues, des bottes et des gants. Ne pas porter de vêtements amples, bijoux, shorts, sandales et ne pas travailler pieds nus. Ne porter aucun bijou. UTILISATION ET ENTRETIEN DES OUTILS ÉLECTRIQUES Ne pas forcer l’outil. Utiliser l’out...
Page 108 - AVERTISSEMENTS DE SÉCURITÉ POUR LA TAILLE-HAIES
4 — Français Éloigner toute partie du corps des lames. Ne retirer les matériaux coincés ou suspendus ou de les tenir lorsque les lames sont en mouvement. Les lames continue de bouger après que l’interrupteur est éteint. Un moment d’inattention pendant l’utilisation du taille-haie peut occasionner ...
Page 110 - SYMBOLE
6 — Français SYMBOLES Certains des symboles ci-dessous peuvent être utilisés sur ce produit. Veiller à les étudier et à apprendre leur signification. Une interprétation correcte de ces symboles permettra d’utiliser l’outil plus efficacement et de réduire les risques. SYMBOLE NOM DÉSIGNATION / EXPLIC...
Page 113 - DÉMARRAGE ET ARRÊT DU TAILLE-HAIES
9 — Français AVERTISSEMENT : Déblayer la zone de travail avant chaque utilisation. Retirer tous les objets tels que les cordons, lumières, fil, ou câbles ont détaché qui peuvent s’emmêler dans la lame tranchante et créer un risque de blessure grave. Avant de mettre le taille-haies en marche, le te...
Page 114 - ENTRETIEN GÉNÉRAL
10 — Français AVERTISSEMENT : Pour empêcher un démarrage accidentel pouvant entraîner des blessures graves, toujours retirer le bloc-piles de l’outil avant tout nettoyage ou entretien. AVERTISSEMENT : Toujours porter une protection oculaire avec écrans latéraux certifiée conforme à la norme ANSI Z87...
Page 115 - AFFÛTAGE DE LA LAME; NETTOYAGE DU TAILLE-HAIES
11 — Français ENTRETIEN AFFÛTAGE DE LA LAME Voir la figure 8. Laisser les lames du taille-haies s’arrêter dans la position illustrée. Ceci laisse un passage pour la lime entre les dents de coupe et les dents de protection Retirer le bloc-piles du taille-haies. Serrer l’ensemble de lames dans u...
Page 116 - SEGURIDAD EN EL ÁREA DE TRABAJO; SEGURIDAD ELÉCTRICA
2 — Español ADVERTENCIAS DE SEGURIDAD GENERALES PARA EL USO DE HERRAMIENTAS ELÉCTRICAS ¡ADVERTENCIA! Lea todas las advertencias de seguridad y las instrucciones. El incumplimiento de las advertencias e instrucciones puede ocasionar descarga eléctrica, fuego o lesiones graves. Guarde todas las advert...
Page 117 - EMPLEO Y CUIDADO DE LA HERRAMIENTA; ADVERTENCIAS DE SEGURIDAD GENERALES
3 — Español Póngase pantalones largos de tela gruesa, mangas largas, botas y guantes. No se ponga ropa holgada o pantalones cortos, sandales ni ande descalzo. No use artículos de joyería de ninguna clase. EMPLEO Y CUIDADO DE LA HERRAMIENTA ELÉCTRICA N o f u e r c e l a h e r r a m i e n t a e l ...
Page 118 - ADVERTENCIAS DE SEGURIDAD DE LA PODADORA DE SETOS
4 — Español Mantenga todas las partes del cuerpo alejadas de la hoja de corte. o retire material cortado ni sujete material por cortar mientras estén moviéndose las hojas. Las hojas sigue moviéndose después de desactivar el interruptor. Un momento de inatención al utilizar una podadora de setos pu...
Page 119 - SÍMBOLO
5 — Español Es posible que se empleen en esta producto algunos de los siguientes símbolos. Le suplicamos estudiarlos y aprender su significado para mayor seguridad al manejar este producto. SÍMBOLO NOMBRE DENOMINACIÓN / EXPLICACIÓN Alerta de seguridad Indica un peligro posible de lesiones personales...
Page 121 - FAMILIARÍCESE CON LA PODADORA DE
7 — Español ESPECIFICACIONES DEL PRODUCTO Motor .......................................................... 18 V, corr. cont.Longitud de la hoja ................................. 559 mm (22 pulg.) Capacidad de corte ................................. 19 mm (3/4 pulg.)Velocidad de corte ..................
Page 124 - MANTENIMIENTO GENERAL
10 — Español MANTENIMIENTO ADVERTENCIA: Al dar servicio a la unidad, sólo utilice piezas de repuesto Ryobi idénticas. El empleo de piezas diferentes puede causar un peligro o dañar el producto. ADVERTENCIA: Siempre póngase protección ocular con protección lateral con la marca de cumplimiento de la n...
Page 125 - LIMPIEZA DE LA PODADORA DE SETOS
11 — Español MANTENIMIENTO Retire el paquete de baterías de la podadora de setos. Sujete el conjunto de las hojas en una prensa de banco y lime la superficie expuesta de cada diente con una lima redonda de 203 mm (8 pulg.) de largo y 6,4 mm (1/4 pulg.) o 5,6 mm (7/32 pulg.) de diámetro. Asegúres...
Page 126 - 8 VOLT BRUSHLESS HEDGE TRIMMER
99800035210-8-20 (REV:04) OPERATOR’S MANUAL MANUEL D’UTILISATION / MANUAL DEL OPERADOR 18 VOLT BRUSHLESS HEDGE TRIMMER TAILLE-HAIES SANS BALAIS DE 18 V /PODADORA DE SETOS SIN ESCOBILLAS DE 18 V P2608 TECHTRONIC INDUSTRIES POWER EQUIPMENT P.O. Box 1288, Anderson, SC 29622, USA 1-800-525-2579 • www.ry...
Page 128 - See this fold-out section for all of the figures
ii See this fold-out section for all of the figures referenced in the operator’s manual. Consulter l’encart à volets afin d’examiner toutes les figures mentionnées dans le manuel d’utilisation. Consulte esta sección desplegable para ver todas las figuras a las que se hace referencia en el manual del...
Page 132 - READ ALL INSTRUCTIONS; IMPORTANT SAFETY INSTRUCTIONS
2 — English WARNING: READ AND UNDERSTAND ALL INSTRUCTIONS. Failure to follow all instructions listed below and on the machine may result in electric shock, fire, and/or serious personal injury. READ ALL INSTRUCTIONS This cutting machine is capable of amputating hands and feet and throwing objects....
Page 139 - SLOPE OPERATION
9 — English OPERATION SLOPE OPERATION See Figure 11. WARNING: Slopes are a major factor related to slip and fall accidents that can result in severe injury. Operation on slopes requires extra caution. If you feel uneasy on a slope, do not mow it. For your safety, do not attempt to mow slopes greater...
Page 140 - STORING THE MOWER
10 — English Replace the blade, plastic spacer, metal spacer , and then thread the blade nut on the shaft and finger tighten. NOTE: Make certain all parts are replaced in the exact order in which they were removed. Torque the blade nut down clockwise using a torque wrench (not provided) to ensur...
Page 141 - MAKE THE MOST OF YOUR PURCHASE!; Your product has been fully tested prior to shipment
11 — English 1-800-525-2579 MAKE THE MOST OF YOUR PURCHASE! Your product has been fully tested prior to shipment to ensure your complete satisfaction. For any questions about operating or maintaining your product, call the RYOBI Help Line! TROUBLESHOOTING IF THESE SOLUTIONS DO NOT SOLVE THE PROBLEM ...
Page 142 - LISEZ TOUTES LES INSTRUCTIONS; INSTRUCTIONS IMPORTANTES CONCERNANT LA SÉCURITÉ
2 — Français AVERTISSEMENT : LISEZ ET VEILLEZ À COMPRENDRE TOUTES LES INSTRUCTIONS. Le non respect des instructions énumérées ci-dessous et sur la machine pourrait résulter en un choc électrique, un incendie, et/ou des blessures sérieuses. LISEZ TOUTES LES INSTRUCTIONS Cet outil coupant est capabl...
Page 147 - DÉVOILEMENT ET INSTALLER DE POIGNÉE; INSTALLATION DE L’INSERT BROYEUR (POUR; RÉGLAGE DE LA HAUTEUR DE LA LAME
7 — Français DÉVOILEMENT ET INSTALLER DE POIGNÉE Voir les figure 2 et 3. Pour soulever poignée inférieure : Desserer les boutons de verrouillage de la poignées inféri- eure en les tournant dans le sens contraire aux aiguilles d’une montre. Tirer la poignée inférieure vers le haut et l’arrière ju...
Page 148 - DÉMARRAGE/ARRÊT DE LA TONDEUSE; CONSEILS DE TONDAISON
8 — Français UTILISATION AVERTISSEMENT : Ne laissez pas la familiarité tirée d’une utilisation fréquente de ce type de produit atténuer votre vigilance. Souvenez-vous qu’une fraction de seconde d’inattention suffit à infliger des blessures graves. AVERTISSEMENT : Toujours porter une protection ocula...
Page 149 - UTILISATION SUR LES PENTES
9 — Français AVERTISSEMENT : Avant d’effectuer de l’entretien ou de nettoyer la tondeuse, s’assurer que les lames de la tondeuse sont complètement immobiles et que les piles et la clé de démarrage sont enlevées pour empêcher un démarrage accidentel ou des possibles blessures corporelles graves. AVER...
Page 150 - ENTREPOSAGE DE LA TONDEUSE
10 — Français Enlevez la écrou de lame, espaceur en plastique, espaceur en métal, et puis la lame. Placez la nouvelle lame sur l’arbre contre le ventilateur. S’assurer que la lame est bien appuyée sur l’arbre. Celui-ci doit passer dans le trou central de la lame et les deux tiges pour lame doive...
Page 151 - TIREZ LE MEILLEUR PARTI DE VOTRE ACHAT!; Ce produit à été entièrement testé avant expédition; Ce produit est accompagné d’une garantie limitée de
11 — Français APPELER L E 1-800-525-2579 BESOIN D'A IDE? ¿NECESITA AYUDA? LLAME AL www.ryobit ools.com DÉPANNAGE TIREZ LE MEILLEUR PARTI DE VOTRE ACHAT! Ce produit à été entièrement testé avant expédition pour assurer la complète satisfaction de l’utilisateur. Pour toute question concernant l’utilis...
Page 152 - LEA TODAS LAS INSTRUCCIONES; INSTRUCCIONES DE SEGURIDAD IMPORTANTES
2 — Español ADVERTENCIA: LEA Y COMPRENDA TODAS LAS INSTRUCCIONES. El incumplimiento de las instrucciones señaladas abajo y en la máquina puede causar descargas eléctricas, incendios y/o lesiones serias. LEA TODAS LAS INSTRUCCIONES Esta máquina de corte es capaz de amputar manos y pies, y de lanzar...
Page 156 - TAPÓN PARA TRITURACIÓN; LLAVE DE ARRANQUE
6 — Español ARMADO DESEMPAQUETADO Este producto requiere armarse. Extraiga cuidadosamente de la caja la herramienta y los accesorios. Asegúrese de que estén presentes todos los artículos enumerados en la lista de empaquetado. ADVERTENCIA: No utilice este producto si alguna pieza incluida en la lis...
Page 157 - AJUSTE DE LA ALTURA DE LA CUCHILLA
7 — Español NOTA: Si le resulta difícil mover el mango inferior, gire las trabas del mango inferior en el sentido en el sentido contrario a las agujas del reloj para liberar el mango. Para fijar el mango inferior en su posición, cierre las trabas del mango inferior. NOTA: Si el mango inferior está...
Page 158 - USOS; ENCENDIDO Y APAGADO DE LA PODADORA; SUGERENCIAS PARA EL PODADO
8 — Español FUNCIONAMIENTO ADVERTENCIA: No permita que su familarización con este tipo de producto lo vuelva descuidado. Tenga presente que un descuido de un instante es suficiente para causar una lesión grave. ADVERTENCIA: Siempre utilice protección para los ojos con escudos laterales que cumplan c...
Page 159 - MANEJO EN PENDIENTES
9 — Español ADVERTENCIA: Antes de realizar tareas de mantenimiento o limpiar la podadora, asegúrese de que las hojas de la podadora se detengan por completo y de quitar las baterías y la llave de arranque para evitar el arranque accidental y posibles lesiones personales. ADVERTENCIA: Siempre póngase...
Page 160 - GUARDADO DE LA PODADORA
10 — Español AVISO: Inspeccione periódicamente todo el producto para detectar partes dañadas, faltantes o sueltas, como tornillos, tuercas, pernos, tapas, etc. Apriete firmemente todos los sujetadores y las tapas y no accione este producto hasta que todas las partes faltantes o dañadas sean reemplaz...
Page 161 - CORRECCIÓN DE PROBLEMAS; APROVECHE AL MÁXIMO SU COMPRA!; asegurar la completa satisfacción del consumidor.
11 — Español CORRECCIÓN DE PROBLEMAS SI CON ESTAS SOLUCIONES NO SE RESUELVE EL PROBLEMA, COMUNÍQUESE CON EL CONCESIONARIO DE SERVICIO AUTORIZADO DE SU PREFERENCIA. PROBLEMA CAUSA POSIBLE SOLUCIÓN El mango no está en posición. Las trabas de los mangos no están cerradas. Cierre las trabas del mango su...
Page 163 - BRUSHLESS BLOWER; SOUFFLANTE SANS BALAI DE 18 V ONE+
OPERATOR’S MANUAL MANUEL D’UTILISATIONMANUAL DEL OPERADOR 18 VOLT ONE+ ™ BRUSHLESS BLOWER SOUFFLANTE SANS BALAI DE 18 V ONE+ ™ SOPLADORA DE SIN ESCOBILLAS DE 18 V ONE+ ™ P21012 WARNING: To reduce the risk of injury, the user must read and understand the operator’s manual before using this product. T...
Page 164 - Consulter l’encart à volets afin d’examiner toutes les figures
ii Fig. 1 A - Blower tube (tube de soufflante, tubo de la sopladora) B - Blower housing outlet (prise de boîtier de soufflante, salida del alojamiento de la sopladora) See this fold-out section for all of the figures referenced in the operator’s manual. Consulter l’encart à volets afin d’examiner to...
Page 171 - TO INSTALL / REMOVE BATTERY PACK
7 — English WARNING: Do not allow familiarity with products to make you care-less. Remember that a careless fraction of a second is sufficient to inflict serious injury. WARNING: Always wear eye protection with side shields marked to comply with ANSI Z87.1, along with hearing protection. Failure to ...
Page 173 - RÈGLES DE SÉCURITÉ IMPORTANTES
2 — Français choc électrique. Le cas échéant, faire remplacer la prise ou le cordon immédiatement par un centre de réparations agréé. Si l’appareil ne fonctionne pas correctement, s’il a été échappé, s’il est endommagé, s’il a été laissé à l’extérieur ou s’il est tombé dans l’eau, retourner le pro...
Page 174 - CONSERVER CES INSTRUCTIONS
3 — Français RÈGLES DE SÉCURITÉ IMPORTANTES Porter une protection oculaire avec écrans latéraux certifiée conforme à la norme ANSI Z87.1 lors de l’utilisation de ce produit. Protection respiratoire. Porter un masque facial ou un masque anti-poussière si le travail produit de la poussière. Le res...
Page 179 - REMISAGE
8 — Français ENTRETIEN GÉNÉRAL Éviter d’utiliser des solvants pour le nettoyage des pièces en plastique. La plupart des matières plastiques peuvent être endommagées par divers types de solvants du commerce. Utiliser un chiffon propre pour éliminer la saleté, la poussière, l’huile, la graisse, etc. A...
Page 180 - INSTRUCCIONES IMPORTANTES
2 — Español INSTRUCCIONES IMPORTANTES DE SEGURIDAD Cuando se usa un electrodoméstico, las precauciones básicas siempre se deben seguir, inclusive lo siguiente: ¡ADVERTENCIA! LEA Y COMPRENDA TODAS LAS INSTRUCCIONES ANTES DE UTILIZAR ESTE FUELLE. Para reducir el riesgo de calambre, el fuego y/o la her...
Page 185 - FUNCIONAMIENTO DE LA SOPLADORA
7 — Español PARA DESMONTAR Y MONTAR EL PAQUETE DE BATERÍAS Vea la figura 3. ADVERTENCIA: Retire siempre el paquete de baterías de la herramienta antes de instalar las piezas, realizar ajustes. limpiarla o cuando no la utilice. Retirar el paquete de baterías evitará que la unidad se accione accidenta...
Page 186 - ALMACENAMIENTO
8 — Español Esté al cuidado de niños, mascotas, ventanas abiertas o coches recién lavados, y sople los desechos de manera segura. Después de utilizar sopladores o cualquier otro equipo, ¡LIMPIE! Deseche de forma adecuada los desechos. ADVERTENCIA: Las herramientas de baterías siempre están en co...
Page 188 - 8 VOLT ONE+TM BRUSHLESS BLOWER; SOUFFLANTE SANS BALAI DE 18 V ONE+TM
9980003007-30-20 (REV:01) OPERATOR’S MANUAL MANUEL D’UTILISATION / MANUAL DEL OPERADOR 18 VOLT ONE+™ BRUSHLESS BLOWER SOUFFLANTE SANS BALAI DE 18 V ONE+™ SOPLADORA DE SIN ESCOBILLAS DE 18 V ONE+™ P21012 TECHTRONIC INDUSTRIES POWER EQUIPMENT P.O. Box 1288, Anderson, SC 29622, USA 1-800-860-4050 • www...
Page 189 - 8 VOLT STRING TRIMMER/EDGER
OPERATOR’S MANUAL MANUEL D’UTILISATIONMANUAL DEL OPERADOR 18 VOLT STRING TRIMMER/EDGER 18 V TONDEUSE À FOUET / TAILLE-BORDURE18 V RECORTADORA DE HILO/ RECORTADORA DE BORDES P20102 WARNING: To reduce the risk of injury, the user must read and understand the operator’s manual before using this product...
Page 190 - See this fold-out section for all the figures; Voir que cette section d’encart pour toutes les figures
ii See this fold-out section for all the figures referenced in the operator’s manual. Voir que cette section d’encart pour toutes les figures a adressé dans le manuel d’utilisation. Vea esta sección de la página desplegable para todas las figuras mencionó en el manual del operador. Fig. 1 Fig. 2 Fig...
Page 199 - OPERATING THE TRIMMER; INSTALLING/REMOVING BATTERY PACK
7 — English WARNING: To avoid serious personal injury, always remove the bat-tery pack and keep hands clear of the lock-out button when carrying or transporting the tool. STARTING/STOPPING THE STRING TRIMMER See Figure 8. To start: Select the desired operating speed (HI or LOW). Press and hold t...
Page 200 - EDGING; CUTTING TIPS
8 — English hear the engine running faster than normal, or when trimming efficiency diminishes. This will maintain best performance and keep line long enough to advance properly.This trimmer is currently set at the 11 in. cutting swath. To adjust to a cutting swath of 13 in.: Remove the battery pa...
Page 201 - SPOOL REPLACEMENT
9 — English WARNING: To avoid serious personal injury, always remove the bat-tery pack from the tool when cleaning or performing any maintenance. WARNING: Always wear eye protection with side shields marked to comply with ANSI Z87.1. Failure to do so could result in objects being thrown into your ey...
Page 202 - STORING THE TRIMMER
10 — English TROUBLESHOOTING 1-800-525-2579 CALL US FIRST For any questions about operating or maintaining your product, call the Ryobi Help Line! Your product has been fully tested prior to shipment to ensure your complete satisfaction. PROBLEM POSSIBLE CAUSE SOLUTION Line will not advance when us-...
Page 203 - LIRE TOUTES LES INSTRUCTIONS
2 — Français AVERTISSEMENT ! Lors de l’utilisation d’outils de jardinage, toujours suivre les consignes de sécurité de base pour éviter les risques d’incendie, d’électrocution et de blessures. LIRE TOUTES LES INSTRUCTIONS Pour travailler en toute sécurité, lire et veiller à bien comprendre toutes ...
Page 208 - ENSEMBLE L’OUTIL
7 — Français ENSEMBLE L’OUTIL Voir la figure 6. AVERTISSEMENT : Ne jamais installer, retrait ou ajuster un accessoire lorsque le moteur tourne ou avec le bloc-piles installée. Pour éviter des blessures graves, arrêter le moteur ou enlever le bloc-piles. Si est installé, retirer le bloc de piles. ...
Page 209 - MISE EN MARCHE ET ARRÊT DU TAILLE-; UTILISATION DU TAILLE-BORDURES
8 — Français Retrait : Relâcher les loquets et retirer le bloc-piles. Pour prendre connaissance des consignes de chargement, consulter les manuels d’utilisation des piles et des chargeurs. AVERTISSEMENT : Pour éviter des blessures graves, tojours retirer le bloc-piles et tenir à distance de main...
Page 210 - TAILLE DES BORDURES
9 — Français moteur tourne à une vitesse supérieure à la normale ou lorsque la coupe devient moins efficace. Ceci permet de maintenir une efficacité maximum et de maintenir une longueur de fil suffisante pour avancer correctement.Cette taille-bordure est actuellement réglée au 279,4 mm (11 po) large...
Page 211 - REMPLACEMENT DE LA BOBINE
10 — Français AVERTISSEMENT : Pour empêcher un démarrage accidentel pouvant entraîner des blessures graves, toujours retirer le piles de l’produit avant tout nettoyage ou entretien. AVERTISSEMENT : Toujours porter une protection oculaire avec écrans latéraux certifiée conforme à la norme ANSI Z87.1....
Page 212 - Ryobi
11 — Français PIÈCES DE REMPLACEMENT Numéro de pièce de la bobine de remplacement : 1,7 mm (0,065 po) fil torsadé ......... AC14RSLA (1) ou AC14RL3A (paquet de 3) 2,0 mm (0,080 po) fil torsadé .............. AC80RL1 (1) ou AC80RL3 (paquet de 3)Numéro de pièce du couvercle de la bobine de remplacemen...
Page 217 - DIÁMETRO DE CORTE AJUSTABLE
6 — Español FAMILIARÍCESE CON SU RECORTADORA DE HILO Vea la figura 1. El uso seguro que este producto requiere la comprensión de la información impresa en la producto y en el manual del operador así como ciertos conocimientos sobre el proyecto a realizar. Antes de usar este producto, familiarícese c...
Page 218 - HERRAMIENTAS NECESARIAS; ARMANDO DE LA HERRAMIENTA
7 — Español ADVERTENCIA: Si hay piezas dañadas o faltantes, no utilice esta producto sin haber reemplazado las piezas dañadas o faltantes. La inobservancia de esta advertencia puede causar lesiones graves. ADVERTENCIA: No intente modificar esta producto ni hacer accesorios no recomendados para la mi...
Page 219 - ENCENDIDO Y APAGADO DE LA RECORTADORA
8 — Español Para el desmontaje: Oprima los pestillos y extraer el paquete de baterías. Para obtener instrucciones específicas de carga, lea los manuales del operador que se incluye con el cargador y la batería. ADVERTENCIA: Para evitar lesiones corporales serias, siempre desmonte de la herramien...
Page 220 - RECORTE DE BORDES; RECOMENDACIONES DE CORTE
9 — Español la longitud apropiada. Avance el hilo siempre que escuche que el motor está funcionando más rápido de lo normal, o cuando disminuya la eficiencia del recorte. Esto mantendrá un desempeño óptimo y mantendrá el hilo a la suficiente longitud para que avance correctamente.Este recortadora de...