Page 3 - Safety Information; Restrictions
• This product is designed for indoor floor cleaning only, do not use it outdoors (such as on an open-ended terrace), on any surface other than the ground (such as a sofa), or in any commercial or industrial environment. • Do not use this product on elevated surfaces without barriers such as the flo...
Page 6 - • Make sure the product is powered off before shipment.
Safety Information • If the power cord is damaged, stop using it immediately. It must be replaced by the manufacturer, its service agent, or similarly qualified persons to avoid a hazard. • Make sure the product is powered off before shipment. • Use of the original packaging is advised. • If to be l...
Page 7 - Table of Faults
Item Main Unit Charging dock Main unit does not charge. Main brush, side brush, fan or main wheel issue. Does not power on. Functions do not work. Power cable Charging dock has no power. Fault Table of Faults Table of Faults 5
Page 8 - Welcome
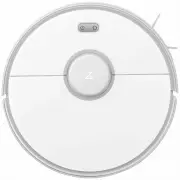
Welcome Thank you for choosing a Roborock Robot Vacuum Cleaner. Treat yourself to crisp, just-mopped floors every day with S5 Max. Engineered for a seamless automated mopping, it has a super-sized water tank, precision water control, virtual no-mop zones, and more. Combined with precision laser mapp...
Page 9 - Product introduction; Robot
On/Off • Press to start cleaning• Press and hold to power on or off Power indicator • White: Battery level 20% • Red: Battery level < 20%• Flashing: Charging or starting up• Flashing red: Error Dock/Spot Clean • Press to return to the dock• Press and hold to spot clean Cover latch Product intro...
Page 10 - Parts list
Product introduction Parts list 8 $IBSHJOHEPDL 1PXFSDBCMF .PQDMPUINPVOU .PQDMPUI .PJTUVSFQSPPGNBU
Page 11 - Dustbin
Product introduction Dustbin Robot System reset Air vent Air filter Dustbin latch Dustbin cover Speaker Water tank latch WiFi indicator light • Off: WiFi disabled• Slow flashing: Waiting for connection • Fast flashing: Connecting• Steady: WiFi connected 9
Page 12 - Machine and sensors
Product introduction Machine and sensors Bumper Recharge sensor Laser distance sensor Wall sensor Side brush Omnidirec- tional wheel Charging contact Main brush Main brush cover latch Main wheels Cliff sensor 10
Page 13 - Mopping module
Product introduction Mopping module Charging dock Water tank Water tank latch Mop cloth att- achment slot Water tank stopper Water filter Mop cloth Mop cloth bracket clip Attaching area Mop cloth bracket Charging points Signal transmitting area Charging dock power indicator Power socketCharging poin...
Page 14 - Installation; Using the robot
Double-sided tape Installation Using the robot 1. Place the charging dock against the wall on a flat surface and plug it into the mains power. Note: • The charging dock should have more than 0.5m (1.6ft) of clearance on each side, and more than 1.5m (5ft) in the front. • If the power cable is vertic...
Page 16 - Connect to the app
Ώ Add device Open the app and click "+" in the top right corner, then follow the instructions in-app. Once your robot has been added, it will be found in a list on the homepage. Note: • Due to ongoing app development, the actual process may differ slightly from the above description. Always ...
Page 19 - Pause
Installation On/Off Press and hold the button to turn on the robot. The power indicator will turn on and the robot will enter Standby mode. If the robot is in Sleep mode, press and hold the button to turn it off and end the current cleanup. Pause When the robot is cleaning, press any button to pause...
Page 20 - Instructions for use; Charging
1.5m 1.5m Instructions for use Charging Auto: After cleaning, the robot will automatically return to the charging dock to recharge.Manual: In Pause mode, press the button to send the robot back to the charging dock. The power indicator will flash slowly as the robot charges. Note: If the cleaning cy...
Page 21 - Selective Room Cleaning; Scheduled Cleaning
Instructions for use Selective Room Cleaning Select specific rooms for cleaning in the app. In this mode, the robot will only clean the selected rooms. Cleaning mode Use the app to choose from Quiet, Balanced, Strong, or MAX modes. Balanced mode is the default. Pin n Go Use the app to set a destinat...
Page 22 - More app functions; Refilling the water tank or cleaning the
Instructions for use More app functions Note: Functions and details of the app may vary slightly due to continuous app development and upgrades. Change Cleaning Mode Real-Time Map Updates View Cleaning History Change Robot Voice Firmware Update Part Replacement Schedule Carpet Boost Remote Control V...
Page 23 - Main brush; Charging dock
Instructions for use Routine maintenance Main brush 1. Turn the robot over then unlatch and remove the main brush cover. 2. Take out the main brush, remove and clean its bearings.3. Remove the main brush cap, rotating in the unlock direction.4. Use the supplied main brush cleaning tool to remove any...
Page 24 - Routine maintenance; Using the main brush cleaning tool; Dustbin and filter; Clean the washable filter
Routine maintenance Using the main brush cleaning tool Use the main brush cleaning tool to remove any hair entangled around the main brush. 2. Open the dustbin lid as indicated by the arrow and pour out the contents. Dustbin and filter 1. Open the top cover of the robot, squeeze the dustbin latch, a...
Page 25 - Battery
Routine maintenance 3. Remove the filter and clean it with water. Clean the washable filter 2. Fill the dustbin with clean water and close the cover. Gently shake the dustbin, then pour out the dirty water. Note: Only use fresh water without cleaning liquid. Note: To avoid damage, do not touch the s...
Page 26 - Side brush; Water tank
Routine maintenance Side brush 1. Turn the robot over and remove the screw holding the side brush.2. Remove and clean the side brush.3. Reinstall the side brush and tighten the screw. Mop cloth 1. Remove the mop cloth from the mop cloth bracket. Note: Side brush replacement every 3-6 months is recom...
Page 27 - Omnidirectional wheel; Machine sensors; Restore factory settings
Routine maintenance Omnidirectional wheel 1. Turn the robot over.2. Use a small screwdriver to separate the axle and the tire.3. Rinse the axle and tire with water to remove any hair and dirt.4. Dry and rebuild the wheel, then press it back in place. System Reset If the robot does not respond when y...
Page 28 - Environmental protection description; Removing the battery
26 Environmental protection description Removing the battery The chemical substances contained in the built-in lithium-ion battery of this product can cause environmental pollution. Remove the battery before disposing of this product and hand it to a professional battery recycling facility for centr...
Page 29 - Basic parameters; WiFi Specification
Basic parameters Robot Charging dock Note: The serial number is on a sticker on the underside of the robot. Name Parameters 353×350×96.5mm Dimensions 14.4V/5200mAh lithium battery Battery Approx. 3.5 kg Weight WiFi Smart Connect Wireless connection 58W Rated power Rated voltage 14.4VDC Name Paramete...
Page 30 - Troubleshooting
Error Solution Error 1: Rotate the laser head to check that it turns freely. The LDS unit is jammed. Remove any items blocking it then move the robot to a new location and restart. Error 8: Clear away any obstacles around the robot. The robot may be stuck. Clear any obstacles around it. Error 2: Cle...
Page 32 - FAQs
FAQs Problem Solution Unable to power on The battery level is low. Put the robot on the charging dock to charge it before use. The battery temperature is too low or too high. Only use the robot within the range of 4-40°C (39-104°F). Unable to connect to WiFi WiFi is disabled. Reset the WiFi and try ...
Page 34 - EU Declaration of Conformity
Hereby we: Name of manufacturer Address Beijing Roborock Technology Co.,Ltd. )ORRU6XLWH%XLOGLQJ&.DQJMLDQ%DRVKHQJ3OD]Db No.8 Heiquan Road, Haidian District, Beijing, P.R.CHINA declare that this DoC is issued under our sole responsibility and that the products: Product description Type(model) desi...
Page 36 - Person responsible for making this declaration:
Low Voltage Directive 2014/35/EU1. EN 60335-1:2012 + A11:2014+AC:2014+A13:20172. EN 60335-2-29:2004 + A2:2010+A11: 20183. EN 62233:2008 1.Household and similar electrical appliances-Safety-Part 1: General requirements2.Household and similar electrical appliances-Safety-Part 2-29: Particular requirem...
Page 37 - WEEE Information
WEEE Information Correct Disposal of this product . This marking indicates that this product should not be disposed with other household wastes throughout the EU. To prevent possible harm to the environment or human health from uncontrolled waste disposal, recycle it responsibly to promote the susta...
Page 38 - Warranty Information
Warranty Information Warranty Information The warranty period depends on the laws of the country in which the product is sold, and the warranty is the responsibility of the seller.The warranty only covers defects in material or workmanship.The repairs under warranty may only be carried out by an aut...