Page 4 - ENGLISH; Introduction; Tap unit
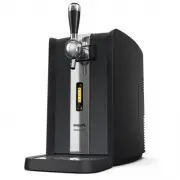
6 ENGLISH Introduction Congratulations on purchasing this new PerfectDraft. From now on you can enjoy the perfect taste of fresh, cold draft beer. The system keeps your beer fresh and at exactly the right temperature so that you can pour a cold beer whenever you feel like it. Several beer brands are...
Page 5 - Important
Important Read this user manual carefully before you use the appliance and save it for future reference. The appliance Warning - If the mains cord is damaged, you must have it replaced by Philips, a service centre authorised by Philips or similarly qualified persons in order to avoid a hazard. - Che...
Page 6 - Caution
- The appliance is not suitable for installation in an area where a water jet could be used. Caution - Keep the appliance out of the reach of children. The handle can be removed for extra safety. - Put the appliance on a horizontal, even and stable surface. Leave at least 10 cm free space around the...
Page 7 - Do not lift the appliance by the tap handle.; Do not shake the keg.
may cause problems when you install the tap unit on the keg. - Do not lift the appliance by the tap handle. The keg Warning - Never store the keg in the freezer! Freezing may cause serious damage to the keg. - To avoid the risk of explosion, do not expose the keg to direct sunlight or temperatures h...
Page 8 - The kegs are not stackable.; This Philips appliance complies with all standards regarding; Before first use; Installing the appliance
- Unopened kegs keep best when you store them at a stable temperature. The cooler you store the keg, the better. - Maximum working pressure: 1.5 bar. - Use the keg only for the HD3720/HD3610/HD3600 PerfectDraft. Do not connect other equipment to the keg. - Do not use kegs from other suppliers than t...
Page 9 - Preparing for use; Placing the tap unit onto the keg; Always clean the tap unit with water and, if necessary, with
5 Attach the tap handle. 6 Place the preferred medallion on top of the handle. Preparing for use Placing the tap unit onto the keg Always clean the tap unit with water and, if necessary, with some washing-up liquid before you place it on the keg and insert the tube. Table 1: 1 Remove the protection ...
Page 10 - When you assemble the tap unit properly, you hear two clicks; Placing the tube into the tap unit
4 Check if the tube release button works properly. When you press the blue tube release button, the two clamps in the opening have to move. Note: If the clamps fail to move when you press the blue tube release button, rinse the tube-connection hole under a running tap again. 5 Put the tap unit onto ...
Page 11 - Placing the keg into the appliance
3 Push the tube connector into the opening in the tap unit (‘click’). Placing the keg into the appliance Never place the keg into the appliance if you have not assembled the tap unit and the tube properly. See sections ‘Placing the tap unit onto the keg’ and ‘Placing the tube into the tap unit’ in t...
Page 12 - Cooling; Wait until the beer has reached the right drinking; Temperature indication
5 Close the doors. Note: If the pump goes on frequently when you are not pouring beer, reinstall the keg or repeat the instructions in section ‘Placing the tap unit onto the keg’ in this chapter. Cooling After you have installed the keg, the appliance automatically starts to cool the keg. Note: At a...
Page 14 - Other indications; How to pour a perfect beer; Follow the instructions below to pour a perfect beer.; Cleaning beer glasses; Always use clean beer glasses when you tap beer.; Pouring beer; You get the best results if you pour the beer in a cool, clean
- Red or green dash with flashing yellow-orange background light = the tap unit and/or tube are not properly placed. Remove the keg and check if the tap unit and the tube are properly placed. See chapter ‘Preparing for use’, sections ‘Placing the tap unit onto the keg’ and ‘Placing the tube into the...
Page 15 - The beer only flows properly into the glass if the tap is
ENGLISH 17 Note: For the best quality draft beer, always clean and rinse used glasses before you use them again. This prevents foam residues of previously poured beer from causing too much foam in freshly poured beer.Note: When you have not poured beer for more than a week, it is recommended to let ...
Page 16 - Serving a freshly poured beer; Dry the bottom of the glass by passing it over a cloth.; different beer pouring traditions; Step
Serving a freshly poured beer 1 Dry the bottom of the glass by passing it over a cloth. 2 Use a clean beer mat for your guest. 3 Pick up the glass in the middle and serve the beer on the beer mat. Make sure the beer brand logo (if present on the glass) faces your guest. 3 different beer pouring trad...
Page 17 - Replacing the keg; Press the release button to the right to open the doors.
Step European (except Germany and UK) German British c. Repeat steps 2 to 6 and fill the glass up to the rim. 8 Close the tap in one smooth movement. Close the tap in one smooth movement. Close the tap in one smooth movement. 9 a. Move the glass away from the spout to prevent drops of beer from fall...
Page 18 - Cleaning; Clean the appliance when you replace the keg or when you; Recycling
4 Press on the release buttons on both sides of the tap unit (1). The tap unit is released from the keg with a click and you can remove it (2). You have to remove the tap unit from the keg before you can replace the tube.Always replace the tube when you install a new keg. Never use a tube for more t...
Page 19 - Removing the cooling element; The cooling element inside the appliance contains a substance
Removing the cooling element The cooling element inside the appliance contains a substance that may pollute the environment. Therefore you must remove the cooling element before you discard the appliance.You can also take or send the appliance to a Philips service centre. The staff of this centre wi...
Page 20 - Guarantee restrictions; Troubleshooting
7 Remove the aluminium plate. , After you have removed the aluminium plate, you see a white plate of approx. 4 x 4cm. This is the actual cooling element. 8 Place the shaft of a screwdriver against one side of the cooling element and push the cooling element off the back of the aluminium plate. 9 Cut...
Page 21 - Appliance general
Problem Solution Appliance general It is not possible to close the doors. Make sure you push down the blue locking levers until they are in horizontal position before you close the doors.Make sure the tube is placed correctly in the tap unit and the tap handle is in upright position. See chapter ‘Pr...
Page 23 - Perhaps the keg is empty. Put a new keg into the appliance.
Problem Solution The display shows the wrong volume (HD3720). For proper functioning of the volume indication, it is crucial that you open the tap handle completely (see chapter ‘How to pour a perfect beer’).In case of a power failure or if the appliance has been disconnected from the mains, the lev...
Page 25 - Keg suppliers; Country
Keg suppliers If you need information about the keg or if you have a problem with your keg, you can contact the supplier of the keg in your country. You will find the phone numbers in the table below. Country Brand Phone number Web address The Netherlands Dommelsch 0800-0230367 www.dommelsch.nl Hert...
Page 26 - DEUTSCH; Einführung; Schlaucheinheit (im Lieferumfang des Fasses enthalten)
28 DEUTSCH Einführung Wir gratulieren Ihnen zum Kauf dieses neuen PerfectDraft Zapfsystems. Ab jetzt können Sie jederzeit den wunderbaren Geschmack von frisch gezapftem Fassbier genießen. Das Gerät hält Ihr Bier frisch und perfekt temperiert, sodass Sie sich ein kühles Bier genehmigen können, wann i...
Page 28 - Achtung
- Zur Vermeidung von Überhitzung sollten Sie das Gerät nicht abdecken (z. B. mit einem Handtuch). - Dieses Gerät ist nur für den Gebrauch in Innenräumen vorgesehen. Verwenden Sie das Gerät nicht im Freien. - Das Gerät ist nicht für Wasseranschlüsse mit Hochdruck geeignet. Achtung - Halten Sie das Ge...
Page 29 - Heben Sie das Gerät nicht am Zapfhahn an.; Schütteln Sie das Fass nicht.
der Zapfeinheit am Bierfass Probleme verursachen. - Heben Sie das Gerät nicht am Zapfhahn an. Das Bierfass Warnhinweis - Bewahren Sie das Fass niemals im Tiefkühlfach auf! Das Einfrieren würde dem Fass erheblichen Schaden zufügen. - Um das Risiko einer Explosion zu vermeiden, sollten Sie das Bierfas...
Page 30 - Die Fässer lassen sich nicht stapeln.; Elektromagnetische Felder; Dieses Philips Gerät erfüllt sämtliche Normen bezüglich
immer auf das darauf abgedruckte Mindesthaltbarkeitsdatum. - Benutzen Sie das Fass nicht, wenn die Oberseite defekt ist. Bei beschädigter Oberseite lässt sich die Zapfeinheit nicht montieren. - Ungeöffnete Bierfässer halten am längsten, wenn sie bei gleichbleibender Temperatur gelagert werden. Je kü...
Page 31 - Vor dem ersten Gebrauch; Das Gerät in Betrieb nehmen; Stecken Sie den Netzstecker in die Steckdose.
Vor dem ersten Gebrauch Das Gerät in Betrieb nehmen 1 Stellen Sie das Gerät auf eine waagerechte, ebene und stabile Unterlage. Für eine optimale Leistung sollte um das Gerät herum mindestens 10 cm Platz frei bleiben. Hinweis: Stellen Sie das Gerät nicht an einen Ort, an dem es direktem Sonnenlicht o...
Page 32 - Zum Gebrauch vorbereiten; Die Zapfeinheit am Fass anbringen
Zum Gebrauch vorbereiten Die Zapfeinheit am Fass anbringen Reinigen Sie die Zapfeinheit immer mit heißem Wasser, bei Bedarf mit etwas Spülmittel, bevor Sie sie auf das Bierfass setzen und den Schlauch einführen. Tabelle 1: 1 Nehmen Sie die Schutzkappe und den Schlauch vom Bierfass. 2 Ziehen Sie den ...
Page 33 - Stellen Sie das Fass keinesfalls in das Gerät, bevor Sie nicht
6 Die Entriegelungstasten an beiden Seiten der Zapfanlage müssen gleich weit herausragen. Ist dies nicht der Fall, drücken Sie sie mit dem Daumen herunter, bis Sie entweder einmal oder zweimal kurz hintereinander ein “Klick” hören. Den Schlauch in die Zapfeinheit einführen 1 Schieben Sie den biegsam...
Page 35 - Die Kühlung; Warten Sie, bis das Bier die richtige Trinktemperatur; Temperaturanzeige
Die Kühlung Sobald Sie das Fass eingesetzt haben, beginnt das Gerät mit dem Kühlen. Hinweis: Bei einer Umgebungstemperatur von 23 °C dauert es 12 bis 15 Stunden, bis ein ungekühltes Fass gekühlt ist. Tipp: Wenn Sie schon kurz nach dem Einsetzen des Fasses in das Gerät Bier zapfen möchten, kühlen Sie...
Page 37 - Weitere Anzeigen; Bier perfekt zapfen; Die Biergläser reinigen; Reinigen Sie die Gläser sorgfältig mit heißem Wasser und
DEUTSCH 39 - Roter oder grüner Gedankenstrich bei blinkendem gelborangefarbenem Hintergrund = Zapfeinheit und/oder Schlauch sind nicht richtig aufgesetzt. Nehmen Sie das Fass heraus und überprüfen Sie den richtigen Sitz der Zapfeinheit und des Schlauchs. Siehe hierzu die Abschnitte “Die Zapfeinheit ...
Page 38 - Bier ausschenken; Das Bier läuft nur richtig in das Glas, wenn der Zapfhahn ganz
Bier ausschenken 1 Die besten Ergebnisse erzielen Sie, wenn Sie das Bier in ein kühles, sauberes und nasses Glas einschenken! Hinweis: In einem kühlen Glas hält die Schaumkrone länger. Zudem bleibt frisch gezapftes Bier auch länger frisch und spritzig.Hinweis: Fassbier lässt sich am besten zapfen, w...
Page 39 - Schritt
8 Europa (außer Deutschland und Großbritannien): Die besten Ergebnisse erzielen Sie, wenn Sie überschüssigen Schaum zügig mit einem Abstreifer in einem Winkel von 45 ° vom Glasrand streichen. Hinweis: Lassen Sie den Abstreifer nicht auf der Arbeitsfläche liegen, sondern tauchen Sie ihn in ein Glas m...
Page 42 - Ausbauen des Kühlelements
2 Reinigen Sie das Gerät von außen mit einem feuchten Tuch. 3 Reinigen Sie die Zapfeinheit stets wie im Kapitel “Das Fass austauschen” beschrieben, um festklebende Bierrückstände zu vermeiden. 4 Nehmen Sie die Abtropfschale mit der Abdeckung heraus. 5 Der Zapfhahn lässt sich aus dem Mittelstück der ...
Page 44 - Garantie und Kundendienst; Garantieeinschränkungen; Fehlerbehebung
7 Nehmen Sie die Aluminiumplatte heraus. , Nun sehen Sie eine weiße, ca. 4 x 4 cm große Platte. Dies ist das eigentliche Kühlelement. 8 Halten Sie die Klinge eines Schraubenziehers gegen eine Seite des Kühlelements, und entfernen Sie das Kühlelement, indem Sie es von der Rückseite der Aluminiumplatt...
Page 45 - Das Gerät im Allgemeinen; Da da Gerät konstant kühlt, läuft auch der Ventilator ständig.
Problem Lösung Das Gerät im Allgemeinen Die Klappen des Geräts lassen sich nicht schließen. Drücken Sie die blauen Verriegelungshebel nach unten, bis sie waagerecht stehen, bevor Sie die Klappen schließen. Achten Sie darauf, dass der Schlauch richtig in die Zapfeinheit eingesetzt ist und der Zapfhah...
Page 46 - Zapfeinheit
Problem Lösung Zapfeinheit Es ist schwierig, die Zapfeinheit auf das Bierfass zu setzen. Prüfen Sie, ob sich noch altes Bier in der Zapfeinheit befindet. Reinigen Sie die komplette Zapfeinheit unter heißem Wasser, dem Sie bei Bedarf etwas Spülmittel zufügen können. Die Entriegelungstasten zum Abnehm...
Page 47 - Bier zapfen
Problem Lösung Auf dem Display steht ein grüner Gedankenstrich, und das Gerät läuft nicht (HD3720). Achten Sie darauf, dass die Zapfeinheit richtig aufgesetzt ist (siehe Kapitel "Für den Gebrauch vorbereiten", Abschnitt "Die Zapfeinheit auf das Bierfass setzen"). Auf dem Display steh...
Page 48 - Vergewissern Sie sich, dass die Klappen richtig geschlossen
Problem Lösung Möglicherweise funktioniert der Schlauch nicht richtig. Bestellen Sie über das PerfectDraft Call Center in Ihrem Land einen neuen Schlauch. Die Schaumkrone ist zu hoch. Siehe Kapitel „Bier perfekt zapfen“. Das Bier aus dem Gerät schmeckt schal. Prüfen Sie, ob das Fass bereits länger a...
Page 49 - Hersteller von Bierfässern; Land
Problem Lösung Stellen Sie das Gerät dort auf, wo die Umgebungstemperatur zwischen 3° C und 32° C liegt. Lassen Sie um das Gerät herum mindestens 10 cm Platz. Setzen Sie das Gerät nicht direktem Sonnenlicht aus.Prüfen Sie, ob die Ventilatoröffnung hinten am Gerät frei von Staub und Schmutz ist. Das ...
Page 50 - ESPAÑOL; Introducción; Unidad del tubo (se suministra con el barril)
52 ESPAÑOL Introducción Enhorabuena por adquirir su nuevo PerfectDraft. De ahora en adelante puede disfrutar del sabor perfecto de cerveza de barril recién servida y fría. El sistema mantiene la cerveza fresca y exactamente a la temperatura correcta para que pueda servirse una cerveza fría siempre q...
Page 51 - Importante
Importante Antes de usar el aparato, lea atentamente este manual de usuario y consérvelo por si necesitara consultarlo en el futuro. El aparato Advertencia - Si el cable de alimentación está dañado, debe ser sustituido por Philips o por un centro de servicio autorizado por Philips, con el fin de evi...
Page 52 - Precaución; No exponga el aparato a la luz solar directa.
- No es conveniente que instale el aparato en una zona donde se pueda utilizar agua a presión. Precaución - Mantenga el aparato fuera del alcance de los niños. Puede quitar el asa para una mayor seguridad. - Coloque el aparato en una superficie horizontal, uniforme y estable. Deje por lo menos 10 cm...
Page 54 - Los barriles no se pueden apilar.; Este aparato Philips cumple todos los estándares sobre; Antes de utilizarlo por primera vez; Instalación del aparato; Coloque el aparato en una superficie horizontal, uniforme
- No utilice el barril si la pieza superior de conexión está dañada. En ese caso, la unidad del grifo no encajará en ella. - Los barriles sin abrir se mantienen mejor si se guardan a una temperatura estable. Cuanto más frío sea el lugar donde almacena el barril, mejor. - Presión máxima de funcionami...
Page 55 - Enchufe el aparato a la red.; Preparación para su uso; Cómo acoplar la unidad del grifo en el barril; Antes de colocar la unidad del grifo en el barril e insertar el
No coloque el aparato en un lugar donde quede expuesto a la luz solar directa o a altas temperaturas (por ejemplo, cerca de una cocina o de un horno). 2 Para guardar el cable sobrante, colóquelo en el compartimento de almacenamiento que se encuentra en la parte posterior del aparato. 3 Enchufe el ap...
Page 57 - Nunca coloque el barril en el aparato si no ha montado
Cómo colocar el tubo en la unidad del grifo 1 Inserte el tubo flexible en el grifo. 2 Deslice los salientes del conector del tubo por debajo de los puntos de bisagras. 3 Empuje el conector del tubo hacia la abertura de la unidad del grifo (“clic”). Cómo colocar el barril en el aparato Nunca coloque ...
Page 58 - Enfriamiento; Después de instalar el barril, el aparato comienza
3 Incline ligeramente hacia delante el barril con la unidad del grifo colocada y póngalo en el aparato. - Coloque primero el barril en la placa de refrigeración del aparato. - A continuación coloque el barril en posición vertical deslizando la unidad del grifo entre las palancas azules de bloqueo. 4...
Page 59 - Indicación de temperatura
, HD3610: El piloto de temperatura se ilumina en color verde (consulte la sección "Pilotos indicadores LED" en este capítulo). pantalla LCD (sólo modelo HD3720) , La pantalla muestra la temperatura, el nivel y el estado óptimo de la cerveza. Indicación de temperatura Espere hasta que la temp...
Page 61 - Otras indicaciones; Cómo servir una cerveza perfecta; Cómo limpiar los vasos de cerveza; Lave los vasos con cuidado con agua caliente y un poco de; Cómo verter cerveza; Conseguirá los mejores resultados si vierte la cerveza en
ESPAÑOL 63 - Piloto indicador verde = la cerveza ha alcanzado la temperatura correcta para beber y está lista para ser servida. Otras indicaciones - Piloto indicador rojo parpadeando = la unidad del grifo y/o el tubo no están colocados correctamente. Cómo servir una cerveza perfecta Siga las instruc...
Page 62 - Cómo servir una cerveza recién vertida
2 Sujete el vaso por la parte inferior o por el centro para asegurarse de que permanece limpio. 3 Abra el grifo con un movimiento rápido y suave. La cerveza sólo fluye correctamente en el vaso si el grifo está completamente abierto. Si el grifo sólo está abierto hasta la mitad, la cerveza saldrá por...
Page 64 - Cómo reemplazar el barril; Pulse el botón de liberación hacia la derecha para abrir las
Paso Estilo europeo (excepto Alemania y Reino Unido) Alemana Británica 8 Cierre el grifo con un movimiento suave. Cierre el grifo con un movimiento suave. Cierre el grifo con un movimiento suave. 9 a. Separe el vaso de la boquilla para evitar que caigan gotas de cerveza en la espuma. Separe el vaso ...
Page 66 - Cómo retirar el elemento de refrigeración
Cómo retirar el elemento de refrigeración El elemento de refrigeración situado en el interior del aparato contiene una sustancia que puede contaminar el medio ambiente. Por lo tanto, debe retirar el elemento de refrigeración antes de desechar el aparato.También puede llevar o enviar el aparato a un ...
Page 67 - Garantía y servicio; Restricciones de la garantía
7 Retire la placa de aluminio. , Después de retirar la placa de aluminio, verá una placa blanca de aproximadamente 4 X 4 cm. Se trata del elemento de refrigeración en sí. 8 Coloque el extremo del destornillador contra uno de los lados del elemento de refrigeración y empuje el elemento de refrigeraci...
Page 68 - Solución de problemas; Si no puede resolver su problema con la información que le; El aparato en general
Solución de problemas Si no puede resolver su problema con la información que le facilitamos más abajo, póngase en contacto con nosotros en línea (www.philips.com) o llame al centro de atención al cliente de PerfectDraft, cuyos números de teléfono son: 078-250159 (Bélgica), 040 80 80 10 980 (Alemani...
Page 69 - Unidad del grifo
Problema Solución Si el aparato emite un silbido, puede que la unidad del grifo no esté conectada correctamente al barril. Asegúrese de enjuagar la unidad del grifo a fondo. Es esencial que todas las piezas de goma de la unidad del grifo estén húmedas antes de colocar la unidad del grifo en el barri...
Page 70 - Pantalla LCD/Pilotos indicadores LED
Problema Solución Puede que el tubo esté roto. Póngase en contacto con el centro de atención al cliente de PerfectDraft de su país para obtener un nuevo tubo. Pantalla LCD/Pilotos indicadores LED El piloto indicador rojo parpadea (HD3610). Retire la unidad del grifo, límpiela y vuelva a instalarla. ...
Page 73 - Proveedores de barriles; País
Proveedores de barriles Si necesita información sobre el barril o si tiene un problema con el mismo, puede ponerse en contacto con el proveedor del barril en su país. Encontrará los números teléfono en la siguiente tabla. País Marca Número de teléfono Dirección web Países Bajos Dommelsch 0800-023036...
Page 74 - FRANÇAIS; Robinet
76 FRANÇAIS Introduction Félicitations pour l’achat de ce système PerfectDraft ! Profitez dorénavant du plaisir inégalable d’une bière pression bien fraîche, chez vous. Le système maintient le fût à température idéale afin que vous puissiez savourer un demi bien frais quand l’envie vous en prend. Pl...
Page 76 - Attention
- Ne couvrez pas l'appareil (par exemple, avec une serviette), cela pourrait provoquer une surchauffe. - Cet appareil est uniquement destiné à un usage en intérieur Ne l'utilisez pas à l'extérieur. - Il est déconseillé d’installer l’appareil dans un endroit où un jet d’eau peut être utilisé. Attenti...
Page 77 - Ne secouez pas le fût.
robinet. La présence de résidus de bière peut entraîner des problèmes lors de l’installation du robinet sur le fût. - N'essayez pas de soulever l'appareil par la poignée. Le fût Avertissement - Ne placez jamais le fût au congélateur ! Le gel peut gravement l'endommager. - Pour éviter tout risque d'e...
Page 78 - Les fûts ne peuvent pas être superposés.; Cet appareil Philips est conforme à toutes les normes relatives; Avant la première utilisation; Installation de l'appareil; Placez l’appareil sur une surface plate et stable. Laissez un
- N'utilisez pas un fût dont la tête de connexion est endommagée. Le robinet de tirage ne pourra pas être fixé sur une tête de connexion endommagée. - Les fûts non entamés se conservent mieux à température constante. Il est conseillé de les conserver à une température basse. - Pression maximale: 1,5...
Page 79 - Insérez la fiche dans la prise secteur.; Avant utilisation; Fixation du robinet sur le fût.; Nettoyez toujours le robinet avec de l’eau, savonneuse si
3 Insérez la fiche dans la prise secteur. 4 HD3720 : installez le plateau égouttoir. 5 Fixez la poignée de la pompe. 6 Placez le médaillon de votre bière préférée sur la poignée. Avant utilisation Fixation du robinet sur le fût. Nettoyez toujours le robinet avec de l’eau, savonneuse si nécessaire, a...
Page 80 - Insertion du tuyau dans le robinet
3 Retournez ensuite le robinet et rincez l’élément de connexion au fût situé dans la partie basse du robinet. Toutes les parties en caoutchouc doivent être humides avant la fixation du robinet sur le fût. 4 Vérifiez que le bouton de déverrouillage du tuyau fonctionne correctement. Lorsque vous appuy...
Page 81 - Mise en place du fût à l'intérieur de l'appareil; Ne placez jamais le fût dans l’appareil si le robinet et le tuyau
2 Poussez le tuyau à fond jusque sous l’articulation. 3 Poussez la partie rigide du tuyau dans l’ouverture du robinet (« clic »). Mise en place du fût à l'intérieur de l'appareil Ne placez jamais le fût dans l’appareil si le robinet et le tuyau ne sont pas correctement installés. Consultez les secti...
Page 82 - Refroidissement; L'appareil commence immédiatement à refroidir le fût installé.
4 Abaissez les leviers de verrouillage bleus jusqu’en position horizontale. Si vous ne pouvez pas abaisser les leviers en position horizontale, cela signifie que le fût n’a pas été correctement introduit dans l’appareil. Sortez le fût et recommencez les étapes 1 à 3. , Une fois le fût installé (même...
Page 83 - Indication de la température
Afficheur LCD (HD3720 uniquement) , L'écran indique la température de la bière, le niveau de bière dans le fût et sa durée de conservation. Indication de la température Attendez que la température du fût soit passée en dessous de 4 °C avant de commencer à la servir. La température de consommation id...
Page 84 - Servir une bière parfaite; Nettoyage des verres à bière; Nettoyez soigneusement les verres à l’eau chaude avec un
Conseil : pour calculer le nombre de jours, comparez la date à celle que vous avez inscrite sur le fût et soustrayez le nombre de jours pendant lesquels le fût est resté au réfrigérateur au chiffre que vous avez écrit sur le fût lorsque vous l’y avez placé. Avant de réinstaller le fût ouvert, nettoy...
Page 85 - Servir la bière
FRANÇAIS 87 3 Pour vérifier si les verres sont débarrassés de toute trace de graisse ou de savon, examinez-les à l’envers à la lumière. Les verres sont propres lorsque l'eau s'écoule de manière égale sur les rebords sans révéler de traces. Conseil : si vous lavez vos verres au lave-vaisselle, n’util...
Page 86 - Étape
7 Fermez la pompe d’un geste franc et précis. Remarque : la pompe peut continuer à fonctionner pendant quelques secondes. 8 Europe (sauf Allemagne et Royaume-Uni) : pour un meilleur résultat, utilisez un coupe-mousse que vous faites glisser d’un geste franc à un angle de 45° sur le bord du verre. Re...
Page 88 - Remplacement du fût; Le fût est vide lorsque le bec de tirage ne produit plus que de
Remplacement du fût Le fût est vide lorsque le bec de tirage ne produit plus que de la mousse, sans bière. HD3720 uniquement : l’afficheur indique également que le fût est vide. 1 Ouvrez les portes en poussant sur les boutons de déverrouillage vers la droite. Ouvrez les portes au maximum. 2 Levez le...
Page 89 - Retrait du composant réfrigérant
Nettoyage Nettoyez l'appareil lorsque vous remplacez le fût où si vous n'allez pas l'utiliser pour une longue période.N'utilisez jamais d'éponges à récurer, de produits abrasifs ou de liquides agressifs tels que de l'essence ou de l'acétone pour nettoyer l'appareil. 1 Débranchez toujours l’appareil ...
Page 91 - Portez le composant réfrigérant à un endroit prévu pour les; Garantie et service; Limites de la garantie; Les fûts et les tuyaux ne sont pas couverts par la garantie.; Dépannage; Problème; Général
N'essayez pas de remonter le composant réfrigérant après l'avoir retiré ! 10 Portez le composant réfrigérant à un endroit prévu pour les déchets chimiques. Garantie et service Si vous avez besoin d’informations supplémentaires ou si vous rencontrez un problème, consultez le site Web de Philips à l’a...
Page 93 - Affichage LCD /voyants DEL
Problème Solution Impossible de placer le fût et son robinet à l'intérieur de l'appareil. Vérifiez que le robinet est correctement installé sur le fût. Poussez fermement vers le bas lorsque vous le fixez sur le fût. Consultez le chapitre « Avant utilisation », section « Fixation du robinet sur le fû...
Page 96 - Fournisseurs de fûts de bière; Pays
Fournisseurs de fûts de bière Pour plus d’informations sur un fût ou si vous rencontrez des problèmes, vous pouvez contacter votre fournisseur local. Vous trouverez les numéros de téléphone dans le tableau ci-dessous. Pays Marque Numéro de téléphone Site Internet Pays-Bas Dommelsch 0800-0230367 www....
Page 97 - Introduzione; Rubinetto; ITALIANO
Introduzione Congratulazioni per l'acquisto del nuovo PerfectDraft. Da oggi potrete provare il gusto di una birra fresca e perfetta appena spillata. Il sistema consente di mantenere la birra fresca e alla giusta temperatura in moda da poter spillare un boccale quando volete. Questo consente l'utiliz...
Page 99 - Attenzione
- Non coprite l'apparecchio (ad esempio con un asciugamano) per evitare che si surriscaldi. - Questo apparecchio deve essere utilizzato esclusivamente all'interno. Non utilizzatelo all'esterno. - L'apparecchio non è adatto per l'installazione in luoghi dove è presente un sistema di erogazione dell'a...
Page 100 - Non scuotete il barile.
- Non esponete l'apparecchio ai raggi diretti del sole. - Prima di riporre l'apparecchio per un lungo periodo di tempo, pulitelo. Assicuratevi di pulire accuratamente il rubinetto. I residui di birra possono causare problemi durante l’installazione del rubinetto sul barile. - Non alzate l'apparecchi...
Page 101 - I barili non sono impilabili.; Questo apparecchio Philips è conforme a tutti gli standard
quando siete in vacanza), rimuovete sempre il barile aperto e conservatelo in frigo. Una volta che il barile è stato aperto, la birra rimane fresca per 30 giorni. - Controllate sempre la data di scadenza sul barile al momento dell'acquisto e prima di montarlo. - Non utilizzate il barile se la parte ...
Page 102 - Primo utilizzo; Installazione dell'apparecchio; Inserite la spina nella presa di corrente.
Primo utilizzo Installazione dell'apparecchio 1 Posizionate l’apparecchio su una superficie orizzontale, uniforme e stabile. Lasciate almeno 10cm di spazio libero intorno all'apparecchio per consentire prestazioni ottimali. Nota Non posizionate l'apparecchio in un luogo esposto alla luce diretta del...
Page 103 - Predisposizione dell'apparecchio; Posizionamento del rubinetto sul barile; Pulite sempre il rubinetto con acqua calda e, se necessario, con
Predisposizione dell'apparecchio Posizionamento del rubinetto sul barile Pulite sempre il rubinetto con acqua calda e, se necessario, con del liquido per piatti prima di posizionarlo sul barile e di inserire il tubo. Tabella 1: 1 Rimuovete il cappuccio di protezione e il tubo dal barile. 2 Se presen...
Page 104 - Non posizionate mai il barile all'interno dell'apparecchio se
6 Assicuratevi che i pulsanti di sgancio su entrambi i lati del rubinetto fuoriescano allo stesso modo. In caso contrario, premete i pulsanti di sgancio su entrambi i lati con i pollici fino a che non sarà possibile sentire uno scatto o due in rapida successione. Posizionamento del tubo all'interno ...
Page 106 - Raffreddamento; Attendete fino a quando la birra non ha raggiunto la; Indicazioni della temperatura
Raffreddamento Dopo aver installato il barile, l'apparecchio avvia automaticamente il processo di raffreddamento. Nota Ad una temperatura esterna di 23°C, sono necessarie dalle 12 alle 15 ore per raffreddare un barile non refrigerato. Consiglio Se desiderate spillare la birra poco dopo aver inserito...
Page 107 - Indicazioni della freschezza
ITALIANO 109 Indicazioni della freschezza Le indicazioni della freschezza indicano per quanto tempo può ancora essere consumata la birra. - Quando viene inserito un nuovo barile all'interno dell'apparecchio, le indicazioni della freschezza mostrano un tempo massimo di 30 giorni per la consumazione. ...
Page 108 - Altre indicazioni; Come spillare una birra perfetta; Pulizia dei bicchieri; Quando spillate la birra, utilizzate sempre bicchieri puliti.; Come spillare la birra
"Posizionamento del rubinetto sul barile" e "Posizionamento del tubo all'interno del rubinetto". Se questo non risolve il problema, provate un altro barile con un nuovo tubo. Spie LED (solo per il modello HD3610) - Sulla parte superiore dell'apparecchio sono presenti tre spie che mos...
Page 110 - Passaggio
, Adesso potrete assaporare una birra alla spina davvero perfetta. Come servire una birra appena spillata 1 Asciugate la base del bicchiere passandola su un panno. 2 Per i vostri ospiti usate un sottobicchiere. 3 Prendete il bicchiere afferrandolo per la parte centrale e servite la birra su un sotto...
Page 113 - Riciclaggio; Rimozione dell'elemento refrigerante
1 Togliete sempre la spina dalla presa di corrente prima di pulire l'apparecchio. 2 Usate un panno umido per pulire la parte esterna dell'apparecchio. 3 Pulite sempre il rubinetto come indicato nel capitolo "Sostituzione del barile" per evitare che si formino residui di birra appiccicosi. 4 ...
Page 115 - Garanzia e assistenza; Limitazioni della garanzia; I barili e i tubi non sono coperti da questa garanzia.; Risoluzione dei guasti; Problema; Generico dell'apparecchio
9 Tagliate i fili collegati all'elemento refrigerante. Non ricollegate l'apparecchio alla presa di corrente dopo aver rimosso l'elemento refrigerante.Una volta rimosso, l'elemento refrigerante non può essere inserito nuovamente. 10 Portate l'elemento refrigerante presso un punto di raccolta ufficial...
Page 117 - Display LCD/spie a LED
Problema Soluzione I residui di birra possono far aderire il rubinetto al barile. Pulite il rubinetto con acqua calda e, se necessario, con del liquido per piatti per rimuovere i residui di birra. Successivamente rimuovete il rubinetto dal barile. Non è possibile posizionare il barile con il rubinet...
Page 118 - Spillatura della birra
Problema Soluzione Il display mostra un livello errato (HD3720). Per un funzionamento corretto dell'indicazione del livello, è fondamentale aprire completamente la leva del rubinetto (vedere il capitolo "Come spillare una birra perfetta").Nel caso di un black out o se l'apparecchio viene sco...
Page 120 - Fornitori di barili
Problema Soluzione Temperature ambiente più alte richiedono un tempo superiore. Se l’apparecchio viene utilizzato con temperature esterne superiori ai 32°C (HD3720) o 30°C (HD3610), la temperatura di consumazione della birra può essere superiore a 3°C. Quando la temperatura scende sotto i 32°C, quel...
Page 121 - Introductie; Tapunit; NEDERLANDS
Introductie Gefeliciteerd met de aankoop van deze nieuwe PerfectDraft. Vanaf nu kunt u thuis genieten van de perfecte smaak van vers, koud tapbier. Het systeem houdt uw bier vers en op precies de juiste temperatuur, zodat u een koud biertje kunt tappen wanneer u maar wilt. Er zijn verschillende bier...
Page 123 - Let op
- Bedek het apparaat niet (met bijvoorbeeld een handdoek) om oververhitting te voorkomen. - Het apparaat is uitsluitend bedoeld voor gebruik binnenshuis. Gebruik het apparaat niet buitenshuis. - Het apparaat is niet geschikt voor installatie in een omgeving waar een waterstraal gebruikt kan worden. ...
Page 124 - Schud het biervat niet.
- Stel het apparaat niet bloot aan direct zonlicht. - Maak het apparaat altijd schoon voordat u het voor langere tijd opbergt. Zorg ervoor dat u de tapunit goed schoonspoelt. Bierresten kunnen problemen veroorzaken als u de tapunit op het biervat aansluit. - Til het apparaat niet op aan de hendel va...
Page 125 - De biervaten zijn niet stapelbaar.; Dit Philips-apparaat voldoet aan alle richtlijnen met
geopende biervat uit het apparaat en plaats het in de koelkast. Na opening van het biervat blijft het bier 30 dagen vers. - Controleer altijd de houdbaarheidsdatum op het biervat bij de aanschaf en voordat u het installeert. - Gebruik het biervat niet als het aansluitpunt boven op het biervat bescha...
Page 126 - Voor het eerste gebruik; Het apparaat installeren; Steek de stekker in het stopcontact.
Voor het eerste gebruik Het apparaat installeren 1 Plaats het apparaat op een horizontale, vlakke en stabiele ondergrond. Laat aan alle zijden van het apparaat ten minste 10 cm ruimte vrij. Onder deze omstandigheden presteert het apparaat optimaal. Opmerking: Plaats het apparaat niet op een plek waa...
Page 127 - Klaarmaken voor gebruik; De tapunit op het vat plaatsen
Klaarmaken voor gebruik De tapunit op het vat plaatsen Maak de tapunit altijd schoon met warm water en indien nodig een beetje afwasmiddel, voordat u deze op het biervat plaatst en het slangetje bevestigt. Tabel 1: 1 Verwijder de beschermkap en het slangetje van het biervat. 2 Verwijder, indien aanw...
Page 128 - Plaats het biervat nooit in het apparaat als de tapunit en het
6 Controleer of de ontgrendelknoppen aan weerzijden van de tapunit elk even ver uitsteken. Is dit niet het geval, druk dan met uw duimen de ontgrendelknoppen aan weerszijden in totdat u één klik hoort of twee klikken kort achter elkaar. Het slangetje in de tapunit bevestigen 1 Steek het flexibele sl...
Page 129 - Koeling
2 Til de twee blauwe vergrendelarmen helemaal omhoog. 3 Kantel het biervat, met de tapunit daarop bevestigd, een beetje naar voren en plaats het in het apparaat. - Plaats eerst het biervat op de koelplaat van het apparaat. - Zet het biervat daarna rechtop door de tapunit tussen de blauwe vergrendela...
Page 130 - Temperatuuraanduiding
1 Wacht tot het bier de juiste drinktemperatuur heeft bereikt. , HD3720: de temperatuur verschijnt in de kleur groen op het display (zie ‘LCD-display’ in dit hoofdstuk). , HD3610: het temperatuurlampje gaat groen branden (zie ‘LED-indicatielampjes’ in dit hoofdstuk). LCD-display (alleen HD3720) , He...
Page 131 - De versheidaanduiding aanpassen
NEDERLANDS 133 Zorg ervoor dat het apparaat altijd is ingeschakeld wanneer er een biervat in zit. - Wanneer er 30 dagen voorbij zijn, geeft het display aan dat het biervat dient te worden vervangen. Op het display worden een streepje en een uitroepteken weergegeven. De versheidaanduiding aanpassen -...
Page 132 - Andere aanduidingen; Een perfect biertje tappen; Bierglazen schoonmaken
LED-indicatielampjes (alleen HD3610) - Er zitten drie indicatielampjes op het apparaat die de status van het apparaat laten zien. - Rood indicatielampje = het apparaat is ingeschakeld. Installeer een biervat. - Oranje indicatielampje = het apparaat koelt het biervat, maar het biervat heeft de juiste...
Page 134 - Een vers getapt biertje serveren; Droog de onderzijde van het glas door het over een doek te; verschillende taptradities; Stap
Een vers getapt biertje serveren 1 Droog de onderzijde van het glas door het over een doek te halen. 2 Leg een schoon bierviltje neer. 3 Pak het glas in het midden vast en zet het op het bierviltje met het bierbeeldmerk (indien op het glas aanwezig) naar de bierdrinker gericht. 3 verschillende taptr...
Page 135 - Het biervat vervangen; Schuif de ontgrendelknop naar rechts om de deuren te
Stap Europees (Duitsland en het Verenigd Koninkrijk uitgezonderd) Duits Brits b. Sluit de tapkraan en laat het glas 1 minuut staan om de schuimkraag tot rust te laten komen.c. Herhaal stap 2 t/m 6 en tap het glas tot de rand vol. 8 Sluit de tapkraan in één vloeiende beweging. Sluit de tapkraan in éé...
Page 136 - Schoonmaken; Maak het apparaat schoon wanneer u het biervat vervangt of
2 Til de blauwe vergrendelarmen helemaal omhoog. 3 Kantel het biervat, met de tapunit daarop bevestigd, naar u toe en neem het uit het apparaat. 4 Druk op de ontgrendelknoppen aan beide zijden van de tapunit (1). De tapunit wordt losgekoppeld van het biervat (u hoort een klik). Vervolgens kunt u dez...
Page 137 - Het koelelement verwijderen
5 Verwijder de hendel van de tapkraan door deze uit het tapkraanhuis te trekken. 6 Maak de tapunit, de lekbak en de lekplaat schoon met warm water en indien nodig een beetje afwasmiddel. Heet water kan brandwonden veroorzaken. Controleer altijd of het water niet te heet is voordat u deze onderdelen ...
Page 139 - Garantiebeperkingen; De biervaten en slangetjes vallen niet onder deze garantie.; Problemen oplossen; Probleem
Garantie & service Als u meer informatie wenst of als u een probleem hebt, kunt u online met ons contact opnemen via www.philips.nl of bellen naar het PerfectDraft-callcenter. Het telefoonnummer is 078-250159 (België), 040 80 80 10 980 (Duitsland) of 0900-2224222 (Nederland).Wanneer u het appara...
Page 142 - Bier tappen; Zie hoofdstuk ‘Een perfect biertje tappen’.
Probleem Oplossing Bier tappen Er komt geen bier uit de tapkraan wanneer ik aan de hendel trek. Mogelijk is het biervat leeg. Plaats een nieuw biervat in het apparaat. Controleer of het slangetje op de juiste wijze in de tapunit is geplaatst (zie ‘Het slangetje in de tapunit bevestigen’ in hoofdstuk...
Page 144 - Biervatleveranciers
Biervatleveranciers Als u informatie over het biervat wilt of als u een probleem hebt met het biervat, neem dan contact op met de leverancier van het biervat in uw land. U vindt het telefoonnummer in de onderstaande tabel. Land Merk Telefoonnummer Internetadres Nederland Dommelsch 0800-0230367 www.d...


 Philips HD3037/03 User Manual
 Philips HD3037/70 User Manual
 Philips HD3080/80 User Manual
 Philips HD3090/80 User Manual
 Philips HD3093/80 User Manual
 Philips hd3620 Manual
 Philips HD4407 Manual
 Philips HD4417/20 User Manual
 Philips HD4418/20 User Manual
 Philips HD4419/20 User Manual
 Philips HD4467/90 User Manual