Page 3 - Contents; Specifications
1 EN Contents 1 Important 2 Safety 2 Power failure backup function 4 Electromagnetic fields (EMF) 4 2 Your multicooker 5 What’s in the box 5 Over view 5 Controls over view 6 Functions over view 7 3 Using the multicooker 8 Before first use 8 Preparations before cooking 8 Cooking rice or risotto 9 Coo...
Page 4 - Important; Safety; Read this safety leaflet carefully before you; Danger
2 EN positioned to avoid spillage of the hot liquids. • This appliance is intended to be used in household and similar applications such as: • staff kitchen areas in shops, offices and other working environments; • farm houses; • by clients in hotels, motels and other residential type environments; ...
Page 5 - Caution
3 EN • Do not use the inner pot if it is deformed. • The accessible surfaces may become hot when the multicooker is operating. Take extra caution when touching the multicooker. • Beware of hot steam coming out of the steam vent during cooking or out of the multicooker when you open the lid. Keep han...
Page 6 - Power failure backup function
4 EN • Do not place a magnetic substance on the lid. Do not use the multicooker near a magnetic substance. • Always let the multicooker cool down before you clean or move it. • Always clean the multicooker after use. Do not clean the multicooker in dishwasher. • Always unplug the multicooker if not ...
Page 7 - Overview; Your multicooker; What’s in the box; User manual
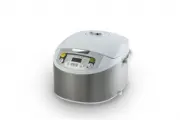
5 EN Overview a Lid f Power socket b Inner pot g Heating element c Lid release button h Water level indications d Control panel i Cooker handle e Main body j Steam vent a b d e f g h j c i 2 Your multicooker Congratulations on your purchase, and welcome to Philips! To fully benefit from the suppor t...
Page 8 - Controls overview
6 EN Controls overview k Cooking functions p Hour button l Display q Minute button m Off/Warm button r Cooking time button n Menu button s Temperature button o Preset button t Star t button k l m n o p q r s t EN
Page 9 - Functions overview
7 EN Functions overview Program Temperature regulation Temperature (Approximately) Time regulation Default time Riz No 135°C No 40 minutes Risotto No 135°C No 40 minutes Ratatouille No 135°C No 40 minutes Plats en sauce No 95°C 5- 30 minutes 30 minutes Bouillir No 90°C 20 minutes - 10 hours 1 hour M...
Page 10 - Preparations before cooking; Using the multicooker; Before first use; Note
8 EN Preparations before cooking Before using the multicooker, you need to follow below preparations: 1 Measure the rice using the measuring cup provided. 2 Wash the rice thoroughly. 3 Put the pre-washed rice in the inner pot. 4 Add water to the level indicated on the scale inside the inner pot that...
Page 11 - When the cooking is finished, you will; Tip; Cooking rice or risotto; Follow the steps in “Preparations before
9 EN 3 Press the star t button ( Start ) to star t cooking. Note • The cooking time is not displayed straight from the beginning. Small dashes are turning around on the screen during most of the cooking time as long as the multicooker detects water in the preparation. When the water has completely e...
Page 12 - Cooking ratatouille
10 EN 5 Depending on the ingredients you added for your home made ratatouille and on the vegetables’ ripening, some of them might release more water than planned. For the tastiest ratatouille, we advise 40 minutes cooking time. You just need to count down 40 minutes and stop the cooking manually by ...
Page 13 - Cooking plats en sauce; Menu
11 EN 7 Press the minute button (Min.) to set a desired minute unit. 8 Press the star t button ( Start ) to star t cooking. 9 When the cooking is finished, you will hear a few beeps and the selected cooking function light will be off. 10 The multicooker will be in keep-warm mode automatically. » The...
Page 14 - Boiling; function light will be off.
12 EN 8 The multicooker will be in keep-warm mode automatically. » The keep-warm indicator lights up. Note • The cooking time begins once the water is boiling, and the time is displayed as a countdown. Tip • You can press the cancel button ( Off/Chaud ) or unplug the multicooker to turn off the keep...
Page 15 - Stewing; After the hour unit is set, press the cooking
13 EN 7 Press the minute button (Min.) to set a desired minute unit. 8 Press the star t button (Star t) to star t cooking. 9 When the cooking is finished, you will hear a few beeps and the selected cooking function light will be off. 10 The multicooker will be in keep-warm mode automatically. » The ...
Page 16 - Frying; Put the plug in the power socket.
14 EN 9 When the cooking is finished, you will hear a few beeps and the selected cooking function light will be off. 10 The multicooker will be in keep-warm mode automatically. » The keep-warm indicator lights up. Note • This function must be operated with the lid opened. • This function may be not ...
Page 17 - Making yogurt; Put the glass container in the inner pot.
15 EN 8 After the hour unit is set, press the cooking time button (Temps de cuisson) again, and the minute unit star ts flashing on the display. 9 Press the minute button (Min.) to set a desired minute unit. 10 Press the star t button (Star t) to star t cooking. 11 When the cooking is finished, you ...
Page 18 - Reheating; Example: reheating rice; Pour some water onto the rice to prevent
16 EN 5 Press the cooking time button (Temps de cuisson), and the minute unit star ts flashing on the display. 6 Press the minute button (Min.) to set a desired minute unit. 7 Press the star t button ( Start ) to star t cooking. 8 When the cooking process is finished, you will hear a few beeps and t...
Page 19 - Baking
17 EN 5 Press the minute button (Min.) to set a desired minute unit. 6 Press the temperature button (Température), and the default cooking temperature star ts flashing on the display. 7 Press the temperature button (Température) to set a desired baking temperature. 8 Press the start button (Start) t...
Page 20 - Steaming; and the hour unit starts flashing on the display.; Start
18 EN 13 The multicooker will be in keep-warm mode automatically. » The keep-warm indicator lights up. 14 Open the lid and carefully take out the steamed food from the plate or the steam basket. Note • The cooking time begins once the water is boiling, and the time is displayed as a countdown. • Whe...
Page 21 - Preset time for delayed cooking; available from 10 minutes to 24 hours.
19 EN 6 The cooking will be finished when the preset time has elapsed. You will hear a few beeps and the selected cooking function light will be off. 7 The multicooker will be in keep-warm mode automatically. » The keep-warm indicator lights up. Note • The preset timer is not available in fry ( Frir...
Page 23 - Environment; Do not throw away the appliance; Guarantee and service; have a problem, visit the Philips website; Specifications; Rice volume; Cleaning and; Interior
21 EN 6 Environment Do not throw away the appliance with normal household waste at the end of its life, but hand it in at an official collection point for recycling. By doing this, you can help to preserve the environment. 7 Guarantee and service If you need service or information, or if you have a ...
Page 24 - Troubleshooting; Problem
22 EN 9 Troubleshooting If you encounter problems when using this multicooker, check the following points before requesting service. If you cannot solve the problem, contact the Philips Consumer Care Center in your country. Problem Solution The light on the button does not go on. There is a connecti...
Page 25 - Table des matières
23 Français FR Table des matières 1 Important 24 Sécurité 24 Fonction de sauvegarde en cas de coupure de courant 26 Champs électromagnétiques (CEM) 26 2 Votre multicuiseur 27 Contenu de l’emballage 27 Aperçu 27 Aperçu des commandes 28 Aperçu des fonctions 29 3 Utilisation du multicuiseur 30 Avant la...
Page 26 - Sécurité; Lisez attentivement ce livret avant d’utiliser
24 FR • Les appareils de cuisson doivent être positionnés de manière stable avec les poignées (le cas échéant) positionnées de façon à éviter tout risque d’éclaboussure de liquides chauds. • Cet appareil est destiné à un usage domestique ou pour une utilisation similaire comme : • cuisine destinée a...
Page 27 - Attention
25 Français FR • N’exposez pas le multicuiseur directement aux rayons du soleil. • Placez le multicuiseur sur une surface stable, horizontale et plane. • Placez toujours la cuve dans le multicuiseur avant de brancher l’appareil sur la prise secteur et de l’allumer. • Ne placez jamais la cuve directe...
Page 28 - Cet appareil Philips est conforme à toutes
26 FR professionnelles, ou en non- conformité avec les instructions de ce mode d’emploi, la garantie est caduque et Philips décline toute responsabilité concernant les dégâts occasionnés. Fonction de sauvegarde en cas de coupure de courant Cet appareil est doté d’une fonction de sauvegarde mémorisan...
Page 29 - Aperçu; Votre multicuiseur; Contenu de l’emballage
27 Français FR Aperçu a Couvercle f Prise secteur b Cuve g Résistance chauffante c Bouton de déverrouillage du couvercle h Indications du niveau d'eau d Inter face i Poignée du cuiseur e Corps de l'appareil j Sor tie vapeur 2 Votre multicuiseur Félicitations pour votre achat et bienvenue dans le mon...
Page 30 - Aperçu des commandes; cuisson
28 FR Aperçu des commandes k Programmes de cuisson p Bouton d'heure l Ecran q Bouton de minute m Bouton Off/Chaud r Bouton de temps de cuisson n Bouton Menu s Thermostat o Bouton de présélection t Bouton de marche k l m n o p q r s t
Page 31 - Aperçu des fonctions
29 Français FR Aperçu des fonctions Programme Possibilité de régler la température Température par défaut Possibilité de régler le temps de cuisson Temps de cuisson par défaut Riz non 135°C non 40 minutes Risotto non 135°C non 40 minutes Ratatouille non 135°C non 40 minutes Plats en sauce non 95°C O...
Page 32 - Préparations avant cuisson; utilisées. Étalez ensuite uniformément le riz.; Utilisation du; Avant la première utilisation; Retirez l’emballage plastique entre la cuve
30 FR Préparations avant cuisson Avant d’utiliser le multicuiseur, vous devez suivre les préparations ci-dessous : 1 Mesurez le riz à l’aide du pot mesureur fourni. 2 Lavez le riz abondamment à l’eau claire. 3 Placez le riz lavé dans la cuve. 4 Ajoutez de l’eau jusqu’au niveau correspondant au nombr...
Page 33 - Remarque; Conseil; Cuisson de riz ou risotto; « Préparations avant cuisson ».
31 Français FR 3 Appuyez sur le bouton de marche ( Start ) pour lancer la cuisson. Remarque • Le temps de cuisson ne s’affiche pas dès le début de la cuisson et laisse place à de petits traits qui tournent. Il en va ainsi pendant la majorité du temps de cuisson, c’est-à-dire tant que le multicuiseur...
Page 34 - Pour une ratatouille savoureuse, nous vous; Cuisson de ratatouille
32 FR 5 En fonction des ingrédients de votre ratatouille et de leur maturation, cer tains peuvent rendre plus d’eau que prévu. Pour une ratatouille savoureuse, nous vous conseillons une cuisson de 40 min pour laquelle il vous suffit de décompter les 40 min et d’arrêter manuellement la cuisson en app...
Page 35 - Cuisson de plats en sauce
33 Français FR 7 Appuyez sur le bouton de minute (Min.) pour définir l’unité de minute souhaitée. 8 Appuyez sur le bouton de marche ( Start ) pour lancer la cuisson. 9 Une fois la cuisson terminée, vous entendez quelques signaux sonores et le voyant de la fonction de cuisson sélectionnée est éteint....
Page 36 - Faire bouillir
34 FR 8 Le multicuiseur passe en mode de maintien au chaud automatiquement. » Le voyant de maintien au chaud s’allume. Remarque • Le temps de cuisson commence lorsque l'eau bout et la durée s'affiche comme un compte à rebours. Conseil • Vous pouvez appuyer sur le bouton d'annulation (Off/Chaud) ou d...
Page 37 - Faire mijoter
35 Français FR 8 Appuyez sur le bouton de marche (Star t) pour lancer la cuisson. 9 Une fois la cuisson terminée, vous entendez quelques signaux sonores et le voyant de la fonction de cuisson sélectionnée est éteint. 10 Le multicuiseur passe en mode de maintien au chaud automatiquement. » Le voyant ...
Page 38 - Faire frire
36 FR 9 Une fois la cuisson terminée, vous entendez quelques signaux sonores et le voyant de la fonction de cuisson sélectionnée est éteint. 10 Le multicuiseur passe en mode de maintien au chaud automatiquement. » Le voyant de maintien au chaud s’allume. Remarque • Cette fonction doit être utilisée ...
Page 39 - Préparation de yaourt
37 Français FR 8 Une fois que l’unité d’heure est définie, appuyez à nouveau sur le bouton de temps de cuisson (Temps de cuisson). L’unité de minute commence alors à clignoter sur l’écran. 9 Appuyez sur le bouton de minute (Min.) pour définir l’unité de minute souhaitée. 10 Appuyez sur le bouton de ...
Page 40 - Réchauffage
38 FR 6 Appuyez sur le bouton de minute (Min.) pour définir l’unité de minute souhaitée. 7 Appuyez sur le bouton de marche ( Start ) pour lancer la cuisson. 8 Une fois la cuisson terminée, vous entendez quelques signaux sonores et le voyant de la fonction de cuisson sélectionnée est éteint. 9 Le mul...
Page 41 - pour lancer la cuisson.; Cuisson au four
39 Français FR 8 Appuyez sur le bouton de minute (Min.) pour définir l’unité de minute souhaitée. 9 Appuyez sur le bouton de température (Température). La température de cuisson par défaut commence à clignoter sur l’écran. 10 Appuyez sur le bouton de température (Température) pour définir la tempéra...
Page 42 - Cuisson à la vapeur
40 FR 12 Une fois la cuisson à la vapeur terminée, vous entendez quelques signaux sonores et le voyant de la fonction de cuisson sélectionnée est éteint. 13 Le multicuiseur passe en mode de maintien au chaud automatiquement. » Le voyant de maintien au chaud s’allume. 14 Ouvrez le couvercle et retire...
Page 43 - Programmation pour une cuisson
41 Français FR 6 La cuisson est terminée lorsque le temps de programmation est écoulé. Vous entendez quelques signaux sonores et le voyant de la fonction de cuisson sélectionnée est éteint. 7 Le multicuiseur passe en mode de maintien au chaud automatiquement. » Le voyant de maintien au chaud s’allum...
Page 44 - Mode de maintien au chaud; Le multicuiseur vous permet un contrôle aisé
42 FR Mode de maintien au chaud Le multicuiseur vous permet un contrôle aisé du maintien au chaud. • Après avoir sélectionné la fonction de cuisson au moyen du bouton de menu ( Menu ), si vous appuyez directement sur le bouton de marche ( Start ), le voyant de maintien au chaud s’allume. Une fois qu...
Page 45 - Environnement; Lorsqu’il ne fonctionnera plus, ne; Garantie et service; Si vous rencontrez un problème ou si vous; Caractéristiques; Capacité nominale; Nettoyage et entretien; Intérieur; Résistance chauffante :; Extérieur
43 Français FR 6 Environnement Lorsqu’il ne fonctionnera plus, ne jetez pas l’appareil avec les ordures ménagères mais déposez-le dans un centre de collecte agréé afin qu’il puisse être recyclé. Vous contribuerez ainsi à la protection de l’environnement. 7 Garantie et service Si vous rencontrez un p...
Page 46 - Dépannage; Problème
44 FR 9 Dépannage En cas de problème lors de l’utilisation de ce multicuiseur, vérifiez les points suivants avant de faire appel au service d’assistance. Si vous ne parvenez pas à résoudre le problème, contactez le Service Consommateurs Philips de votre pays. Problème Solution Le voyant sur le bouto...


 Philips HD2590/90 User Manual
 Philips HD2637/90 User Manual
 Philips HD2639/90 User Manual
 Philips HD2640/10 User Manual
 Philips HD2692/90 User Manual
 Philips HD3011/08 User Manual
 Philips HD3037/70 User Manual
 Philips HD3080/80 User Manual
 Philips HD3090/80 User Manual
 Philips HD3093/80 User Manual
 Philips hd3620 Manual
 Philips HD3720/25 User Manual