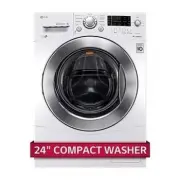
Page 2 - Product Registration Information
Congratulations on your purchase and welcome to the LG family. Your new LG washing machine combines the most advanced washing technology with simple operation and high efficiency. Follow the operating and care in- structions in this manual and your washer will provide many years of reliable service....
Page 3 - For your safety, the information in this manual must be; WARNING; BASIC SAFETY PRECAUTIONS; READ ALL INSTRUCTIONS BEFORE USE
I M P O R T A N T S A F E T Y I N S T R U C T I O N S I M P O R T A N T S A F E T Y I N S T R U C T I O N S w WARNING For your safety, the information in this manual must be followed to minimize the risk of fi re, explosion, or electric shock, or to prevent property damage, personal injury, or loss ...
Page 4 - I M P O R T A N T S A F E T Y I N S T R U C T I O N S; GROUNDING INSTRUCTIONS
w WARNING For your safety, the information in this manual must be followed to minimize the risk of fi re, explosion, or electric shock, or to prevent property damage, personal injury, or loss of life. READ ALL INSTRUCTIONS BEFORE USE I M P O R T A N T S A F E T Y I N S T R U C T I O N S I M P O R T ...
Page 5 - SAFETY INSTRUCTIONS FOR INSTALLATION
• Refer to INSTALLATION INSTRUCTIONS for detailed grounding procedures. Installation instructions are packed in the washer for installer’s reference. If the washer is moved to a new location, have it checked and reinstalled by a qualifi ed service person. Failure to follow this warning can cause ser...
Page 6 - SAFETY INSTRUCTIONS FOR USE, CARE AND CLEANING, AND DISPOSAL
I M P O R T A N T S A F E T Y I N S T R U C T I O N S I M P O R T A N T S A F E T Y I N S T R U C T I O N S SAFETY INSTRUCTIONS FOR USE, CARE AND CLEANING, AND DISPOSAL • Unplug the washer before cleaning to avoid the risk of electric shock. • Never use harsh chemicals, abrasive cleaners, or solvent...
Page 7 - Rear of Washer; SPECIAL FEATURES
P A R T S A N D F E A T U R E S P A R T S A N D F E A T U R E S 3 2 1 4 5 DETERGENT DISPENSER DRAWER This three-compartment drawer provides separate dispensers for prewash and main wash detergent, and liquid fabric softener. CONTROL PANEL WITH LED DISPLAY Simple electronic controls are user-friendly...
Page 8 - CHOOSE THE PROPER LOCATION; Power Outlet
I N S T A L L A T I O N I N S T R U C T I O N S I N S T A L L A T I O N I N S T R U C T I O N S CHOOSE THE PROPER LOCATION CLEARANCES Allow at least 19.8 in. (50.3 cm) in front of the washer to open the door. To ensure sufficient clearance for water lines and airflow, allow minimum clearances of at ...
Page 9 - FLOORING
I N S T A L L A T I O N I N S T R U C T I O N S I N S T A L L A T I O N I N S T R U C T I O N S FLOORING STACKING KIT To stack the LG dryer on this washer, the stacking kit included with the dryer must be used. For kit instructions, refer to the dryer owner's manual or the instructions included with...
Page 10 - MUST; UNPACKING
I N S T A L L A T I O N I N S T R U C T I O N S I N S T A L L A T I O N I N S T R U C T I O N S When removing the washer from the carton base, be sure to remove the foam drum support in the middle of the carton base. If you must lay the washer down to remove the base packaging materials, always lay ...
Page 11 - CONNECTING THE WATER LINES
I N S T A L L A T I O N I N S T R U C T I O N S I N S T A L L A T I O N I N S T R U C T I O N S CONNECTING THE WATER LINES 3 Attach the hot water line to the hot water faucet. Attach the cold water line to the cold water faucet. Tighten the fi ttings securely. Open the water faucets fully to check f...
Page 12 - CONNECTING THE DRAIN LINE; Option 2: Laundry Tub
I N S T A L L A T I O N I N S T R U C T I O N S I N S T A L L A T I O N I N S T R U C T I O N S CONNECTING THE DRAIN LINE Stand Pipe Tie Strap Clip the end of the hose into the elbow bracket. Insert the end of the drain hose into a standpipe. Use tie strap to secure the drain hose in place. NOTE: To...
Page 13 - LEVELING THE WASHER; Place the pads under both front feet.
I N S T A L L A T I O N I N S T R U C T I O N S I N S T A L L A T I O N I N S T R U C T I O N S LEVELING THE WASHER Position the washer in the final location, taking special care to not pinch, strain, or crush the water and drain lines. Place a level across the top of the washer. 1 Leveling Feet Lev...
Page 14 - SORTING WASH LOADS; H O W T O U S E; Loading the Washer
SORTING WASH LOADS H O W T O U S E H O W T O U S E Fabric Care Labels Most articles of clothing feature fabric care labels that include instructions for proper care. Grouping Similar Items For best results, sort clothes into loads that can be washed with the same wash cycle. Different fabrics have d...
Page 15 - SELECTING DETERGENT; only
H O W T O U S E H O W T O U S E SELECTING DETERGENT ABOUT THE DISPENSER The automatic dispenser consists of three compartments which hold: • Liquid fabric softener. • Liquid or powdered detergent for prewash. • Liquid or powdered detergent and color-safe bleach for main wash. All laundry products ca...
Page 16 - LOADING THE DISPENSER; Prewash Detergent Compartment; Never; Fabric Softener Compartment
H O W T O U S E H O W T O U S E LOADING THE DISPENSER Prewash Detergent Compartment Add liquid or powdered detergent to this compartment when using the Prewash option. Always use HE (High-Efficiency) detergent with your washing machine. • The amount of detergent added for the Prewash option is 1/2 t...
Page 17 - CONTROL PANEL FEATURES; CYCLE SELECTOR KNOB; CYCLE MODIFIER BUTTONS
H O W T O U S E H O W T O U S E CONTROL PANEL FEATURES POWER ON/OFF BUTTON Press to turn the washer ON. Press again to turn the washer OFF. NOTE: Pressing the ON/OFF button during a cycle will cancel that cycle and any load settings will be lost. CYCLE SELECTOR KNOB Turn this knob to select the desi...
Page 18 - CYCLE GUIDE
H O W T O U S E H O W T O U S E CYCLE GUIDE NOTE: To protect your garments, not every wash temperature, spin speed, soil level, or option is available with every cycle. The cycle guide below shows the options and recommended fabric types for each cycle. Cycle Fabric type Wash Temp. Spin Soil Level W...
Page 19 - THE LED DISPLAY; CYCLE COMPLETION INDICATOR; DOOR LOCK INDICATOR; CHILD LOCK INDICATOR
H O W T O U S E H O W T O U S E THE LED DISPLAY CYCLE COMPLETION INDICATOR This portion of the display shows which stage of the wash cycle is currently underway (Load Sensing, Wash, Rinse, Spin). ESTIMATED TIME REMAINING When the START/PAUSE button is pressed, the washer automatically detects the wa...
Page 20 - OPERATING THE WASHER
H O W T O U S E H O W T O U S E OPERATING THE WASHER Press the ON/OFF button to turn on the washer. The lights around the cycle selector knob will illuminate. Turn the cycle selector knob to the desired cycle. The display will show the preset Rinse/Wash Temperature, Spin Speed, Soil Level, and Optio...
Page 21 - Spin Speed; Soil Level
Spin Speed The washer drum spins at up to 1,400 rpm. This reduces drying time and saves energy. Turn the Spin Speed knob until the indicator light for the desired setting is lit. Some fabrics, such as delicates, require a slower spin speed. H O W T O U S E H O W T O U S E CYCLE MODIFIER BUTTONS Each...
Page 22 - CYCLE OPTION BUTTONS; Favorite
H O W T O U S E H O W T O U S E CYCLE OPTION BUTTONS Your washing machine features several additional cycle options to customize cycles to meet your individual needs. Certain option buttons also feature a special function (see the following page for details) that can be activated by pressing and hol...
Page 23 - SPECIAL FUNCTIONS; Tub Clean; Tub Clean Alarm
SPECIAL FUNCTIONS The option buttons also activate special functions, including Child Lock and Tub Clean. Press and hold the option button marked with the special function for 3 seconds to activate. Tub Clean A buildup of detergent residue can occur in the wash tub over time and can lead to a mildew...
Page 24 - REGULAR CLEANING; Cleaning the Exterior; - If using powder cleaner
C A R E A N D C L E A N I N G C A R E A N D C L E A N I N G w WARNING: • Unplug the washer before cleaning to avoid the risk of electric shock. Failure to follow this warning can cause serious injury, fire, electrical shock, or death. • Never use harsh chemicals, abrasive cleaners, or solvents to cl...
Page 25 - Cleaning the Dispenser; C A R E A N D C L E A N I N G
Removing Lime Buildup If you live in an area with hard water, lime scale can form on internal components of the washer. Use of a water softener is recommended in areas with hard water. If a descaler is used, make sure that it is suitable for use in a washer, and run the TUB CLEAN cycle before washin...
Page 26 - Cleaning the Water Inlet Filters; MAINTENANCE
Cleaning the Water Inlet Filters If the washer detects that water is not entering the dispenser, an error message will show on the display. If you live in an area with hard water, this may be caused by clogged inlet filters. Turn off both water faucets completely. Unscrew the hot and cold water line...
Page 27 - Cleaning the Drain Pump Filter; • Unplug the power cord before cleaning.; • Opening the drain filter will result in water; • If you use the washing machine with the
C A R E A N D C L E A N I N G C A R E A N D C L E A N I N G Cleaning the Drain Pump Filter Lint and other objects may accumulate and clog the drain pump filter. If the washer fails to drain properly, unplug the washer and allow the water to cool, if necessary, before proceeding. Open the drain pump ...
Page 28 - NORMAL SOUNDS YOU MAY HEAR; Problem; Clicking; Spraying or hissing; Humming or gurgling; BEFORE CALLING FOR SERVICE
T R O UB L E S H O O T I N G T R O UB L E S H O O T I N G NORMAL SOUNDS YOU MAY HEAR Problem Possible Causes Solutions Rattling and clanking noise Thumping sound Water leaking around washer • Foreign objects, such as keys, coins, or safety pins, may be in drum or pump. • Heavy wash loads may produce...
Page 31 - Using Smart DiagnosisTM
T R O UB L E S H O O T I N G T R O UB L E S H O O T I N G Press and hold the “Wash Temp.” button for three seconds, while holding the phone mouthpiece to the icon or Power button. Keep the phone in place until the tone transmission has finished. This takes about 6 seconds, and the display will count...
Page 32 - KEY DIMENSIONS AND SPECIFICATIONS; Description; Electrical Requirements; S P E C I F I C A T I O N S
KEY DIMENSIONS AND SPECIFICATIONS Model WM1377H* Description Front-Loading Washer Electrical Requirements 120 VAC @ 60 Hz. Max. Water Pressure 20 - 120 psi (138 - 827 kPA) Dimensions 24" (W) X 25.20" (D) X 33.5" (H), 45" (D with door open) 60.96 cm (W) X 64.0 cm (D) X 85.09 cm (H), 1...
Page 33 - LG WASHING MACHINE LIMITED WARRANTY (USA)
THIS LIMITED WARRANTY DOES NOT COVER: 1. Service trips to deliver, pick up, or install the product or for instruction on product use. 2. Replacing house fuses or resetting of circuit breakers, correction of house wiring or plumbing, or correction of product installation. 3. Damage or failure caused ...
Page 34 - LG WASHING MACHINE LIMITED WARRANTY (CANADA)
LG WASHING MACHINE LIMITED WARRANTY (CANADA) WARRANTY: Should your LG Washer (“Product”) fail due to a defect in material or workmanship under normal home use during the warranty period set forth below, LG Canada will at its option repair or the Product upon receipt of proof of original retail purch...
Page 36 - Información de registro del producto
I N T R O D U C C I Ó N I N T R O D U C C I Ó N Felicitaciones por su compra y bienvenido a la familia LG. Su nueva lavadora LG combina la más avanzada tecnología de lavado con un simple funcionamiento y una alta efi ciencia. Siga las instrucciones de funcionamiento y cuidado contenidas en este manu...
Page 37 - Su seguridad y la seguridad de otros es muy importante.; Para su seguridad, debe seguir la información con-; LEA TODAS LAS INSTRUCCIONES ANTES DE USAR; PRECAUCIONES BÁSICAS DE SEGURIDAD; ADVERTENCIA
I N S T R U C C I O N E S I M P O R T A N T E S D E S E G U R I D A D I N S T R U C C I O N E S I M P O R T A N T E S D E S E G U R I D A D Su seguridad y la seguridad de otros es muy importante. En este manual y en la lavadora proporcionamos varios mensajes de seguridad importantes. Lea y cumpla si...
Page 38 - I N S T R U C C I O N E S I M P O R T A N T E S D E S E G U R I D A D
w ADVERTENCIA Para su seguridad, debe seguir la información con- tenida en este manual para minimizar el riesgo de incendio, explosión o descarga eléctrica, o para evitar el daño a la propiedad, lesiones físicas, o incluso la muerte. w ADVERTENCIA: Una conexión inadecuada del conductor de conexión a...
Page 39 - INSTRUCCIONES DE SEGURIDAD PARA LA INSTALACIÓN
• Consulte las INSTRUCCIONES DE INSTALACIÓN para obtener información detallada de los procedimientos de conexión a tierra. Junto con la lavadora se encuentran las instrucciones de instalación como referencia para el instalador. Si va a cambiar de lugar la lavadora, contrate a una persona del servici...
Page 40 - GUARDE ESTAS INSTRUCCIONES
I N S T R U C C I O N E S I M P O R T A N T E S D E S E G U R I D A D I N S T R U C C I O N E S I M P O R T A N T E S D E S E G U R I D A D • Desenchufe la lavadora antes de proceder a su limpieza para evitar posibles descargas eléctricas. • Nunca utilice productos químicos fuertes, limpiadores abra...
Page 41 - FUNCIONES ESPECIALES; Parte trasera de la lavadora
C O M P O N E N T E S Y F U N C I O N E S C O M P O N E N T E S Y F U N C I O N E S 3 2 1 4 5 FUNCIONES ESPECIALES GAVETA DISPENSADORA DE DETERGENTE Esta gaveta de tres compartimentos proporciona dispensadores separados para pre-lavado, detergente para lavado principal, y suavizante líquido. PANEL D...
Page 42 - CÓMO ELEGIR LA UBICACIÓN MÁS ADECUADA; Toma de corriente; • No almacene ni instale la lavadora en lugares
I N S T R U C C I O N E S P A R A L A I N S T A L A C I Ó N I N S T R U C C I O N E S P A R A L A I N S T A L A C I Ó N CÓMO ELEGIR LA UBICACIÓN MÁS ADECUADA DISTANCIAS DE SEPARACIÓN No olvide tener en cuenta las molduras de pare-des, puertas o piso, que podrían aumentar la distancia de separación n...
Page 43 - TIPO DE PISO
I N S T R U C C I O N E S P A R A L A I N S T A L A C I Ó N I N S T R U C C I O N E S P A R A L A I N S T A L A C I Ó N TIPO DE PISO • Para minimizar el ruido y la vibración, la lavadora DEBE instalarse en un piso sólidamente construido. Vea la NOTA más abajo. • La cuesta permisible debajo de toda l...
Page 44 - DEBEN; DESEMBALAJE
I N S T R U C C I O N E S P A R A L A I N S T A L A C I Ó N I N S T R U C C I O N E S P A R A L A I N S T A L A C I Ó N Al quitar la lavadora de la base de cartón, asegúrese de quitar el soporte de espuma del tambor que hay en el medio de la base de cartón. Si debe recostar la lavadora para quitar l...
Page 45 - CONEXIÓN DE LOS CONDUCTOS DE AGUA
I N S T R U C C I O N E S P A R A L A I N S T A L A C I Ó N I N S T R U C C I O N E S P A R A L A I N S T A L A C I Ó N CONEXIÓN DE LOS CONDUCTOS DE AGUA 3 Conecte el conducto de agua caliente al grifo de agua caliente. Conecte el conducto de agua fría al grifo de agua fría. Ajuste las uniones con f...
Page 46 - CONEXIÓN DEL CONDUCTO DE DESAGÜE; Opción 1: Tubo vertical
I N S T R U C C I O N E S P A R A L A I N S T A L A C I Ó N I N S T R U C C I O N E S P A R A L A I N S T A L A C I Ó N CONEXIÓN DEL CONDUCTO DE DESAGÜE Stand Pipe Tie Strap Sujete el extremo de la manguera al soporte tipo codo. Inserte el extremo de la manguera de desagüe en el tubo vertical. Use u...
Page 47 - NIVELACIÓN DE LA LAVADORA; INSTALACIÓN DE ALMOHADILLAS ANTIDESLIZANTES (OPCIONAL); Coloque las almohadillas debajo de las dos patas frontales.; • Almohadillas antideslizantes
I N S T R U C C I O N E S P A R A L A I N S T A L A C I Ó N I N S T R U C C I O N E S P A R A L A I N S T A L A C I Ó N NIVELACIÓN DE LA LAVADORA 2 Coloque la lavadora en su lugar final, tomando especial precaución de no apretar, forzar ni aplastar las tuberías de desagüe y de agua. Coloque un nivel...
Page 48 - CLASIFICACIÓN DE LAS CARGAS DE LAVADO; I N S T R U C C I O N E S D E U S O; Etiquetas de cuidado de las prendas; Carga de la lavadora
CLASIFICACIÓN DE LAS CARGAS DE LAVADO I N S T R U C C I O N E S D E U S O I N S T R U C C I O N E S D E U S O Etiquetas de cuidado de las prendas La mayoría de prendas tienen etiquetas con instrucciones sobre sus cuidados específicos. Agrupación de prendas similares Para obtener resultados óptimos, ...
Page 49 - SELECCIÓN DEL DETERGENTE; únicamente
I N S T R U C C I O N E S D E U S O I N S T R U C C I O N E S D E U S O SELECCIÓN DEL DETERGENTE ACERCA DEL DISPENSADOR El dispensador automático está compuesto de tres compartimientos para: • Suavizante líquido. • Detergente en polvo o líquido para el pre- lavado. • Detergente en polvo o líquido pa...
Page 50 - CARGA DEL DISPENSADOR; Compartimiento para suavizante
I N S T R U C C I O N E S D E U S O I N S T R U C C I O N E S D E U S O CARGA DEL DISPENSADOR Compartimiento para detergente del pre-lavado Agregue detergente líquido o en polvo a este compartimiento cuando utilice la opción de pre-lavado. Siempre utilice un detergente de alta eficiencia (HE) en su ...
Page 51 - FUNCIONES DEL PANEL DE CONTROL; PERILLA DE SELECCIÓN DE CICLO; BOTONES MODIFICADORES DE CICLO
I N S T R U C C I O N E S D E U S O I N S T R U C C I O N E S D E U S O FUNCIONES DEL PANEL DE CONTROL BOTÓN POWER ON/OFF (ENCENDIDO/APAGADO) Presione este botón para encender la lavadora.Presiónelo de nuevo para apagarla. NOTA: Al presionar el botón ON/OFF durante un ciclo, se cancelará el ciclo y ...
Page 52 - GUÍA DE CICLOS
I N S T R U C C I O N E S D E U S O I N S T R U C C I O N E S D E U S O GUÍA DE CICLOS NOTA: Para proteger sus prendas, no todas las temperaturas de lavado, velocidades de centrifugado, niveles de suciedad u opciones están disponibles en todos los ciclos. La guía de ciclos a continuación muestra las...
Page 53 - PANTALLA LED; INDICADOR DE ESTADO DEL CICLO; INDICADOR DE BLOQUEO DE PUERTA; INDICADOR DE BLOQUEO INFANTIL
I N S T R U C C I O N E S D E U S O I N S T R U C C I O N E S D E U S O PANTALLA LED INDICADOR DE ESTADO DEL CICLO Esta sección de la pantalla muestra la fase del ciclo en curso (Sensor de carga, lavado, enjuague, centrifugado). TIEMPO ESTIMADO RESTANTE Cuando se presiona el botón START/PAUSE(INICIO...
Page 54 - FUNCIONAMIENTO DE LA LAVADORA
I N S T R U C C I O N E S D E U S O I N S T R U C C I O N E S D E U S O FUNCIONAMIENTO DE LA LAVADORA Presione el botón ENCENDIDO/APAGADO para prender la lavadora. Las luces alrededor de la perilla de selección de ciclo se iluminarán. Gire la perilla de selección de ciclo para se- leccionar el ciclo...
Page 55 - Velocidad de centrifugado
I N S T R U C C I O N E S D E U S O I N S T R U C C I O N E S D E U S O BOTONES MODIFICADORES DE CICLO Velocidad de centrifugado El tambor de la lavadora centrifuga a una velocidad de hasta 1.400 RPM. Esto reduce el tiempo de secado y ahorra energía. Gire la perilla Spin Speed (velocidad de centrifu...
Page 56 - BOTONES DE OPCIÓN DE CICLO; Para agregar opciones de ciclo a un ciclo:
I N S T R U C C I O N E S D E U S O I N S T R U C C I O N E S D E U S O BOTONES DE OPCIÓN DE CICLO Su lavadora incluye varias opciones de ciclo adicionales para personalizar y adaptar los ciclos a sus necesidades particulares. Algunos botones de opción también cuentan con una función especial (consu...
Page 57 - Alarma de Limpieza de Tambor
FUNCIONES ESPECIALES Los botones de opción también activan funciones especiales, incluida la de Child Lock (bloqueo infantil) y Tub Clean (Limpieza de tina). Mantenga presionado el botón de opción marcado con la función especial durante 3 segundos para activar la misma. Tub Clean (limpieza de tina) ...
Page 58 - Limpieza del exterior; LIMPIEZA REGULAR; Cuidado y limpieza del interior; - Si usa limpiador en polvo
C U I D A D O Y L I M P I EZ A C U I D A D O Y L I M P I EZ A 58 w ADVERTENCIA: • Desenchufe la lavadora antes de proceder con su limpieza para evitar posibles descargas eléctricas. Si no se cumple con esta advertencia, se podrán producir lesiones graves, incendios, descargas eléctricas, o muerte. •...
Page 59 - LIMPIEZA DE LA LAVADORA; Limpieza del dispensador; C U I D A D O Y L I M P I EZ A; Eliminación de la acumulación de sarro; ¡No; Almacenamiento de la lavadora; Aviso de activación de limpieza de tina
LIMPIEZA DE LA LAVADORA Limpieza del dispensador El dispensador debe limpiarse periódicamente para remover la acumulación de detergente y otros productos de lavado. NOTA: Si limpia el dispensador de detergente una vez por semana, siempre dispensará correctamente. C U I D A D O Y L I M P I EZ A C U I...
Page 60 - MANTENIMIENTO
C U I D A D O Y L I M P I EZ A C U I D A D O Y L I M P I EZ A Limpieza de los filtros de entrada de agua Si la lavadora detecta que no ingresa agua al dispensador, aparecerá un mensaje de error en pantalla. Si vive en un área donde hay agua dura, esto puede ocasionarse por filtros de entrada obstrui...
Page 61 - • Desenchufe el cable de alimentación antes; • Si usa la lavadora con el filtro de desagüe
Limpieza del filtro de la bomba de desagüe Pelusas y otros objetos pueden acumularse y obstruir el filtro de la bomba de desagüe. Si la lavadora no drena adecuadamente, desenchufe la lavadora y deje que el agua se enfríe, de ser necesario, antes de proceder. Abra el panel de acceso del filtro de la ...
Page 62 - SONIDOS NORMALES QUE SE PUEDEN ESCUCHAR; Repiqueteo; Zumbido o borboteo; ANTES DE SOLICITAR ASISTENCIA TÉCNICA; Problema
R E S O L U C I Ó N D E P R O B L E M A S R E S O L U C I Ó N D E P R O B L E M A S SONIDOS NORMALES QUE SE PUEDEN ESCUCHAR Ruido metálico y de traqueteo Sonido de golpes Pérdida de agua alrededor de la lavadora Exceso de espuma • Puede haber objetos extraños, como llaves, monedas, o imperdibles en ...
Page 65 - Uso de Smart DiagnosisTM
R E S O L U C I Ó N D E P R O B L E M A S R E S O L U C I Ó N D E P R O B L E M A S Mantenga apretado el botón Wash Temp durante tres segundos, mientras sostiene el micrófono del teléfono cerca del ícono o botón Power. Sostenga el teléfono en el lugar hasta que el tono de transmisión haya finalizado...
Page 66 - DIMENSIONES Y ESPECIFICACIONES CLAVE
E S P E C I F I C A C I O N E S E S P E C I F I C A C I O N E S DIMENSIONES Y ESPECIFICACIONES CLAVE Modelo WM1377H* Descripción Lavadora de carga frontal Requisitos eléctricos 120 V de CA @ 60 Hz. Presión máxima del agua 20 - 120 psi (138 - 827 kPA) Dimensiones 24” (ancho) X 25,20”(prof.) X 33,5” (...