Page 2 - TABLE OF CONTENTS
TABLE OF CONTENTS 2 3 IMPORTANT SAFETY INSTRUCTIONS 3 READ ALL INSTRUCTIONS BEFORE USE 4 WARNING STATEMENTS 8 CAUTION STATEMENTS 9 PRODUCT OVERVIEW 9 Product Features 11 OPERATION-WASHER 11 Using the Washer 14 Adding Cleaning Products 17 Control Panel 18 Wash Cycles 25 Cycle Modifiers 25 Options and...
Page 3 - IMPORTANT SAFETY INSTRUCTIONS; READ ALL INSTRUCTIONS BEFORE USE; WARNING
3 IMPORTANT SAFETY INSTRUCTIONS ENGLISH IMPORTANT SAFETY INSTRUCTIONS READ ALL INSTRUCTIONS BEFORE USE Safety for a Dryer WARNING Fire HazardFailure to follow safety warnings exactly could result in serious injury, death or property damage.Do not install a booster fan in the exhaust duct.Install all...
Page 4 - Safety Messages; WARNING STATEMENTS; Installation; WARNING - Risk of Fire; dryer airflow and increase the risk of fire.
4 IMPORTANT SAFETY INSTRUCTIONS Safety Messages Your safety and the safety of others are very important. We have provided many important safety messages in this manual and on your appliance. Always read and follow all safety messages. All safety messages will tell you what the potential hazard is, t...
Page 6 - Grounding Instructions
6 IMPORTANT SAFETY INSTRUCTIONS • This is a single appliance and a single unit for sale, delivery and installation.• Do not disassemble this appliance for use, as it can’t be installed in a side-by-side configuration. Grounding Instructions • Improper connection of the equipment-grounding conductor ...
Page 7 - Maintenance
7 IMPORTANT SAFETY INSTRUCTIONS ENGLISH • Do not store or use gasoline or other flammable vapors and liquids in the vicinity of this or any other appliance. • Do not mix chlorine bleach with ammonia or acids such as vinegar. Follow package directions when using laundry products. Incorrect usage can ...
Page 8 - SAVE THESE INSTRUCTIONS; CAUTION STATEMENTS; CAUTION
8 IMPORTANT SAFETY INSTRUCTIONS SAVE THESE INSTRUCTIONS • Do not disassemble or repair the appliance by yourself.• Remove the door(s) before the appliance is removed from service or discarded to avoid the danger of children or small animals getting trapped inside. • Make sure the dispenser drawer or...
Page 9 - PRODUCT OVERVIEW; Product Features; Front View
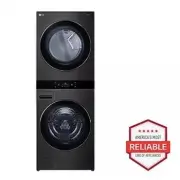
9 PRODUCT OVERVIEW ENGLISH PRODUCT OVERVIEW Product Features The images in this guide may be different from the actual components and accessories, which are subject to change by the manufacturer without prior notice for product improvement purposes. Front View a Control Panel b Lint Filter c Dryer D...
Page 10 - Product Specifications; Included Accessories
10 PRODUCT OVERVIEW Product Specifications Accessories Included Accessories a Non-skid Pads b Hole Caps c Wrench d Y Connector e Tie Strap f Elbow Bracket (for securing drain hose) Required Accessories a Hot and Cold Water Hoses (for Washer) b Cold Water Hose (for Dryer) c Connecting Supply Hose d T...
Page 11 - Using the Washer; Operation Overview
11 OPERATION-WASHER ENGLISH OPERATION-WASHER Using the Washer WARNING • To reduce the risk of fire, electric shock, or injury to persons, read the SAFETY INSTRUCTIONS before operating this appliance. Operation Overview 1 Sort laundry and load the washer.• Sort laundry by fabric type, soil level, col...
Page 12 - Sorting Laundry; Grouping Similar Items
12 OPERATION-WASHER Sorting Laundry CAUTION • Clothing or articles that are waterproof or water-resistant must be washed in the Bedding or XL Load cycle only. (Examples include water resistant clothing, mattress covers, outdoor clothes, and plastic mats.) Failure to do so may result in personal inju...
Page 13 - Loading the Washer; General Tips
13 OPERATION-WASHER ENGLISH Loading the Washer WARNING • Clothing or articles that are waterproof or water- resistant must be washed in the Bedding , or XL Load cycle only. (Examples include water resistant clothing, mattress covers, outdoor clothes, and plastic mats.) Failure to do so may result in...
Page 14 - Small Items; Adding Cleaning Products; About Detergent Use; Tablet Detergents; Using the ezDispense Function
14 OPERATION-WASHER Small Items • Do not wash a single small item. Add enough similar items to the load to prevent an out-of- balance load. • Wash small, light items in a mesh bag. Small items can get caught in the door seal, and brassiere hooks can snag on other clothing or the drum. Adding Cleanin...
Page 15 - Using the Manual Dispense Function
15 OPERATION-WASHER ENGLISH 3 Pour the detergent and softener into their respective reservoirs, up to the MAX line. • The ezDispense drawer has two reservoirs. Put the liquid detergent into the right-hand reservoir and the fabric softener into the left-hand reservoir. • If you don't use liquid fabri...
Page 16 - Manual Main Wash Detergent
16 OPERATION-WASHER 6 Load the laundry products into the appropriate manual dispenser compartments.• Use the main wash detergent compartment at the front of the manual dispenser for powdered or liquid detergent or oxygen- based bleach. Do not use it for liquid chlorine bleach. • Do not place deterge...
Page 17 - Control Panel; Control Panel Features for the Washer
17 OPERATION-WASHER ENGLISH Control Panel Control Panel Features for the Washer a Power On/Off Button • Press this button to turn the washer on or off.• Pressing this button during a cycle will cancel that cycle and any load settings will be lost.• The door will unlock after a brief pause. NOTE • If...
Page 18 - Wash Cycles; Cycle Guide
18 OPERATION-WASHER • Use these buttons to adjust the wash temperature, spin speed and soil level settings for the selected cycle. • The current settings are shown in the display.• Press the button for that option to select other settings. h Indicators a Control Lock Indicator • This indicator light...
Page 19 - Default Cycles
19 OPERATION-WASHER ENGLISH Default Cycles These cycles are in the initial cycle list. Cycle Normal Wash Description Use to wash all normal items such as cotton, linen, shirts, jeans or mixed loads, except delicate fabrics such as wool or silk. • Pressing the Start/Pause button without selecting a c...
Page 23 - Download Cycles; Available Options
23 OPERATION-WASHER ENGLISH Download Cycles The wash cycle below can be downloaded on the LG ThinQ app. Available Options † This option is automatically included in the cycle and cannot be deselected. NOTE • Delay Start and Extra Rinse can be selected for every cycle in this table. • Steam and Cold ...
Page 25 - Cycle Modifiers; About Modifier Buttons; Options and Extra Functions; Washer Settings
25 OPERATION-WASHER ENGLISH Cycle Modifiers About Modifier Buttons Each cycle has default settings that are selected automatically. You can also customize these settings using the cycle modifier buttons.• Press the button for the desired modifier and select the the desired setting. • The washer auto...
Page 27 - Settings
27 OPERATION-WASHER ENGLISH Pre-wash This option adds a pre-wash (for about 15 - 17 minutes ) for improved cleaning of heavily soiled or stained clothing.• Swipe the bar to turn the option on or off. NOTE • If you select Pre-wash after putting the main wash detergent directly in the drum, the deterg...
Page 29 - Using the Dryer; Check the Lint Filter Before Every
29 OPERATION-DRYER ENGLISH OPERATION-DRYER Using the Dryer WARNING • To reduce the risk of fire, electric shock, or injury to persons, read the SAFETY INSTRUCTIONS before operating this appliance. Operation Overview 1 Clean the lint filter.• If the lint filter has not already been cleaned, lift out ...
Page 30 - Loading the Dryer
30 OPERATION-DRYER Loading the Dryer General Tips • Combine large and small items in the same load.• Close zippers, hooks and drawstrings to prevent these items from snagging or tangling on other clothes. NOTE • Damp clothes will expand as they dry. Do not overload the dryer; clothes require room to...
Page 31 - Control Panel Features for the Dryer
31 OPERATION-DRYER ENGLISH Control Panel Control Panel Features for the Dryer a Power On/Off Button • Press this button to turn the dryer on or off.• Pressing this button during a cycle will cancel that cycle and any load settings will be lost. b WASH/DRY Button • Press this button to switch the cen...
Page 33 - Dry Cycles
33 OPERATION-DRYER ENGLISH Dry Cycles Cycle Guide The appliance automatically sets the dryness level and temperature at the recommended setting for each cycle. The estimated time remaining will be shown in the display. Default Cycles These cycles are in the initial cycle list. • Press the Temp. butt...
Page 36 - Special Drying Cycles
36 OPERATION-DRYER WARNING • To reduce the risk of serious injury, death, explosion, or fire, follow basic safety precautions, including the following:- Do not open the dryer door during steam cycles.- Do not touch the steam nozzle in the drum during or after the steam cycle. • Do not use steam cycl...
Page 39 - Options and Extra Fuctions; Dryer Settings
39 OPERATION-DRYER ENGLISH Cycle Modifiers About Modifier Buttons Each cycle has default settings that are selected automatically. Customize these settings using the cycle modifier buttons. Temp. Use this button to select the temperature setting. This allows precise care of fabrics and garments. Pre...
Page 42 - SMART FUNCTIONS; Using LG ThinQ Application; LG ThinQ Application Features; Installing LG ThinQ App and; Models with QR Code
42 SMART FUNCTIONS SMART FUNCTIONS Using LG ThinQ Application The LG ThinQ application allows you to communicate with the appliance using a smartphone. LG ThinQ Application Features • Remote Start - Control the appliance remotely from the LG ThinQ application. • Downloaded - Download new and special...
Page 43 - Using the Washer/Dryer Remotely; Remote Start; Downloaded Cycle
43 SMART FUNCTIONS ENGLISH 3 Touch the add ( ~ ) button on the LG ThinQ app to connect your LG appliance. Follow the instructions in the app to complete the process. NOTE • You may be asked to provide a password to connect to the LG network (not your home network) during the Wi-Fi setup. The passwor...
Page 44 - Cloud Cycle; Function
44 SMART FUNCTIONS Cloud Cycle Use the LG ThinQ app to start cycles with various options. Cloud cycles are deleted from the appliance once the power is turned off. RF Module Specifications † This feature is only available on some models. Industry Canada Statement This device contains licence-exempt ...
Page 46 - MAINTENANCE; Washer; Care after Wash; Cleaning the Exterior; Cleaning the Drum
46 MAINTENANCE MAINTENANCE WARNING • To reduce the risk of fire, electric shock, or injury to persons, read this entire owner’s manual, including the SAFETY INSTRUCTIONS, before operating this appliance. • Unplug the appliance before cleaning to avoid the risk of electric shock. Failure to follow th...
Page 47 - Removing Mineral Buildup; Leaving the Door Open
47 MAINTENANCE ENGLISH • For other drum cleaning products, follow the cleaner manufacturer’s instructions and recommendations. • Do not exceed the maximum fill line when adding bleach or powdered cleaners. Powdered cleaners may remain in the drum after cleaning. 3 Close the door and press the Power ...
Page 48 - Cleaning the Door Seal
48 MAINTENANCE 3 Remove the ezDispense reservoirs from the drawer, and open the reservoirs lids.• Rinse the drawer in warm water to dissolve the detergent or softener scale. 4 Clean the outsides of the ezDispense reservoirs and inserts with warm water.• Use a soft cloth or brush to remove any residu...
Page 49 - Cleaning the Water Inlet Filters; Cleaning the Drain Pump Filter
49 MAINTENANCE ENGLISH Cleaning the Water Inlet Filters If the washer does not fill properly, an error message will appear on the display. The inlet valve filter screens could be clogged by hard water scale, sediment in the water supply, or other debris. WARNING • The inlet screens protect the delic...
Page 50 - Care in Cold Climates; Storing the Appliance
50 MAINTENANCE 4 Remove the pump filter.• Twist the pump filter counterclockwise to remove. 5 Clean the pump filter and opening. 6 Reassemble the plug onto the drain hose and reclip the drain hose. 7 Insert the drain pump filter and twist it clockwise. 8 Close the drain pump filter cover. NOTE • An ...
Page 51 - When the Water Inlet Hoses Are Frozen
51 MAINTENANCE ENGLISH 5 Add 1 gallon of nontoxic recreational vehicle (RV) antifreeze to the empty drum and close the door.• Never use automotive antifreeze. 6 Turn on the washer and press the Spin button. 7 Press the Start/Pause button to start the drain pump for 1 minute . • This will expel some ...
Page 52 - Dryer; Cleaning the Interior; Cleaning the Lint Filter
52 MAINTENANCE Dryer Regular Cleaning Cleaning the Exterior Proper care of your appliance can extend its life. The outside of the appliance can be cleaned with warm water and a mild, nonabrasive household detergent. Immediately wipe off any spills with a soft, damp cloth. NOTE • Do not use methylate...
Page 54 - TROUBLESHOOTING; FAQs: Frequently Asked Questions
54 TROUBLESHOOTING TROUBLESHOOTING The appliance is equipped with an automatic error-monitoring system to detect and diagnose problems at an early stage. If the appliance does not function properly or does not function at all, check the following before you call for service. Washer FAQs: Frequently ...
Page 56 - ezDispense Error Messages
56 TROUBLESHOOTING ezDispense Error Messages Noises Oversudsing Too much sudsing detected. • The washer will operate the suds reduction cycle for about 2 hours. Voltage abnormality Abnormal voltage detected. • Unplug the power plug. If error recurs, call for service. Problem Possible Cause & Sol...
Page 57 - Operation
57 TROUBLESHOOTING ENGLISH Operation Water being added after the washer has already begun to operate The wash load may be unbalanced. If the washer senses that the load is unbalanced, it will stop and refill to redistribute the load. • Normal operation The washer may be diluting laundry additives to...
Page 60 - Performance
60 TROUBLESHOOTING Performance Water in the washer does not drain or drains slowly. The end of the drain hose is more than 96 inches (2.4 m) above the bottom of the washer. • Move the end of the drain hose so that it is lower than 96 inches (2.4 m). Bleach does not dispense. Bleach dispenser cover i...
Page 61 - Odor
61 TROUBLESHOOTING ENGLISH Odor Musty or mildewy odor in the washer Incorrect or too much detergent has been used. • Use only HE (High-Efficiency) detergent in accordance with the manufacturer’s instructions. Inside of the drum was not cleaned properly. • Run the Tub Clean cycle regularly. Problem P...
Page 65 - Steam Function
65 TROUBLESHOOTING ENGLISH Steam Function Clothes have damp spots after a dry cycle. Very large load or very small load. Single large item such as a blanket or comforter. • If items are too tightly packed or too sparse the sensor may have trouble reading the dryness level of the load. Use a Timed Dr...
Page 66 - Common
66 TROUBLESHOOTING Common Wi-Fi Problem Possible Cause & Solution Trouble connecting appliance and smartphone to Wi-Fi network The password for the Wi-Fi network was entered incorrectly. • Delete your home Wi-Fi network and begin the connection process again. Mobile data for your smartphone is t...
Page 67 - LIMITED WARRANTY; CANADA; TERMS AND CONDITIONS
67 LIMITED WARRANTY ENGLISH LIMITED WARRANTY CANADA TERMS AND CONDITIONS ARBITRATION NOTICE: THIS LIMITED WARRANTY CONTAINS AN ARBITRATION PROVISION THAT REQUIRES YOU AND LG TO RESOLVE DISPUTES BY BINDING ARBITRATION INSTEAD OF IN COURT, UNLESS THE LAWS OF YOUR PROVINCE OR TERRITORY DO NOT PERMIT TH...
Page 68 - THIS LIMITED WARRANTY DOES NOT COVER:
68 LIMITED WARRANTY LIABLE FOR ANY INCIDENTAL, CONSEQUENTIAL, SPECIAL, DIRECT, INDIRECT, PUNITIVE OR EXEMPLARY DAMAGES, INCLUDING, WITHOUT LIMITATION, LOSS OF GOODWILL, LOST PROFITS, LOSS OF ANTICIPATED PROFITS, LOST REVENUE, LOSS OF USE, OR ANY OTHER DAMAGE, WHETHER ARISING DIRECTLY OR INDIRECTLY F...
Page 69 - PROCEDURE FOR RESOLVING DISPUTES:
69 LIMITED WARRANTY ENGLISH is located outside a 150 km radius from a ASC, as determined by LG Canada, it will be your responsibility to bring the Product, at your sole expense, to the ASC for in-warranty repair. All costs and expenses associated with the above excluded circumstances, listed under t...
Page 76 - For inquiries or comments,
LG Customer Information Center Register your product Online! www.lg.com For inquiries or comments, visit www.lg.com or call: 1-800-243-0000 U.S.A. 1-888-542-2623 CANADA
Page 77 - INSTALLATION MANUAL; WASHTOWER; Read this installation manual thoroughly before installing the
INSTALLATION MANUAL WASHTOWER Read this installation manual thoroughly before installing the appliance and keep it handy for reference at all times. ENGLISH WK*X30*H*A / SWW*50*3 MFL71983213 Rev.02_063023 www.lg.com Copyright © 2023 LG Electronics Inc. All Rights Reserved.
Page 78 - IMPORTANT SAFETY
TABLE OF CONTENTS 2 3 IMPORTANT SAFETY INSTRUCTIONS 3 READ ALL INSTRUCTIONS BEFORE USE 4 WARNING STATEMENTS 8 CAUTION STATEMENTS 9 PRODUCT OVERVIEW 9 Product Features 11 INSTALLATION 11 Before Installing 13 Choosing the Proper Location 15 Unpacking and Removing Shipping Material 15 Connecting Electr...
Page 87 - INSTALLATION; Before Installing; Installation Overview
11 INSTALLATION ENGLISH INSTALLATION Before Installing Installation Overview Please read the following installation instructions first after purchasing this appliance or transporting it to another location. a Choosing the Proper Location b Unpacking and Removing Shipping Material c Connecting the Ga...
Page 89 - Choosing the Proper; Flooring
13 INSTALLATION ENGLISH Choosing the Proper Location Check the following requirements for the install location before installing the appliance.• Allow for sufficient space between the walls and the appliance for installation. • Make sure that the floor is clean, dry and free of dust, dirt, water and...
Page 90 - Exhaust; Clearances; Installation spacing for Recessed Area
14 INSTALLATION Exhaust • Choose a location that allows for proper exhaust installation. A gas dryer must be exhausted to the outdoors. Power Outlet • The power outlet must be within 60 inches (1.5 m) of either side of the appliance. • Position the appliance so that the outlet and plug are easily ac...
Page 91 - Unpacking and Removing; Unpacking Shipping Material; Lifting the Appliance off the Foam; Removing Shipping Material; Connecting Electric Dryers; Electrical Requirements for Electric
15 INSTALLATION ENGLISH Unpacking and Removing Shipping Material Unpacking Shipping Material * This feature is only available on some models. Lifting the Appliance off the Foam Base • After removing the carton and shipping material, lift the appliance off the foam base. • Make sure the plastic drum ...
Page 92 - Installing the Dryer Side; Side Venting
16 INSTALLATION WARNING • The power cord (pigtail) connection between the wall receptacle and the dryer terminal block IS NOT supplied with the dryer. Type of pigtail and gauge of wire must conform to local codes and with instructions on the following pages. • The wiring and grounding must conform t...
Page 93 - Venting the Dryer; Ductwork
17 INSTALLATION ENGLISH 3 Preassemble a 4" (10 cm) elbow e to the next 4" (10 cm) duct section, and secure all joints with duct tape. Be sure that the male end of the elbow faces AWAY from the dryer. Insert the elbow/duct assembly through the side opening and press it onto the adapter duct. ...
Page 94 - Routing and Connecting Ductwork; Connecting Gas Dryers; Electrical Requirements for Gas
18 INSTALLATION NOTE • Deduct 6 ft. (1.8 m) for each additional elbow. Do not use more than four 90° elbows.• In Canada, only those foil-type flexible ducts, if any, specifically identified for use with the appliance by the manufacturer should be used. In the United States, only those foil-type flex...
Page 95 - Gas Supply Requirements; Connecting the Gas Supply
19 INSTALLATION ENGLISH not cut or remove the grounding prong from this plug. • Do not, under any circumstances, cut or remove the third (ground) prong from the power cord. • For personal safety, this dryer must be properly grounded. • This dryer must be plugged into a 120-VAC, 60- Hz. grounded outl...
Page 96 - High-Altitude Installations; Connecting the Water Inlet; How to Connect the Water Inlet
20 INSTALLATION 3 Connect the dryer to your laundry room’s gas supply using a new flexible stainless steel connector with a 3/8-inch NPT fitting. WARNING • DO NOT use old connectors. 4 Securely tighten all connections between the dryer and your laundry room’s gas supply. 5 Turn on your laundry room’...
Page 97 - Required Accessories; Connecting the Drain Hose
21 INSTALLATION ENGLISH Required Accessories a Hot and Cold Water Hoses (for Washer) b Cold Water Hose (for Dryer) c Connecting Supply Hose d Tie Straps 1 Check the fittings and seals. Inspect the threaded fitting on each hose and make sure there is a rubber seal e in place in both ends of each hose...
Page 98 - Using a Standpipe to Drain
22 INSTALLATION WARNING • The drain hose should always be properly secured. Failure to properly secure the drain hose can result in flooding and property damage. NOTE • The drain must be installed in accordance with any applicable local codes and regulations. • Make sure that the drain hose is not s...
Page 99 - Leveling the Appliance; How to Level the Appliance
23 INSTALLATION ENGLISH 2 Hang the end of the drain hose over the side of the laundry tub. 3 Use the provided tie strap to secure the drain hose in place. Leveling the Appliance The drum of the washer spins at very high speeds. To minimize vibration, noise, and unwanted movement, the floor must be a...
Page 100 - Final Installation Check; Connecting the Washer to the; Testing the Washer
24 INSTALLATION WARNING • Do not raise the front of the appliance with a wood block or similar object. Doing so can cause serious injury or death. Using Non-Skid Pads If you install the appliance on a slippery surface, it may move because of excessive vibration. Incorrect leveling may cause malfunct...
Page 101 - Testing the Dryer; Testing Dryer Heating; Checking Airflow
25 INSTALLATION ENGLISH 1 Load the washer with 6 thick bath towels (approximately 6 pounds). 2 Press the Power button. 3 Press the Speed Wash button. 4 Select the Start/Pause button to start the wash cycle. 5 Make sure that water is supplied, that the washer does not rock or vibrate excessively, and...
Page 102 - Check the Duct Condition; Error Codes
26 INSTALLATION • This button sequence activates the installation test. A message will display if the activation is successful. 3 Press the Start/Pause button. • The appliance will start the test, which will last a few minutes. The heat will be turned on and the temperatures in the drum will be meas...
Page 103 - Restricted or Blocked Airflow
27 INSTALLATION ENGLISH Restricted or Blocked Airflow Avoid long runs or runs with multiple elbows or bends. Excess or crushed transition duct Too many elbows or exhaust too long Check for blockages and lint buildup. Make sure the ductwork is not crushed or restricted. Duct Blockage (80%) / Duct Blo...
Page 104 - APPENDIX; Disassembly; Disassembling the Washer and
28 APPENDIX APPENDIX Disassembly Disassembling the Washer and Dryer The washer and dryer cannot be disassembled and installed for use side by side. If it is necessary to disassemble the appliance in order to move or reinstall it, follow these instructions. WARNING • Protect your hands and arms from ...