Page 2 - TABLE OF CONTENTS
TABLE OF CONTENTS 2 3 IMPORTANT SAFETY INSTRUCTIONS 3 READ ALL INSTRUCTIONS BEFORE USE 4 WARNING STATEMENTS 8 CAUTION STATEMENTS 9 PRODUCT OVERVIEW 9 Product Features 11 OPERATION-WASHER 11 Using the Washer 14 Adding Cleaning Products 17 Control Panel 20 Wash Cycles 23 Cycle Modifiers 23 Options and...
Page 3 - IMPORTANT SAFETY INSTRUCTIONS; READ ALL INSTRUCTIONS BEFORE USE; WARNING
3 IMPORTANT SAFETY INSTRUCTIONS ENGLISH IMPORTANT SAFETY INSTRUCTIONS READ ALL INSTRUCTIONS BEFORE USE Safety for a Dryer WARNING Fire HazardFailure to follow safety warnings exactly could result in serious injury, death or property damage.Do not install a booster fan in the exhaust duct.Install all...
Page 4 - Safety Messages; WARNING STATEMENTS; Installation; WARNING - Risk of Fire; dryer airflow and increase the risk of fire.
4 IMPORTANT SAFETY INSTRUCTIONS Safety Messages Your safety and the safety of others are very important. We have provided many important safety messages in this manual and on your appliance. Always read and follow all safety messages. All safety messages will tell you what the potential hazard is, t...
Page 6 - Grounding Instructions
6 IMPORTANT SAFETY INSTRUCTIONS • This is a single appliance and a single unit for sale, delivery and installation.• Do not disassemble this appliance for use, as it can’t be installed in a side-by-side configuration. Grounding Instructions • Improper connection of the equipment-grounding conductor ...
Page 7 - Maintenance
7 IMPORTANT SAFETY INSTRUCTIONS ENGLISH • Do not put oily or greasy clothing, candles or flammable materials on top of the appliance.• Keep the area underneath and around your appliances free of combustible materials (lint, paper, rags, etc.), gasoline, chemicals and other flammable vapors and liqui...
Page 8 - SAVE THESE INSTRUCTIONS; CAUTION STATEMENTS; CAUTION; Operation
8 IMPORTANT SAFETY INSTRUCTIONS SAVE THESE INSTRUCTIONS • Disconnect this appliance from the power supply before cleaning and attempting any user maintenance. Turning the controls to the OFF position does not disconnect this appliance from the power supply. • Remove any dust or foreign matter from t...
Page 9 - PRODUCT OVERVIEW; Product Features; Front View
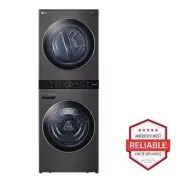
9 PRODUCT OVERVIEW ENGLISH PRODUCT OVERVIEW Product Features The images in this guide may be different from the actual components and accessories, which are subject to change by the manufacturer without prior notice for product improvement purposes. Front View a Control Panel b Lint Filter c Dryer D...
Page 10 - Product Specifications; Included Accessories
10 PRODUCT OVERVIEW Product Specifications Accessories Included Accessories a Non-skid Pads b Hole Caps c Wrench d Y Connector e Tie Strap f Elbow Bracket (for securing drain hose) Required Accessories a Hot and Cold Water Hoses (for Washer) b Cold Water Hose (for Dryer) c Connecting Supply Hose d T...
Page 11 - Using the Washer; Operation Overview
11 OPERATION-WASHER ENGLISH OPERATION-WASHER Using the Washer WARNING • To reduce the risk of fire, electric shock, or injury to persons, read the SAFETY INSTRUCTIONS before operating this appliance. Operation Overview 1 Sort laundry and load the washer.• Sort laundry by fabric type, soil level, col...
Page 12 - Sorting Laundry; Grouping Similar Items
12 OPERATION-WASHER Sorting Laundry CAUTION • Clothing or articles that are waterproof or water-resistant must be washed in the Waterproof , Bedding , Bulky/Large , or Jumbo Wash cycle only. (Examples include water resistant clothing, mattress covers, outdoor clothes, and plastic mats.) Failure to d...
Page 13 - Loading the Washer; General Tips
13 OPERATION-WASHER ENGLISH Loading the Washer WARNING • Clothing or articles that are waterproof or water- resistant must be washed in the Waterproof , Bedding , Bulky/Large , or Jumbo Wash cycle only. (Examples include water resistant clothing, mattress covers, outdoor clothes, and plastic mats.) ...
Page 14 - Small Items; Adding Cleaning Products; About Detergent Use; Tablet Detergents; Using the Dispenser
14 OPERATION-WASHER Small Items • Do not wash a single small item. Add enough similar items to the load to prevent an out-of- balance load. • Wash small, light items in a mesh bag. Small items can get caught in the door seal, and brassiere hooks can snag on other clothing or the drum. Adding Cleanin...
Page 15 - Pre-wash Detergent Compartment; Main Wash Detergent Compartment
15 OPERATION-WASHER ENGLISH 3 Gently close the detergent dispenser drawer before starting the cycle.• Slamming the drawer closed may result in the detergent overflowing into another compartment or dispensing into the drum earlier than programmed. • Be careful not to get a hand caught in the drawer w...
Page 16 - Fabric Softener Compartment
16 OPERATION-WASHER Fabric Softener Compartment This compartment holds fabric softener, which is automatically dispensed during the final rinse cycle. Either powdered or liquid fabric softener may be used.• Do not exceed the maximum fill line. Using too much fabric softener may stain clothes or caus...
Page 17 - Control Panel; Control Panel Features for the Washer
17 OPERATION-WASHER ENGLISH Control Panel Control Panel Features for the Washer a Power On/Off Button • Press this button to turn the washer on or off.• Pressing this button during a cycle will cancel that cycle and any load settings will be lost.• The door will unlock after a brief pause. NOTE • If...
Page 18 - Time and Status Display
18 OPERATION-WASHER • These buttons allow you to select additional cycle options. Certain buttons also allow you to activate special functions by pressing and holding the button for 3 seconds . Remote Start Use a smartphone to control your washer remotely.- For more information, see SMART FUNCTIONS ...
Page 20 - Wash Cycles; Cycle Guide
20 OPERATION-WASHER Wash Cycles The wash cycles are designed for specific types of wash loads. Select the cycle that best matches the load contents for maximum wash performance and fabric care. See Sorting Laundry section for best results, and follow the fabric care labels on your garments. For a gu...
Page 21 - Available Options
21 OPERATION-WASHER ENGLISH Available Options † This option is automatically included in the cycle and cannot be deselected. NOTE • If the Turbo Wash option is on, you cannot set the spin level to No Spin . Soil Level Default: Normal Available: All Cycle Heavy Duty Description Suitable for washing h...
Page 23 - Cycle Modifiers; About Modifier Buttons; Options and Extra Functions; Special Cycles
23 OPERATION-WASHER ENGLISH Cycle Modifiers About Modifier Buttons Each cycle has default settings that are selected automatically. You can also customize these settings using the cycle modifier buttons.• Repeatedly press the button for the desired modifier until the indicator light for the desired ...
Page 25 - Using the Dryer; Check the Lint Filter Before Every; Loading the Dryer
25 OPERATION-DRYER ENGLISH OPERATION-DRYER Using the Dryer WARNING • To reduce the risk of fire, electric shock, or injury to persons, read the SAFETY INSTRUCTIONS before operating this appliance. Operation Overview 1 Clean the Lint Filter.• If the lint filter has not already been cleaned, lift out ...
Page 27 - Control Panel Features for the Dryer
27 OPERATION-DRYER ENGLISH Control Panel Control Panel Features for the Dryer a Power Button • Press the button to turn the appliance on. Press again to turn the appliance off. NOTE • Pressing the Power button during a cycle will cancel that cycle and any load settings will be lost. b Cycles • Press...
Page 29 - Dry Cycles
29 OPERATION-DRYER ENGLISH Dry Cycles Cycle Guide The appliance automatically sets the dryness level and temperature at the recommended setting for each cycle. The estimated time remaining will be shown in the display. • Temperature : Low > Medium Low > Medium > Medium High > High • Dry ...
Page 31 - Steam
31 OPERATION-DRYER ENGLISH Cycle Modifiers About Modifier Buttons Each cycle has default settings that are selected automatically. Customize these settings using the cycle modifier buttons. Press the button for the desired modifier to open the modifier’s screen. Temp. Use this button to adjust the t...
Page 33 - SMART FUNCTIONS; Using LG ThinQ Application; LG ThinQ Application Features; Before Using LG ThinQ Application
33 SMART FUNCTIONS ENGLISH SMART FUNCTIONS Using LG ThinQ Application The LG ThinQ application allows you to communicate with the appliance using a smartphone. LG ThinQ Application Features • Remote Start - Control the appliance remotely from the LG ThinQ application. • Downloaded - Download new and...
Page 34 - Installing the LG ThinQ Application; Downloaded Cycle; Cloud Cycle; RF Module Specifications
34 SMART FUNCTIONS NOTE • The Wi-Fi connection may not connect or may be interrupted because of the home network environment. • The network connection may not work properly depending on the Internet service provider. • The surrounding wireless environment can make the wireless network service run sl...
Page 35 - FCC RF Radiation Exposure Statement; Smart Diagnosis; Function
35 SMART FUNCTIONS ENGLISH FCC Notice The following notice covers the transmitter module contained in this product.This equipment has been tested and found to comply with the limits for a Class B digital device, pursuant to Part 15 of the FCC Rules. These limits are designed to provide reasonable pr...
Page 37 - MAINTENANCE; Washer; Care after Wash; Cleaning the Exterior; Cleaning the Drum
37 MAINTENANCE ENGLISH MAINTENANCE WARNING • To reduce the risk of fire, electric shock, or injury to persons, read this entire owner’s manual, including the SAFETY INSTRUCTIONS, before operating this appliance. • Unplug the appliance before cleaning to avoid the risk of electric shock. Failure to f...
Page 38 - Removing Mineral Buildup; Leaving the Door Open; Cleaning the Dispenser Drawer
38 MAINTENANCE • For other drum cleaning products, follow the cleaner manufacturer’s instructions and recommendations. • Do not exceed the maximum fill line when adding bleach or powdered cleaners. Powdered cleaners may remain in the drum after cleaning. 3 Close the door and press the Power button. ...
Page 39 - Cleaning the Door Seal; Cleaning the Water Inlet Filters
39 MAINTENANCE ENGLISH • Do not use soap when cleaning the drawer and inserts. 6 Wipe off any moisture with a dry towel or cloth after cleaning. 7 To clean the drawer opening, use a small, non-metal brush to clean the recess. Remove all residue from the upper and lower parts of the recess. 8 Replace...
Page 40 - Cleaning the Drain Pump Filter
40 MAINTENANCE 6 Rinse filters thoroughly and press them back into place. 7 Flush then reattach the water hoses.• Before reattaching the water inlet hoses, flush them by running several gallons of water through them into a bucket or drain, preferably with the faucets wide open for maximum flow. NOTE...
Page 41 - Care in Cold Climates; Storing the Appliance; When the Water Inlet Hoses Are Frozen
41 MAINTENANCE ENGLISH 8 Close the drain pump filter cover. NOTE • An OE message blinks on the display when the drain pump filter is clogged with dirt. Clean the drain pump filter. Care in Cold Climates Storing the Appliance If the washer will not be used for an extended period of time and is in an ...
Page 42 - When the Drain Hose is Frozen
42 MAINTENANCE 4 Immerse the water inlet hoses in hot water to thaw them. 5 Reconnect the water inlet hoses to the water inlets of the washer and to the faucets.• See Connecting the Water Inlet Hoses for details. 6 Turn on the faucets. 7 Press the Power button to turn on the washer. 8 Press the Spin...
Page 43 - Dryer; Cleaning the Interior; Cleaning the Lint Filter
43 MAINTENANCE ENGLISH Dryer Regular Cleaning Cleaning the Exterior Proper care of your appliance can extend its life. The outside of the appliance can be cleaned with warm water and a mild, nonabrasive household detergent. Immediately wipe off any spills with a soft, damp cloth. NOTE • Do not use m...
Page 45 - TROUBLESHOOTING; FAQs: Frequently Asked Questions
45 TROUBLESHOOTING ENGLISH TROUBLESHOOTING The appliance is equipped with an automatic error-monitoring system to detect and diagnose problems at an early stage. If the appliance does not function properly or does not function at all, check the following before you call for service. Washer FAQs: Fre...
Page 47 - Noises
47 TROUBLESHOOTING ENGLISH Noises vs VIBRATION SENSOR ERROR Vibration sensor malfunctions. • Call for service. Problem Possible Cause & Solution Clicking Door lock sounds when the door locks or unlocks. • Normal operation Spraying or hissing Water spraying or circulating during the cycle • Norma...
Page 50 - Performance
50 TROUBLESHOOTING Performance Washer is not filling properly. Filter is clogged. • Make sure that inlet filters on the fill valves are not clogged. Refer to Cleaning the Water Inlet Filters in MAINTENANCE . Inlet hoses may be kinked. • Check that inlet hoses are not kinked or clogged. Energy effici...
Page 51 - Odor
51 TROUBLESHOOTING ENGLISH Odor Wrinkling Hot and cold water inlet hoses are reversed. • Hot water rinse can set wrinkles in garments. Check the inlet hose connectors. Staining Bleach or softener dispensed too soon. • Dispenser compartment was overfilled or closed too quickly, causing the bleach or ...
Page 55 - Steam Function
55 TROUBLESHOOTING ENGLISH Steam Function Excess static in clothes after drying. Fabric softener is not used or is used incorrectly. • Use a fabric softener or the Reduce Static option, if available, to reduce static electricity. Be sure to follow the manufacturer’s instructions. Clothes dried too l...
Page 56 - Indicator Messages
56 TROUBLESHOOTING Indicator Messages Problem Possible Cause & Solution Flow Sense indicator ( W ) shows four bars during the drying cycle or the display shows d8O after drying. Exhaust system is too long or has too many turns/restrictions. • Install a shorter or straighter duct run. See the Ins...
Page 57 - Common
57 TROUBLESHOOTING ENGLISH Common Wi-Fi Problem Possible Cause & Solution Trouble connecting appliance and smartphone to Wi-Fi network The password for the Wi-Fi network was entered incorrectly. • Delete your home Wi-Fi network and begin the connection process again. Mobile data for your smartph...
Page 58 - LIMITED WARRANTY; USA; TERMS AND CONDITIONS
58 LIMITED WARRANTY LIMITED WARRANTY USA TERMS AND CONDITIONS ARBITRATION NOTICE: THIS LIMITED WARRANTY CONTAINS AN ARBITRATION PROVISION THAT REQUIRES YOU AND LG ELECTRONICS (“LG”) TO RESOLVE DISPUTES BY BINDING ARBITRATION INSTEAD OF IN COURT, UNLESS YOU CHOOSE TO OPT OUT. IN ARBITRATION, CLASS AC...
Page 59 - THIS LIMITED WARRANTY DOES NOT COVER:; PROCEDURE FOR RESOLVING DISPUTES:
59 LIMITED WARRANTY ENGLISH THIS LIMITED WARRANTY DOES NOT COVER: • Service trips to deliver, pick up, or install, educate how to operate, correct wiring, or correct unauthorized repairs. • Damage or failure of the Product to perform during power failures and interrupted or inadequate electrical ser...
Page 64 - For inquiries or comments,
LG Customer Information Center Register your product Online! www.lg.com For inquiries or comments, visit www.lg.com or call: 1-800-243-0000 U.S.A. 1-888-542-2623 CANADA
Page 65 - INSTALLATION MANUAL; WASHTOWER; Read this installation manual thoroughly before installing the
INSTALLATION MANUAL WASHTOWER Read this installation manual thoroughly before installing the appliance and keep it handy for reference at all times. ENGLISH WKEX200H*A / WKGX201H*A MFL71728904 Rev.10_071423 www.lg.com Copyright © 2020-2023 LG Electronics Inc. All Rights Reserved.
Page 66 - IMPORTANT SAFETY
TABLE OF CONTENTS 2 3 IMPORTANT SAFETY INSTRUCTIONS 3 READ ALL INSTRUCTIONS BEFORE USE 4 WARNING STATEMENTS 8 CAUTION STATEMENTS 9 PRODUCT OVERVIEW 9 Product Features 11 INSTALLATION 11 Before Installing 13 Choosing the Proper Location 15 Unpacking and Removing Shipping Material 15 Connecting Electr...
Page 75 - INSTALLATION; Before Installing; Installation Overview
11 INSTALLATION ENGLISH INSTALLATION Before Installing Installation Overview Please read the following installation instructions first after purchasing this appliance or transporting it to another location. a Choosing the Proper Location b Unpacking and Removing Shipping Material c Connecting the El...
Page 77 - Choosing the Proper; Flooring
13 INSTALLATION ENGLISH Choosing the Proper Location Check the following requirements for the install location before installing the appliance.• Allow for sufficient space between the walls and the appliance for installation. • Make sure that the floor is clean, dry and free of dust, dirt, water and...
Page 78 - Exhaust; Clearances; Installation spacing for Recessed Area
14 INSTALLATION Exhaust • Choose a location that allows for proper exhaust installation. A gas dryer must be exhausted to the outdoors. Power Outlet • The power outlet must be within 60 inches (1.5 m) of either side of the appliance. • Position the appliance so that the outlet and plug are easily ac...
Page 79 - Unpacking and Removing; Unpacking Shipping Material; Lifting the Appliance off the Foam; Removing Shipping Material; Connecting Electric Dryers; Electrical Requirements for Electric
15 INSTALLATION ENGLISH Unpacking and Removing Shipping Material Unpacking Shipping Material * This feature is only available on some models. Lifting the Appliance off the Foam Base • After removing the carton and shipping material, lift the appliance off the foam base. • Make sure the plastic drum ...
Page 81 - Four-Wire Direct Wire
17 INSTALLATION ENGLISH 7 Attach the power cord ground wire to the green ground screw. 8 Tighten all screws securely. 9 Reinstall the terminal block access cover. a White Wire moved from Ground Screw b Hot Leads of Power Cord (Black and Red) c Neutral Wire (White) d Power Cord Ground Wire e Ground S...
Page 82 - Three-Wire Power Cord
18 INSTALLATION a White Wire moved from Ground Screw b Hot Leads of Power Cord (Black and Red) c Neutral Wire (White) d Power Cord Ground Wire e Ground Screw (green) Three-Wire Power Cord 1 Remove the terminal block access cover on the upper back of the appliance. 2 Install the UL-listed strain reli...
Page 83 - Installing the Dryer Side; Side Venting
19 INSTALLATION ENGLISH insulation from each wire. Bend the ends of the three wires into a hook shape. 2 Remove the terminal block access cover on the upper back of the appliance. 3 Install UL-listed strain relief into the power cord through-hole. 4 Thread the 3-wire, #10 AWG minimum copper conducto...
Page 84 - Venting the Dryer
20 INSTALLATION 2 Press the tabs on the knockout c and carefully remove the knockout for the desired vent opening. (Right-side venting is not available on gas models.) Press the adapter duct d onto the blower housing and secure to the base of the dryer as shown. 3 Preassemble a 4" (10 cm) elbow ...
Page 85 - Ductwork; Routing and Connecting Ductwork; Connecting Gas Dryers
21 INSTALLATION ENGLISH Ductwork NOTE • Deduct 6 ft. (1.8 m) for each additional elbow. Do not use more than four 90° elbows.• In Canada, only those foil-type flexible ducts, if any, specifically identified for use with the appliance by the manufacturer should be used. In the United States, only tho...
Page 86 - Electrical Requirements for Gas; Gas Supply Requirements; Connecting the Gas Supply
22 INSTALLATION Electrical Requirements for Gas Models WARNING • This dryer is equipped with a three-prong grounding plug for protection against shock hazard which should be plugged directly into a properly grounded three-prong receptacle. Do not cut or remove the grounding prong from this plug. • D...
Page 87 - High-Altitude Installations; Connecting the Water Inlet; How to Connect the Water Inlet
23 INSTALLATION ENGLISH damage the threads of the gas connector when removing the shipping cap. 3 Connect the dryer to your laundry room’s gas supply using a new flexible stainless steel connector with a 3/8-inch NPT fitting. WARNING • DO NOT use old connectors. 4 Securely tighten all connections be...
Page 88 - Required Accessories; Connecting the Drain Hose
24 INSTALLATION Required Accessories a Hot and Cold Water Hoses (for Washer) b Cold Water Hose (for Dryer) c Connecting Supply Hose d Tie Straps 1 Check the fittings and seals. Inspect the threaded fitting on each hose and make sure there is a rubber seal e in place in both ends of each hose to prev...
Page 89 - Using a Standpipe to Drain
25 INSTALLATION ENGLISH WARNING • The drain hose should always be properly secured. Failure to properly secure the drain hose can result in flooding and property damage. NOTE • The drain must be installed in accordance with any applicable local codes and regulations. • Make sure that the drain hose ...
Page 90 - Leveling the Appliance; How to Level the Appliance
26 INSTALLATION 2 Hang the end of the drain hose over the side of the laundry tub. 3 Use the provided tie strap to secure the drain hose in place. Leveling the Appliance The drum of the washer spins at very high speeds. To minimize vibration, noise, and unwanted movement, the floor must be a solid, ...
Page 91 - Final Installation Check; Connecting the Washer to the; Testing the Washer
27 INSTALLATION ENGLISH WARNING • Do not raise the front of the appliance with a wood block or similar object. Doing so can cause serious injury or death. Using Non-Skid Pads If you install the appliance on a slippery surface, it may move because of excessive vibration. Incorrect leveling may cause ...
Page 92 - Testing the Dryer; Testing Dryer Heating; Checking Airflow
28 INSTALLATION 1 Load the washer with 6 thick bath towels (approximately 6 pounds). 2 Press the Power button. 3 Press the Speed Wash button. 4 Select the Start/Pause button to start the wash cycle. 5 Make sure that water is supplied, that the washer does not rock or vibrate excessively, and that it...
Page 93 - Check the Duct Condition; Error Codes
29 INSTALLATION ENGLISH also be shown with error codes. See the chart on the next page for error code details and solutions. • If the Flow Sense ( W ) display indicates that the exhaust system is severely restricted, have the system checked immediately, as performance will be poor. 5 End of cycle.• ...
Page 95 - APPENDIX; Disassembly; Disassembling the Washer and
31 APPENDIX ENGLISH APPENDIX Disassembly Disassembling the Washer and Dryer The washer and dryer cannot be disassembled and installed for use side by side. If it is necessary to disassemble the appliance in order to move or reinstall it, follow these instructions. WARNING • Protect your hands and ar...