Page 2 - I N T R O D U C T I O N; product Registration Information
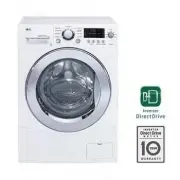
Congratulations on your purchase and welcome to the LG family. Your new LG washing machine combines the most advanced washing technology with simple operation and high efficiency. If you follow the operating and care instructions in this manual, your washer will provide you with many years of reliab...
Page 3 - I M P O R T A N T S A F E T Y I N S T R U C T I O N S; WARNING; For your safety, the information in this manual must be; READ ALL INSTRUCTIONS BEFORE USE
I M P O R T A N T S A F E T Y I N S T R U C T I O N S w WARNING For your safety, the information in this manual must be followed to minimize the risk of fire or explosion, electric shock, or to prevent property damage, personal injury, or loss of life. Your Safety and the safety of others is very im...
Page 4 - BASIC SAFETY pRECAUTIONS; gROUNDINg INSTRUCTIONS
• Before use, the washer must be properly installed as described in this manual. • Do not wash articles that have been previously cleaned in, washed in, soaked in, or spotted with gasoline, dry cleaning solvents, or other fl ammable or explosive substances, as they give off vapors that could ignite ...
Page 5 - SAFETY INSTRUCTIONS FOR INSTALLATION
• Refer to INSTALLATION INSTRUCTIONS for detailed grounding procedures. Installation instructions are packed in the washer for installer’s reference. If the washer is moved to a new location, have it checked and reinstalled by a qualified service person. Failure to follow this warning can cause seri...
Page 6 - SAFETY INSTRUCTIONS FOR USE, CARE AND CLEANINg, AND DISpOSAL
I M P O R T A N T S A F E T Y I N S T R U C T I O N S SAFETY INSTRUCTIONS FOR USE, CARE AND CLEANINg, AND DISpOSAL • Unplug the washer before cleaning to avoid the risk of electric shock. • Never use harsh chemicals, abrasive cleaners, or solvents to clean the washer. They will damage the fi nish. •...
Page 7 - P A R T S A N D F E AT U R E S; DETERgENT DISpENSER DRAwER; SpECIAL FEATURES
P A R T S A N D F E AT U R E S 3 2 1 4 5 DETERgENT DISpENSER DRAwER This three-compartment drawer provides separate dispensers for prewash and main wash detergent, and liquid fabric softener. CONTROL pANEL wITh LED DISpLAY Simple electronic controls are user-friendly. The LED display indicates cycle...
Page 8 - I N S T A L L AT I O N I N S T R U C T I O N S; ChOOSE ThE pROpER LOCATION; power Outlet
I N S T A L L AT I O N I N S T R U C T I O N S ChOOSE ThE pROpER LOCATION CLEARANCES Allow at least 19.8 in. (50.3 cm) in front of the washer to open the door. To ensure sufficient clearance for water lines and airflow, allow minimum clearances of at least 1 in. (2.5 cm) at the sides and 4 in. (10 c...
Page 9 - FLOORINg
I N S T A L L AT I O N I N S T R U C T I O N S FLOORINg NOTE: Please note that the floor must be strong and rigid enough to support the weight of the washer when fully loaded, without flexing or bouncing. If your floor has too much flex in it, you may need to reinforce it to make it more rigid. A fl...
Page 10 - UNpACkINg
I N S T A L L AT I O N I N S T R U C T I O N S If you must lay the washer down to remove the base packaging materials, always lay it carefully on its side. Do NOT lay the washer on its front or back. IMPORTANT: To prevent internal damage during transport, the washer is equipped with 4 shipping bolts...
Page 11 - CONNECTINg ThE wATER LINES
I N S T A L L AT I O N I N S T R U C T I O N S CONNECTINg ThE wATER LINES Insert a rubber seal into the threaded fittings on each hose. 1 Rubber Seal Water Hose (to tap) Rubber Seal Water Hose (to water inlet on washer) 3 Attach the hot water line to the hot water tap. Attach the cold water line to ...
Page 12 - CONNECTINg ThE DRAIN LINE; Option 2: Laundry Tub
I N S T A L L AT I O N I N S T R U C T I O N S CONNECTINg ThE DRAIN LINE Stand Pipe Tie Strap Clip the end of the hose into the elbow bracket. Insert the end of the drain hose into a standpipe. Use tie strap to secure the drain hose in place. NOTE: Total height of the hose end should not exceed 96 i...
Page 13 - LEVELINg ThE wAShER
3 I N S T A L L AT I O N I N S T R U C T I O N S LEVELINg ThE wAShER Loosen the locknuts on all 4 leveling feet until you can turn the feet with the included wrench. Turn clockwise to raise the washer or counterclockwise to lower it. 2 Once the washer is level from side to side and front to back, ti...
Page 14 - SORTINg wASh LOADS; H O W TO U S E; Loading the washer
SORTINg wASh LOADS H O W TO U S E Fabric Care Labels Most articles of clothing feature fabric care labels that include instructions for proper care. grouping Similar Items For best results, sort clothes into loads that can be washed with the same wash cycle.Different fabrics have different care requ...
Page 15 - SELECTINg DETERgENT
H O W TO U S E SELECTINg DETERgENT ABOUT ThE DISpENSER The automatic dispenser consists of four compartments which hold: • Liquid fabric softener. • Liquid or powdered detergent for prewash.• Liquid or powdered detergent and color-safe bleach for main wash. All laundry products can be added at once ...
Page 16 - LOADING THE DISPENSER; Prewash Detergent Compartment; Fabric Softener Compartment
H O W TO U S E LOADING THE DISPENSER Prewash Detergent Compartment Add liquid or powdered detergent to this compartment when using the Prewash option. Always use HE (High-Efficiency) detergent with your washing machine.• The amount of detergent added for the Prewash option is 1/2 the amount recommen...
Page 17 - CONTROL pANEL FEATURES; CYCLE SELECTOR kNOB
H O W TO U S E CONTROL pANEL FEATURES pOwER ON/OFF BUTTON Press to turn the washer ON. Press again to turn the washer OFF. NOTE: Pressing the ON/OFF button during a cycle will cancel that cycle and any load settings will be lost. CYCLE SELECTOR kNOB Turn this knob to select the desired cycle. Once t...
Page 18 - CYCLE GUIDE
H O W TO U S E CYCLE GUIDE NOTE: To protect your garments, not every wash/rinse temperature, spin speed, soil level, or option is available with every cycle. The cycle guide below shows the options and recommended fabric types for each cycle. Cycle Fabric type Wash/Rinse Temp. Spin Soil Level Water ...
Page 19 - ThE LED DISpLAY; CYCLE COmpLETION INDICATOR
H O W TO U S E ThE LED DISpLAY CYCLE COmpLETION INDICATOR This portion of the display shows which stage of the wash cycle is currently underway (LOAD SENSING, WASH, RINSE or SPIN). ESTImATED TImE REmAININg When the START/PAUSE button is pressed, the washer automatically detects the wash load (weight...
Page 20 - OpERATINg ThE wAShER
H O W TO U S E OpERATINg ThE wAShER Press the ON/OFF button to turn on the washer. The lights around the cycle selector knob will illuminate. Turn the cycle selector knob to the desired cycle. The display will show the preset Rinse/Wash Temperature, Spin Speed, Soil Level, and Option settings for th...
Page 21 - SpIN SpEED; CYCLE SETTINg BUTTONS; SOIL LEVEL
SpIN SpEED The washer drum spins at up to 1,300 rpm. This reduces drying time and saves energy. Turn the SPIN SPEED knob until the indicator light for the desired setting is lit. Some fabrics, such as delicates, require a slower spin speed. H O W TO U S E CYCLE SETTINg BUTTONS Each cycle has preset ...
Page 22 - CYCLE OpTION BUTTONS
H O W TO U S E CYCLE OpTION BUTTONS Your washing machine features several additional cycle options to customize cycles to meet your individual needs. Certain option buttons also feature a special function (see the following page for details) that can be activated by pressing and holding that option ...
Page 23 - SpECIAL FUNCTIONS; TUB CLEAN; ChILD LOCk
The wool wash cycle of this machine has been approved by Woolmark for the washing of machine washable Woolmark products provided that the products are washed according to the instructions on the garment label and those issued by the manufacturer of this washing machine, M0807. SpECIAL FUNCTIONS The ...
Page 24 - C A R E A N D C L E A N I N G; REgULAR CLEANINg; Cleaning the Exterior
C A R E A N D C L E A N I N G w WARNING: • Unplug the washer before cleaning to avoid the risk of electric shock. Failure to follow this warning can cause serious injury, fire, electrical shock, or death. • Never use harsh chemicals, abrasive cleaners, or solvents to clean the washer. They will dama...
Page 25 - Cleaning the Dispenser
Removing Lime Buildup If you live in an area with hard water, lime scale can form on internal components of the washer. Use of a water softener is recommended in areas with hard water. If a descaler is used, make sure that it is suitable for use in a washer, and run the TUB CLEAN cycle before washin...
Page 26 - Cleaning the water Inlet Filters; mAINTENANCE
Cleaning the water Inlet Filters If the washer detects that water is not entering the dispenser, an error message will show on the display. If you live in an area with hard water, this may be caused by clogged inlet filters. Turn off both water taps completely. Unscrew the hot and cold water lines f...
Page 27 - Cleaning the Drain pump Filter
C A R E A N D C L E A N I N G Cleaning the Drain pump Filter Lint and other objects may accumulate and clog the drain pump filter. If the washer fails to drain properly, unplug the washer and allow the water to cool, if necessary, before proceeding. Open the drain pump filter access panel. 1 Unclip ...
Page 28 - T R O U B L E S H O O T I N G; NORmAL SOUNDS YOU mAY hEAR; problem; BEFORE CALLINg FOR SERVICE
T R O U B L E S H O O T I N G NORmAL SOUNDS YOU mAY hEAR problem possible Causes Solutions Rattling and clanking noise Thumping sound Water leaking around washer • Foreign objects, such as keys, coins, or safety pins, may be in drum or pump. • Heavy wash loads may produce a thumping sound. • Washer ...
Page 31 - kEY DImENSIONS AND SpECIFICATIONS; S P E C I F I C AT I O N S / O P T I O N A L A C C E S S O R I E S
kEY DImENSIONS AND SpECIFICATIONS model wm1355h* Description Front-Loading Washer Electrical Requirements 120 VAC @ 60 Hz. Max. Water Pressure 4.5 ~ 145 PSI (30~1000 kPa) Dimensions 24" (W) X 25.20" (D) X 33.5" (H), 45" (D with door open) 60.96 cm (W) X 64.0 cm (D) X 85.09 cm (H), 11...
Page 32 - TO CONTACT LG ELECTRONICS; LG WASHING MACHINE LIMITED WARRANTY - USA
Your LG Washing Machine will be will repaired or replaced, at LG’s option, if it proves to be defective in material or work- manship under normal use, during the warranty period (“Warranty Period”) set forth below, effective from the date (“Date of Purchase”) of original consumer purchase of the pro...
Page 33 - LG WASHING MACHINE LIMITED WARRANTY - CANADA
LG ELECTRONICS, INC. LG WASHING MACHINE LIMITED WARRANTY - CANADA All PartsControllerDrum TubDD Motor (Stator, Rotor, Hall sensor) 1 Year3 Years5 Years 10 Years 1 Year (In-Home Service)1 Year (In-Home Service)1 Year (In-Home Service)1 Year (In-Home Service)
Page 34 - I N T R O D U C C I Ó N; Información de registro del producto
I N T R O D U C C I Ó N Escoja el lugar adecuado ..................................... 40Espacios de instalación ........................................ 40Tipo de piso .......................................................... 41Kit de superposición ............................................ 41De...
Page 35 - I N S T R U C C I O N E S I M P O R T A N T E D E S E G U R I D A D; Su Seguridad y la de los demás son de suma importancia.; ADVERTENCIA; Por su seguridad, debe seguir la información indicada; LEA TODAS LA INSTRUCCIONES ANTES DE USAR
I N S T R U C C I O N E S I M P O R T A N T E D E S E G U R I D A D Su Seguridad y la de los demás son de suma importancia. En este manual y en su electrodoméstico figuran muchos mensajes importantes de seguridad. Lea y cumpla siempre con todos los mensajes de seguridad. Éste es el símbolo de alerta...
Page 36 - INSTRUCCIONES báSICaS dE SEgURIdad; INSTRUCCIONES PaRa La CONExIÓN a TIERRa
w ADVERTENCIA Por su seguridad, debe seguir la información indicada en este manual para minimizar el riesgo de incendio o explosión, descarga eléctrica, o para prevenir daños a la propiedad, lesiones personales o muerte. LEA TODAS LA INSTRUCCIONES ANTES DE USAR INSTRUCCIONES báSICaS dE SEgURIdad w A...
Page 37 - INSTRUCCIONES dE SEgURIdad PaRa La INSTaLaCIÓN
• Consulte las INSTRUCCIONES DE INSTALACIÓN para un procedimiento detallado de conexión a tierra. Junto con la lavadora se encuentran las instrucciones de instalación como referencia. Si cambiará de lugar la lavadora, contrate a una persona del servicio calificada para que la controle y reinstale. S...
Page 38 - INSTRUCCIONES dE SEgURIdad PaRa La UTILISaCIÓN,; GUARDE ESTAS INSTRUCCIONES
I N S T R U C C I O N E S I M P O R T A N T E D E S E G U R I D A D • Desenchufe la lavadora antes de limpiar la misma para evitar el riesgo de descargas eléctricas. • Al limpiar la lavadora nunca utilice químicos de corte, limpiadores abrasivos o solventes. Los mismos dañarán su aspecto. • No coloq...
Page 39 - P I E Z A S Y C A R A C T E R Í S T I C A S; CaRaCTERÍSTICaS ESPECIaLES
P I E Z A S Y C A R A C T E R Í S T I C A S 3 2 1 4 5 CaRaCTERÍSTICaS ESPECIaLES CajÓN dE dEPÓSITO dE dETERgENTE Este cajón de tres compartimentos proporciona dispensadores independientes para el detergente del prelavado, del lavado principal y del suavizante. PaNTaLLa dE LEd dEL PaNEL dE CONTROL Lo...
Page 40 - I N S T R U C C I O N E S P A R A L A I N S T A L A C I Ó N; ESCOja EL LUgaR adECUadO; Tomacorriente
I N S T R U C C I O N E S P A R A L A I N S T A L A C I Ó N ESCOja EL LUgaR adECUadO ESPaCIOS dE INSTaLaCIÓN Deje por lo menos 50,3 cm (19,8 pulgadas) al frente de la lavadora para poder abrir la compuerta. Para asegurar que se haya dotado de suficiente espacio para las tuberías de agua y flujo de a...
Page 41 - TIPO dE PISO
I N S T R U C C I O N E S P A R A L A I N S T A L A C I Ó N TIPO dE PISO NOTA: Tome en cuenta que el piso debe ser lo suficientemente fuerte y rígido para soportar el peso de la lavadora cuando se encuentra completamente cargada, sin flexionarse ni rebotar. Si su piso tiene mucha flexión, podría nec...
Page 42 - dESEmbaLajE
I N S T R U C C I O N E S P A R A L A I N S T A L A C I Ó N Si debe asentar la lavadora hacia abajo para quitar los materiales de embalaje de la base, hágalo siempre cuidadosamente sobre su parte lateral. NO asiente la lavadora sobre su parte frontal o posterior. IMPORTANTE: Para prevenir daños en e...
Page 43 - CONExIÓN dE LaS TUbERÍaS dE agUa
I N S T R U C C I O N E S P A R A L A I N S T A L A C I Ó N CONExIÓN dE LaS TUbERÍaS dE agUa Inserte un sello de caucho en las conexiones roscadas en cada manguera. 1 Sello de caucho Manguera de agua (a la llave) Sello de caucho Manguera de agua (a la conexión de agua en la lavadora) 3 Conecte la tu...
Page 44 - CONExIÓN dE La TUbERÍa dE dRENajE; Opción 1: Tubo vertical
I N S T R U C C I O N E S P A R A L A I N S T A L A C I Ó N CONExIÓN dE La TUbERÍa dE dRENajE Stand Pipe Tie Strap Enganche el extremo de la manguera en la abrazadera del codo. Inserte el extremo de la manguera de drenaje en el tubo vertical. Utilice la correa para asegurar la manguera en su lugar. ...
Page 45 - NIvELaCIÓN dE La LavadORa
I N S T R U C C I O N E S P A R A L A I N S T A L A C I Ó N NIvELaCIÓN dE La LavadORa 2 Coloque la lavadora en el lugar final, tomando la precaución especial de no apretar, forzar ni aplastar las tuberías de drenaje y agua. Coloque un nivelador en la parte superior de la lavadora. 1 Patas niveladora...
Page 46 - CLaSIfICaCIÓN dE LaS CaRgaS dE LavadO; C Ó M O U S A R; Carga de la lavadora
CLaSIfICaCIÓN dE LaS CaRgaS dE LavadO C Ó M O U S A R Etiquetas de cuidado de las telas La mayoría de las prendas de vestir tienen etiquetas de cuidado de las telas para lograr un cuidado adecuado. agrupamiento de prendas similares Para obtener los mejores resultados, clasifique las prendas en carga...
Page 47 - SELECCIÓN dE dETERgENTE
C Ó M O U S A R SELECCIÓN dE dETERgENTE dETaLLES SObRE EL dEPÓSITO El cajón de suministro automático consiste en 4 compartimentos que almacenan: • Suavizante líquido de telas. • Detergente líquido o en polvo para el prelavado.• Detergente líquido o en polvo y cloro a prueba de decoloramiento para el...
Page 48 - CaRga dEL dEPÓSITO; Compartimiento de detergente; Compartimiento del suavizante
C Ó M O U S A R CaRga dEL dEPÓSITO Compartimiento de detergente para prelavado Agregue el detergente líquido o en polvo a este compartimiento cuando se usa la opción de Prewash (prelavado). Use siempre detergente tipo HE (de alta eficiencia) con su lavadora.• La cantidad de detergente que se deberá ...
Page 49 - CaRaCTERÍSTICaS dEL PaNEL dE CONTROL
C Ó M O U S A R CaRaCTERÍSTICaS dEL PaNEL dE CONTROL bOTÓN dE ENCENdIdO/aPagadO Apriete el botón para ENCENDER la lavadora. Apriete nuevamente para APAGAR la lavadora. NOTA: Apretar el botón de ENCENDIDO/ APAGADO durante un ciclo cancelará ese ciclo y borrará cualquier programación de carga. PERILLa...
Page 50 - GUÍA DE CICLOS
C Ó M O U S A R GUÍA DE CICLOS NOTA: Para proteger sus prendas de vestir, no todas las temperaturas de lavado/enjuague, velocidades de centrifugado, niveles de suciedad u opciones están disponibles en cada ciclo. La guía de ciclos indicada más aba jo muestra las opciones y tipos de telas recomendada...
Page 51 - La PaNTaLLa dE LEd; IdICadOR dE COmPLETaCIÓN dE CICLO
C Ó M O U S A R La PaNTaLLa dE LEd IdICadOR dE COmPLETaCIÓN dE CICLO Esta parte de la pantalla muestra que etapa del ciclo de lavado se esta realizando actualmente (SENSOR DE CARGA, LAVADO, ENJUAGUE o GIRO). ESTImaTEd TImE REmaININg (ESTImadO TIEmPO RESTaNTE) Cuando se aprieta el botón INICIO/PAUSA,...
Page 52 - fUNCIONamIENTO dE La LavadORa
C Ó M O U S A R fUNCIONamIENTO dE La LavadORa Apriete el botón de ENCENDIDO/APAGADO para encender la lavadora. Las luces alrededor de la perilla selectora de ciclos se iluminarán. Gire la perilla selectora al ciclo deseado. La pantalla mostrará el preajuste programado de Rinse/Wash Temperature (temp...
Page 53 - bOTONES dE ajUSTE dE CICLO
SPIN SPEEd (velocidad de centrifugado) El tambor de la lavadora entrifuga a 1.300 r.p.m. Esto reduce el ciclo de secado y ahorra energía. Gire el mando SPIN SPEED hasta que se encienda el indicador del ajuste deseado. Algunas telas, como las delicadas, requieren una velocidad de centrifugado mas len...
Page 54 - bOTONES dE OPCIÓN dE CICLO; Para añadir opciones de ciclo al ciclo:
C Ó M O U S A R bOTONES dE OPCIÓN dE CICLO Su lavadora dispone de varias opciones de ciclo adicionales, las cuales personalizan los ciclos para cumplir con sus necesidades individuales. Ciertos botones de opción también incorporan una función especial (vea la siguiente página para obtener mayor info...
Page 55 - fUNCIONES ESPECIaLES
fUNCIONES ESPECIaLES Los botones de función también activan funciones especiales, incluyendo CHILD LOCK (cerr.niñ), TUB CLEAN (lavar de tonel). Apriete y mantenga apretado el botón de opción marcado con la función especial por 3 segundos para activar. TUb CLEaN (lavar de tonel) Puede ocurrir la acum...
Page 56 - M A N T E N I M I E N TO Y L I M P I E Z A; Limpieza del exterior; LImPIEZa REgULaR; mantenimiento y limpieza del interior
M A N T E N I M I E N TO Y L I M P I E Z A 56 w ADVERTENCIA: • Desenchufe la lavadora antes de limpiar la misma para evitar el riesgo de descargas eléctricas. Si no se cumple con esta advertencia se podrán producir heridas graves, incendios, descargas eléctricas o muerte. • Al limpiar la lavadora nu...
Page 58 - LImPIEZa dE La LavadORa; Limpieza del depósito
M A N T E N I M I E N TO Y L I M P I E Z A LImPIEZa dE La LavadORa Limpieza del depósito Se debe limpiar el depósito periódicamente para eliminar la acumulación de detergente y otros productos de lavandería. Tire del cajón de depósito hasta que se detenga. Apriete el botón en el centro del cajón tir...
Page 59 - Limpieza de los filtros de entrada de agua; maNTENImIENTO
Limpieza de los filtros de entrada de agua Si la lavadora detecta que el agua no está ingresando al cajón de depósito, se mostrará un mensaje de error en la pantalla. Si vive en una zona de agua dura, esto puede ser el motivo del taponamiento de los filtros de entrada. IMPORTANTE: Ponga mucho cuidad...
Page 60 - Limpieza del filtro de la bomba de drenaje
M A N T E N I M I E N TO Y L I M P I E Z A Limpieza del filtro de la bomba de drenaje Se pueden acumular pelusas y otros objetos y taponar el filtro de la bomba de drenaje. Si la lavadora no drena adecuadamente, desconéctela y deje enfriar el agua, de ser necesario, antes de continuar. Abra el filtr...
Page 61 - R E S O L U C I Ó N D E P R O B L E M A S; SONIdOS NORmaLES QUE POdRÍa ESCUCHaR; Problema; aNTES dE LLamaR a maNTENImIENTO
R E S O L U C I Ó N D E P R O B L E M A S SONIdOS NORmaLES QUE POdRÍa ESCUCHaR Problema Causas posibles Soluciones Ruidos de traqueteo Sonido de golpes Fugas de agua alrededor de la lavadora • Objetos extraños, tales como llaves, monedas, o imperdibles, pueden encontrarse en el tambor o bomba. • Las...
Page 64 - E S P E C I F I C A C I O N E S / A C C E S O R I O S O P C I O N A L E S; dImENSIONES Y ESPECIfICaCIONES CLavE
E S P E C I F I C A C I O N E S / A C C E S O R I O S O P C I O N A L E S dImENSIONES Y ESPECIfICaCIONES CLavE modelo Wm1355H* Descripción Lavadora de carga frontal Requisitos eléctricos 120 V CA a 60 Hz. Presión de agua máx. 4,5~145 libras por pulgada cuadrada (30~1000 kPa) Dimensiones 60,96 cm (an...
Page 65 - GARANTÍA LIMITADA DE LA LAVADORA LG – EE. UU.; PARA CONTACTAR A LG ELECTRONICS
Su máquina lavadora LG será reparada o reemplazada, a discreción de LG, si se comprueba que existe un defecto en el material o la mano de obra bajo condiciones de uso normales, durante el período de garantía (“Período de garantía”) establecido más abajo, vigente desde la fecha (“Fecha de compra”) de...
Page 66 - M E M O