Page 2 - Washing Machine; 4 HOURS A DAY, 7 DAYS A WEEK FOR LG CUSTOMER SERVICE
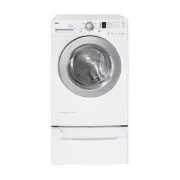
Owner's Manual WM2016CW Please read this manual carefully. It provides instructions on safe installation, use, and maintenance.Retain it for future reference.Record the model and serial numbers of your machine and report this information to your dealer if your machinerequires service. Washing Machin...
Page 3 - Direct Drive System; Tilted drum and extra large opening make it possible to load; Automatic Wash Load Detection; Automatically detects the load and optimizes the washing time.; Child Lock
PRODUCT FEATURES 2 CONTENTS ■ Direct Drive System The advanced Brushless DC motor directly drives the drum without belt and pulley. ■ Tilted Drum and Extra Large Door Opening Tilted drum and extra large opening make it possible to load and unload clothing more easily. ■ Automatic Wash Load Detection...
Page 4 - IMPORTANT SAFETY INFORMATION; READ ALL INSTRUCTIONS BEFORE USE; GROUNDING INSTRUCTIONS; WARNING
IMPORTANT SAFETY INFORMATION ENGLISH 3 READ ALL INSTRUCTIONS BEFORE USE WARNING! For your safety, the information in this manual must be followed to minimize the risk of fire orexplosion, electric shock, or to prevent property damage, personal injur y, or loss of life. IIM MP PO OR RT TA AN NT T S S...
Page 5 - T id; SPECIFICATIONS; Accessories; Front-loading Washing Machine; Specifications subject to change by manufacturer.
Hose retainer Hot/Cold (1 each) Hose Wrench T id e for removing shipping bolts and leveling the washer Tie strap to secure drain hose to standpipe, inlet hose, or laundry tub Cap (4 each) to cover the holes created afterremoving the shipping bolts WASH WASH, EST. TIM E EST. TIME , SPIN SPIN, 울 란 제 리...
Page 6 - INSTALLATION INSTRUCTIONS; Shipping bolts
5 INSTALLATION INSTRUCTIONS ENGLISH 1. To prevent internal damage during transport, 4 locking bolts are installed. Before operatingthe washer, remove the bolts and braces. • If they are not removed, it may cause severe vibration, noise, and malfunction. 3. Take out the 4 bolts and braces by twisting...
Page 7 - Installation clearances
INSTALLATION INSTRUCTIONS 6 ■ Installation clearances The location must be large enough to fully open the washer door. ■ Washer dimensions • Most installations require a minimum 4 in. (10 cm) clearance behind the washer. ■ Minimum installation spacing forrecessed area installation. The following dim...
Page 8 - Connecting water supply hose; Electrical connection; CAUTION! Concerning the Power Cord
INSTALLATION INSTRUCTIONS ENGLISH 7 • Water supply pressure must be between 14.5 and 116 psi(100~800 kPa). • Do not crossthread when connecting inlet hose to the valve. • If the water supply pressure is more than 116 psi, a pressure reducing device should be installed. • Two Sealing washers are supp...
Page 9 - Installation of drain hose
INSTALLATION INSTRUCTIONS 8 ■ Installation of drain hose WASH EST. TIME SPIN WASH WASH EST. TIME EST. TIME SPIN SPIN WASH WASH EST. TIME SPIN SPIN WASH EST. TIME SPIN WASH WASH, EST. TIME EST. TIME, SPIN SPIN, • The drain hose should not be placed higher than 96 in. from the bottom of the washer. • ...
Page 10 - Level adjustment
INSTALLATION INSTRUCTIONS ENGLISH 9 ■ Level adjustment • Leveling the washing machine properly prevents excessive noise and vibration.Install the appliance on a solid and level floor surface,preferably in a corner of the room. • If the floor is uneven, adjust the adjustable feet as required. (Do not...
Page 11 - PREPARATION BEFORE WASHING; Fabric Care Labels; Check before loading; INSTRUCTIONS before operating this appliance.
PREPARATION BEFORE WASHING 1 0 1. Fabric Care Labels Look for a care label on your clothes. This will tell you about the fabric content of your garment and how it shouldbe washed. 2. Sorting To get the best results, sort clothes into loads that can be washed with the same wash cycle.Different fabric...
Page 12 - USING THE DISPENSER; About detergent; Prewash Detergent Compartment
USING THE DISPENSER ENGLISH 1 1 The automatic dispenser consists of four compartments which hold 1) liquid chlorine bleach, 2) liquid fabricsoftener, 3) liquid or powdered detergent for prewash and 4) liquid or powdered detergent and color safe bleach for main wash.All laundry products can be added ...
Page 13 - Main Wash Detergent Compartment
USING THE DISPENSER 1 2 • Add measured detergent to this compartment for Main wash. Detergent is flushed from thedispenser at the beginning of the cycle. Eitherpowdered or liquid detergent can be used. • Liquid or powdered color-safe bleach may be added to the main wash compartment along withthe sam...
Page 14 - CYCLES; Stain
CYCLES ENGLISH 1 3 ■ Select cycles designed for different types of fabric and soil levels. Extra High No Spin Low Medium High High Extra High No Spin Low Medium Medium High No Spin Low Medium No Spin Low Low MediumNo Spin Tap Cold/Cold Tap Cold/Cold Tap Cold/Cold Tap Cold/Cold Tap Cold/Cold Stain Cy...
Page 15 - HOW TO USE THE WASHER
HOW TO USE THE WASHER 1 4 • Rotate the Cycle selector knob to select cycle designed for different types of fabric and soillevels. • Each cycle has a preset Water Temperature, Spin Speed, Soil Level, and Option (See page 13). • The preset settings can be changed anytime before Start. NOTE: This front...
Page 16 - LED DISPLAY; ESTIMATED TIME REMAINING
HOW TO USE THE WASHER ENGLISH 1 5 • Press repeatedly to adjust the volume of the Beeper. 11. Beeper • Select a water temperature based on the type of load you are washing. • Follow the fabric care label and chart below for best results. • Warm rinses leave the loads dryer than cold rinses. Warm rins...
Page 17 - CHILD LOCK; STATUS INDICATOR
HOW TO USE THE WASHER CHILD LOCK DOOR LOCKED 1 6 • Lights whenever the door of the washer is locked. • The door can be unlocked by pressing the Start/Pause button to stop the washer. NOTE: If the water temperature or the level is too high, the door cannot be unlocked. Do not try to force the door op...
Page 18 - MAINTENANCE; The water inlet filter; CAUTION; Be careful when draining if the water is hot.
ENGLISH 1 7 MAINTENANCE 2 3 1 ■ The water inlet filter • " " error message will blink on the control panel when water does not enter the dispenser.• If your water is very hard or contains traces of lime deposit, the water inlet filter may become clogged. We recommend cleaning it every few mo...
Page 19 - The washing drum
1 8 MAINTENANCE ■ Cleaning the Dispenser• The dispenser may need to be cleaned periodically due to laundry additive build-up. • Run warm water and use a soft brush or cloth on the drawer, liquid detergent box and inserts to remove any excesslaundry additives. • Clean the drawer opening using water a...
Page 20 - Cleaning your washer; Winterizing instructions
ENGLISH 1 9 MAINTENANCE ■ Cleaning your washer 1. Exterior Proper care of your washer can extend its life.The outside of the machine can be cleaned with warm water and a neutral, non-abrasive household detergent.Immediately wipe off any spills. Wipe with a damp cloth.Try not to damage the surface wi...
Page 21 - TROUBLESHOOTING GUIDE; Problem
2 0 TROUBLESHOOTING GUIDE ✽ This washing machine is equipped with automatic safety functions which detect and diagnose problems at anearly stage and react appropriately. When the machine does not function properly or does not function at all,check the following points before you call the Service Dep...
Page 25 - NOTES
Page 26 - Lavadora
2 5 MANUAL DELPROPIETARIO WM2016CW Lea este manual cuidadosamente. Le proveerá instrucciones para una instalación, uso y mantenimientoseguros. Consérvelo para futuras referencias. Cite estainformación a su proveedor si requiere de servicio. Lavadora ☎ ☎ 1-800-243-0000 para el Servicio LG (Atención a...
Page 27 - Sistema DD Invertidor.; Automáticamente detecta la carga y optimiza el tiempo de lavado.; LA PANTALLA DE LED
CARACTERÍSTICAS DEL PRODUCTO CONTENIDO ■ Sistema DD Invertidor. El avanzado motor de DC sin cepillo que mueve directamente elcilindro sin cinturón ni polea. ■ Cilindro Inclinado y Abertura Extra Grande. El cilindro inclinado y la abertura extra grande, hacen màs fácil la carga y descarga. ■ Detecció...
Page 28 - INSTRUCCIONES DE CONECCIONA TIERRA
INFORMACIÓN IMPORTANTE DE SEGURIDAD LEA TODAS LAS INSTRUCCIONES ANTES DE USARLA. ADVERTENCIA! Para su seguridad, la información en este manual debe ser seguida para minimizar el riesgo de incendio óexplosión, descarga eléctrica, ó para prevenir daños a su propiedad, a su persona ó pérdida de la vida...
Page 29 - ESPECIFICACIONES; Máquina Lavadora de Carga por el Frontal; Especificaciones sujetas a cambio por el fabricante.; Atrás de la Lavadora; ACCESORIOS
2 8 WASH WASH, EST. TIM E EST. TIME , SPIN SPIN, 울 란 제 리 란 제 리 ESPECIFICACIONES ■ Nombre: Máquina Lavadora de Carga por el Frontal ■ Suministro de Energía: 120V ~ 60Hz ■ Dimensiones: 68.6 cm (Ancho) X 75.6 cm (Profundidad) X 98.3 cm (Altura), 129.1 cm (P, puerta abierta) 27 ” (A) X 29 3/ 4 ” (P) X 3...
Page 30 - INSTRUCCIONES DE INSTALACIÓN; Pernos de Transportación; ADVERTENCIA
INSTRUCCIONES DE INSTALACIÓN ESPAÑOL 2 9 1. Cuatro pernos están instalados para proteger lalavadora durante el transporte. Antes de operarla lavadora, retire los pernos y abrazaderas. • Si no son retirados, pueden causar fuertes vibraciones, ruido y mal funcionamiento. 3. Retire los 4 pernos y abraz...
Page 31 - Espacios Libres de instalación
INSTRUCCIONES DE INSTALACIÓN ■ Espacios Libres de instalación El lugar debe ser lo suficientemente grande para abrir en su totalidad la puerta de la lavadora. ■ Dimensiones de la lavadora • La mayoría de las instalaciones requieren un mínimo de 10 cm. Libres detrás de la lavadora. ■ Espacio mínimo d...
Page 32 - Conectando la manguera de suministro de agua.; Conexión Eléctrica; PRECAUCIÓN! Relacionado al Cordòn de Poder
INSTRUCCIONES DE INSTALACIÓN • La presión de suministro de agua debe estar entre 14.5 y 116 psi (100 y 800 kPa). • No corte ni desgarre la manguera de entrada a la válvula.• Si la presión de suministro de agua es mayor a 116 psi, deberá instalarse un dispositivo reductor depresión. • Dos empaques se...
Page 33 - Instalación de la Manguera de Desagüe
3 2 INSTRUCCIONES DE INSTALACIÓN ■ Instalación de la Manguera de Desagüe • La manguera de desagüe no debe ubicarse a mas de 96" desde la base de la lavadora. • Asegurar adecuadamente la manguera de desagüe protegerá su piso de daños debidos afugas de agua. • Ubique el extremo de la manguera de d...
Page 34 - Nivelar
WASH WASH, EST. TIME EST. TIME, SPIN SPIN, WASH WASH EST. TIME EST. TIME SPIN SPIN WASH WASH EST. TIME EST. TIME SPIN SPIN INSTRUCCIONES DE INSTALACIÓN ■ Nivelar Pie ajustable Tuerca de seguro Alto Bajo Pie ajustable Pie ajustable ESPAÑOL 3 3 • Nivelar correctamente la lavadora previene el ruido y l...
Page 35 - PREPARACIÓN ANTES DE LAVAR; Etiquetas de Cuidado; Verifique antes de Cargar; Importantes de Seguridad antes de operar este aparato.
3 4 PREPARACIÓN ANTES DE LAVAR 1. Etiquetas de Cuidado Busque etiquetas de cuidado en sus prendas. Esto le dirá sobre el contenido de las telas de su ropa y comodebe ser lavada. 2. Clasificando Para obtener los mejores resultados, clasifique al ropa en cargas que puedan ser lavadas con el mismo cicl...
Page 36 - USANDO EL DISTRIBUIDOR; Acerca del Detergente; Compartimiento de Detergente para Prelavado
USANDO EL DISTRIBUIDOR El distribuidor automático consiste de cuatro compartimentos que retienen 1) cloro líquido blanqueador, 2)suavizante de telas líquido, 3) detergente líquido ó en polvo para el prelavado y 4) detergente en polvo ó líquido yblanqueador seguro para los colores para el lavado prin...
Page 37 - Compartimiento de Detergente del; Compartimiento de Suavizante de Telas
3 6 USANDO EL DISTRIBUIDOR • Añada el detergente con medida a este compartimiento para el lavado Principal. El detergente es drenado del distribuidor alcomenzar el ciclo. Puede usarse tanto detergentelíquido como en polvo. • Puede añadirse blanqueador que cuide los colores al compartimiento del Lava...
Page 38 - CICLOS
CICLOS ■ Usted puede seleccionar ciclos diseñados para diferentes tipos de telas y niveles de suciedad. ESPAÑOL 3 7 Ciclo Algodón, Lino, Toallas, Camisetas O O O O O O Algodón/ Toallas (Cotton/ Towels) Tibia/Fría Extra Alto Normal Tibia/Tibia Caliente/Fría Ligeramente Fría/Fría Fría/Fría No Exprimid...
Page 39 - COMO USAR LA LAVADORA; Selector de Ciclo
• SPINSENSE puede ser usado cuando el piso es de madera o cuando uno tiene la preocupacíón de que vibre la lavadora. • Presione el botón Stain cycle por 3 seg para operar SPINSENSE • Cuando se escoge la opción de Spin Speed la luz en el botón se encenderá y apagará continuamente. • Presione el botón...
Page 40 - Nivel de Suciedad; INDICADOR DE SEGURO DE LA COMPUERTA
COMO USAR LA LAVADORA • Use este botón para activar o apagar la Alarma. 11. Beeper • Para cambiar el nivel de suciedad, presione el botón de Nivel de Suciedad (Soil Level) repetidamente hasta que el nivel deseado se hayaconseguido. 10. Nivel de Suciedad (Soil Level) • Seleccione la temperatura del a...
Page 41 - TIEMPO RESTANTE ESTIMADO; INDICADOR DE ESTADO
OPCIONES (OPTION) SEGURO PARA NIÑOS (CHILD LOCK) PUERTA ASEGURADA (DOOR LOCKED) • Use esta opción para cargas que requieran tratamiento previo. Añade 16 minutos de prelavado y desagüe. NOTA: Cuando use la opción de Prelavado, no use detergente líquido en el compartimiento deLavado Principal. Use det...
Page 42 - MANTENIMIENTO; El Filtro de Entrada de Agua.; PRECAUCIÓN; retirar fibras u objetos.
MANTENIMIENTO 2 3 ■ El Filtro de Entrada de Agua. • El mensaje de error “ ”parpadeará en el panel de control cuando no entre agua al compartimiento de detergente. • Si su agua es muy dura ó contiene residuos de cal, el filtro de entrada de agua puede obstruirse. De tal modo que resulta bueno limpiar...
Page 43 - El Cilindro de Lavado
MANTENIMIENTO ■ Limpiando el Distribuidor• El distribuidor puede necesitar que lo limpie periódicamente debido a los residuos de los aditivos de lavandería. • Ponga agua caliente junto con un cepillo suave o alguna prenda sobre el cajón, para eliminar los excesos de detergente y cualquier aditivo de...
Page 44 - Limpiando su Lavadora; LAVAR DE TONEL; demasiado puede ocasionar goteras dentro de la lavadora.; Instrucciones de Invierno
MANTENIMIENTO ■ Limpiando su Lavadora 1. Exterior El cuidado adecuado de su lavadora puede extender su vida.El exterior de la máquina puede ser limpiado con agua tibia y un detergente casero neutral, no-abrasivo.Limpie inmediatamente cualquier derrame. Limpie con un trapo húmedo.Trate de no golpear ...
Page 45 - GUÍA PARA LA LOCALIZACIÓN DE PROBLEMAS; Problema
GUÍA PARA LA LOCALIZACIÓN DE PROBLEMAS ✽ Esta lavadora está equipada con funciones de seguridad automáticas que detectan y diagnostican fallastempranamente y reaccionan apropiadamente. Cuando la máquina no funcione apropiadamente ó no funcionepara nada, verifique los puntos siguientes antes de llama...
Page 48 - GARANTÍA; Grantía Limitada En Los Estados Unidos De Lavadora LG
GARANTÍA Su lavadora LG será reparada o reemplazada, a consideración de LG, si prueba ser defectuosa en material o en ejecución dentro deun uso normal, dentro del periodo de garantía ("periodo de garantía") descrito en la parte inferior, efectivo desde la fecha ("fecha decompra") de ...