Page 2 - CAUTION; IMPORTANT
The exclamation point within an equilateral triangle is intended to alert the user to the presence of important operating and maintenance (servicing) instructions in the literature accompanying the appliance. The lightning flash with arrowhead symbol, within an equilateral triangle, is intended toal...
Page 3 - Operating Environment
Information for users on collection and disposal of old equipment and used batteries These symbols on the products, packaging, and/or accompanying documents mean that used electrical and electronic products and batteries should not be mixed with general household waste. For proper treatment, recover...
Page 4 - Contents
4 En Thank you for buying this Pioneer product. Please read through these operating instructions so you will know how to operate your model properly. After you have finished reading the instructions, put them away in a safe place for future reference. Contents Flow of settings on the receiver . . 6 ...
Page 5 - 8 Making recordings; Bluetooth; 1 Additional information
English Italiano Français N ederlands Es pañol Deut sc h English Français Deutsch Nederlands Italiano Español 5 En 08 Making recordings Making an audio or a video recording . . . . . . 52 09 Controlling the rest of your system Setting the remote to control other components . . . . . . . . . . . . . ...
Page 6 - Flow of settings on the receiver; procedure below to make the connections and; (When using connections other than the
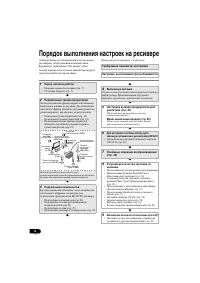
6 En Flow of settings on the receiver The unit is a full-fledged AV receiver equipped with an abundance of functions and terminals. It can be used easily after following the procedure below to make the connections and settings. The colors of the steps indicate the following: Required setting item Se...
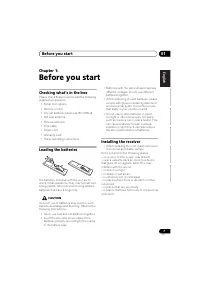
Page 7 - English; Before you start; Checking what’s in the box; Installing the receiver
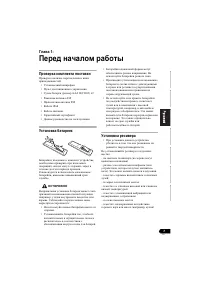
Before you start 01 7 En English Français Deutsch Nederlands Italiano Español Chapter 1: Before you start Checking what’s in the box Please check that you’ve received the following supplied accessories: • Setup microphone• Remote control• Dry cell batteries (AAA size IEC R03) x2• AM loop antenna• FM...
Page 8 - Ventilation; Receiver
Before you start 01 8 En Ventilation When installing this unit, make sure to leave space around the unit for ventilation to improve heat dispersal (at least 40 cm at the top). If not enough space is provided between the unit and walls or other equipment, heat will build up inside, interfering with p...
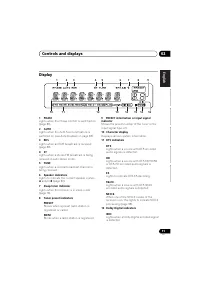
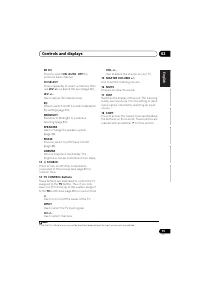
Page 9 - Controls and displays; Front panel; Operating range of remote control
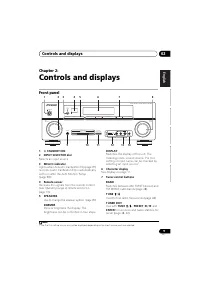
Controls and displays 02 9 En English Français Deutsch Nederlands Italiano Español Chapter 2: Controls and displays Front panel 1 STANDBY/ON 2 INPUT SELECTOR dial Selects an input source. 3 MCACC indicator Lights when Acoustic Calibration EQ (page 37) is on (Acoustic Calibration EQ is automaticall...
Page 10 - Auto playback
Controls and displays 02 10 En PRESET / Use to select preset radio stations (page 49). 8 MASTER VOLUME dial 9 PHONES jack Use to connect headphones. When the headphones are connected, there is no sound output from the speakers (page 41). 10 Listening mode buttons AUTO/DIRECT Switches between Auto ...
Page 11 - Display
Controls and displays 02 11 En English Français Deutsch Nederlands Italiano Español Display 1 PHASE Lights when the Phase Control is switched on (page 36). 2 AUTO Lights when the Auto Surround feature is switched on (see Auto playback on page 33). 3 RDS Lights when an RDS broadcast is received (page...
Page 12 - Listening in
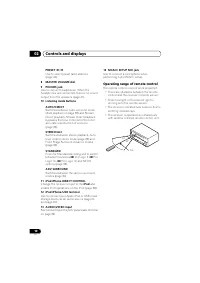
Controls and displays 02 12 En 2 D + Lights when a source with Dolby Digital Plus encoded audio signals is detected. 2 HD Lights when a source with Dolby TrueHD encoded audio signals is detected. EX Lights to indicate Dolby Digital EX decoding. 2 PLll(x) Lights to indicate 2 Pro Logic II / 2 Pro Log...
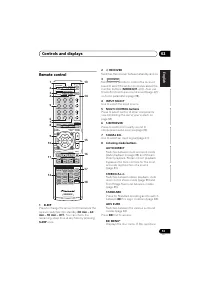
Page 13 - Remote control; Controlling the rest of your system; RECEIVER
Controls and displays 02 13 En English Français Deutsch Nederlands Italiano Español Remote control 1 SLEEP Press to change the amount of time before the receiver switches into standby ( 30 min – 60 min – 90 min – Off ). You can check the remaining sleep time at any time by pressing SLEEP once. 2 R...
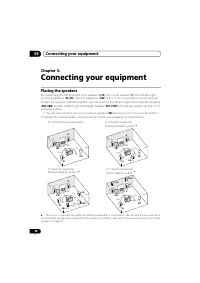
Page 16 - Connecting your equipment; Placing the speakers; By connecting the left and right front speakers (; Connect the surround back or front height
Connecting your equipment 03 16 En Chapter 3: Connecting your equipment Placing the speakers By connecting the left and right front speakers ( L / R ), the center speaker ( C ), the left and right surround speakers ( SL / SR ), and the subwoofer ( SW ), a 5.1 ch surround system can be enjoyed. Furth...
Page 17 - Hints on the speaker placement; Setting the Up Mix; PRE OUT SURR BACK/FRONT; Connect; HEIGHT; The Pre Out Setting
Connecting your equipment 03 17 En English Français Deutsch Nederlands Italiano Español Hints on the speaker placement Where you put your speakers in the room has a big effect on the quality of the sound. The following guidelines should help you to get the best sound from your system. • The subwoofe...
Page 18 - Switching the speaker; SP; Switching the speaker system
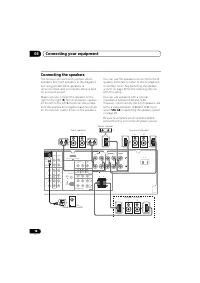
Connecting your equipment 03 18 En Connecting the speakers The receiver will work with just two stereo speakers (the front speakers in the diagram) but using at least three speakers is recommended, and a complete setup is best for surround sound. Make sure you connect the speaker on the right to the...
Page 19 - Bare wire connections
Connecting your equipment 03 19 En English Français Deutsch Nederlands Italiano Español Bare wire connections A-Speaker terminals: 1 Twist exposed wire strands together. 2 Loosen terminal and insert exposed wire. 3 Tighten terminal. B-Speaker terminals: 1 Twist exposed wire strands together. 2 Push ...
Page 20 - Making cable connections; Important; HDMI cables; HDMI cable
Connecting your equipment 03 20 En Switching the speaker system Three speaker system settings are possible using the SPEAKERS button. • Use the SPEAKERS button on the front panel to select a speaker system setting. 1 Press repeatedly to choose a speaker system option: • SP A – Sound is output from...
Page 21 - About HDMI; Standard RCA video cables
Connecting your equipment 03 21 En English Français Deutsch Nederlands Italiano Español About HDMI The HDMI connection transfers uncompressed digital video, as well as almost every kind of digital audio that the connected component is compatible with, including DVD- Video, DVD-Audio, SACD, Dolby Dig...
Page 22 - About video outputs connection; HDMI OUT
Connecting your equipment 03 22 En Component video cables Use component video cables to get the best possible color reproduction of your video source. The color signal of the TV is divided into the luminance ( Y ) signal and the color ( P B and P R ) signals and then output. In this way, interferenc...
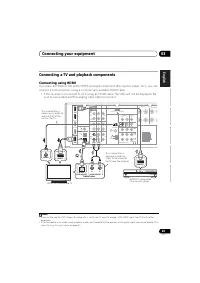
Page 23 - Connecting a TV and playback components; Connecting using HDMI; sure to use a standard RCA analog video cable to connect.
Connecting your equipment 03 23 En English Français Deutsch Nederlands Italiano Español Connecting a TV and playback components Connecting using HDMI If you have an HDMI or DVI (with HDCP) equipped component (Blu-ray disc player, etc.), you can connect it to this receiver using a commercially availa...
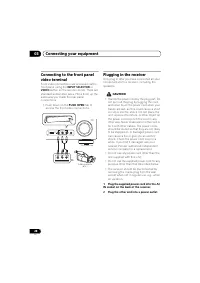
Page 24 - Connecting your component with no HDMI terminal; HDMI terminal to the receiver.
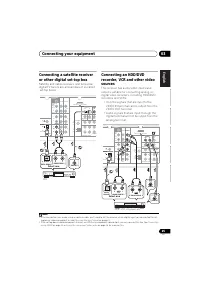
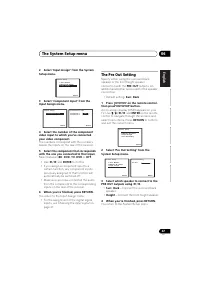
Connecting your equipment 03 24 En Connecting your component with no HDMI terminal This diagram shows connections of a TV and DVD player (or other playback component) with no HDMI terminal to the receiver. 123 Note 1 If the connection was made using an optical cable, you’ll need to tell the receiver...
Page 26 - The Input Assign menu
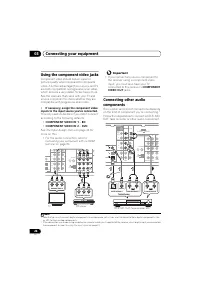
Connecting your equipment 03 26 En Using the component video jacks Component video should deliver superior picture quality when compared to composite video. A further advantage (if your source and TV are both compatible) is progressive-scan video, which delivers a very stable, flicker-free picture. ...
Page 27 - Connecting antennas; Push open the tabs, then insert one wire; Using external antennas; To improve FM reception
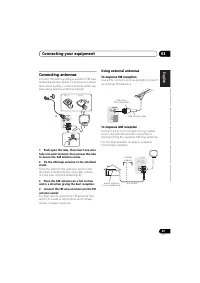
Connecting your equipment 03 27 En English Français Deutsch Nederlands Italiano Español Connecting antennas Connect the AM loop antenna and the FM wire antenna as shown below. To improve reception and sound quality, connect external antennas (see Using external antennas below). 1 Push open the tabs,...
Page 29 - Basic Setup; iPod USB
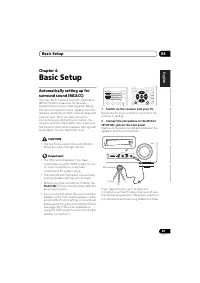
Basic Setup 04 29 En English Français Deutsch Nederlands Italiano Español Chapter 4: Basic Setup Automatically setting up for surround sound (MCACC) The Auto Multi-Channel Acoustic Calibration (MCACC) setup measures the acoustic characteristics of your listening area, taking into account ambient noi...
Page 30 - Other
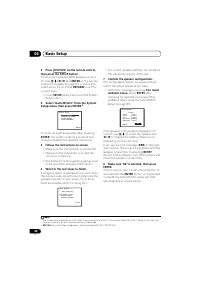
Basic Setup 04 30 En 3 Press on the remote control, then press the SETUP button. An on-screen display (OSD) appears on your TV. Use /// and ENTER on the remote control to navigate through the screens and select menu items. Press RETURN to exit the current menu. • Press SETUP at any time to exit ...
Page 31 - The Auto MCACC Setup has finished!
Basic Setup 04 31 En English Français Deutsch Nederlands Italiano Español A progress report is displayed on-screen while the receiver outputs more test tones to determine the optimum receiver settings for channel level, speaker distance, and Acoustic Calibration EQ. Again, try to be as quiet as poss...
Page 32 - Listening to your system; Basic playback
Listening to your system 05 32 En Chapter 5: Listening to your system Important • The listening modes and many features described in this section may not be available depending on the current source, settings and status of the receiver. Basic playback Here are the basic instructions for playing a so...
Page 33 - With two channel sources
Listening to your system 05 33 En English Français Deutsch Nederlands Italiano Español Auto playback The simplest, most direct listening option is the Auto Surround feature. With this, the receiver automatically detects what kind of source you’re playing and selects multichannel or stereo playback a...
Page 34 - With multichannel sources; Using the Advanced surround effects
Listening to your system 05 34 En With multichannel sources , you can select from: • DOLBY PLIIz HEIGHT – Up to 7.1 channel sound 1 • Straight Decode – Plays back without the DOLBY PLIIz HEIGHT effects. When the surround back speaker is connected. 2 If you connected surround back speakers, see also ...
Page 35 - Listening in stereo; Using Front Stage
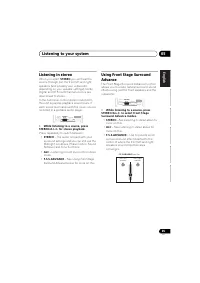
Listening to your system 05 35 En English Français Deutsch Nederlands Italiano Español Listening in stereo When you select STEREO you will hear the source through just the front left and right speakers (and possibly your subwoofer depending on your speaker settings). Dolby Digital and DTS multichann...
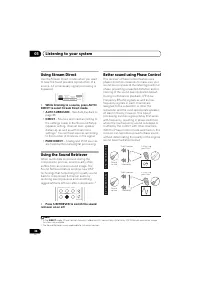
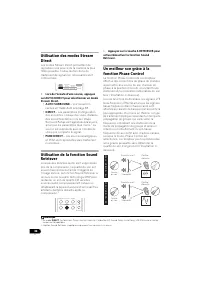
Page 36 - DIRECT to select Stream Direct mode.; Using the Sound Retriever; Press S.RETRIEVER to switch the sound; Better sound using Phase Control
Listening to your system 05 36 En Using Stream Direct Use the Stream Direct modes when you want to hear the truest possible reproduction of a source. All unnecessary signal processing is bypassed. • While listening to a source, press AUTO/ DIRECT to select Stream Direct mode. • AUTO SURROUND – See A...
Page 37 - Automatically
Listening to your system 05 37 En English Français Deutsch Nederlands Italiano Español Phase Control technology provides coherent sound reproduction through the use of phase matching 1 for an optimal sound image at your listening position. The default setting is on and we recommend leaving Phase Con...
Page 38 - UP MIX OFF
Listening to your system 05 38 En • SB AUTO – Matrix decoding processing for generating the surround back component from the surround component is switched automatically. Matrix decoding processing is only performed when surround back channel signals are detected in the input signals. • SB OFF – Mat...
Page 39 - Setting
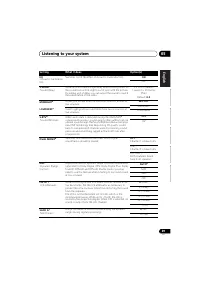
Listening to your system 05 39 En English Français Deutsch Nederlands Italiano Español Setting What it does Option(s) EQ (Acoustic Calibration EQ) Switches on/off the effect of Acoustic Calibration EQ. ON OFF S.DELAY (Sound Delay) Some monitors have a slight delay when showing video, so the soundtra...
Page 40 - amp
Listening to your system 05 40 En a. You can change the MIDNIGHT/LOUDNESS options at any time by using MIDNIGHT button. b. You can change the Sound Retriever feature at any time by using S.RETRIEVER button. c. WMA and MP3 playback available only via iPod/USB input. d. This setting works only with du...
Page 42 - The System Setup menu; Using the System Setup menu
The System Setup menu 06 42 En Chapter 6: The System Setup menu Using the System Setup menu The following section shows you how to make detailed settings to specify how you’re using the receiver, and also explains how to fine-tune individual speaker system settings to your liking. Important • The OS...
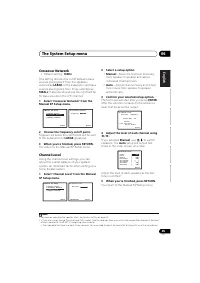
Page 43 - Manual speaker setup; Automatically setting up for surround
The System Setup menu 06 43 En English Français Deutsch Nederlands Italiano Español Manual speaker setup This receiver allows you to make detailed settings to optimize the surround sound performance. You only need to make these settings once (unless you change the placement of your current speaker s...
Page 44 - Tip
The System Setup menu 06 44 En • Center – Select LARGE if your center speaker reproduces bass frequencies effectively, or select SMALL to send bass frequencies to the other speakers or subwoofer. If you didn’t connect a center speaker, choose NO (the center channel is sent to the other speakers). • ...
Page 45 - Crossover Network
The System Setup menu 06 45 En English Français Deutsch Nederlands Italiano Español Crossover Network • Default setting: 100Hz This setting decides the cutoff between bass sounds playing back from the speakers selected as LARGE , or the subwoofer, and bass sounds playing back from those selected as ...
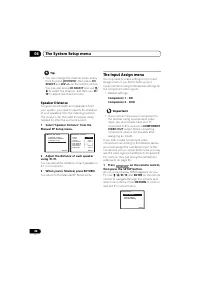
Page 46 - Speaker Distance
The System Setup menu 06 46 En Tip • You can change the channel levels at any time by press , then press CH SELECT and LEV +/– on the remote control. You can also press CH SELECT and use / to select the channel, and then use / to adjust the channel levels. Speaker Distance For good sound depth...
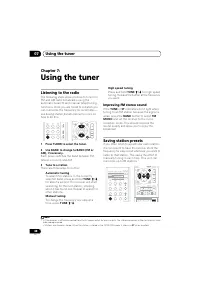
Page 48 - Using the tuner; Listening to the radio; Saving station presets; Saving station presets
Using the tuner 07 48 En Chapter 7: Using the tuner Listening to the radio The following steps show you how to tune in to FM and AM radio broadcasts using the automatic (search) and manual (step) tuning functions. Once you are tuned to a station you can memorize the frequency for recall later— see S...
Page 49 - Naming preset stations; Listening to station presets
Using the tuner 07 49 En English Français Deutsch Nederlands Italiano Español 1 Tune to a station you want to memorize. See Listening to the radio on page 48 for more on this. 2 Press TUNER EDIT. The display shows PRESET , then a blinking MEM and station preset. 3 Press PRESET / to select the stat...
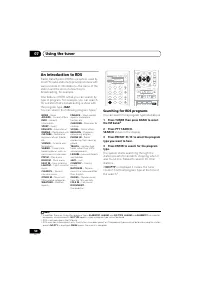
Page 50 - Searching for RDS programs
Using the tuner 07 50 En An introduction to RDS Radio Data System (RDS) is a system used by most FM radio stations to provide listeners with various kinds of information—the name of the station and the kind of show they’re broadcasting, for example.One feature of RDS is that you can search by type o...
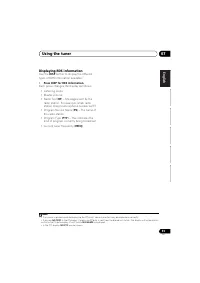
Page 51 - Displaying RDS information
Using the tuner 07 51 En English Français Deutsch Nederlands Italiano Español Displaying RDS information Use the DISP button to display the different types of RDS information available. 1 • Press DISP for RDS information. Each press changes the display as follows: • Listening mode• Master volume• Ra...
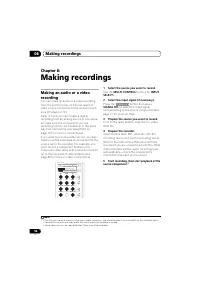
Page 52 - Making recordings
Making recordings 08 52 En Chapter 8: Making recordings Making an audio or a video recording You can make an audio or a video recording from the built-in tuner, or from an audio or video source connected to the receiver (such as a CD player or TV). Keep in mind you can’t make a digital recording fro...
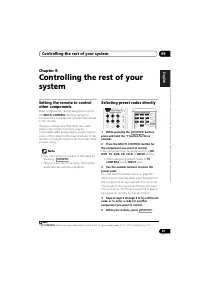
Page 53 - Selecting preset codes directly
Controlling the rest of your system 09 53 En English Français Deutsch Nederlands Italiano Español Chapter 9: Controlling the rest of your system Setting the remote to control other components Most components can be assigned to one of the MULTI CONTROL buttons using the component’s manufacturer prese...
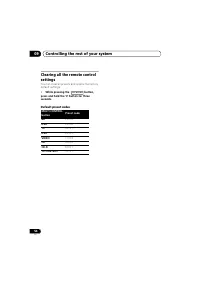
Page 54 - You can clear all presets and restore the factory; While pressing the; Default preset codes; Preset code
Controlling the rest of your system 09 54 En Clearing all the remote control settings You can clear all presets and restore the factory default settings. • While pressing the button, press and hold the ‘0’ button for three seconds. Default preset codes MULTI CONTROL button Preset code BD 2 2 5 5 DVD...
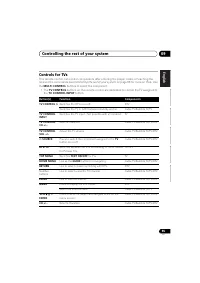
Page 55 - Controls for TVs; receiver the commands (see; MULTI CONTROL; buttons to select the component.; the; TV CONTROL INPUT; Function
Controlling the rest of your system 09 55 En English Français Deutsch Nederlands Italiano Español Controls for TVs This remote control can control components after entering the proper codes or teaching the receiver the commands (see Controlling the rest of your system on page 53 for more on this). U...
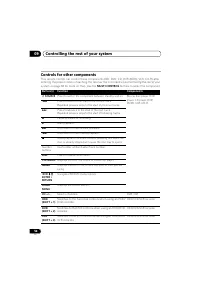
Page 56 - Controlling the rest of your
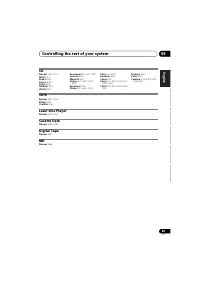
Controlling the rest of your system 09 56 En Controls for other components This remote control can control these components (BD, DVD, CD, DVR (BDR), VCR, CD-R) after entering the proper codes or teaching the receiver the commands (see Controlling the rest of your system on page 53 for more on this)....
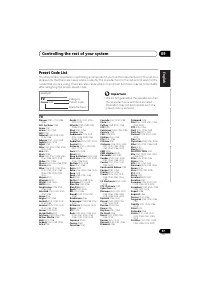
Page 57 - Preset Code List; TV
Controlling the rest of your system 09 57 En English Français Deutsch Nederlands Italiano Español Preset Code List You should have no problem controlling a component if you find the manufacturer in this list, but please note that there are cases where codes for the manufacturer in the list will not ...
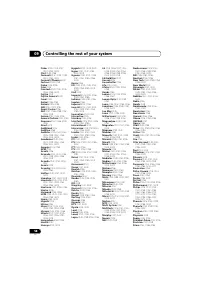
Page 59 - DVD; BD
Controlling the rest of your system 09 59 En English Français Deutsch Nederlands Italiano Español Profex 0142, 0154 Profi-Tronic 0149, 0155 Proline 0149, 0155 Prosonic 0125, 0141, 0152, 0155, 0228, 0229, 0232 Protech 0140, 0141, 0142, 0144, 0149, 0152, 0229 Provision 0152, 0155 Pye 0149, 0152, 0155,...
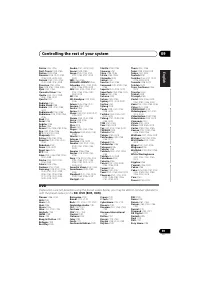
Page 61 - VCR
Controlling the rest of your system 09 61 En English Français Deutsch Nederlands Italiano Español VCR Pioneer 1053, 1108 Adyson 1050 Aiwa 1033, 1034, 1035 Akai 1034 Akiba 1040, 1050 Akura 1034, 1040, 1050 Alba 1035, 1036, 1037, 1040, 1050, 1051 Ambassador 1037 Amstrad 1033, 1050, 1051 Anitech 1040, ...
Page 62 - Satellite Set Top Box
Controlling the rest of your system 09 62 En Satellite Set Top Box Pioneer 6220, 6219, 6204 @sat 6251 @Sky 6238 ABsat 6180 Acoustic Solutions 6217 ADB 6174 Akai 6214 Akura 6228 Alba 6176, 6200, 6180, 6217 Allsat 6214 Alltech 6180 Allvision 6252, 6238, 6199 Amitronica 6180 Ampere 6256, 6261 Amstrad 6...
Page 64 - Cable Set Top Box
Controlling the rest of your system 09 64 En Viola Digital 6232 Vision 6228, 6189 Visionic 6250 Visiosat 6213, 6254, 6180, 6244, 6186, 6191 Vitecom 6244 Volcasat 6245 VTech 6179 Wetekom 6236 Wewa 6176 Wharfedale 6217, 6265, 6218 Wisi 6177, 6256, 6229, 6261, 6176, 6236, 6255, 6230, 6252, 6199 Worldsa...
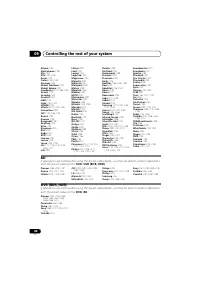
Page 65 - CD
Controlling the rest of your system 09 65 En English Français Deutsch Nederlands Italiano Español CD Pioneer 5000, 5011 AKAI 5043 Asuka 5045 Denon 5019 Fisher 5048 Goldstar 5040 Hitachi 5042 Kenwood 5020, 5021, 5031 Luxman 5049 Marantz 5033 Onkyo 5017, 5018, 5030, 5050 Panasonic 5036 Philips 5022, 5...
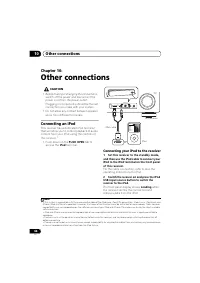
Page 66 - Other connections; Connecting an iPod; PUSH OPEN; Connecting your iPod to the receiver; Set this receiver to the standby mode,
Other connections 10 66 En Chapter 10: Other connections CAUTION • Before making or changing the connections , switch off the power and disconnect the power cord from the power outlet. Plugging in components should be the last connection you make with your system. • Do not allow any contact between ...
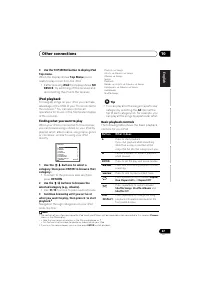
Page 67 - iPod playback; Finding what you want to play; Basic playback controls; Button; Press to set the play and pause modes.
Other connections 10 67 En English Français Deutsch Nederlands Italiano Español 3 Use the TOP MENU button to display iPod Top menu. When the display shows Top Menu you’re ready to play music from the iPod. 1 • If after pressing iPod the display shows NO DEVICE , try switching off the receiver and re...
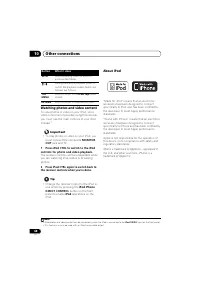
Page 68 - Watching photos and video content; About iPod; Normal; iPod Top; menu; RETURN; Press to return to the previous level.
Other connections 10 68 En Watching photos and video content To view photos or video on your iPod, since video control is not possible using this receiver, you must use the main controls of your iPod instead. 1 Important • To play photos or video on your iPod, you must connect the composite MONITOR ...
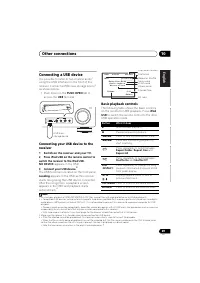
Page 69 - Connecting a USB device
Other connections 10 69 En English Français Deutsch Nederlands Italiano Español Connecting a USB device It is possible to listen to two-channel audio 1 using the USB interface on the front of this receiver. Connect a USB mass storage device 2 as shown below. • Push down on the PUSH OPEN tab to acces...
Page 70 - USB Error; USB messages; Compressed audio compatibility; WMA; Other compatibility information; Apple and iTunes are trademarks of Apple Inc.,; About WMA; Windows Media, and the Windows logo are
Other connections 10 70 En Important If a USB Error message lights in the display, try following the points below: • Switch the receiver off, then on again.• Reconnect the USB device with the receiver switched off. • Select another input source (like BD ), then switch back to iPod USB . • Use a dedi...
Page 71 - ® ADAPTER for; Wireless music play; Remote control operation; Connecting Optional; ADAPTER
Other connections 10 71 En English Français Deutsch Nederlands Italiano Español Bluetooth ® ADAPTER for Wireless Enjoyment of Music Important • Do not move the receiver with the Bluetooth ADAPTER connected. Doing so could cause damage or faulty contact. Wireless music play When the Bluetooth ADAPTER...
Page 73 - Start playback of music contents stored in; wireless technology device.; The following operations are now possible for
Other connections 10 73 En English Français Deutsch Nederlands Italiano Español 3 Start playback of music contents stored in Bluetooth wireless technology device. The following operations are now possible for Bluetooth wireless technology devices, using the remote controller. 1 The Bluetooth ® word ...
Page 74 - Additional information; Troubleshooting; authorized independent service company to carry out repair work.
Additional information 11 74 En Chapter 11: Additional information Troubleshooting Incorrect operations are often mistaken for trouble and malfunctions. If you think that there is something wrong with this component, check the points below. Take a look at the other components and electrical applianc...
Page 75 - Problem
Additional information 11 75 En English Français Deutsch Nederlands Italiano Español No sound from surround or center speakers. • Connect the speakers properly (refer to page 18).• Refer to Speaker Setting on page 43 to check the speaker settings. • Refer to Channel Level on page 45 to check the spe...
Page 77 - Symptom; Cable) to connect this receiver to a component or TV with the
Additional information 11 77 En English Français Deutsch Nederlands Italiano Español HDMI Symptom Remedy No picture or sound. • If the problem still persists when connecting your HDMI component directly to your monitor, please consult the component or monitor manual or contact the manufacturer for s...
Page 78 - Configuration; iPod messages; Select a different category.
Additional information 11 78 En Important information regarding the HDMI connection There are cases where you may not be able to route HDMI signals through this receiver (this depends on the HDMI equipped component you are connecting-check with the manufacturer for HDMI compatibility information).If...
Page 79 - Resetting the main unit; panel controls to do this.; the USB to the receiver.
Additional information 11 79 En English Français Deutsch Nederlands Italiano Español USB messages Resetting the main unit Use this procedure to reset all the receiver’s settings to the factory default. Use the front panel controls to do this. 1 Switch the receiver into standby. 2 While holding down ...
Page 80 - Cleaning the unit
Additional information 11 80 En Specifications Audio section Rated power output Front, Center, Surround . . . . . . . . 130 W per channel (1 kHz, 6 Ω , 1 %) . . . . . . . . . . . . . . . . . . . . . . 100 W per channel (20 Hz to 20 kHz, 8 Ω , 0.09 %) Total Harmonic Distortion . . . . . . 0.06 % (20 ...
Page 82 - ATTENTION
Ce point d’exclamation, placé dans un triangle équilatéral, a pour but d’attirer l’attention de l’utilisateur sur la présence, dans les documents qui accompagnentl’appareil, d’explications importantes du point de vue de l’exploitation ou del’entretien. Ce symbole de l’éclair, placé dans un triangle ...
Page 84 - Table des matières; 1 Avant de commencer
4 Fr Nous vous remercions pour cet achat d’un produit Pioneer. Nous vous demandons de lire soigneusement ce mode d’emploi ; vous serez ainsi à même de faire fonctionner l’appareil correctement. Après avoir bien lu le mode d’emploi, le ranger dans un endroit sûr pour pouvoir s’y référer ultérieuremen...
Page 85 - 7 Utilisation du tuner; 1 Informations complémentaires
5 Fr English Français Deutsch Nederlands Italiano Español 07 Utilisation du tuner Pour écouter la radio . . . . . . . . . . . . . . . . . . . 48 Amélioration du son stéréo FM . . . . . . . . . . 48 Mémorisation de stations préréglées . . . . . . 48 Pour écouter les stations préréglées . . . . . . 49...
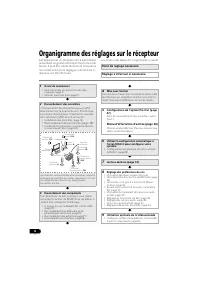
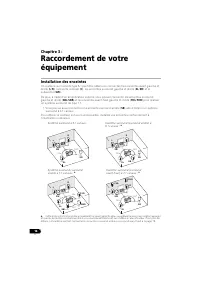
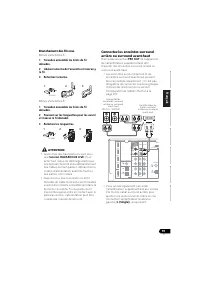
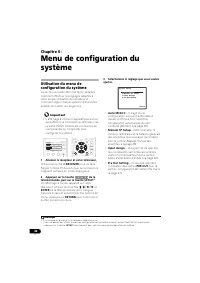
Page 86 - Organigramme des réglages sur le récepteur; Les couleurs des étapes ont la signification suivante :; Point de réglage nécessaire; (Lors du raccordement des enceintes avant-
6 Fr Organigramme des réglages sur le récepteur Cet appareil est un récepteur AV à part entière présentant un grand nombre de fonctions et de prises. Il peut être utilisé facilement lorsque les raccordements et les réglages mentionnés ci-dessous ont été effectués. Les couleurs des étapes ont la sign...
Page 87 - Avant de commencer; Mise en place des piles; Installation du récepteur
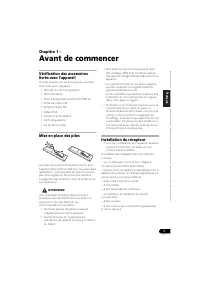
7 Fr English Français Deutsch Nederlands Italiano Español Chapitre 1 : Avant de commencer Vérification des accessoires livrés avec l’appareil Veuillez vérifier que les accessoires suivants sont livrés avec l’appareil : • Microphone de configuration• Télécommande• Piles à anode sèche (AAA IEC R03) x2...
Page 88 - En installant cet appareil, veuillez vous assurer; Récepteur
8 Fr Ventilation En installant cet appareil, veuillez vous assurer de bien laisser un espace de ventilation suffisant autour afin de permettre une meilleur dispersion de la chaleur (au moins 40 cm sur le dessus). Si l’espace entre l’appareil et le mur ou un autre appareil est insuffisant, la chaleur...
Page 89 - Commandes et affichages; Panneau frontal; Portée de
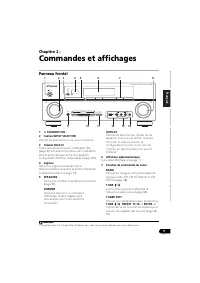
9 Fr English Français Deutsch Nederlands Italiano Español Chapitre 2 : Commandes et affichages Panneau frontal 1 STANDBY/ON 2 Cadran INPUT SELECTOR Permet de sélectionner une source d’entrée. 3 Témoin MCACC S’allume lorsque Acoustic Calibration EQ (page 37) est sélectionné (Acoustic Calibration EQ...
Page 90 - Portée de la télécommande
10 Fr PRESET / Ces touches permettent de sélectionner des stations de radio préréglées (page 49). 8 Cadran MASTER VOLUME 9 Prise PHONES Permet de raccorder un casque. Lorsque le casque est branché, les enceintes ne fournissent aucun son (page 41). 10 Touches de mode d’écoute AUTO/DIRECT Permet d’a...
Page 91 - Affichage; Lecture en mode
11 Fr English Français Deutsch Nederlands Italiano Español Affichage 1 PHASE S’allume lorsque la touche Phase Control est sélectionnée (page 36). 2 AUTO S’allume lorsque l’option Auto Surround est sélectionnée (voir la section Lecture en mode Auto à la page 33). 3 RDS S’allume lors de la réception d...
Page 93 - Télécommande; Commander le reste de votre système
13 Fr English Français Deutsch Nederlands Italiano Español Télécommande 1 SLEEP Appuyez sur cette touche pour modifier le délai qui s’écoule avant que le récepteur ne passe en mode veille ( 30 min – 60 min – 90 min – Off ). Vous pouvez vérifier le temps restant avant le passage en mode veille en app...
Page 96 - Installation des enceintes; • Vous pouvez aussi connecter une enceinte surround arrière (; détails, consultez la section
16 Fr Chapitre 3 : Raccordement de votre équipement Installation des enceintes Un système surround de type 5.1 peut être obtenu en connectant les enceintes avant gauche et droite ( L / R ), l’enceinte centrale ( C ), les enceintes surround gauche et droite ( SL / SR ) et le subwoofer ( SW ). De plus...
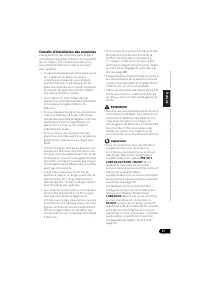
Page 97 - Conseils d’installation des enceintes; Réglage de la fonction Up; Connectez; Configuration de l’option Pre Out
17 Fr English Français Deutsch Nederlands Italiano Español Conseils d’installation des enceintes L’emplacement des enceintes dans la pièce d’écoute a une grande influence sur la qualité du son obtenu. Les conseils suivants vous permettront d’obtenir le meilleur son avec votre système. • Le caisson d...
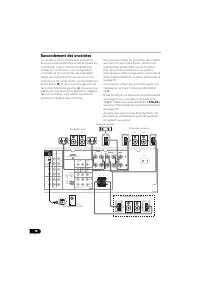
Page 98 - Raccordement des enceintes; Permutation du système d’enceintes
18 Fr Raccordement des enceintes Le récepteur fonctionnera avec seulement deux enceintes stéréo (les enceintes avant sur le schéma), mais il est recommandé d’en utiliser au moins trois ; une configuration complète de huit enceintes est cependant idéale pour la production du son surround. Vérifiez qu...
Page 99 - Branchement des fils nus; Bornes d’enceintes A :
19 Fr English Français Deutsch Nederlands Italiano Español Branchement des fils nus Bornes d’enceintes A : 1 Torsadez ensemble les brins de fil dénudés. 2 Libérez la borne de l’enceinte et insérez-y le fil. 3 Refermez la borne. Bornes d’enceintes B : 1 Torsadez ensemble les brins de fil dénudés. 2 P...
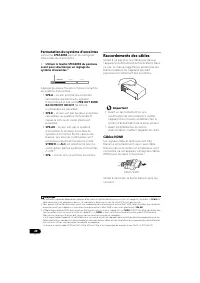
Page 100 - Raccordements des câbles; Câbles HDMI; Câble HDMI
20 Fr Permutation du système d’enceintes La touche SPEAKERS permet de configurer trois systèmes d’enceintes. • Utilisez la touche SPEAKERS du panneau avant pour sélectionner un réglage du système d’enceintes. 1 Appuyez plusieurs fois pour choisir une option du système d’enceintes : • SP A – Le son...
Page 101 - À propos de HDMI
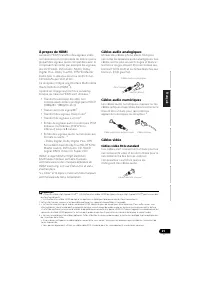
21 Fr English Français Deutsch Nederlands Italiano Español À propos de HDMI La liaison HDMI transfère des signaux vidéo numériques non compressés de même que la plupart des signaux audio compatibles avec le composant raccordé, par exemple les signaux des DVD-Vidéo, DVD-Audio, SACD, Dolby Digital Plu...
Page 102 - Câbles vidéo en composantes
22 Fr Câbles vidéo en composantes Les câbles vidéo en composantes permettent d’obtenir la meilleure reproduction couleur possible de votre source vidéo. Le signal couleur de votre téléviseur regroupe le signal de luminance ( Y ) et la couleur (les signaux P B et P R ) et la sortie. Les interférences...
Page 103 - Raccordement d’un téléviseur et de périphériques de lecture; Connexion au moyen de l’interface HDMI
23 Fr English Français Deutsch Nederlands Italiano Español Raccordement d’un téléviseur et de périphériques de lecture Connexion au moyen de l’interface HDMI Si vous avez un composant équipé d’une prise HDMI ou DVI (avec HDCP) (Lecteur de disque Blu- ray, etc.), vous pouvez le raccorder à ce récepte...
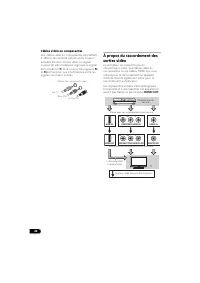
Page 104 - Raccordement d’un équipement dépourvu de borne HDMI; lecture) dépourvus de borne HDMI à cet appareil.
24 Fr Raccordement d’un équipement dépourvu de borne HDMI Ce schéma montre les connexions d’un téléviseur et d’un lecteur DVD (ou autre équipement de lecture) dépourvus de borne HDMI à cet appareil. 123 Remarque 1 Si la connexion a été réalisée avec un câble optique, vous devrez indiquer à cet appar...
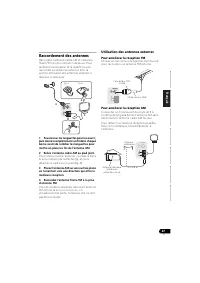
Page 107 - Raccordement des antennes; Poussez sur les languettes pour les ouvrir,; Utilisation des antennes externes; Pour améliorer la réception FM
27 Fr English Français Deutsch Nederlands Italiano Español Raccordement des antennes Raccordez l’antenne cadre AM et l’antenne filaire FM comme indiqué ci-dessous. Pour améliorer la réception et la qualité du son, raccordez les antennes externes (voir la section Utilisation des antennes externes ci-...
Page 108 - Branchement du récepteur
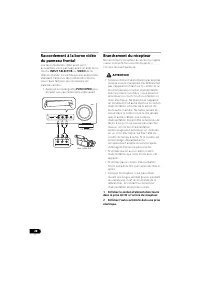
28 Fr Raccordement à la borne vidéo du panneau frontal Les raccordements vidéo avant sont accessibles via le panneau avant à l’aide de la touche INPUT SELECTOR ou VIDEO de la télécommande. Ce sont des prises audio/vidéo standard. Faites les raccordements comme vous l’avez fait pour les connexions du...
Page 109 - Configuration de base
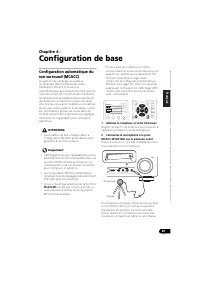
29 Fr English Français Deutsch Nederlands Italiano Español Chapitre 4 : Configuration de base Configuration automatique du son surround (MCACC) Le système de calibrage acoustique multicanaux (Multi-Channel Acoustic Calibration, MCACC) mesure les caractéristiques acoustiques de votre position d’écout...
Page 111 - La configuration MCACC automatique est
31 Fr English Français Deutsch Nederlands Italiano Español Un rapport de progression apparaît à l’écran pendant que le récepteur émet davantage de tonalités de test afin de déterminer les réglages optimum du récepteur en matière de niveau des canaux, distance des enceintes et calibrage Acoustic Cali...
Page 112 - Lecture de base
32 Fr Chapitre 5 : Écoute de sources à l’aide de votre système Important • Les modes d’écoute et de nombreuses fonctions décrites dans la présente section peuvent ne pas être disponibles en fonction de la source, des paramètres et de l’état actuels du récepteur. Lecture de base Voici les instruction...
Page 113 - Lecture en mode Auto; avec les
33 Fr English Français Deutsch Nederlands Italiano Español Lecture en mode Auto La fonction Auto Surround correspond à l’option d’écoute en mode direct la plus simple. Grâce à cette fonction, le récepteur détecte automatiquement le type de source que vous écoutez et sélectionne un mode de lecture mu...
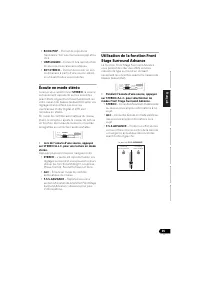
Page 115 - Écoute en mode stéréo; Utilisation de la fonction Front Stage
35 Fr English Français Deutsch Nederlands Italiano Español • ROCK/POP – Permet de reproduire l’ambiance ‘live’ pour la musique pop et/ou rock. • UNPLUGGED – Convient à la reproduction de sources musicales acoustiques. • EXT.STEREO – Permet de recréer un son multicanaux à partir d’une source stéréo, ...
Page 117 - Appuyez sur la touche; Lorsque vous écoutez une source,
37 Fr English Français Deutsch Nederlands Italiano Español La technologie Phase Control garantit une reproduction cohérente du son, grâce à l’utilisation de la correspondance de phase 1 qui permet d’obtenir une image sonore optimale à la position d’écoute. La fonction Phase Control est activée par d...
Page 119 - Paramètre
39 Fr English Français Deutsch Nederlands Italiano Español Paramètre Fonction Option(s) EQ (Égalisation du calibrage acoustique) Sélectionne/Désélectionne l’effet de Acoustic Calibration EQ. ON OFF S.DELAY (Sound Delay) Certains moniteurs peuvent présenter un léger retard lors de la retransmission v...
Page 123 - Réglage manuel des enceintes; Configuration automatique du son
43 Fr English Français Deutsch Nederlands Italiano Español Réglage manuel des enceintes Ce récepteur vous permet d’effectuer des réglages précis afin d’optimiser les performances de son surround. Les réglages ne seront faits qu’une seule fois (sauf si vous changez l’emplacement de vos enceintes ou s...
Page 124 - Astuce
44 Fr • Center – Sélectionnez LARGE si votre enceinte centrale reproduit de façon fidèle les fréquences graves, ou sélectionnez SMALL pour envoyer les fréquences graves vers les autres enceintes ou vers le subwoofer. Si vous n’avez pas connecté d’enceinte centrale, choisissez NO (le canal central es...
Page 125 - Réseau de recouvrement
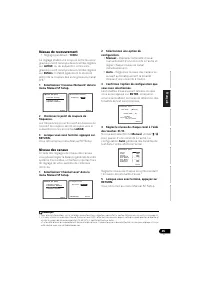
45 Fr English Français Deutsch Nederlands Italiano Español Réseau de recouvrement • Réglage par défaut : 100Hz Ce réglage établit une coupure entre les sons graves qui sont renvoyés des enceintes réglées sur LARGE , ou du subwoofer, et les sons graves qui sont renvoyés des enceintes réglées sur SMAL...
Page 126 - Distance des enceintes; Menu d’affectation d’entrée
46 Fr Astuce • Vous pouvez modifier les niveaux des canaux à tout moment en appuyant sur , puis sur CH SELECT et LEV +/– de la télécommande. Vous pouvez également appuyer sur CH SELECT et utiliser / pour sélectionner le canal, puis utiliser / pour ajuster les niveaux des canaux. Distance des enc...
Page 128 - Utilisation du tuner; Pour écouter la radio; Mémorisation de stations préréglées; Amélioration du son stéréo FM
48 Fr Chapitre 7 : Utilisation du tuner Pour écouter la radio Les étapes suivantes décrivent la façon de régler les bandes FM et AM à l’aide de la recherche automatique et des fonctions de réglage manuel. Lorsque vous avez réglé une station, vous pouvez en mémoriser la fréquence pour y accéder ultér...
Page 129 - Pour écouter les stations préréglées; Mémorisation
49 Fr English Français Deutsch Nederlands Italiano Español 1 Pour régler une station de radio que vous désirez mémoriser. Pour plus d’informations à ce sujet, consultez la section Pour écouter la radio à la page 48. 2 Appuyez sur la touche TUNER EDIT. L’écran affiche PRESET , puis un MEM clignotant ...
Page 130 - Présentation du système RDS; Recherche de programmes RDS
50 Fr Présentation du système RDS Le système RDS (système de radiocommunication de données) est utilisé par la plupart des stations de radio FM pour fournir aux auditeurs différents types d’informations—notamment le nom de la station et le type d’émissions diffusées.L’une des fonctions du système RD...
Page 131 - Affichage d’informations RDS
51 Fr English Français Deutsch Nederlands Italiano Español Affichage d’informations RDS La touche DISP permet d’afficher les différents types d’informations RDS disponibles. 1 • Appuyez sur DISP pour plus d’informations sur le système RDS. Chaque pression fait changer l’affichage dans l’ordre suivan...
Page 132 - Enregistrement; Raccordement de votre équipement
52 Fr Chapitre 8 : Enregistrement Faire un enregistrement audio ou vidéo Vous pouvez enregistrer un contenu audio ou vidéo à partir du syntoniseur intégré ou d’une source audio ou vidéo raccordée au récepteur (un lecteur de CD ou un téléviseur par ex.).Gardez à l’esprit qu’il n’est pas possible d’ef...
Page 134 - Codes de préréglages par défaut
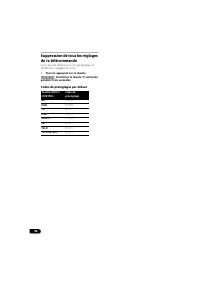
54 Fr Suppression de tous les réglages de la télécommande Vous pouvez effacer tous les préréglages et rétablir les réglages d’usine. • Tout en appuyant sur la touche , maintenez la touche ‘0’ enfoncée pendant trois secondes. Codes de préréglages par défaut Touche MULTI CONTROL Code de préréglage BD ...
Page 135 - Commandes pour les téléviseurs; Fonction
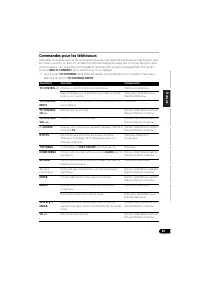
55 Fr English Français Deutsch Nederlands Italiano Español Commandes pour les téléviseurs Cette télécommande permet de commander d’autres équipements audiovisuels après avoir saisi les codes corrects, ou bien en utilisant la méthode d’apprentissage des commandes (pour plus d’informations, voir la se...
Page 136 - Commandes pour autres composants; pour sélectionner le composant.
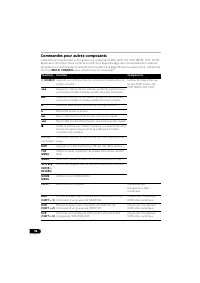
56 Fr Commandes pour autres composants Cette télécommande peut commander ces composants (BD, DVD, CD, DVR (BDR), VCR, CD-R) après avoir entré les codes corrects ou effectué l’apprentissage des commandes au niveau du récepteur (voir Commander le reste de votre système à la page 53 pour en savoir plus...
Page 137 - Liste des codes de préréglage; Catégorie
57 Fr English Français Deutsch Nederlands Italiano Español Liste des codes de préréglage Vous ne devriez rencontrer aucun problème de commande d’un composant si le fabricant apparaît dans la liste. Il se peut toutefois que certains codes de fabricant figurant dans la liste ne fonctionnent pas pour l...
Page 141 - Enregistreur vidéo numérique
61 Fr English Français Deutsch Nederlands Italiano Español Enregistreur vidéo numérique Pioneer 1053, 1108 Adyson 1050 Aiwa 1033, 1034, 1035 Akai 1034 Akiba 1040, 1050 Akura 1034, 1040, 1050 Alba 1035, 1036, 1037, 1040, 1050, 1051 Ambassador 1037 Amstrad 1033, 1050, 1051 Anitech 1040, 1050 ASA 1038,...
Page 142 - Décodeur satellite
62 Fr Décodeur satellite Pioneer 6220, 6219, 6204 @sat 6251 @Sky 6238 ABsat 6180 Acoustic Solutions 6217 ADB 6174 Akai 6214 Akura 6228 Alba 6176, 6200, 6180, 6217 Allsat 6214 Alltech 6180 Allvision 6252, 6238, 6199 Amitronica 6180 Ampere 6256, 6261 Amstrad 6202, 6243, 6256, 6261, 6236, 6180 Anglo 61...
Page 144 - Décodeur câble
64 Fr Décodeur satellite (Combiné SAT/PVR) @sat 6251 Allvision 6199 Atsat 6251 B@ytronic 6230, 6199 Boca 6187 BskyB 6210 Bush 6254 Canal Satellite 6278 Comag 6199, 6187 Daewoo 6182 Digifusion 6269 Digihome 6218 DigiQuest 6251 Digital 6187 DMT 6192 Edision 6247 eMTech 6196 GbSAT 6196 Gecco 6199 Globo...
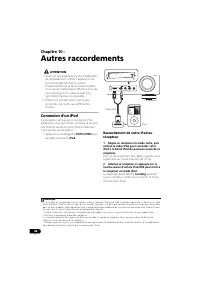
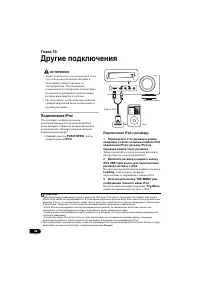
Page 146 - Autres raccordements; Connexion d’un iPod
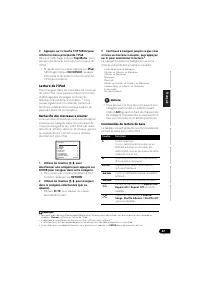
66 Fr Chapitre 10 : Autres raccordements ATTENTION • Avant un raccordement ou une modification de raccordement , mettez l’appareil hors tension et débranchez le cordon d’alimentation de la prise d’alimentation. Vous devez d’abord avoir effectué tous les raccordements du système avant d’y raccorder d...
Page 147 - Lecture de l’iPod; Recherche des morceaux à écouter; Commandes de lecture de base; Touche; et
67 Fr English Français Deutsch Nederlands Italiano Español 3 Appuyez sur la touche TOP MENU pour afficher le menu principal de l’iPod. Dès que l’affichage indique Top Menu , vous pouvez commencer à écouter la musique de l’iPod. 1 • Si, après que vous avez appuyé sur iPod , l’affichage indique NO DEV...
Page 148 - À propos d’iPod; DISP; Normale; Permet de revenir au niveau précédent.
68 Fr Visualisation de photos et de contenu vidéo Pour visualiser des photos ou une vidéo sur votre iPod, comme ce récepteur ne permet pas la commande vidéo, vous devez utiliser les commandes principales de votre iPod. 1 Important • Pour lire des photos ou une vidéo sur votre iPod, vous devez raccor...
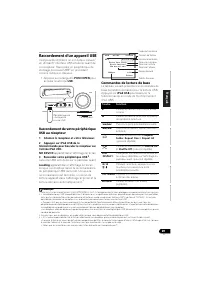
Page 149 - Raccordement d’un appareil USB
69 Fr English Français Deutsch Nederlands Italiano Español Raccordement d’un appareil USB Il est possible d’obtenir un son à deux canaux 1 en utilisant l’interface USB située à l’avant de ce récepteur. Raccordez un périphérique de stockage de masse USB 2 en procédant comme indiqué ci-dessous. • Appu...
Page 150 - Messages USB; Autres informations sur la compatibilité
70 Fr Important Si un message USB Error s’affiche, essayez les procédures suivantes : • Éteignez le récepteur, puis rallumez-le.• Raccordez le périphérique USB avec le récepteur éteint. • Sélectionnez une autre source d’entrée (comme BD ), puis revenez à iPod USB . • Utilisez un adaptateur CA spécia...
Page 151 - ADAPTATEUR; Lecture de musique sans fil; Fonctionnement par télécommande; Raccordement de l’ADAPTATEUR
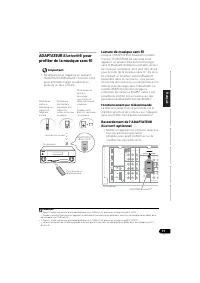
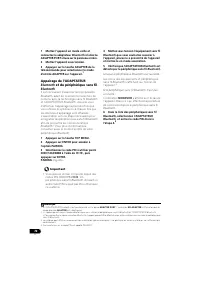
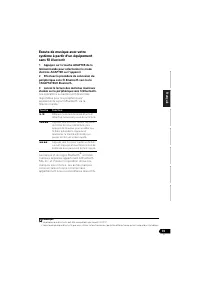
71 Fr English Français Deutsch Nederlands Italiano Español ADAPTATEUR Bluetooth ® pour profiter de la musique sans fil Important • Ne déplacez pas l’appareil en laissant l’ADAPTATEUR Bluetooth connecté. Cela pourrait endommager le matériel ou produire un faux contact. Lecture de musique sans fil Lor...
Page 152 - Appairage de l’ADAPTATEUR
72 Fr 1 Mettez l’appareil en mode veille et connectez la adaptateur Bluetooth à la borne ADAPTER PORT située sur le panneau arrière. 2 Mettez l’appareil sous tension. 3 Appuyez sur la touche ADAPTER de la télécommande pour sélectionner le mode d’entrée ADAPTER sur l’appareil. 1 Appairage de l’ADAPTA...
Page 154 - Informations complémentaires; Guide de dépannage; le plus proche pour effectuer la réparation.
74 Fr Chapitre 11 : Informations complémentaires Guide de dépannage Une utilisation incorrecte de l’appareil est souvent interprétée comme un problème ou un dysfonctionnement. Si vous êtes convaincu que cet appareil ne fonctionne pas correctement, contrôlez les points ci-dessous. Inspectez les autre...
Page 155 - Réglage des; Problème éventuel
75 Fr English Français Deutsch Nederlands Italiano Español Aucun son n’est émis des enceintes surround ou centrale. • Raccordez les enceintes correctement (voir page 18).• Vérifiez les réglages des enceintes (voir la section Réglage des enceintes à la page 43). • Vérifiez les niveaux des enceintes (...
Page 157 - Symptôme; Pas d’image ni de son.
77 Fr English Français Deutsch Nederlands Italiano Español HDMI Symptôme Réparation possible Pas d’image ni de son. • Si le problème persiste lorsque vous connectez directement votre composant HDMI à votre moniteur, reportez-vous au manuel du composant ou du moniteur ou prenez contact avec le servic...
Page 158 - mode d’emploi pour plus d’informations sur; L’iPod ne répond pas.; No Track; Sélectionnez une autre catégorie.
78 Fr Information importante concernant la connexion HDMI Dans certains cas, il ne sera peut-être pas possible d’acheminer les signaux HDMI via ce récepteur (ceci dépend du composant HDMI que vous connectez - contrôlez les informations du fabricant concernant la compatibilité HDMI).Si vous ne receve...
Page 159 - Mettez le récepteur en mode de veille.; apparaît sur l’afficheur.; OK; s’affiche pour indiquer que les réglages
79 Fr English Français Deutsch Nederlands Italiano Español Messages USB Réinitialisation de l’unité principale Respectez cette procédure pour rétablir les réglages d’usine du récepteur. Utilisez les commandes du panneau frontal pour ce faire. 1 Mettez le récepteur en mode de veille. 2 Tout en mainte...
Page 160 - Spécifications; Nettoyage de l’appareil
80 Fr Spécifications Section audio Puissance nominale de sortie Avant, Centrale, Surround . . . . . . . . . . 130 W par canal (1 kHz, 6 Ω , 1 %) . . . . . . . . . . . . . . . . . . . . . . . . .100 W par canal (20 Hz à 20 kHz, 8 Ω , 0,09 %) Distorsion harmonique totale . . . . . . 0,06 % (20 Hz à 20...
Page 165 - System Setup
5 Ru English Français Deutsch Nederlands Italiano Español 06 System Setup ( ) System Setup ( ) . . . . . . . . . . . . . . . . . . . 42 . . . . . . 43 Speaker Setting ( ) . . . . . . . . . 43 Crossover Network ( ) . . . . . . . . . . . . . . 45 Channel Level ( ) . . . . . . . . . . 45 Speaker Distan...
Page 166 - MCACC; Sound Retriever
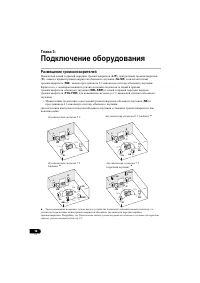
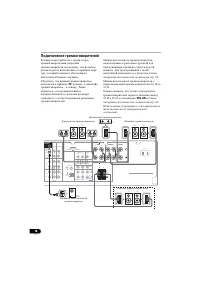
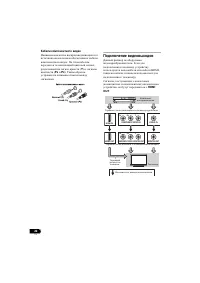
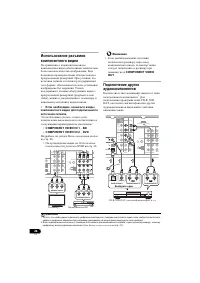
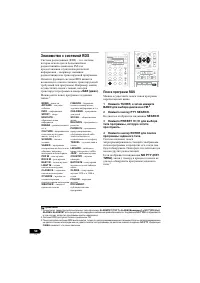
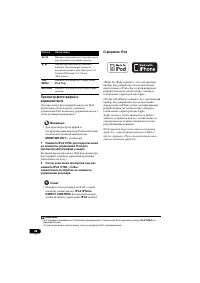
6 Ru - , . . Ц : , 1 • ( . 7) • ( . 7) 2 . , . • ( . 16) • ( . 18) • ( . 19) : . 3 BD/DVD . • ( . 22) • ( . 23) • ( . 27) • ( . 28) Передний левый (L (Л)) *Передний верхний левый (FHL) *Передний верхний правый (FHR) Левый объемного звучания (LS (ЛO)) *Левый тыловой канал (SBL) *Правый ...
Page 169 - Acoustic
9 Ru English Français Deutsch Nederlands Italiano Español 2: 1 STANDBY/ON 2 Pery INPUT SELECTOR . 3 MCACC , Acoustic Calibration EQ ( . 37) ( «Acoustic Calibration EQ» « .» MCACC ( . 29)). 4 ( . . 10). 5 SPEAKERS ( . 20). DIMMER . . DISPLAY . , , , . 1 6 . . 11. 7 BAND AM, FM ST ( ) FM MO...
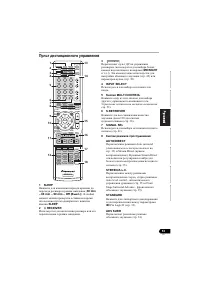
Page 171 - PHASE; RDS; PRESET; EXPRESS
11 Ru English Français Deutsch Nederlands Italiano Español 1 PHASE , ( . 36). 2 AUTO ( . . 33). 3 RDS RDS ( . 50). 4 ST FM . 5 TUNE . 6 , A / B ( . 20). 7 , ( . 13). 8 PRESET . MEM , . 9 PRESET . . 10 . 11 DTS DTS DTS. HD DTS- EXPRESS DTS-HD. ES DTS-ES. 96/24 DTS 96/24. NEO:6 NEO:6 , NEO:6 ( . 33)...
Page 172 - Pro; SIGNAL SELECT; DIMMER
12 Ru 2 HD Dolby TrueHD. EX Dolby Digital EX. 2 PLll(x) 2 Pro Logic II / 2 Pro Logic IIx. 2 Pro Logic IIz ( . . 33). 13 ADV.S. Э ( . . 34). 14 SIGNAL SELECT DIGITAL , . , , . HDMI , HDMI. , HDMI, HDMI . 15 Up Mix/DIMMER , Up Mix ON ( . . 38). , DIMMER . 16 DIR. DIRECT PURE DIRECT ( . 36). VSX-820_SY...
Page 174 - iPod
14 Ru BD : BD MENU * Blu- ray. 9 MULTI CONTROL ( BD , DVD . .). : AUDIO PARAMETER ( . 38). SETUP System Setup ( ) ( . 42). RETURN . BD , DVD DVR : TOP MENU « » BD/DVD. HOME MENU «HOME MENU» ( ). RETURN . MENU TOOLS ( ) Blu-ray. TUNER : TUNER EDIT / ( . 48 49). BAND AM, FM ST ( ) FM MONO ( . 48). P...
Page 175 - Acoustic Calibration EQ (
15 Ru English Français Deutsch Nederlands Italiano Español 12 ( . 48) CD, . . . ( , MIDNIGHT ( ) .) HDD *, DVD *, VCR * HDD/DVD/VCR- , DVD VCR. SB CH ON , AUTO , OFF . CH SELECT , LEV +/– ( . 45). LEV +/– . EQ / Acoustic Calibration EQ ( . 37). MIDNIGHT Midnight ( ) Loudness ( ) ( . 39). SPEAKERS ...
Page 177 - Up Mix
17 Ru English Français Deutsch Nederlands Italiano Español P . . • . . ( ) . • 2–3 . • Э - , Э - . • , . – . • , . , , . • . . . • 60–90 . , . DVD-Audio . • 7.1- , , Up Mix ( . Up Mix . 38). • , . . • . • . Э , ( , ). • , . PRE OUT SURR BACK/FRONT HEIGHT ( . . 19). , . SURR.BACK , , HEIGHT , ( , , )...
Page 180 - Кабель HDMI
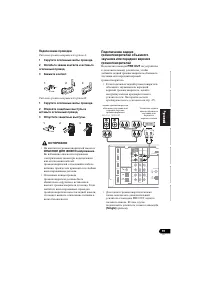
20 Ru SPEAKERS . • SPEAKERS . 1 : • SP A – , A PRE OUT SURR BACK/FRONT HEIGHT ( ). • SP B – , B ( ). • SP AB – A, B . , STEREO ALC A B. 2 • SP – . ( ). , , . • . • . HDMI -, . , HDMI. 3 . 1 , Speaker Setting ( ) . 43. , SP B , ( ). 2 6 Ω 16 Ω . , 12 Ω 16 Ω , SP AB . SPEAKERS DIMMER DIS...
Page 181 - RCA
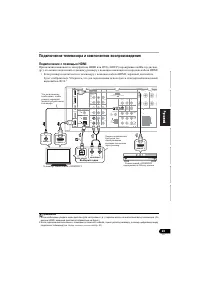
21 Ru English Français Deutsch Nederlands Italiano Español HDMI HDMI , , , DVD-Video, DVD-Audio, SACD, Dolby Digital Plus, Dolby TrueHD, DTS-HD Master Audio ( . ), Video CD/Super VCD CD. High- Definition Multimedia Interface (HDMI ® ). HDMI . 1 • ( , HDCP (1080p/24, 1080p/60, .)) • 3D 2 • Deep Color...
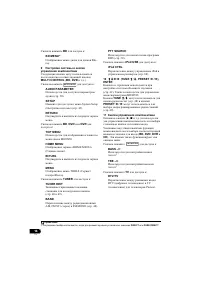
Page 187 - o 6
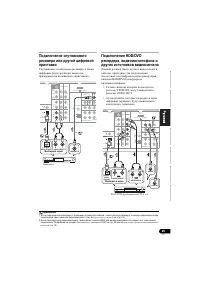
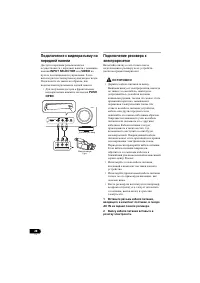
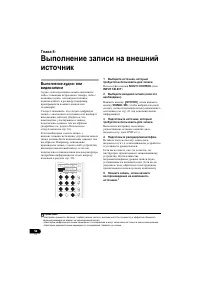
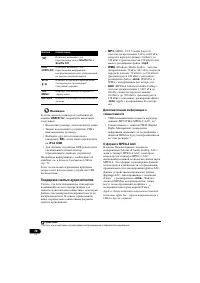
27 Ru English Français Deutsch Nederlands Italiano Español FM, . ( . ). 1 , , AM. 2 AM . , ( . ), ( . ). 3 AM . 4 FM FM. , FM . , . FM FM- PAL- ( ). AM 5 o 6 AM , AM. . ANTENNA AM LOOP 2 1 3 4 рис. a рис. b ANTENNA FM UNBAL 75 Ω AM LOOP PAL 75 Ω ANTENNA FM UNBAL 75 Ω AM LOOP 5 6 ( ) VSX-820_SYXCN_...
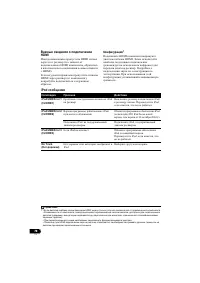
Page 191 - ERR
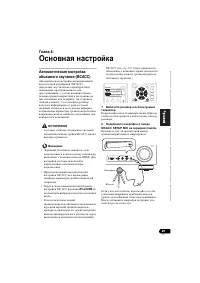
31 Ru English Français Deutsch Nederlands Italiano Español ( ERR ( ) ) . RETRY ( ) , . 8 , «OK», ENTER. 7 10 ENTER 8, MCACC , . , , , . . Э 1 3 . 9 (MCACC) ! System Setup ( ). MCACC , (System Setup) ( . . 42). 1 MCACC MCACC ( , , , ), . , ( , , . .), . - , . • . MCACC. 1 • , 12 . , Speaker Setting...
Page 195 - Dolby Digital DTS; Stream
35 Ru English Français Deutsch Nederlands Italiano Español • ROCK/POP – . . • UNPLUGGED – . • EXT.STEREO – . a STEREO ( ) ( , , ). Dolby Digital DTS . (ALC), , , . • STEREO/A.L.C. . : • STEREO – , - Midnight, Loudness, Phase Control, Sound Retriever Tone. • ALC – . • F.S.S.ADVANCE – . . (Front...
Page 196 - Surround Setup; PCM; Sound; Phase Control
36 Ru • Stream Direct ( ) AUTO/DIRECT . • AUTO SURROUND – . . 33 • DIRECT – Surround Setup ( , , ), . 1 . • PURE DIRECT – PCM . Sound Retriever ( ) , . Sound Retriever ( ) DSP, CD 2- , . 2 • S.RETRIEVER . Phase Control ( ) Phase Control ( ) , , / ( . . ). LFE (Low-Frequency Eff...
Page 202 - System
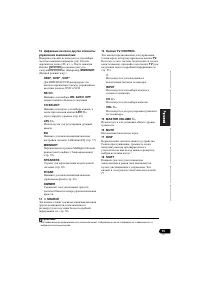
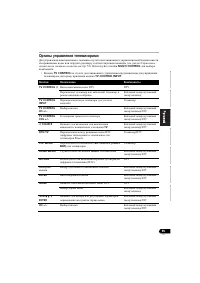
42 Ru 6: System Setup ( ) System Setup ( ) . • Э , HDMI. . 1 . RECEIVER . 1 , . 2 , SETUP. 2 . /// ENTER . RETURN ( ) . 3 , . • Auto MCACC – ( . (MCACC) . 29). • Manual SP Setup – , , ( . . 43). • Input Assign – , ( . . 46). • Pre Out Setting – , PRE OUT ( . . 47). 1 , . 2 • System Setup (...
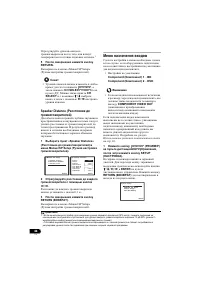
Page 204 - «Manual SP Setup»
44 Ru • Center ( ) – LARGE , , SMALL , . , NO ( ). • Front Height ( ) 1 – LARGE , . SMALL , . , NO . • Surr ( ) – LARGE , . SMALL , . , NO ( ). • Surr. Back ( ) 2 – ( , ). 3 LARGE , . SMALL , . , NO . • Subwoofer ( ) – SMALL , YES ( . ). PLUS , ( , , ). , NO ( ). 3 RETURN. «Manual SP Setup» ( ). •...
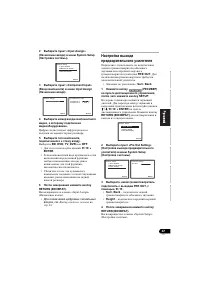
Page 207 - «Input Assign»
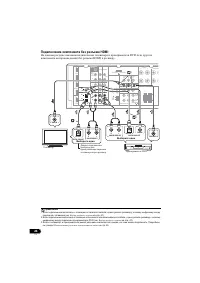
47 Ru English Français Deutsch Nederlands Italiano Español 2 «Input Assign» ( ) System Setup ( ). 3 «Component Input» ( ) Input Assign ( ). 4 , . . 5 , . BD , DVD , TV , DVR OFF . • / ENTER . • , , , . • , , . 6 RETURN ( ). «Input Assign» ( ). • , . . 41 . , PRE OUT . . • : Surr. Back 1 ( ) ...
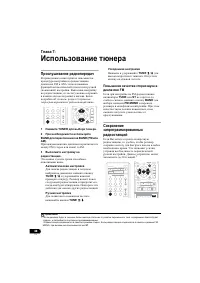
Page 208 - FM AM
48 Ru 7: FM AM ( ) ( ) . , . . . 1 TUNER . 2 BAND BAND (FM AM). FM ( ) AM. 3 . Э , . TUNE / . , . . TUNE / . TUNE / . . FM FM- TUNE ST - , BAND FM MONO . , . , , . Э , . 30 . 1 CH DVR CD CD-R ADAPTER iPod USB VIDEO TUNER S.RETRIEVER SIGNAL SEL VOL ENTER RETURN PARAMETER TOOLS VOLUM...
Page 210 - BAND
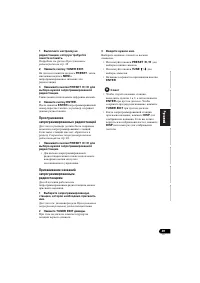
50 Ru RDS (RDS) – , FM – , . RDS , . , , JAZZ ( ) . : 1 RDS , . 1 TUNER, BAND FM. 2 2 PTY SEARCH. SEARCH . 3 PRESET / , . 4 ENTER . , . . NO PTY ( ) , , . 3 NEWS – AFFAIRS – INFO – SPORT – EDUCATE – o DRAMA – p . . CULTURE – , . . SCIENCE – VARIED – , , . POP M – - ROCK M – - EASY M – LIGHT ...
Page 215 - DTV
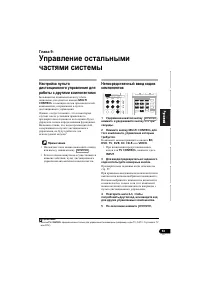
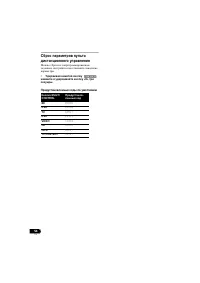
55 Ru English Français Deutsch Nederlands Italiano Español ( . У . 53). MULTI CONTROL . • TV CONTROL , TV CONTROL INPUT . TV CONTROL / DTV. DTV . / / TV CONTROL INPUT . ( .) T TV CONTROL CH +/– . / / /DTV TV CONTROL VOL +/– . / / /DTV SOURCE , TV . / / /DTV DTV/TV DTV ( ) Pioneer. T /DTV TOP M...
Page 216 - SOURCE
56 Ru (BD, DVD, CD, DVR (BDR), VCR, CD-R) ( . У . 53). MULTI CONTROL . SOURCE . Blu-ray , DVD, - , DVR (BDR), VCR, CD-R . . . . . . . . ( ). / / . DISP . TOP MENU « » BD/ DVD. MENU BD/DVD DVR. , ENTER RETURN BD/DVD. HOME MENU «HOME MENU» ( ). CH +/– . , HDD (SHIFT + 1) HDD/DVD...
Page 227 - All
67 Ru English Français Deutsch Nederlands Italiano Español • iPod NO DEVICE , iPod . iPod iPod , . 1 . iPod , iPod, , , , , , , iPod. 1 / , ENTER . • , RETURN . 2 / ( , ). • / . 3 , , . 2 iPod : Playlists ( ) Songs ( ) Artists ( ) Albums ( ) Songs ( ) Albums ( ) Songs ( )...
Page 228 - Slower
68 Ru iPod iPod, . 1 • iPod MONITOR OUT . 1 iPod CTRL iPod . iPod . 2 iPod CTRL, . • iPod , iPod iPhone DIRECT CONTROL , iPod iPod. iPod «Made for iPod» , iPod Apple. «Works with iPhone» , iPhone Apple. Apple . iPod Apple Inc., Ш . iPhone Apple Inc. / / . / : Faster ( ) Normal ( ...
Page 229 - USB; USB; USB; Repeat Folder
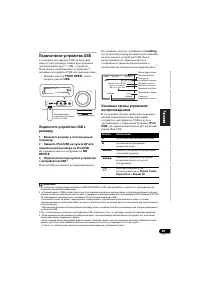
69 Ru English Français Deutsch Nederlands Italiano Español USB USB 1 USB - . 2 USB, . • PUSH OPEN , USB . USB 1 . 2 iPod USB iPod USB. NO DEVICE . 3 USB. 3 USB . Loading , USB. , , . 4 USB . iPod USB iPod USB. 1 Э WMA/MP3/MPEG-4 AAC ( ). 2 • К USB , - ( ) ( MP3) FAT16/ 32. К USB. • К Pioneer (...
Page 230 - Apple iTunes
70 Ru USB Error , : • , . • USB . • ( , BD ), iPod USB . • USB ( ). . USB . 79. , USB . , , . , , : • MP3 (MPEG-1/2/2.5 Audio Layer 3) – : 8 48 ; : 8 / 320 / ( 128 / ); : .mp3 • WMA (Windows Media Audio) – : 32 / 44,1 ; : 32 / 192 / ( 128 / ); : .wma ; WM9 Pro WMA : • AAC (MPEG-4 Advanced Audio Codi...
Page 233 - NODEVICE
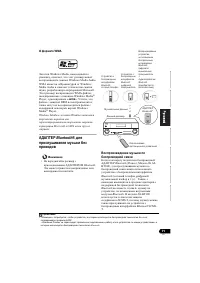
73 Ru English Français Deutsch Nederlands Italiano Español К Bluetooth: Bluetooth . 1 К Bluetooth: NODEVICE . , Bluetooth . 6 Bluetooth Bluetooth PIN- , 4. 2 Bluetooth 1 ADAPTER ADAPTER. 2 Bluetooth Bluetooth . 3 , Bluetooth . Bluetooth . 3 Bluetooth ® ( ) Bluetooth SIG, Inc.; Pioneer . . ...
Page 234 - Dolby Digital
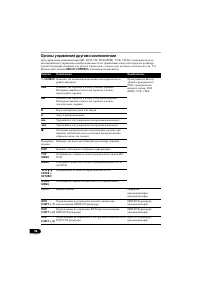
74 Ru 11: . , , . , . , , , Pioneer . • , , , , . . • . • , . . . • ( ) . , , Pioneer. . • ( . . 16). • MUTE ( ) . • SPEAKERS ( ) ( . . 20). • SIGNAL SEL ( ) ( . . 41). . • ( . . 16). • ( MULTI CONTROL ). • . 46, , . • , - , . . , . . • , . • , , . • Dolby Digital DTS (LFE). • , Speaker Setting ...
Page 235 - Channel Level
75 Ru English Français Deutsch Nederlands Italiano Español . • ( . . 18). • . Speaker Setting ( ) . 43 . • . Channel Level ( У ) . 45. Э PHASE CONTROL . • , , . . PHASE , 0° ( , , ). • ( . Speaker Distance ( ) . 46). . • ( . 27) . • . • FM , ( FM). • AM ( . . 27). • , , ( , ). . • ( . . 27). . • , ,...
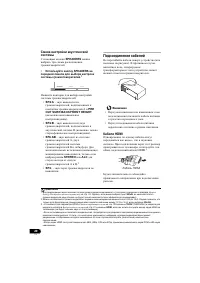
Page 240 - LINE Pure; Pioneer Corporation.
80 Ru , , . . . . . . . . . . . 130 (1 , 6 Ω , 1 %) . . . . . . . . . . . . . . . . . . . . . . . . . . 100 (20 20 , 8 Ω , 0,09 %) . . . . 0,06 % (20 20 , 8 Ω , 95 / .) ( LINE Pure Direct) . . . . . . . . . . . . . . . . . . . . . 5 100 FRONT : A, B . . . . . . . . . . . . . . . . . . 6 Ω 16 Ω FRO...
Page 244 - PIONEER CORPORATION; PIONEER EUROPE NV
<5707-00000-317-1S> Published by Pioneer Corporation. Copyright © 2010 Pioneer Corporation. All rights reserved. Publication de Pioneer Corporation. © 2010 Pioneer Corporation. Tous droits de reproduction et de traduction réservés. Printed in China Imprimé en Chine Примечание: В соответствии с...


 Pioneer A-50 / A-70
User Manual
Pioneer A-50 / A-70
User Manual
 Pioneer A-A6MK2-K
User Manual
Pioneer A-A6MK2-K
User Manual
 Pioneer SC-LX73 / SC-LX83
User Manual
Pioneer SC-LX73 / SC-LX83
User Manual
 Pioneer SC-LX90
User Manual
Pioneer SC-LX90
User Manual
 Pioneer VSX-1016V
User Manual
Pioneer VSX-1016V
User Manual
 Pioneer VSX-1017AV
User Manual
Pioneer VSX-1017AV
User Manual
 Pioneer VSX-1018AH
User Manual
Pioneer VSX-1018AH
User Manual
 Pioneer VSX-2014i
Manual
Pioneer VSX-2014i
Manual
 Pioneer VSX-2016AV
User Manual
Pioneer VSX-2016AV
User Manual
 Pioneer VSX-2020
User Manual
Pioneer VSX-2020
User Manual
 Pioneer VSX-322-K
User Manual
Pioneer VSX-322-K
User Manual
 Pioneer VSX-416 / VSX-516
User Manual
Pioneer VSX-416 / VSX-516
User Manual
 Pioneer VSX-417 / VSX-817
User Manual
Pioneer VSX-417 / VSX-817
User Manual
 Pioneer VSX-420
User Manual
Pioneer VSX-420
User Manual
 Pioneer VSX-421
User Manual
Pioneer VSX-421
User Manual
 Pioneer VSX-422
User Manual
Pioneer VSX-422
User Manual
 Pioneer VSX-520
User Manual
Pioneer VSX-520
User Manual