Jura 15145 - Manuals
Jura 15145 Coffee Machine – User Manual in PDF format online.
Manuals:
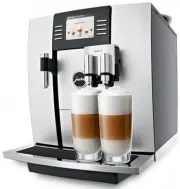
User Manual Jura 15145


Summary
2 Table of contents Your WE8 IMPORTANT SAFEGUARDS 4 Control elements 8 1 Preparing and using for the first time 10 JURA on the Internet ....................................................................................................................................10Setting up the machine ..........
3 Table of contents Cleaning the milk system .......................................................................................................................... 30Dismantling and rinsing the fine foam frother........................................................................................
4 IMPORTANT SAFEGUARDS IMPORTANT SAFEGUARDS SAVE THESE INSTRUCTIONS. Pass them on to any subsequent user. When using electrical appliances, basic safety precautions shall always be followed, to reduce the risk of fire, electric shock, and/or injury to persons, including the following: Z Read all ins...
Jura Coffee Machines Manuals
-
 Jura 13629
User Manual
Jura 13629
User Manual
-
 Jura 13734
User Manual
Jura 13734
User Manual
-
 Jura 13748
User Manual
Jura 13748
User Manual
-
 Jura 13781
User Manual
Jura 13781
User Manual
-
 Jura 15027
User Manual
Jura 15027
User Manual
-
 Jura 15045
User Manual
Jura 15045
User Manual
-
 Jura 15079
User Manual
Jura 15079
User Manual
-
 Jura 15094
User Manual
Jura 15094
User Manual
-
 Jura 15115
User Manual
Jura 15115
User Manual
-
 Jura 15134
User Manual
Jura 15134
User Manual
-
 Jura 15147
User Manual
Jura 15147
User Manual
-
 Jura 15177
User Manual
Jura 15177
User Manual
-
 Jura 15212
User Manual
Jura 15212
User Manual
-
 Jura 15228
User Manual
Jura 15228
User Manual
-
 Jura 15263
User Manual
Jura 15263
User Manual
-
 Jura 15268
User Manual
Jura 15268
User Manual
-
 Jura 15278
User Manual
Jura 15278
User Manual
-
 Jura 15280
User Manual
Jura 15280
User Manual
-
 Jura 15305
User Manual
Jura 15305
User Manual
-
 Jura 15342
User Manual
Jura 15342
User Manual