Page 2 - Instructions; General safety instructions
Instructions 4 1 Instructions 1.1 General safety instructions Risk of personal injury • During use the appliance and its accessible parts become very hot. Children must be kept at a safe distance. • Never touch the heating elements during use. • Keep children under eight years of age at a safe dista...
Page 3 - • Never leave objects on the cooking; For this appliance; Manufacturer liability; Power voltage
Instructions 5 EN • Never leave objects on the cooking surface. • Do not use the appliance to heat rooms for any reason. • Do not remove the seal on the front of the oven. For this appliance • Ensure that the appliance is switched off before replacing the bulb. • Do not rest any weight or sit on the...
Page 4 - Identification plate; Danger of suffocation
Instructions 6 • Deliver the appliance to the appropriate recycling facility for electrical and electronic equipment waste, or deliver it back to the retailer when purchasing an equivalent product, on a one for one basis. Our appliances are packaged in non-polluting and recyclable materials.• Delive...
Page 5 - Description; General Description; Display
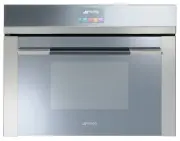
Description 7 EN 2 Description 2.1 General Description 1 Control panel 2 Oven light 3 Seal 4 Door 5 Fan 6 Evaporation tray 7 Water supply tube 8 Rack support frames Frame shelf 2.2 Control panel 1 Display The touchscreen display allows you to interact with the device. Press the icons to access the v...
Page 6 - Shelves; Available accessories; Perforated tray
Description 8 2.3 Other parts Shelves The appliance features shelves to position trays and racks at different heights. The insertion heights are indicated from the bottom upwards (see 2.1 General Description). Cooling fan The fan cools the oven and comes into operation during cooking.The fan causes ...
Page 7 - Rack; Other cooking containers; • You can also use your own containers
Description 9 EN Rack Useful for supporting containers with food during cooking. Evaporation tray cover Useful for distributing the steam uniformly inside the oven. Sponge Useful for removing condensation and the remaining water from the oven. 2.5 Other cooking containers • You can also use your own...
Page 8 - Use; Danger of burns
Use 10 3 Use 3.1 Instructions High temperature inside the oven during use Danger of burns • Keep the oven door closed during cooking. • Protect your hands by wearing oven gloves when moving food inside the oven. • Open the appliance door carefully during or after cooking. • Take care because steam m...
Page 9 - Using the accessories; Racks
Use 11 EN 3.2 First use 1. Remove any protective film from the outside or inside of the appliance, including accessories. 2. Remove any labels (apart from the technical data plate) from the accessories and from the oven cavity. 3. Remove and wash all the appliance accessories (see 4 Cleaning and mai...
Page 10 - Trays
Use 12 Trays The tray should be placed into the hollow of the rack. The perforated tray should be placed in the hollow of the rack above the tray. In this way it is possible to collect the liquids separately from the food that is being cooked (configuration 2 + 1, see “Predefined programs table”). 3...
Page 11 - Home screen
Use 13 EN Home screen Press the time on the display. It is now possible to select the various available functions on the “home screen” of the appliance. 1 Settings 2 Preset programs 3 Cooking functions 4 Special functions 5 Personal programs Steam function settings 1. Place the food inside the oven....
Page 12 - Enter the required duration (for example
Use 14 5. Enter the required duration (for example 25 minutes: first touch the minutes box, then the numbers 2 and 5). 6. Press the symbol to confirm. A request to fill the reservoir with water is shown on the display. Filling the reservoir 7. Fill a container (e.g. a jug) with sufficient water for ...
Page 13 - Extract the tube and immerse it in the
Use 15 EN 10. Extract the tube and immerse it in the container until the end reaches all the way to the bottom. 11. Press the symbol to start filling the reservoir with water. 12. When it finishes, the display will indicate that it is possible to begin the steam function. 13. Shake the tube to remov...
Page 15 - Press the symbol
Use 17 EN 20. Press the symbol to confirm the end of cooking time (for example 13:30). The appliance waits for the delay start time. Preheating stage Steaming is always preceded by a preheating stage, which allows the appliance to heat up to cooking temperature. A progressive increase in the tempera...
Page 16 - Modifying the set data
Use 18 A buzzer sounds to indicate that cooking has begun automatically. Modifying the set data During operation, it is possible to modify the cooking duration:21. When the appliance is cooking, press . 22. Enter the new cooking duration required on the numerical keypad. 23. Press the symbol to conf...
Page 17 - End of the steam function
Use 19 EN 26. Press the symbol to confirm the end of cooking time. 27. The appliance waits for the delay start time. End of the steam function At the end of the cooking cycle, “steam function ended” appears on the display and a buzzer will sound that can be deactivated by pressing the symbol or . 28...
Page 19 - Advice for steaming
Use 21 EN Advice for steaming • Pasta and rice: once a temperature of 100°C has been reached the cooking time will be the same as on a cooktop. Put the pasta or rice in a metal tray and cover with about a centimetre of water. For best results when cooking rice, place a lid on the container or cover ...
Page 20 - Peeling tomatoes and peppers:
Use 22 • Thin soups: steaming helps to enhance the flavour with minimal supervision because the liquids will not overflow. To produce vegetable soup of the right consistency, first steam the vegetables, then add the stock and steam at 100°C. The steam function is also ideal for preparing the stock. ...
Page 21 - Combination cooking functions
Use 23 EN Combination cooking functions 1. Press the time shown on the display to activate the appliance. 2. Select the cooking functions icon on the “home screen”. 3. Select a combination cooking function. 4. Enter the required duration (for example 25 minutes: first touch the minutes box, then the...
Page 23 - Preheating stage
Use 25 EN 11. Press the symbol to confirm the percentage of steam set (for example 50%). 12. If you wish to set an end of cooking time, press the symbol and select “function delayed”. 13. Enter the required end of cooking time (for example 13.30: first touch the hours box, then the numbers 1 and 3; ...
Page 24 - Combination functions list; Combination steam
Use 26 When the preheating finishes, the temperature will have reached the maximum level set.A buzzer sounds to indicate that the dish to be cooked can be placed inside the oven. • Press the symbol to start cooking. Combination functions list Press and hold the return symbol for a few seconds to imm...
Page 25 - Traditional cooking functions
Use 27 EN Traditional cooking functions 1. Select the cooking functions icon on the “home screen”. 2. Press the symbol to access the traditional functions menu. 3. Select the required function. 4. The appliance will begin preheating. The display will show the chosen function, the pre-set temperature...
Page 26 - Changing a function during cooking
Use 28 Changing a function during cooking 1. Press the symbol corresponding to the function you wish to modify. 2. Press the symbol to access the traditional functions menu. 3. Press the symbol of the new function required. 4. The display will show the new function chosen, the preset temperature, th...
Page 27 - Interrupting a function
Use 29 EN 3. Press the symbol to confirm. Interrupting a function 4. Press the return symbol for approximately 2 seconds to interrupt a cooking function. Select the required option. Traditional functions list Press and hold the return symbol for a few seconds to immediately interrupt cooking at any ...
Page 28 - Convection
Use 30 Convection As the heat comes from above and below at the same time, this system is particularly suitable for certain types of food. Traditional cooking, also known as static cooking, is suitable for cooking just one dish at a time. Ideal for pies, bread and casseroles. It is also suitable for...
Page 29 - Timer during function
Use 31 EN Timer during function 1. Press the symbol during a cooking function. 2. Press timer . 3. Enter the required duration (for example 25 minutes: first touch the minutes box, then the numbers 2 and 5). 4. Press the symbol to confirm. 5. The countdown starts. 6. Wait for the buzzer to indicate ...
Page 30 - Timed cooking
Use 32 Timed cooking 1. Press the symbol during a cooking function. 2. Press duration . 3. Enter the required duration (for example 25 minutes: first touch the minutes box, then the numbers 2 and 5). 4. Press the symbol to confirm. 5. Timed cooking starts. 6. At the end of the cooking cycle, “functi...
Page 31 - duration
Use 33 EN Modifying the data set during timed cooking During operation, it is possible to modify timed cooking duration: 1. Press the symbol . 2. Press duration . 3. Enter the new required duration and press the symbol to confirm. Delayed cooking 1. After having set a cooking time, press the symbol ...
Page 33 - To save energy; Special functions
Use 35 EN 3.5 Cooking advice To save energy • Reduce any opening of the door to a minimum to avoid heat dispersal. • Keep the inside of the appliance clean at all times. General advice • It is not possible to shorten cooking times by increasing the temperature (the food could be overcooked on the ou...
Page 34 - Select the special functions icon
Use 36 Select the special functions icon on the “home screen”. List of special functions Timer This function sounds a buzzer when the time set has elapsed. Defrost by weight This function defrosts foods on the basis of the type and weight of the frozen product. Defrost by time This function allows y...
Page 35 - Timer
Use 37 EN Timer 1. Select timer from the “special functions” menu. 2. Enter the required duration (for example 25 minutes: first touch the minutes box, then the numbers 2 and 5). 3. Press the symbol to confirm. 4. The countdown starts. 5. Wait for the buzzer to indicate that the time has finished. T...
Page 36 - Defrost by weight
Use 38 Defrost by weight 1. Place the food inside the appliance.2. Select defrost by weight from the “special functions” menu. 3. Select the type of food to be defrosted. 4. Use the symbols and to set the weight (in kilograms) of the food to be defrosted. 5. Press the symbol to confirm. 6. Select st...
Page 37 - Defrost by time
Use 39 EN Pre-set parameters: Defrost by time 1. Place the food inside the appliance.2. Select defrost by time from the “special functions” menu. 3. Enter the required duration (for example 1 hour: first touch the hours box, then the numbers 0 and 1). 4. Press the symbol to confirm. 5. Press the sym...
Page 38 - Proving
Use 40 Proving 1. Position the dough to prove on the second level. 2. Select proving from the “special functions” menu. 3. Press the symbol to start proving. 4. The appliance will begin preheating. 5. It will then proceed with the selected function. 6. While the function is in progress, it is possib...
Page 39 - Reheat
Use 41 EN Reheat 1. Place the food to be heated inside the oven. 2. Select reheat from the “special functions” menu. 3. Press the symbol to modify the duration of the reheating. 4. Press the symbol to start the reheat function. Sabbath mode This function allows you to heat previously cooked food whi...
Page 40 - Sabbath mode
Use 42 1. Select Sabbath mode from the “special functions” menu. 2. Press the symbol to start the Sabbath mode function or press the value of the set temperature to modify it (from 60° to 100°). 3. When finished keep the return symbol pressed in order to return to the main menu. For the special func...
Page 41 - Empty reservoir
Use 43 EN Empty reservoir 1. Select empty reservoir from the “special functions” menu. 2. The appliance prompts you to drain the water from the reservoir. 3. Remove the cover from the evaporation tray and dry it with the sponge supplied. 4. We recommend positioning the supplied sponge inside the eva...
Page 42 - Squeeze out the water absorbed by the
Use 44 The residual water is discharged into the evaporation tray: as well as facilitating removal, this contributes to cooling down the oven more quickly. If the remaining quantity of water is over 500 ml, the water will be discharged into the evaporation tray in two different steps to facilitate d...
Page 43 - Starting a program
Use 45 EN Starting a program 1. Press the symbols and to select the type of dish required from the “preset programs” menu. Then press on the name of the dish to confirm. 2. Select the subtype of dish to be cooked and press the name of the subtype to confirm. 3. Select the type of cooking (according ...
Page 44 - If you select the
Use 46 9. If you select the start option, cooking will start using the default program settings and all the set parameters will be shown on the display. 10. A buzzer will sound and a specific message will indicate when you should put the dish in the oven and start cooking. 11. Press the symbol to st...
Page 45 - End of program
Use 47 EN End of program 1. The appliance will warn the user when the program finishes via the buzzer and the flashing symbol. 2. To perform a new cooking cycle with the parameters that are already set up, press the symbol (press it twice if the buzzer is on). The appliance will restart cooking auto...
Page 47 - Predefined programs table
Use 49 EN Predefined programs table MEAT Subcategory Cooking Weight (Kg) Function Steam % Shelf Temp. (°C) Time (minutes) Roast beef rare 1 40 2 180 60 medium 1 40 2 180 80 well done 1 40 2 180 90 Pork spare ribs fresh 1 50 2 150 140 Pork chops fresh 1 - 3 250 15 Pork sausages fresh 1 - 3 250 12 Bac...
Page 48 - FISH
Use 50 FISH VEGETABLES Subcategory Cooking Weight (Kg) Function Steam % Shelf Temp. (°C) Time (minutes) Baked fish fresh 0.5 - 1 160 35 Barramundi fillet fresh 0.5 100 2 + 1 85 5 Cod fillet fresh 1 100 2 + 1 100 6 Salmon fillet fresh 0.8 100 2 + 1 100 5 Prawns fresh 1 100 2 + 1 90 5 Fish (whole) fre...
Page 49 - BREAD
Use 51 EN DESSERTS/PASTRIES BREAD Subcategory Cooking Weight (Kg) Function Steam % Shelf Temp. (°C) Time (minutes) Ring cake fresh 1 - 1 160 60 Biscuits/muffins fresh 0.6 - 1 160 18 Profiteroles fresh 0.5 - 1 180 70 Meringues fresh 0.3 - 1 120 90 Tarts fresh 0.8 - 1 170 40 Croissants fresh 0.6 - 1 1...
Page 50 - PIZZA
Use 52 PIZZA PASTA/RICE SLOW COOKING Subcategory Cooking Weight (Kg) Function Steam % Shelf Temp. (°C) Time (minutes) Pan baked pizza fresh 1 - 1 250 9 Subcategory Cooking Weight (Kg) Function Steam % Shelf Temp. (°C) Time (minutes) Pasta bake/Lasagne fresh 2 - 1 220 40 Paella fresh 2 100 2 100 35 Q...
Page 51 - Personal programs; personal programs
Use 53 EN 3.8 Personal programs This menu allows you to enter a personal program with the parameters you wish to use. On first use, the appliance will only offer you to add a new recipe. After storing your personal recipes, these will then be available in the relative menu. Select the personal progr...
Page 52 - recipe 1
Use 54 • Cooking function • Cooking duration • Frame shelf • Weight of dish 3. Make the required changes. 4. To save the program, press the symbol . The appliance will ask you to enter a name for the recipe you have just created. 5. Enter the name of the recipe. The key deletes the preceding letter ...
Page 56 - Language
Use 58 Language 1. Select language from the “settings” menu. 2. Press the symbols and to select the required language. 3. Confirm the selected language. Clock 1. Press the symbols or and select clock from the “settings” menu. 2. Enter the current time. 3. Press the symbol to confirm. Sets the interf...
Page 57 - Control lock
Use 59 EN Control lock 1. Press the symbols or and select control lock from the “settings” menu. 2. To confirm activation of the control lock select yes . During normal operation it is indicated by the indicator light coming on. Demo mode (for showrooms only) 1. Press the symbols or and select demo ...
Page 58 - yes
Use 60 Eco-Logic 1. Press the symbols or and select eco-logic from the “settings” menu. 2. To confirm the activation of the eco-logic mode, select yes . Sound 1. Press the symbols or and select sound from the “settings” menu. 2. To disable the sound associated with the pressing of the symbols on the...
Page 59 - Keep warm
Use 61 EN Keep warm 1. Press the symbol or and select keep warm from the “settings” menu. 2. To confirm the activation of the keep warm function select yes . Eco-Light 1. Press the symbols or and select eco-light from the “settings” menu. This mode allows the appliance to keep the food that has just...
Page 62 - Cleaning and maintenance; Cleaning the surfaces; Ordinary daily cleaning; Removing the door; Improper use
Cleaning and maintenance 64 4 Cleaning and maintenance 4.1 Instructions 4.2 Cleaning the surfaces To keep the surfaces in good condition, they should be cleaned regularly after use. Let them cool first. Ordinary daily cleaning Always use only specific products that do not contain abrasives or chlori...
Page 63 - Grasp the door on both sides with both; Cleaning the door glazing; Removing the internal glass panels
Cleaning and maintenance 65 EN 2. Grasp the door on both sides with both hands, lift it forming an angle of around 30° and remove it. 3. To reassemble the door, put the hinges in the relevant slots in the oven, making sure that grooved sections A are resting completely in the slots. Lower the door a...
Page 64 - Lift the intermediate glass unit upwards.
Cleaning and maintenance 66 4. Lift the intermediate glass unit upwards. 5. Clean the external glass panel and the panels removed previously. Use absorbent kitchen roll. In case of stubborn dirt, wash with a damp sponge and neutral detergent. 6. Replace the intermediate glass unit. 7. The rubber str...
Page 65 - Cleaning the oven interior; Preliminary operations
Cleaning and maintenance 67 EN 4.5 Cleaning the oven interior For the best oven upkeep, clean it regularly after having allowed it to cool.• Take out all removable parts.• Clean the oven racks with warm water and non-abrasive detergent. Rinse and dry damp parts carefully. 4.6 Vapour Clean Preliminar...
Page 66 - • Spray a water and washing up liquid
Cleaning and maintenance 68 • Spray a water and washing up liquid solution inside the oven using a spray nozzle. Direct the spray against the side walls, upwards, downwards and towards the deflector. • Close the door. Vapour Clean setting 1. Select the Vapour Clean function from the “special functio...
Page 67 - Programmed vapour clean cycle set-up
Cleaning and maintenance 69 EN 3. Press the symbol to confirm. The assisted cleaning cycle starts. 4. If the temperature inside the oven is too high, an acoustic signal will sound and a warning message on the display will indicate that you should wait for it to cool down. 5. A buzzer will indicate t...
Page 68 - End of the Vapour Clean cycle
Cleaning and maintenance 70 End of the Vapour Clean cycle 1. Open the door and wipe away the less stubborn dirt with a microfibre cloth. 2. Use a non-scratch sponge with brass filaments on hard to remove deposits. 3. In case of grease residues use specific oven cleaning products. 4. Remove the water...
Page 69 - ok
Cleaning and maintenance 71 EN 3. Pour about 250 ml of white vinegar into the evaporation tray so as to cover part of the bottom of the oven cavity as well. 4. Press the symbol to start the descaling function. 5. When the descaling procedure has ended press the ok key. 6. Remove the vinegar from the...
Page 70 - Manual descaling
Cleaning and maintenance 72 Manual descaling If you decide to carry out descaling before being prompted to do so it is possible to perform the function manually.1. Select manual descaling from the “special functions” menu. 2. Carry out the procedure indicated in the chapter “Descaling” starting from...
Page 71 - Cleaning the reservoir; clean reservoir
Cleaning and maintenance 73 EN 4.8 Cleaning the reservoir 1. Select clean reservoir from the “special functions” menu. 2. Press the control knob to confirm the choice of function. The display shows the request to fill the reservoir. 3. Fill a container (e.g. a jug) with a mixture of water and citric...
Page 73 - step
Cleaning and maintenance 75 EN 11. Remove the cover from the evaporation tray and dry it with the sponge supplied. 12. We recommend positioning the supplied sponge inside the evaporation tray. 13. Press the symbol to start draining the remaining solution from the reservoir. The residual mixture is d...
Page 74 - Extraordinary maintenance; Replacing the internal light bulb
Cleaning and maintenance 76 4.9 Extraordinary maintenance Replacing the internal light bulb 1. Completely remove all accessories from inside the oven. 2. Remove the racks/trays support frames. 3. Remove the bulb cover using a tool (e.g. a screwdriver). 4. Slide out and remove the lamp. 5. Replace th...
Page 76 - Installation; Electrical connection; General information; Cable replacement
Installation 78 5 Installation 5.1 Electrical connection General information Check the grid characteristics against the data indicated on the plate.The identification plate bearing the technical data, serial number and brand name is visibly positioned on the appliance.Do not remove this plate for an...
Page 77 - Position of the power cable
Installation 79 EN 5.3 Positioning Position of the power cable (rear view) Front panel seal Glue the supplied seal to the rear part of the front panel to avoid water or other liquids from leaking in. Heavy appliance Crushing hazard • Position the appliance into the cabinet cutout with the help of a ...
Page 78 - Fastening bushings
Installation 80 Fastening bushings Remove the bushing covers inserted on the oven front. Mount the appliance into the recess.Secure the appliance to the piece of furniture using screws. Cover the bushings with the previously removed covers. Appliance overall dimensions (mm) (front view) (top view)