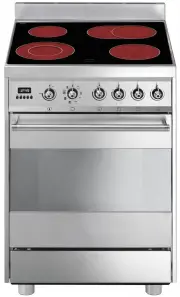
Page 2 - Introduction; INSTRUCTIONS FOR SAFE AND PROPER USE
Introduction 1. INSTRUCTIONS FOR SAFE AND PROPER USE THIS MANUAL IS AN INTEGRAL PART OF THE APPLIANCE AND THEREFORE MUST BE KEPT IN ITS ENTIRETY AND IN AN ACCESSIBLE PLACE FOR THE WHOLE WORKING LIFE OF THE COOKER. WE ADVISE READING THIS MANUAL AND ALL THE INSTRUCTIONS THEREIN BEFORE USING THE COOKER...
Page 3 - The manufacturer declines all responsibility
Introduction THE I.D. PLATE WITH TECHNICAL DATA, REGISTRATION NUMBER AND BRAND NAME IS POSITIONED VISIBLY IN THE STORAGE COMPARTMENT. THE PLATE MUST NOT BE REMOVED. DO NOT PUT PANS WITHOUT PERFECTLY SMOOTH AND FLAT BOTTOMS ON THE COOKING HOB GRIDS. NEVER USE THE COOKING HOB AS A WORK SURFACE. DO NOT...
Page 4 - Instructions for the installer; OF; It is the law that all gas appliances are installed by; Electrical connection; This rating plate must never be removed.; , located in an easily accessible; for damage to persons
Instructions for the installer 2. INSTALLATION OF THE APPLIANCE It is the law that all gas appliances are installed by authorised persons . Clearance around the cooker must comply with the requirements of AS5601. 2.1 Electrical connection Make sure that the power line voltage matches the specificati...
Page 5 - Can be connected to the inlet fitting directly. The
Instructions for the installer 2.2 Gas connection This appliance is suitable for installation with Natural Gas or LPG. Refer to page 12 for the relevant burner pressure and appropriate injector sizes. When the appliance is to be connected to Natural Gas then the pressure regulator supplied must be f...
Page 6 - Room ventilation; Caution; – This cooker may only be installed and operated in rooms; Clearance above and around domestic cookers
Instructions for the installer 2.3 Room ventilation Caution – This cooker may only be installed and operated in rooms permanently ventilated in accordance with current regulations. For proper operation of a gas appliance it is essential for the air necessary for combustion of the gas to be able to f...
Page 7 - REQUIREMENTS
Instructions for the installer REQUIREMENTS 1 Overhead clearances – (Measurement A ) Range hoods and exhaust fans shall be installed in accordance with the manufacturer’s instructions. However, in no case shall the clearance between the highest part of the hob of the cooking appliance and a range ho...
Page 8 - Instruction for wall fixing
Instructions for the installer 2.5 Instruction for wall fixing 1) Fix the screw to the wall and hook the chain ( B ); 2) Hook the chain to the hole positioned at the rear of the cooker by the gas pipe ( A ); 3) Once the chain is in position, push the cooker against the wall; 4) The height of the scr...
Page 9 - ADAPTATION TO DIFFERENT TYPES OF GAS; Replacement of nozzles on the hob; Unscrew the burner nozzles with a 7 mm socket wrench
Instructions for the installer 3. ADAPTATION TO DIFFERENT TYPES OF GAS Before performing any cleaning or maintenance work, detach the appliance from the electrical socket. The hob of the cooker is adjusted for use with either natural gas at a pressure of 1.0kPa (A11X) or LPG (propane) at a pressure ...
Page 10 - Burner and nozzle characteristics table; BURNERS
Instructions for the installer 3.2 Burner and nozzle characteristics table Burner Nominal gas consumption (MJ/h) LPG – 2.75 kPa Turn-down gas consumption (MJ/h) Injector (mm) Auxiliary 3.9 1.3 0.54 Semi-rapid 6.3 1.6 0.68 Rapid 10.8 2.7 0.88 Wok 13.5 5.8 1.00 Fish pan 6.8 2.9 0.72 Burner Nominal gas...
Page 11 - Adjustment of minimum for natural gas; This operation must be done
Instructions for the installer 4. FINAL OPERATIONS After replacing the nozzles, reposition the flame-spreader crowns, the burner caps and the grids. After adjustment to a different kind of gas from the one for which the cooker has been tested, replace the plate inside the storage compartment with on...
Page 12 - Instructions for the user; DESCRIPTION OF CONTROLS; Front control panel; All the cooker controls and commands are on the front panel.; DESCRIPTION OF SYMBOLS; THERMOSTAT KNOB; ° and
Instructions for the user 5. DESCRIPTION OF CONTROLS 5.1 Front control panel All the cooker controls and commands are on the front panel. DESCRIPTION OF SYMBOLS OVEN THERMOSTAT REAR RIGHT-HAND COOKING ZONE OVEN FUNCTIONS FRONT RIGHT-HAND COOKING ZONE FRONT LEFT-HAND COOKING ZONE FISH COOKING ZONE RE...
Page 13 - FUNCTION SWITCH KNOB; Turn the knob to select from the following functions:; COOKING HOB BURNER
Instructions for the user FUNCTION SWITCH KNOB Turn the knob to select from the following functions: NO FUNCTION SET LOWER HEATING ELEMENT + VENTILATION UPPER AND LOWER HEATING ELEMENT LOWER HEATING ELEMENT + VENTILATED HEATING ELEM. ELEMENTO RISCALDANTE SUPERIORE E INFERIORE + VENTILAZIONE VENTILAT...
Page 14 - Electronic Analogue Clock; LIST OF FUNCTIONS; display flashes on and off at regular intervals. Press the
Instructions for the user 5.2 Electronic Analogue Clock LIST OF FUNCTIONS MINUTE-MINDER BUTTON AUTOMATIC SWITCH-OFF TIMING BUTTON TIME SETTING AND RESET VALUE DECREASE BUTTON VALUE INCREASE BUTTON 5.2.1 Setting the time When the oven is used for the first time, or after a power blackout, the display...
Page 16 - Cooking duration time:
Instructions for the user 5.2.3 Programming Cooking duration time: the 2 nd button can be used to set the cooking time. Before setting it, turn the thermostat to the cooking temperature of choice and the function selector knob to any setting. To set the cooking time, proceed as follows: - Press the ...
Page 17 - Function
Instructions for the user Cooking start: as well as setting a cooking duration time, the user can also set the cooking start time (up to 12 hours after the current time). To set the cooking start/end time, proceed as follows. - Set the cooking duration time as described in the previous point. - With...
Page 18 - USE OF THE COOKING HOB; Lighting of the cooking hob burners; in the flame caps correspond to the spark plugs and
Instructions for the user 6. USE OF THE COOKING HOB 6.1 Lighting of the cooking hob burners Before lighting the hob burners check that the flame caps are in the correct position and that their burner caps are in place, making sure that the holes A in the flame caps correspond to the spark plugs and ...
Page 19 - Practical advice for using the cooking hob burners
Instructions for the user 6.2 Practical advice for using the cooking hob burners For better use of the burners and lower gas consumption, use covered containers that are proportional in size to the burner to prevent the flame from licking the sides (see paragraph “6.3 Diameter of containers"). W...
Page 20 - Warnings and general advice; It comes on when the function switch knob is turned to any position.
Instructions for the user 7. USE OF THE OVEN The user has only to press the central key for 1/2 seconds to enable use of the oven on first use or after a power blackout. 7.1 Warnings and general advice Before using the oven for the first time, pre-heat it to maximum temperature (250°C) long enough t...
Page 21 - ACCESSORIES; support; Accessories on Request
Instructions for the user 8. AVAILABLE ACCESSORIES The oven features 4 support positions for plates and racks of different height. Oven grill: for cooking food on plates, small cakes, roasts or food requiring light grilling. Plate grill: for placing above plate for cooking foods that might drip. Ove...
Page 22 - HINTS; Keep the oven door closed during cooking; FUNCTION SWITCH
Instructions for the user 9. COOKING HINTS During cooking, do not cover the bottom of the oven with aluminium or tin foil and do not place pans or oven trays on it as this may damage the enamel coating. If you wish to use greaseproof paper, place it so that it will not interfere with the hot air cir...
Page 26 - AND; Cleaning stainless steel; To clean and preserve the stainless steel surfaces, always use; only; pour the product on a damp cloth and wipe the surface,; Cleaning of cooking hob components
Instructions for the user 10. CLEANING AND MAINTENANCE 10.1 Cleaning stainless steel Before performing any operations requiring access to powered parts, switch off the power supply to the machine. To keep stainless steel in good condition it should be cleaned regularly after use. Let it cool first. ...
Page 27 - fully dry; before remounting.; Ignition plugs and thermocouples; Cleaning of the oven; and sliding out of the
Instructions for the user 10.2.2 Burner caps, flame cap crowns and burners To facilitate cleaning, caps, flame cap crowns, and burners are all removable. To remove the flame separating crown of the fish hob, loosen the two screws exposed after having removed the cap. Wash all parts with warm water a...
Page 28 - ” and “
Instructions for the user For easier cleaning, the storage drawer underneath the oven can becompletely removed. Pull it right out and raise the front (as for an ordinary drawer). On some models, once the drawer has been pulled completely out the twotabs have to be pushed up as shown in the diagram, ...
Page 29 - glass; MAINTENANCE; Replacement of light bulb; Remove cover; the
Instructions for the user 10.4 Door glass The door glass should always be kept clean. Use absorbent kitchen paper to clean. In case of tough spots, clean with a damp sponge using regular detergent. 11. EXTRAORDINARY MAINTENANCE The oven may require extraordinary maintenance or replacement of parts s...
Page 30 - Oven door seal
Instructions for the user 11.3 Oven door seal To permit thorough cleaning of the oven, the seal may be removed. Before removing the seal, take off the door as described above. Once the door has been taken off, lift the tabs at the corners as shown in the figure. 11.4 Lubrication of gas taps With tim...
Page 31 - Preventive maintenance; PROBLEMS AND CAUSES; PROBLEM
Instructions for the user 11.5 Preventive maintenance This appliance does not need any special maintenance. However, afew simple operations have to be carried out periodically to preventmalfunctioning: Burners: the burners must be cleaned periodically to ensure correct combustion; make sure that all...