Page 2 - Instructions; General safety instructions
Instructions 26 1 Instructions 1.1 General safety instructions Risk of personal injury • During use the appliance and its accessible parts become very hot. • Never touch the heating elements during use. • Keep children under the age of eight at a safe distance unless they are constantly supervised. ...
Page 4 - Risk of damaging the appliance
Instructions 28 Risk of damaging the appliance • Racks and trays have to be inserted into the side guides until they come to a complete stop. The mechanical safety locks that prevent the rack from being taken out accidentally must face downwards and towards the back of the appliance. • Use wooden or...
Page 5 - For this appliance
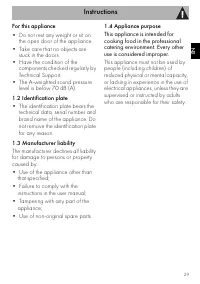
Instructions 29 EN For this appliance • Do not rest any weight or sit on the open door of the appliance. • Take care that no objects are stuck in the doors. • Have the condition of the components checked regularly by Technical Support. • The A-weighted sound pressure level is below 70 dB (A). 1.2 Id...
Page 6 - Power voltage
Instructions 30 1.5 Disposal This appliance must be disposed of separately from other waste (Directives 2002/95/EC, 2002/96/EC, 2003/108/EC). The appliance does not contain substances in quantities sufficient to be considered hazardous to health and the environment, in accordance with current Europe...
Page 7 - How to read the user manual
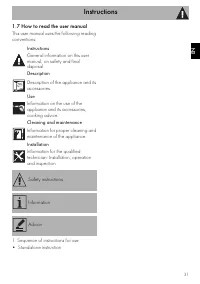
Instructions 31 EN 1.7 How to read the user manual This user manual uses the following reading conventions: 1. Sequence of instructions for use.• Standalone instruction. Instructions General information on this user manual, on safety and final disposal. Description Description of the appliance and i...
Page 8 - Description; General Description; Control panel
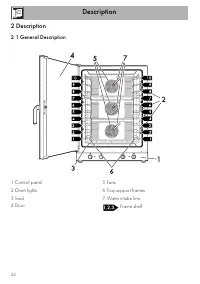
Description 32 2 Description 2.1 General Description 1 Control panel 2 Oven lights 3 Seal 4 Door 5 Fans 6 Tray support frames 7 Water intake line Frame shelf
Page 9 - will be dispensed until the knob is released.
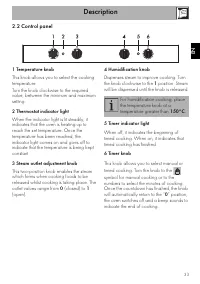
Description 33 EN 2.2 Control panel 1 Temperature knob This knob allows you to select the cooking temperature.Turn the knob clockwise to the required value, between the minimum and maximum setting. 2 Thermostat indicator light When the indicator light is lit steadily, it indicates that the oven is h...
Page 10 - Shelves
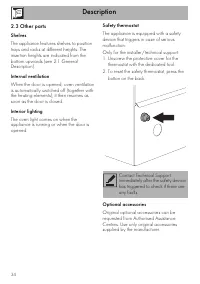
Description 34 2.3 Other parts Shelves The appliance features shelves to position trays and racks at different heights. The insertion heights are indicated from the bottom upwards (see 2.1 General Description). Internal ventilation When the door is opened, oven ventilation is automatically switched ...
Page 11 - Use; Remove any protective film from the
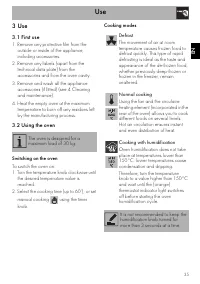
Use 35 EN 3 Use 3.1 First use 1. Remove any protective film from the outside or inside of the appliance, including accessories. 2. Remove any labels (apart from the technical data plate) from the accessories and from the oven cavity. 3. Remove and wash all the appliance accessories (if fitted) (see ...
Page 12 - General advice
Use 36 3.3 Cooking advice General advice • Use a fan assisted function to achieve consistent cooking at several levels. • It is not possible to shorten cooking times by increasing the temperature (the food could be overcooked on the outside and undercooked on the inside). Advice for cooking meat • C...
Page 13 - Cleaning and maintenance; Cleaning the appliance; Ordinary daily cleaning; Cleaning the door; Removing the door
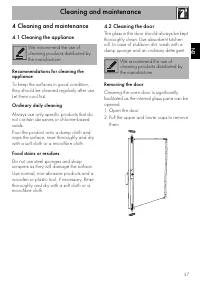
Cleaning and maintenance 37 EN 4 Cleaning and maintenance 4.1 Cleaning the appliance Recommendations for cleaning the appliance To keep the surfaces in good condition, they should be cleaned regularly after use. Let them cool first. Ordinary daily cleaning Always use only specific products that do n...
Page 14 - Clean both the interior and exterior of the; Cleaning the oven cavity
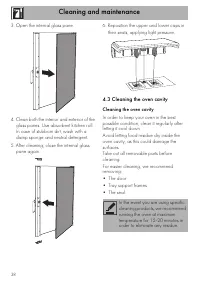
Cleaning and maintenance 38 3. Open the internal glass pane. 4. Clean both the interior and exterior of the glass panes. Use absorbent kitchen roll. In case of stubborn dirt, wash with a damp sponge and neutral detergent. 5. After cleaning, close the internal glass pane again. 6. Reposition the uppe...
Page 15 - Removing the tray support frames; Extraordinary maintenance; Removing the door seal
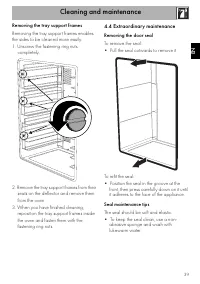
Cleaning and maintenance 39 EN Removing the tray support frames Removing the tray support frames enables the sides to be cleaned more easily.1. Unscrew the fastening ring nuts completely. 2. Remove the tray support frames from their seats on the deflector and remove them from the oven. 3. When you h...
Page 16 - Replacing the internal light bulb
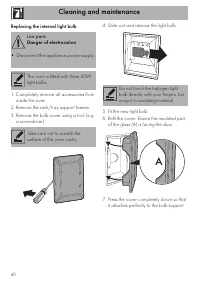
Cleaning and maintenance 40 Replacing the internal light bulb 1. Completely remove all accessories from inside the oven. 2. Remove the rack/tray support frames. 3. Remove the bulb cover using a tool (e.g. a screwdriver). 4. Slide out and remove the light bulb. 5. Fit the new light bulb. 6. Refit the...
Page 17 - If the appliance is not working properly; Regular Maintenance
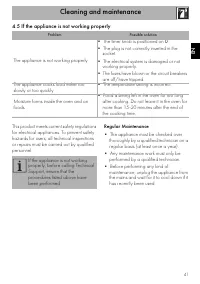
Cleaning and maintenance 41 EN 4.5 If the appliance is not working properly This product meets current safety regulations for electrical appliances. To prevent safety hazards for users, all technical inspections or repairs must be carried out by qualified personnel. Regular Maintenance • The applian...
Page 18 - Installation; Electrical connection; Fixed connection
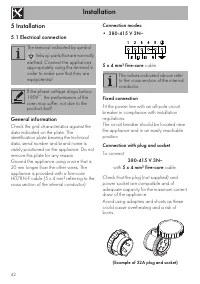
Installation 42 5 Installation 5.1 Electrical connection General information Check the grid characteristics against the data indicated on the plate. The identification plate bearing the technical data, serial number and brand name is visibly positioned on the appliance. Do not remove this plate for ...
Page 19 - Cable replacement
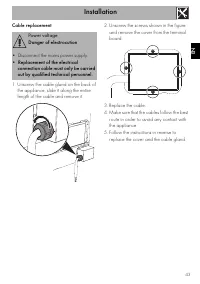
Installation 43 EN Cable replacement 1. Unscrew the cable gland on the back of the appliance, slide it along the entire length of the cable and remove it. 2. Unscrew the screws shown in the figure and remove the cover from the terminal board. 3. Replace the cable. 4. Make sure that the cables follow...
Page 20 - Improper use
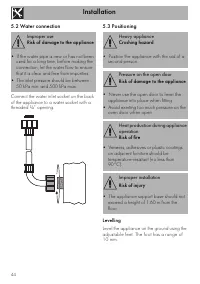
Installation 44 5.2 Water connection Connect the water inlet socket on the back of the appliance to a water socket with a threaded ¾” opening. 5.3 Positioning Levelling Level the appliance on the ground using the adjustable feet. The foot has a range of 10 mm. Improper use Risk of damage to the appl...
Page 21 - Steam outlet pipe
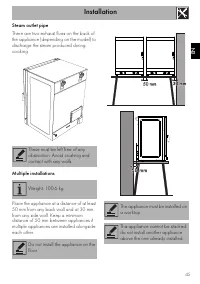
Installation 45 EN Steam outlet pipe There are two exhaust flues on the back of the appliance (depending on the model) to discharge the steam produced during cooking. Multiple installations Place the appliance at a distance of at least 50 mm from any back wall and at 30 mm from any side wall. Keep a...
Page 22 - High food temperature
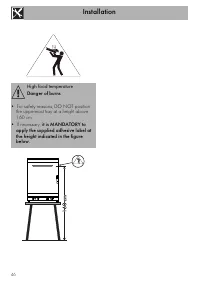
Installation 46 High food temperature Danger of burns • For safety reasons, DO NOT position the uppermost tray at a height above 160 cm. • If necessary, it is MANDATORY to apply the supplied adhesive label at the height indicated in the figure below.