Page 2 - Instructions; General safety instructions
Instructions 48 1 Instructions 1.1 General safety instructions Risk of personal injury • During use the appliance and its accessible parts become very hot. • Never touch the heating elements during use. • Keep children under the age of eight at a safe distance unless they are constantly supervised. ...
Page 3 - Risk of damaging the appliance
Instructions 49 EN • Have qualified personnel carry out installation and assistance interventions according to the standards in force. • Do not try to repair the appliance yourself or without the intervention of a qualified technician. • If the power supply cable is damaged, it must be replaced by t...
Page 4 - For this appliance
Instructions 50 • Do not obstruct ventilation openings and heat dispersal slots. • Never leave the appliance unattended during cooking operations where fats or oils could be released. • Never leave objects on the cooking surface. • Do not use the appliance to heat rooms for any reason. • Remove any ...
Page 5 - Identification plate
Instructions 51 EN 1.2 Identification plate • The identification plate bears the technical data, serial number and brand name of the appliance. Do not remove the identification plate for any reason. 1.3 Manufacturer liability The manufacturer declines all liability for damage to persons or property ...
Page 6 - How to read the user manual; Plastic packaging
Instructions 52 • Deliver the appliance to the appropriate recycling centre for electrical and electronic equipment waste, or return it to the retailer when purchasing an equivalent product, on a one for one basis. Our appliances are packaged in non-polluting and recyclable materials. • Deliver the ...
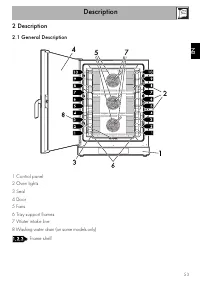
Page 7 - Description; General Description
Description 53 EN 2 Description 2.1 General Description 1 Control panel 2 Oven lights 3 Seal 4 Door 5 Fans 6 Tray support frames 7 Water intake line 8 Washing water drain (on some models only) Frame shelf
Page 8 - Controls description; Backlit capacitive buttons
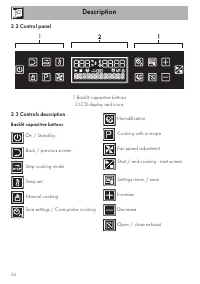
Description 54 2.2 Control panel 1 Backlit capacitive buttons 2 LCD display and icons 2.3 Controls description Backlit capacitive buttons On / Stand-by Back / previous screen Step cooking mode Temp set Manual cooking Time settings / Core probe cooking Humidification Cooking with a recipe Fan speed a...
Page 9 - LCD display and icons; Δt; Available accessories
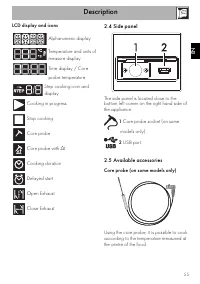
Description 55 EN LCD display and icons Alphanumeric display Temperature and units of measure display Time display / Core probe temperature Step cooking icon and display Cooking in progress Stop cooking Core probe Core probe with Δt Cooking duration Delayed start Open Exhaust Close Exhaust 2.4 Side ...
Page 10 - Shelves
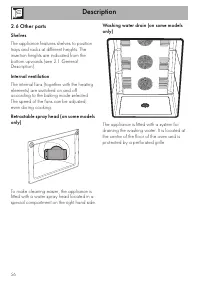
Description 56 2.6 Other parts Shelves The appliance features shelves to position trays and racks at different heights. The insertion heights are indicated from the bottom upwards (see 2.1 General Description). Internal ventilation The internal fans (together with the heating elements) are switched ...
Page 11 - Safety thermostat
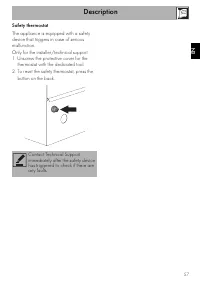
Description 57 EN Safety thermostat The appliance is equipped with a safety device that triggers in case of serious malfunction.Only for the installer/technical support:1. Unscrew the protective cover for the thermostat with the dedicated tool. 2. To reset the safety thermostat, press the button on ...
Page 12 - Use; First time switching on
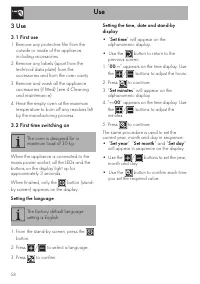
Use 58 3 Use 3.1 First use 1. Remove any protective film from the outside or inside of the appliance, including accessories. 2. Remove any labels (apart from the technical data plate) from the accessories and from the oven cavity. 3. Remove and wash all the appliance accessories (if fitted) (see 4 C...
Page 15 - Parameters and default values; The appliance has three baking modes:
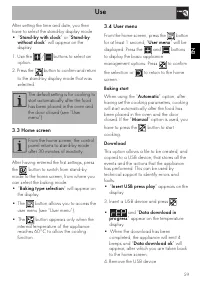
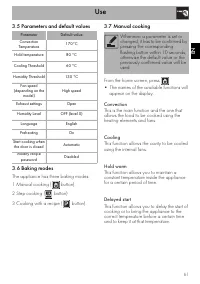
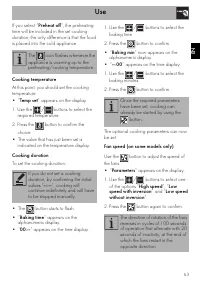
Use 61 EN 3.5 Parameters and default values 3.6 Baking modes The appliance has three baking modes: 1 Manual cooking ( button). 2 Step cooking ( button). 3 Cooking with a recipe ( button). 3.7 Manual cooking From the home screen, press : • The names of the available functions will appear on the displ...
Page 19 - Ready to start cooking
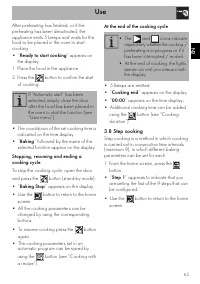
Use 65 EN After preheating has finished, or if the preheating has been deactivated, the appliance emits 5 beeps and waits for the food to be placed in the oven to start cooking:• “ Ready to start cooking ” appears on the display. 1. Place the food in the appliance. 2. Press the button to confirm the...
Page 21 - Cooking with a recipe; Creating a new recipe
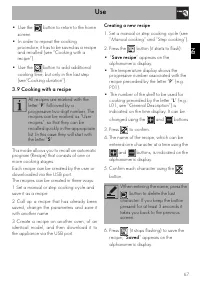
Use 67 EN • Use the button to return to the home screen. • In order to repeat the cooking procedure, it has to be saved as a recipe and recalled (see “Cooking with a recipe”) • Use the button to add additional cooking time, but only in the last step (see“Cooking duration”). 3.9 Cooking with a recipe...
Page 23 - Parameters
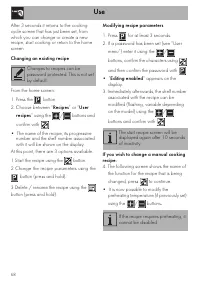
Use 69 EN 5. Pressing the flashing button takes you to the parameter modification screen: • “ Parameters ” appears on the alphanumeric display. 6. Change the parameters using the relative buttons. At this point, the following options are available: 1 The button takes you back to the screen in step 4...
Page 24 - Deleting and renaming a recipe
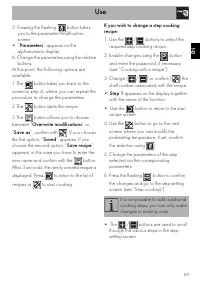
Use 70 • Use the button to change the step selected. • Use the to save the step cooking recipe with a new name or overwrite it, as described above. • To discard the changes, press the button, which takes you to the start recipe screen; press again to return to the list of recipes. Deleting and renam...
Page 25 - Starting a recipe; Cooking with the core probe; Hot temperature probe
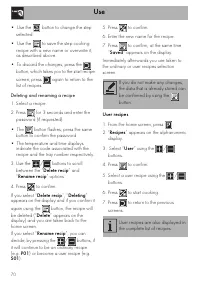
Use 71 EN Starting a recipe 1. Select a recipe (preset or user).• The display shows the progressive number associated with it, the tray number and the name 2. Use the / button to scroll through the list of recipes. • Use the button to return to the previous screens. • Use the button to delete / rena...
Page 26 - Improper use
Use 72 The core probe is a thermometer that measures the temperature directly at the centre of the food and stops the cooking cycle when it detects that the temperature is the same as the one set by the user.• Remove the protective rubber cap from the tip of the probe before using it for the first t...
Page 27 - If you select the
Use 73 EN 6. Use the / buttons to select between “ T probe ” and “ Δt probe ”. 7. Confirm with . If you select the “ T Probe ” option 1. Choose whether to set preheating or not (see “Manual cooking”). 2. Use the / buttons to set the cooking temperature (see “Manual cooking”). 3. Press to confirm. 4....
Page 28 - Special functions; Cooling
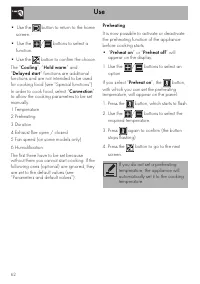
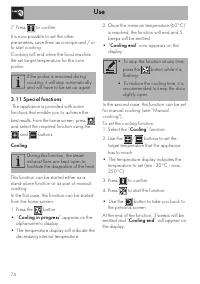
Use 74 7. Press to confirm. It is now possible to set the other parameters, save them as a recipe and / or to start cooking.Cooking will end when the food reaches the set target temperature for the core probe. 3.11 Special functions The appliance is provided with some functions that enable you to ac...
Page 29 - Hold warm
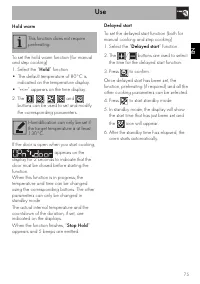
Use 75 EN Hold warm To set the hold warm function (for manual and step cooking):1. Select the “ Hold ” function. • The default temperature of 80°C is indicated on the temperature display. • “ --:-- ” appears on the time display. 2. The , , , and buttons can be used to set and modify the correspondin...
Page 30 - General advice
Use 76 3.12 Cooking advice General advice • Use a fan assisted function to achieve consistent cooking at several levels. • It is not possible to shorten cooking times by increasing the temperature (the food could be overcooked on the outside and undercooked on the inside). Advice for cooking meat • ...
Page 31 - Cleaning and maintenance; Cleaning the appliance; Ordinary daily cleaning; Cleaning the door; Removing the door
Cleaning and maintenance 77 EN 4 Cleaning and maintenance 4.1 Cleaning the appliance Recommendations for cleaning the appliance To keep the surfaces in good condition, they should be cleaned regularly after use. Let them cool first. Ordinary daily cleaning Always use only specific products that do n...
Page 32 - Clean both the interior and exterior of the; Cleaning the oven cavity
Cleaning and maintenance 78 3. Open the internal glass pane. 4. Clean both the interior and exterior of the glass panes. Use absorbent kitchen roll. In case of stubborn dirt, wash with a damp sponge and neutral detergent. 5. After cleaning, close the internal glass pane again. 6. Reposition the uppe...
Page 33 - Removing the tray support frames
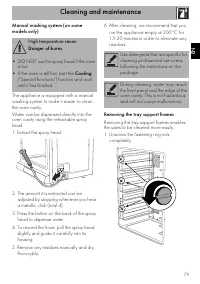
Cleaning and maintenance 79 EN Manual washing system (on some models only) The appliance is equipped with a manual washing system to make it easier to clean the oven cavity.Water can be dispensed directly into the oven cavity using the retractable spray head.1. Extract the spray head. 2. The amount ...
Page 34 - Remove the tray support frames from their; Extraordinary maintenance; Removing the door seal
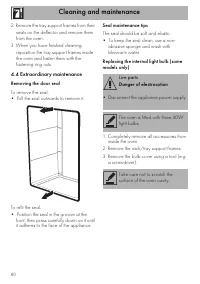
Cleaning and maintenance 80 2. Remove the tray support frames from their seats on the deflector and remove them from the oven. 3. When you have finished cleaning, reposition the tray support frames inside the oven and fasten them with the fastening ring nuts . 4.4 Extraordinary maintenance Removing ...
Page 35 - Risk of malfunction
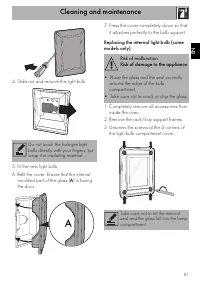
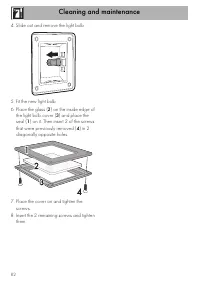
Cleaning and maintenance 81 EN 4. Slide out and remove the light bulb. 5. Fit the new light bulb. 6. Refit the cover. Ensure that the internal moulded part of the glass ( A ) is facing the door. 7. Press the cover completely down so that it attaches perfectly to the bulb support. Replacing the inter...
Page 37 - If the appliance is not working properly; Regular Maintenance
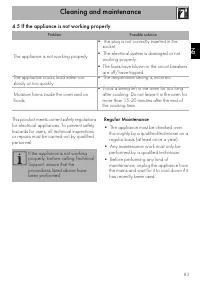
Cleaning and maintenance 83 EN 4.5 If the appliance is not working properly This product meets current safety regulations for electrical appliances. To prevent safety hazards for users, all technical inspections or repairs must be carried out by qualified personnel. Regular Maintenance • The applian...
Page 38 - Installation; Electrical connection; Fixed connection
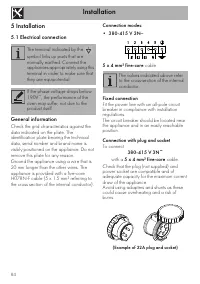
Installation 84 5 Installation 5.1 Electrical connection General information Check the grid characteristics against the data indicated on the plate. The identification plate bearing the technical data, serial number and brand name is visibly positioned on the appliance. Do not remove this plate for ...
Page 39 - Cable replacement
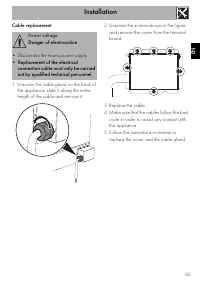
Installation 85 EN Cable replacement 1. Unscrew the cable gland on the back of the appliance, slide it along the entire length of the cable and remove it. 2. Unscrew the screws shown in the figure and remove the cover from the terminal board. 3. Replace the cable. 4. Make sure that the cables follow...
Page 41 - Direct discharge into a drainage system
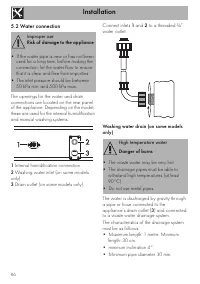
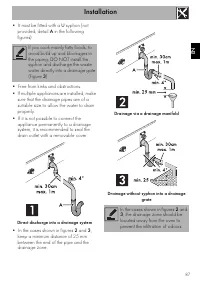
Installation 87 EN • It must be fitted with a U syphon (not provided, detail A in the following figures). • Free from kinks and obstructions.• If multiple appliances are installed, make sure that the drainage pipes are of a suitable size to allow the water to drain properly. • If it is not possible ...
Page 42 - Heavy appliance
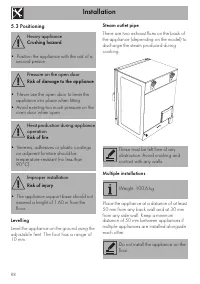
Installation 88 5.3 Positioning Levelling Level the appliance on the ground using the adjustable feet. The foot has a range of 10 mm. Steam outlet pipe There are two exhaust flues on the back of the appliance (depending on the model) to discharge the steam produced during cooking. Multiple installat...
Page 43 - High food temperature
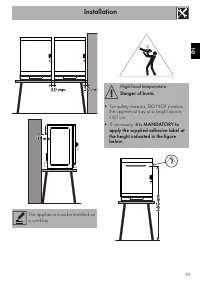
Installation 89 EN ù The appliance must be installed on a worktop. High food temperature Danger of burns • For safety reasons, DO NOT position the uppermost tray at a height above 160 cm. • If necessary, it is MANDATORY to apply the supplied adhesive label at the height indicated in the figure below...