Page 2 - ENGLISH
ENGLISH 3 -28 Thank you for choosing our product. We advise you to read this manual carefully. It contains all necessary instructions for maintaining unaltered the appearance and functional qualities of the appliance.
Page 3 - Contents
Contents 1. INSTRUCTIONS FOR USE ..................................................................................................... 4 2. SAFETY PRECAUTIONS ........................................................................................................ 6 3. ENVIRONMENTAL CARE ...............
Page 4 - General instructions; INSTRUCTIONS FOR USE; cooking and heating up food
General instructions 1. INSTRUCTIONS FOR USE This manual is an integral part of the appliance. It must be kept in its entirety and in an accessible place for the whole working life of the appliance. We recommend reading this manual and all information it contains carefully before using the appliance...
Page 6 - SAFETY PRECAUTIONS; not; Never disconnect the plug by pulling on the cable.
General instructions 2. SAFETY PRECAUTIONS Consult the installation instructions for safety standards on electrical or gas appliances and for ventilation functions. In your interests and for your safety the law requires that the installation and servicing of all electrical and gas appliances be carr...
Page 8 - Instructions for disposal; ENVIRONMENTAL CARE; Our environmental care; suffocation hazard for children, especially the plastic bags.; Important
Instructions for disposal 3. ENVIRONMENTAL CARE 3.1 Our environmental care Adequate selective collection for the subsequent forwarding of the decommissioned product to recycling, treatment and ecologically compatible disposal contributes to avoiding possible negative effects on the environment and o...
Page 9 - Instructions for the user; GET TO KNOW YOUR APPLIANCE
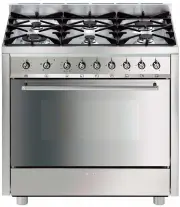
Instructions for the user 4. GET TO KNOW YOUR APPLIANCE Cooking hob Control panel Oven light (double on some models) Oven seal Fan Storage compartment Rack/tray support frame 9
Page 10 - Description of the controls on the front panel
Instructions for the user 4.1 Description of the controls on the front panel 4.1.1 Timer knob In order to use the timer, the buzzer must be set by turning the knob clockwise. The numbers correspond to minutes (maximum 55 minutes). Adjustment is progressive and intermediate positions between the figu...
Page 11 - AVAILABLE ACCESSORIES; Reduction pan stand:; Using the rack or tray
Instructions for the user 5. AVAILABLE ACCESSORIES NOTE: Some models are not provided with all accessories. Tray rack: it can be combined with the oven tray. Reduction pan stand: useful when using small pans. Oven tray: useful for collecting fat from foods placed on the rack above. The oven accessor...
Page 12 - USING THE COOKING HOB; General warnings and advice; least 1 minute before trying to re-light the burner; Cookware diameters; Burner
s es e es t t Instructions for the user 6. USING THE COOKING HOB 6.1 General warnings and advice Before lighting the hob burners, make sure that the flame-spreader crowns are correctly positioned in their housings with their respective burner caps. 6.2 Lighting the hob burners All the appliance's co...
Page 13 - Before using the appliance; Heat the empty appliance to the maximum temperature
Instructions for the user 7. USING THE OVEN 7.1 Before using the appliance • Remove any labels (apart from the technical data plate) from trays, dripping pans and the cooking compartment. • Remove any protective film from the outside or inside of the appliance, including from accessories such as tra...
Page 14 - General warnings and advice for use
Instructions for the user 7.6 General warnings and advice for use All cooking operations must be carried out with the door closed. The dissipation of heat may cause hazards. During cooking, do not cover the bottom of the oven with aluminium or tin foil and do not place pans or oven trays on it as th...
Page 15 - Using the bottom burner; The bottom burner cannot be lit with the oven door closed.; Using the electric grill
Instructions for the user 7.7 Using the bottom burner 7.7.1 Electronic spark ignition Open the oven door fully, press the thermostat knob and turn it anti-clockwise between MIN and MAX; the electric spark ignition is activated automatically. After lighting, keep the knob pressed down for a few secon...
Page 16 - COOKING WITH THE OVEN; DEFROSTING; Cooking advice and instructions; We recommend preheating the oven before putting food in.
Instructions for the user 8. COOKING WITH THE OVEN GRILL: The heat coming from the grill element gives perfect grilling results above all for thin and medium thickness meat and in combination with the rotisserie (where present) gives the food an even browning at the end of cooking. Perfect for sausa...
Page 17 - Cooking information table
Types of food Weight Function Runner position from the bottom bottom burner bottom burner + Temperature °C Time (minutes) Temperature °C Time (minutes) FIRST COURSES Instructions for the user 8.2 Cooking information table Lasagne 3 Kg - 4 230 - 240 50 - 60 230 - 240 45 - 50 Cannelloni 2.5 Kg - 3 220...
Page 18 - CLEANING AND MAINTENANCE; Cleaning stainless steel; Food stains or residues
Instructions for the user 9. CLEANING AND MAINTENANCE Do not use steam jets for cleaning the appliance. The steam could reach the electronics, damaging them and causing short-circuits. WARNING: For your safety, you are advised to wear protective gloves while performing any cleaning or extraordinary ...
Page 19 - Cleaning the oven
Instructions for the user 9.4.2 Burner caps and flame-spreader crowns The burner caps and flame-spreader crowns can be removed for easier cleaning. Wash them in warm water and non-abrasive detergent making sure to remove any encrustation, then wait until they are perfectly dr y. Refit the flame-spre...
Page 21 - EXTRAORDINARY MAINTENANCE; Removing the door; Replacing the light bulb
Instructions for the user 10. EXTRAORDINARY MAINTENANCE The oven requires periodic minor maintenance or replacement of parts subject to wear, such as gaskets, light bulbs, etc. Specific instructions for each operation of this kind are given below. Before any intervention that requires access to live...
Page 22 - Instructions for the installer; Clearances above and around household appliances; REQUIREMENTS; Side clearances; NOTES; Combustion gas discharge
Instructions for the installer 11. INSTALLATION The appliance connection point shall be accessible with the appliance installed. 11.1 Clearances above and around household appliances Extract from AS5601 REQUIREMENTS 1 Overhead clearances – (Measurement A) Range hoods and exhaust fans shall be instal...
Page 23 - Room ventilation
Instructions for the installer 11.3 Gas connection This appliance is suitable for installation with Natural Gas. Refer to “12.4 Burner and nozzle characteristics tab le” for the relevant burner pressure and appropriate injector sizes. When the appliance is to be connected to Natural Gas then the pre...
Page 24 - Electrical connection
Instructions for the installer 11.6 Electrical connection Make sure the voltage and the cross-section of the power supply line match the specifications indicated on the identification plate positioned on the appliance. Do not remove this plate for any reason. A copy of the plate is attached to the i...
Page 25 - Positioning and levelling the appliance
Instructions for the installer 11.7 Positioning the skirt (on some models only) The skirt must always be positioned and secured correctly on the appliance. 1 Loosen the 4 screws ( A ) on the back of the worktop (2 for each side). 2 Place the skirt above the worktop, taking care to align the skirt's ...
Page 27 - REPLACEMENT OF NOZZLES; Natural gas at a pressure of 1.0 kPa; Replacing the hob nozzles
Instructions for the installer 12. REPLACEMENT OF NOZZLES BEFORE PERFORMING ANY OPERATIONS, SWITCH OFF THE POWER SUPPLY TO THE APPLIANCE. Appliance set for gas: Natural gas at a pressure of 1.0 kPa (see label on product) In the case of operation with other types of gas, the burner nozzles must be ch...
Page 28 - Burner and nozzle characteristics table
Instructions for the installer 12.4 Burner and nozzle characteristics table Burner NG - 1.0 kPa Nominal gas consumption (MJ/h) Injector (1/100 mm) Auxiliar y 3.9 .90 Semi-rapid 7.5 1.20 Rapid 12.0 1.55 Wok 15.8 1.85 Oven 15.0 1.75 Burner ULPG - 2.75 kPa Nominal gas consumption (MJ/h) Injector (1/100...