Smeg A1C-6 - User Manual
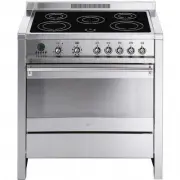
Smeg A1C-6 Range – User Manual, read for free online in PDF format. We hope this helps you resolve any issues you may have. If you have further questions, please contact us through the contact form.
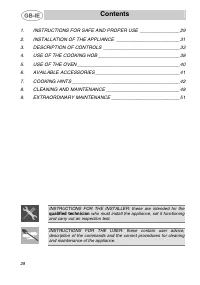
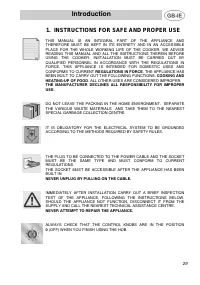
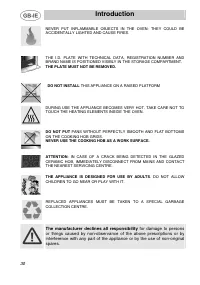
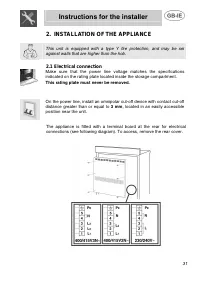
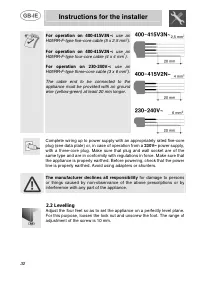
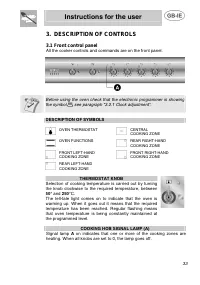
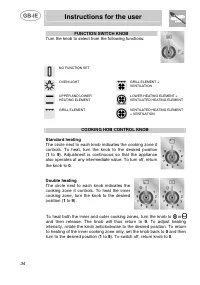
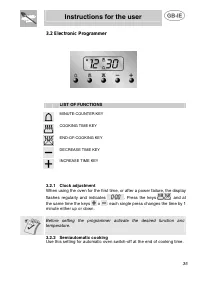
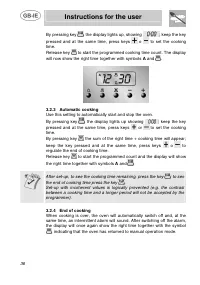
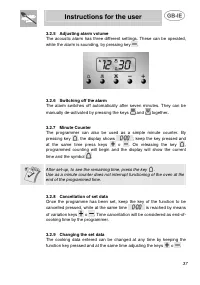

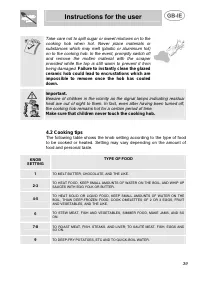
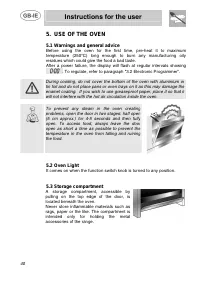
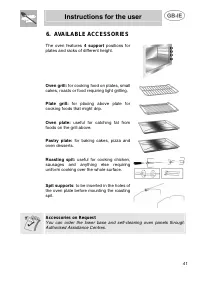
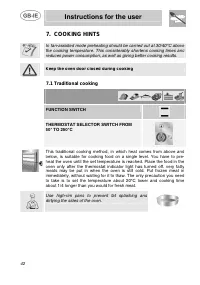
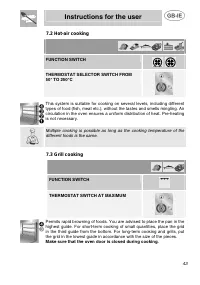
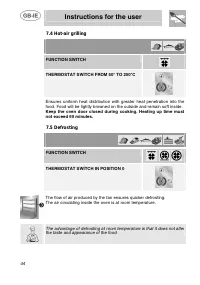
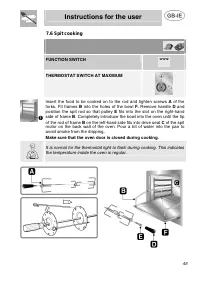
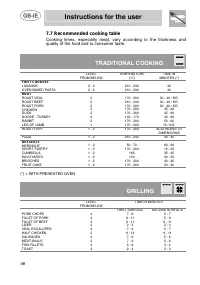
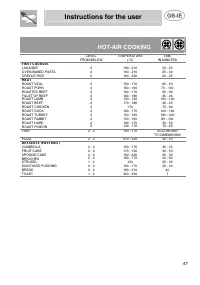

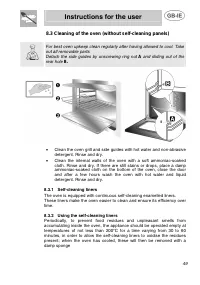
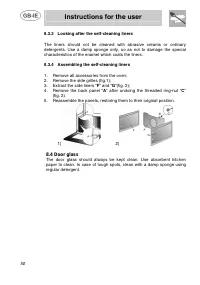
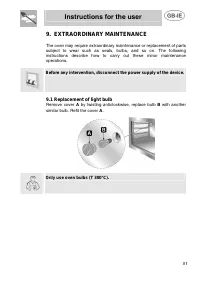
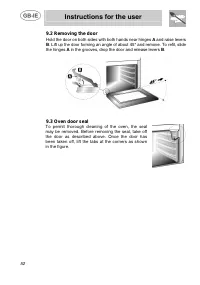
Table of Contents:
- Page 2 – Introduction; INSTRUCTIONS FOR SAFE AND PROPER USE; REGULATIONS IN FORCE; COOKING AND; NEVER ATTEMPT TO REPAIR THE APPLIANCE.
- Page 3 – The manufacturer declines all responsibility; for damage to persons
- Page 4 – Instructions for the installer; INSTALLATION OF THE APPLIANCE; Electrical connection; This rating plate must never be removed.; , located in an easily accessible
- Page 5 – use an
- Page 6 – Instructions for the user; DESCRIPTION OF CONTROLS; Front control panel; All the cooker controls and commands are on the front panel.; DESCRIPTION OF SYMBOLS; THERMOSTAT KNOB; ° and
- Page 7 – FUNCTION SWITCH KNOB; COOKING HOB CONTROL KNOB
- Page 8 – Electronic Programmer; LIST OF FUNCTIONS; flashes regularly and indicates; cooking
- Page 9 – After set-up, to see the cooking time remaining, press the key
- Page 10 – Counter
- Page 11 – USE OF THE COOKING HOB; to a maximum setting of
- Page 12 – Failure to instantly clean the glazed
- Page 13 – Warnings and general advice; It comes on when the function switch knob is turned to any position.; Storage compartment
- Page 14 – AVAILABLE ACCESSORIES; support; Accessories on Request
- Page 15 – Keep the oven door closed during cooking; Traditional cooking; FUNCTION SWITCH
- Page 19 – Recommended cooking table; TRADITIONAL COOKING; GRILLING
- Page 20 – HOT-AIR COOKING
- Page 21 – CLEANING AND MAINTENANCE; Cleaning the glazed ceramic hob; To clean and preserve the stainless steel surfaces, always use; only; pour the product on a damp cloth and wipe the surface,
- Page 22 – and sliding out of the; liners
- Page 23 – ” and “
- Page 24 – EXTRAORDINARY MAINTENANCE; Replacement of light bulb; Remove cover
- Page 25 – Removing the door; Hold the door on both sides with both hands near hinges
Contents
28
1.
INSTRUCTIONS FOR SAFE AND PROPER USE _______________ 29
2.
INSTALLATION OF THE APPLIANCE ________________________ 31
3.
DESCRIPTION OF CONTROLS _____________________________ 33
4.
USE OF THE COOKING HOB _______________________________ 38
5.
USE OF THE OVEN _______________________________________ 40
6.
AVAILABLE ACCESSORIES ________________________________ 41
7.
COOKING HINTS _________________________________________ 42
8.
CLEANING AND MAINTENANCE ____________________________ 48
9.
EXTRAORDINARY MAINTENANCE __________________________ 51
INSTRUCTIONS FOR THE INSTALLER: these are intended for the
qualified technician
who must install the appliance, set it functioning
and carry out an inspection test.
INSTRUCTIONS FOR THE USER: these contain user advice,
description of the commands and the correct procedures for cleaning
and maintenance of the appliance.
"Loading the manual" means you need to wait until the file loads and becomes available for online reading. Some manuals are very large, and the time they take to appear depends on your internet speed.
Summary
Introduction 29 1. INSTRUCTIONS FOR SAFE AND PROPER USE THIS MANUAL IS AN INTEGRAL PART OF THE APPLIANCE AND THEREFORE MUST BE KEPT IN ITS ENTIRETY AND IN AN ACCESSIBLE PLACE FOR THE WHOLE WORKING LIFE OF THE COOKER. WE ADVISE READING THIS MANUAL AND ALL THE INSTRUCTIONS THEREIN BEFORE USING THE COO...
Introduction 30 NEVER PUT INFLAMMABLE OBJECTS IN THE OVEN: THEY COULD BE ACCIDENTALLY LIGHTED AND CAUSE FIRES. THE I.D. PLATE WITH TECHNICAL DATA, REGISTRATION NUMBER AND BRAND NAME IS POSITIONED VISIBLY IN THE STORAGE COMPARTMENT. THE PLATE MUST NOT BE REMOVED. DO NOT INSTALL THIS APPLIANCE ON A RA...
Instructions for the installer 31 2. INSTALLATION OF THE APPLIANCE This unit is equipped with a type Y fire protection, and may be set against walls that are higher than the hob. 2.1 Electrical connection Make sure that the power line voltage matches the specifications indicated on the rating plate ...