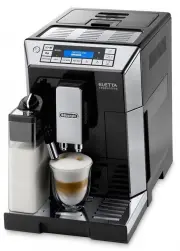
Page 6 - MILK
5 18 19 20 21 22 23 24 25 26 28 30 31 32 29 MILK A B 17 27A 27B
Page 7 - MAKING CAPPUCCINOS AND MILK BASED
6 CONTENTSINTRODUCTION ................................................ 7 Symbols used in these instructions .................................. 7Letters in brackets ............................................................ 7Troubleshooting and repairs ............................................ ...
Page 9 - A number of buttons on the panel have a double function. This is; CAPPUCCINO; menu, press this button to scroll the menu items); LATTE; this button to scroll the menu items); OK
8 This is a household appliance only. It is not intended to be used in:• staff kitchen areas in shops, offices and other working environments; • farm houses;• by clients in hotels, motels and other re- sidential type environments; • bed and breakfast type environments. Any other use is considered im...
Page 10 - FLAT WHITE; TURNING THE APPLIANCE ON
9 Installing the appliance Important! When you install the appliance, you should respect the fol-lowing safety warnings: • The appliance gives off heat. After positioning the applian- ce on the worktop, leave a space of at least 3 cm between the surfaces of the appliance and the side and rear walls ...
Page 15 - MILK MENU; Please note: general instructions for all milk based; Cleaning the milk container after use; Important! Danger of burns
14 6. Attach the milk container to the connection nozzle and push as far as it will go (fig. 23). The machine emits a beep (if the beep function is enabled). 7. Place a sufficiently large cup under the coffee and frothed milk spouts. Adjust the length of the milk spout. To move it nearer the cup, si...
Page 18 - Infuser
17 33 1. Check regularly (about once a week) that the inside of the appliance (accessible after removing the drip tray) is not dirty. If neces-sary, remove coffee deposits with the brush supplied and a sponge. 2. Remove the residues with a vacuum cleaner (fig. 33). Cleaning the water tank 1. Clean t...
Page 19 - Cleaning the milk container
18 39 PUSH 9. Close the infuser door.10. Replace the water tank. Cleaning the milk container Clean the milk container every two days as described below:1. Remove the lid.2. Remove the milk spout and intake tube.3. Turn the froth adjustment dial clockwise to the “INSERT” position (fig. 40) and pull o...
Page 20 - SETTING WATER HARDNESS; WATER SOFTENER FILTER; Please note
19 Avoid contact with splashes of water. 9. Press the OK button to confirm that you have added the solution. The descale programme automatically performs a series of rinses and pauses to remove limescale deposits from inside the machine. “Descale underway” is displayed. The descale programme starts,...
Page 22 - DISPLAYED MESSAGES; DISPLAYED MESSAGE
21 DISPLAYED MESSAGES DISPLAYED MESSAGE POSSIBLE CAUSE SOLUTION FILL TANK Insufficient water in the tank. Fill the tank with water and/or insert it cor-rectly, pushing it as far as it will go until it clicks into place. EMPTY GROUNDS CONTAINER The grounds container (A10) is full. Empty the grounds c...
Page 23 - TROUBLESHOOTING
22 GENERAL ALARM The inside of the appliance is very dirty. Clean the inside of the appliance thoroughly, as described in the section “Cleaning”. If the message is still displayed after cleaning, contact a service centre. EMPTY CIRCUIT, FILL CIRCUITWater deliveryPRESS OK The water circuit is empty P...
Page 24 - DISPOSAL
23 Coffee does not come out of one of the spouts. The spouts are blocked. Clean the spouts with a toothpick (fig. 34). The appliance does not come on. The power cable is not plugged in properly. Plug the cable fully into the socket on the back of the appliance (fig. 1). It is not plugged into the ma...
Page 25 - Warning - this appliance must be earthed; Green and Yellow to Earth
24 ELECTRICAL CONNECTION (UK ONLY) Before using this appliance ensure that the voltage indicated on the product corresponds with the main voltage in your home, if you are in any doubt about your supply contact your local electricity company.The flexible mains lead is supplied connected to a B.S. 136...