Page 10 - Product description; Intended use; Product overview
Contents Introduction................................................................... 10Safety............................................................................12Assembly...................................................................... 22Operation......................................
Page 11 - Product liability
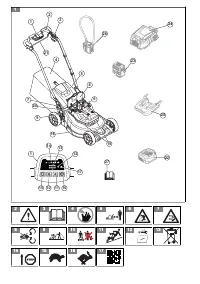
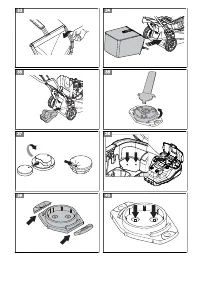
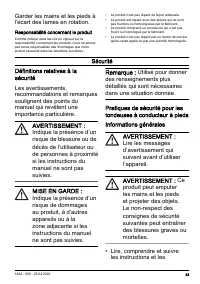
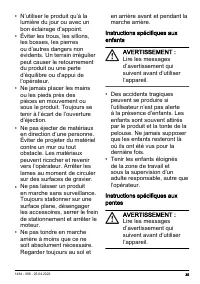
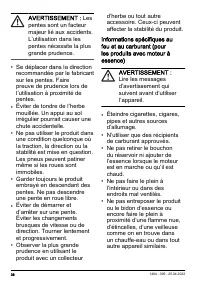
(Fig. 7) Warning: Keep hands and feet away from the rotating blade. (Fig. 8) Warning: Keep hands and feet away from rotating parts. (Fig. 9) Before and while walking rearward, look behind and down for small children, animals or other risks that can cause you to fall. (Fig. 10) Keep persons and anima...
Page 22 - Introduction; To install and remove the multi battery
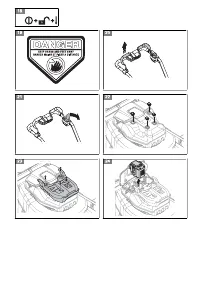
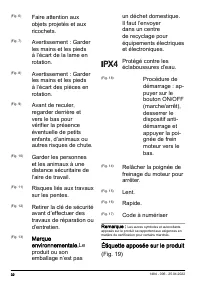
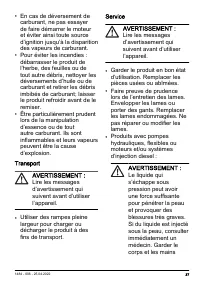
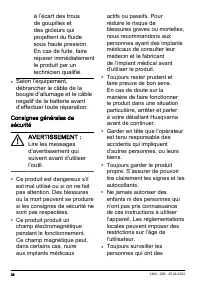
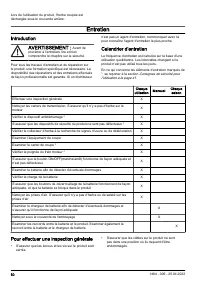
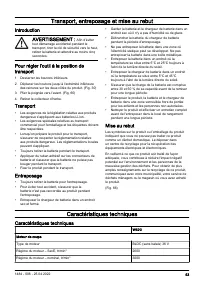
• Only charge the battery indoors in a room with good airflow and away from sunlight. Do not charge the battery in wet conditions. Safety instructions for maintenance WARNING: Read the warning instructions that follow before you use the product. • Remove the safety key before you do maintenance on t...
Page 23 - Operation; To start to use Husqvarna Connect
9. Install the multi battery onto the battery adapter.10. Connect the multi battery to the battery adapter. (Fig. 28) 11. Attach battery adapter cord to the handle with the 3 fabric straps. (Fig. 29) 12. Remove the multi battery in the opposite sequence. WARNING: Do not attach the cord too loosely t...
Page 24 - To install the sensor; To set the product in operation position; Battery status
To install the sensor 1. Make sure that the sensor is connected to the Husqvarna Fleet Services ™ app. Refer to To do a pairing operation between the app and the product on page 23. 2. Drill 2 holes by the marks in the enclosure slot. (Fig. 38) Note: Make sure that the holes are the same dimension a...
Page 25 - To charge the multi battery
LED display Charging status LED 1, LED 2 are lit, LED 3 flashes 50%-75% LED 1, LED 2, LED 3 are lit, LED 4 flashes 75%-100% LED 1, LED 2, LED 3, LED 4 are lit Fully charged To charge the multi battery Note: Charge the battery if it is the first time that you use it. A new battery is only 30% charged...
Page 26 - Maintenance
When you operate the product, the cut grass discharges below the rear cover. Maintenance Introduction WARNING: Before you do maintenance, you must read and understand the safety chapter. For all servicing and repair work on the product, special training is necessary. We guarantee the availability of...
Page 27 - Troubleshooting; Battery
4. Examine the motor shaft to make sure that it is not bent. 5. When you attach the new blade, make sure that the bent ends point in the direction of the cutting cover. (Fig. 60) 6. Put the friction washer and the blade against the blade support. (Fig. 61) 7. Make sure that the blade aligns with the...
Page 31 - Description du produit; Utilisation prévue; Présentation du produit
Table des matières Introduction................................................................... 31Sécurité.........................................................................33Montage........................................................................ 46Fonctionnement.......................
Page 33 - Responsabilité concernant le produit
Garder les mains et les pieds à l’écart des lames en rotation. Responsabilité concernant le produit Comme indiqué dans les lois en vigueur sur la responsabilité concernant les produits, nous ne serons pas tenus responsables des dommages que notre produit causerait dans les situations suivantes : • L...
Page 47 - Fonctionnement; Pour commencer à utiliser Husqvarna
Montage du bouchon de broyage (accessoire ) 1. Soulever le couvercle arrière et retirer le collecteur d’herbe. 2. Placer le bouchon de broyage dans le canal de décharge. (Fig. 35) 3. Remplacer la lame par la lame de broyeur fournie avec l’ensemble de déchiquetage. Se reporter à la section Pour rempl...
Page 48 - État de la batterie
Réglage de la hauteur de coupe La hauteur de coupe peut être réglée à 6 niveaux.1. Pousser la commande de hauteur de coupe dans le sens de la roue, puis vers l’arrière pour augmenter la hauteur de coupe. 2. Pousser la commande de hauteur de coupe dans le sens de la roue, puis vers l’avant pour dimin...
Page 50 - Entretien
Lors de l’utilisation du produit, l’herbe coupée est déchargée sous le couvercle arrière. Entretien Introduction AVERTISSEMENT : Avant de procéder à l’entretien, lire et bien comprendre le chapitre sur la sécurité. Pour tous les travaux d’entretien et de réparation sur le produit, une formation spéc...
Page 51 - Dépannage; Batterie
Pour remplacer la lame 1. Bloquer la lame au moyen d’un bloc de bois. (Fig. 58) 2. Retirer le boulon de lame, la rondelle élastique et la lame. (Fig. 59) 3. Examiner le support de lame et le boulon de lame afin de détecter d’éventuels dommages.a) En cas de remplacement de la lame ou du support de la...
Page 57 - Responsabilidad del fabricante
Mantenga las manos y los pies alejados de las cuchillas giratorias. Responsabilidad del fabricante Como se menciona en las leyes de responsabilidad del fabricante, no nos hacemos responsables de los daños que cause nuestro producto si: • el producto se repara incorrectamente• el producto se repara c...
Page 71 - Funcionamiento; Introducción; Para empezar a utilizar Husqvarna Connect; Husqvarna Fleet Services; Para realizar una operación de; Para ubicar el producto en posición de
3. Reemplace la cuchilla con la cuchilla de mantillo que se suministra con el juego de mantillo. Consulte Para reemplazar la cuchilla en la página 74. Funcionamiento Introducción ADVERTENCIA: Antes de utilizar el producto, debe leer y entender el capítulo sobre seguridad. Husqvarna Connect La aplica...
Page 72 - Estado de la batería
Para ajustar la altura de corte La altura de corte puede ajustarse en 6 niveles.1. Presione el control de altura de corte hacia la rueda y, a continuación, hacia atrás para aumentar la altura de corte. 2. Presione el control de altura de corte hacia la rueda y, a continuación, hacia delante para red...
Page 74 - Mantenimiento
Mantenimiento Introducción ADVERTENCIA: Antes de realizar el mantenimiento, debe leer y entender el capítulo sobre seguridad. Para todos los trabajos de mantenimiento y reparación del producto, se requiere capacitación especial. Garantizamos la disponibilidad de trabajos de mantenimiento y reparació...
Page 75 - Solución de problemas; Batería
3. Revise si el soporte de la cuchilla y el tornillo de la cuchilla presentan daños.a) Si reemplaza la cuchilla o el soporte de la cuchilla, reemplace también el tornillo de la cuchilla, la arandela de resorte y la arandela de fricción. 4. Examine el eje del motor para asegurarse de que no está dobl...