Page 2 - OPERATION; SAFETY RULES; SAFE OPERATION PRACTICES FOR POWERED WALK-BEHIND ROTARY; TRAINING
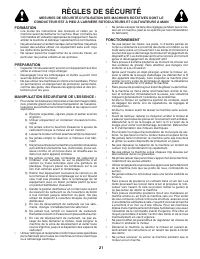
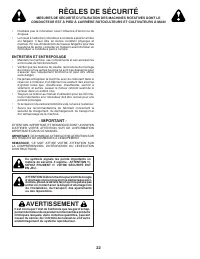
2 OPERATION • Do not allow hands, feet, or other body parts or cloth- ing near the rotating tines or any other moving part. The tines begin to rotate once the engine/motor is started and the activating device is engaged. The tines may momentarily rotate after the activating device is released. • Exe...
Page 3 - MAINTENANCE AND STORAGE; WARNING; The engine exhaust from this product con tains
3 • Never pick up or carry a machine while the engine (motor) is running. • Do not operate the tiller while under the influence of alcohol or drugs. • Powered walk-behind tiller work is strenuous. You must be in good physical condition and mentally alert. If you have any condition that might be aggr...
Page 4 - CUSTOMER RESPONSIBILITIES; PRODUCT SPECIFICATIONS; FRANÇAIS; TABLE OF CONTENTS
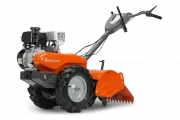
4 CONGRATULATIONS on your purchase of a new tiller. It has been designed, en gi neered and manu fac tured to give you the best pos sible de penda bil ity and per form ance.Should you experience any prob lems you can not easily remedy, please contact your nearest authorized service center. We have co...
Page 5 - TOOLS REQUIRED FOR ASSEMBLY; ASSEMBLY
5 TOOLS REQUIRED FOR ASSEMBLY A socket wrench set will make assembly easier. Standard wrench sizes are listed.(1) Utility knife(1) Tire pressure gauge(1) Pair of pliers(1) 9/16" wrench OPERATOR’S POSITION (See Fig. 1) When right or left hand is mentioned in this manual, it means when you are in ...
Page 7 - REMOVE TILLER FROM CRATE
7 ASSEMBLY REMOVE TILLER FROM CRATE • Make sure shift lever indicator is in “N” position (See Fig. 6) • Tilt tiller forward by lifting handle. Separate cardboard cover from leveling shield. • Rotate tiller handle to the right and pull tiller out of carton. CONNECT SHIFT ROD (See Fig. 6) • Insert end...
Page 8 - KNOW YOUR TILLER; READ THIS MANUAL AND SAFETY RULES BEFORE OPERATING YOUR TILLER.; MEETS ANSI SAFETY REQUIREMENTS
8 KNOW YOUR TILLER READ THIS MANUAL AND SAFETY RULES BEFORE OPERATING YOUR TILLER. Compare the illustrations with your tiller to familiarize yourself with the location of various controls and adjustments. Save this manual for future reference. These symbols may appear on your Tiller or in literature...
Page 9 - TINE OPERATION - WITH WHEEL DRIVE; HOW TO USE YOUR TILLER
9 OPERATION ENGINE • Move throttle control to “SLOW” po si tion and allow the engine to run slowly for cool down. • Turn the engine switch to the "OFF" Position.• Turn the fuel valve lever to the "OFF" Position. NOTE: NEVER USE CHOKE TO STOP ENGINE. IMPORTANT: TO STOP ENGINE IN AN EM...
Page 10 - TURNING; BEFORE START ING ENGINE; TO TRANSPORT
10 OPERATION TILLING (See Fig. 11) • Release depth stake pin. Pull the depth stake up for increased tilling depth. Place depth stake pin in hole of depth stake to lock in position. • Place shift lever indicator in tilling position.• Hold the drive control bar against the handle to start tilling move...
Page 11 - ADD GASOLINE
11 OPERATION TO START ENGINE (See Fig. 13 & 14) CAUTION: KEEP TINE CONTROL IN “OFF” PO SI TION WHEN STARTING ENGINE. When starting engine for the first time or if engine has run out of fuel, it will take ex tra pulls of the recoil starter to move fuel from the tank to the engine. 1. Make sure sp...
Page 12 - TINE SHEAR PINS
12 • Soil conditions are important for proper tilling. Tines will not readily penetrate dry, hard soil which may con trib ute to excessive bounce and difficult handling of your tiller. Hard soil should be mois tened before tilling; however, extremely wet soil will “ball-up” or clump during tilling. ...
Page 13 - MAINTENANCE; GENERAL RECOMMENDATIONS; BEFORE EACH USE; LUBRICATION CHART; SERVICE DATES
13 MAINTENANCE GENERAL RECOMMENDATIONS The warranty on this tiller does not cover items that have been subjected to operator abuse or negligence. To receive full value from the warranty, the operator must main tain tiller as instructed in this manual.Some adjustments will need to be made periodicall...
Page 14 - LUBRICATION
14 MAINTENANCE Disconnect spark plug wire before performing any maintenance to prevent accidental start ing of engine.Prevent fires! Keep the engine free of grass, leaves, spilled oil, or fuel. Re- move fuel from tank before tipping unit for maintenance. Clean muffler area of all grass, dirt, and de...
Page 15 - COOLING SYSTEM; MUFFLER; CLEANING
15 COOLING SYSTEM (See Fig. 20) Your engine is air cooled. For proper en gine performance and long life keep your engine clean. • Clean air screen frequently using a stiff-bristled brush.• Remove blower housing and clean as nec es sary.• Keep cylinder fins free of dirt and chaff. MAINTENANCE BLOWER ...
Page 16 - SERVICE AND ADJUSTMENTS; TILLER; TIRE CARE
16 SERVICE AND ADJUSTMENTS CAUTION: Disconnect spark plug wire from spark plug and place wire where it cannot come into contact with plug. TILLER TO ADJUST HANDLE HEIGHT (See Fig. 21) Select handle height best suited for your tilling conditions. Handle height will be different when tiller digs into ...
Page 17 - TO REPLACE GROUND DRIVE BELT
17 SERVICE AND ADJUSTMENTS TO REPLACE GROUND DRIVE BELT (See Fig. 23 and 24) • Remove belt guard (See “TO REMOVE BELT GUARD” in this section of this manual). • Remove old belt by slipping off engine pulley first then remove from transmission pulley. • Place new belt in groove of transmission pulley ...
Page 18 - TO AD JUST CARBURETOR
18 SERVICE AND ADJUSTMENTS NEW TINE WORN TINE Fig.25 Fig. 26 TINE TINE 3-1/2" (9 cm) MAX TRANS MIS SION Fig. 27 SHARP EDGE HAIRPIN CLIP SHARP EDGES COUNTER TINE ROTATION SHARP EDGES SHARP EDGE SHEAR PIN SHEAR PIN HAIRPIN CLIP SHARP EDGE ENGINE TO AD JUST CARBURETOR The carburetor has been preset...
Page 19 - FUEL SYSTEM; ENGINE OIL; OTHER; STORAGE
19 Immediately prepare your tiller for storage at the end of the season or if the unit will not be used for 30 days or more. WARNING: Never store the tiller with gasoline in the tank inside a build ing where fumes may reach an open flame or spark. Allow the engine to cool before storing in any en cl...
Page 20 - TROUBLESHOOTING POINTS
20 TROUBLESHOOTING POINTS Will not start 1. Out of fuel. 1. Fill fuel tank. 2. Fuel valve "OFF". 2. Turn fuel valve to the "ON" position. 3. Engine Switch "OFF". 3. Turn engine switch to the "ON" position. 4. Engine not “CHOKED” properly. 4. See “TO START ENGINE” in O...
Page 21 - RÈGLES DE SÉCURITÉ
21 • Ne jamais essayer de faire des réglages pendant que le mo- teur est en marche (sauf là où spécifié par recommandation du fabricant). FONCTIONNEMENT • Ne pas laisser les mains, les pieds, ni d’autres parties du corps ou vêtements à proximité des dents en rotation ou de toute autre pièce en mouve...
Page 22 - ENTRETIEN ET ENTREPOSAGE; AVERTISSEMENT
22 • N’utilisez pas le rotoculteur sous l’influence d’alcool ou de drogues. • Le travail à l’aide d’un rotoculteur à conduite à pied à l’arrière est fatigant. Il faut être en bonne condition physique et mentale. En cas d’interdiction de travaux fatigants pour des questions de santé, consulter un méd...
Page 23 - RESPONSABILITÉS DU CLIENT; SPÉCIFICATIONS DE PRODUIT; SOMMAIRE
23 RESPONSABILITÉS DU CLIENT • Lisez et faites attention aux règles de sécurité.• Suivez un programme habituel d’entretien, de soin, et d’uti- li sa tion de la motobineuse. • Suivez les instructions dans les sections des Entretien et d’Entreposage de ce manuel. IMPORTANT: CETTE MACHINE EST MUNI D’UN...
Page 24 - MONTAGE; LES OUTILS EXIGES POUR LE MONTAGE
24 DEVANT POSITION DE L’OPÉRATEUR DROITE GAUCHE Fig. 1 MONTAGE Votre nouvelle motobineuse a été montée à l'usine sauf certaines pièces en vue de l'expédition. Pour s'assurer d'une utilisation correcte et sûre de votre motobineuse, toutes les pièces et ferrures que vous assemblez doivent être serrées...
Page 26 - RACCORDER LA TIGE DE CHANGEMENT DE; HAUTEUR DE POIGNEE
26 MONTAGE RACCORDER LA TIGE DE CHANGEMENT DE VI TES SE (Voir la Fig. 6) • Insérez l’extrémité de la tige de changement de vitesse dans le trou de l’indicateur de levier de changemen t de vitesse. • Insérez le collier en épingle à cheveux à travers le trou de la tige de changement de vitesse pour la...
Page 27 - UTILISATION; CONNAISSEZ VOTRE MOTOBINEUSE
27 Fig. 7 UTILISATION CONNAISSEZ VOTRE MOTOBINEUSE LISEZ CE MANUEL DU PROPRIÉTAIRE ET LES RÈGLES DE SÉCURITÉ AVANT D’UTILISER VOTRE MOTOBINEUSE. Comparez les illustrations à votre motobineuse pour connaître les positions des différentes commandes et les différents réglages. Conservez ce manuel. Ces ...
Page 28 - UTILISATION DES FRAISES - AVEC LA; COMMENT UTILISER
28 UTILISATION L’utilisation d’une motobineuse présente le risque de la projection des particules dans les yeux, ce qui peut causer des blessures sérieuses. Portez toujours des lunettes de sécurité ou une visière avant de démarrer la motobineuse et lorsque vous labourez. Nous recommandons une visièr...
Page 29 - POUR TRANSPORTER; VIRER
29 POUR TRANSPORTER ATTENTION: Laissez refroidir le moteur et le silen cieux avant de soulever ou transporter. Débranchez le fil de bougie d’allumage. Vidangez l’essence du réservoir. DANS LA COUR • Déclenchez la goupille de la jauge de profondeur. Déplacez vers le fond la jauge de profondeur au tro...
Page 30 - REMPLIR LE RÉSERVOIR D’ESSENCE
30 UTILISATION DÉMARRAGE DU MOTEUR (Voir la fig. 12 et 13) ATTENTION : Gardez la commande des dents à la position “OFF” lors du démarrage du moteur. Lors du démarrage initial ou si le moteur a fonctionné sans carburant, il sera nécessaire de tirer plusieurs fois sur le lanceur pour transférer le car...
Page 31 - CONSEILS DE LABOURAGE; BOULONS DE CISAILLEMENT DES DENTS; BINAGE
31 UTILISATION CONSEILS DE LABOURAGE ATTENTION: Utilisez la motobineuse avec la commande des gaz à la position lente “SLOW” (à mi-chemin entre les positions rapide “FAST” et ralenti “IDLE”) jusqu’à ce que vous soyez habitué à elle. • Le labourage est le creusage en retournant et en ameu blis sant le...
Page 32 - ENTRETIEN; TABLEAU DE LUBRIFICATION; DATES D’ENTRETIEN; RECOMMANDATIONS GÉNÉRALES; AVANT CHAQUE UTILISATION
32 ENTRETIEN TABLEAU DE LUBRIFICATION CALENDRIER D’ENTRETIEN INSCRIVEZ LES DATES AU FURET À MESURE QUE VOUSEFFECTUEZ LES ENTRETIENSRÉGULIERS Vérifiez le niveau d’huile de moteur Changez l’huile de moteur Huilez les points de pivotement Inspectez le tamis à air Inspectez le silencieux pare-étincelles...
Page 33 - LUBRIFICATION
33 Débranchez le fil de bougie d'allumage avant d'effectuer tout entretien pour éviter un démarrage accidentel du moteur.Évitez les incendies! Maintenez le moteur exempt d'herbe, de feuilles et d'huile ou de carburant répandu. Vidangez le carburant du réservoir avant de pencher la motobi- neuse pour...
Page 34 - NETTOYAGE; SILENCIEUX
34 ENTRETIEN NETTOYAGE Ne pas nettoyer la motobineuse si le moteur et la transmission sont encore chauds. Il serait mieux de ne pas utiliser de l’eau pressurisée (tuyau d’arrosage, etc.) afin de nettoyer la machine sauf si la garniture près de la transmission, le silencieux du moteur, le filtre à ai...
Page 35 - SOIN DES PNEUS; RÉVISION ET RÉGLAGES; MOTOBINEUSE; POUR RÉGLER LA HAUTEUR DU GUIDON
35 SOIN DES PNEUS ATTENTION: Lors du montage des pneus, à moins que les bourrelets soient cor rec- te ment posés, le gonflement excessif peut provoquer une ex plo sion. • Maintenez dans les pneus une pression de 20 PSI (1,4 kg/cm 2 ). Si la pression de pneu n’est pas uniforme, la moto- bineuse tirer...
Page 36 - POUR REMPLACER LA COURROIE D’ENTRAÎ-
36 RÉVISION ET RÉGLAGES POUR REMPLACER LA COURROIE D’ENTRAÎ- NEMENT À TERRE (Voir les Figs. 22 et 23) • Enlevez le protecteur de courroie (Voir “ENLEVER LE PRO- TEC TEUR DE COURROIE”). • Enlevez la vieille courroie en la glissant de la poulie du moteur et de la poulie de tranmission. • Posez la nouv...
Page 37 - POUR RÉGLER LE CARBURATEUR
37 RÉVISION ET RÉGLAGES Fig. 24 NOU VEL LE FRAISE FRAISE USÉE MOTEUR POUR RÉGLER LE CARBURATEUR Le carburateur a été réglé à l’usine et non modifiable. IMPORTANT: NE TOUCHEZ PAS LE REGULATEUR DE MOTEUR. LE CONSTRUCTEUR DE L’EQUIPEMENT QUI A MONTE LE MOTEUR DETERMINE LA VITESSE MAXIMUM HORS CHARGE A ...
Page 38 - SYSTÈME D'ALIMENTATION; ENTREPOSAGE; HUILE DE MOTEUR; INFORMATION SUPPLEMENTAIRE
38 Préparez immédiatement votre motobineuse pour l’en tre po sa ge à la fin de la saison ou si l'unité ne sera pas utilisée pendant 30 jours ou plus. AT T E N T I O N: N ’ e n t r e p o s e z j a m a i s l a motobineuse lorsque le ré ser voir contient d’essence dans un bâtiment où les va peurs pour ...
Page 39 - GUIDE DE DÉPANNAGE
39 GUIDE DE DÉPANNAGE Le moteur refuse 1. Sans essence. 1. Remplissez le réservoir d’essence. de démarrer 2. Robinet de carburant à la position "OFF" (arrêt). 2. Placez le robinet de carburant à la position "ON" (marche). 3. Commutateur du moteur à la position "OFF" (arrêt). ...