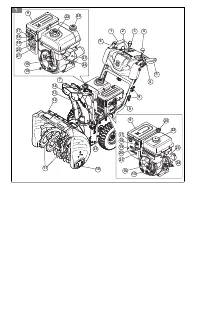
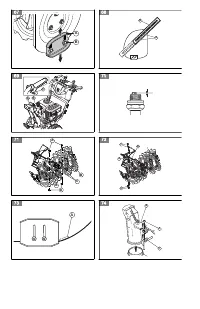
Page 8 - Product overview
Contents Introduction............................................................... 8Safety........................................................................ 9Assembly................................................................ 12Operation.....................................................
Page 9 - Safety; Safety definitions
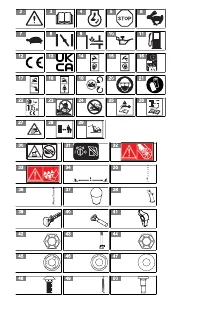
(Fig. 21) Wear protection gloves. (Fig. 22) Sound power level. (Fig. 23) No operation on slopes more than 20 degrees. (Fig. 24) Risk of falling. (Fig. 25) Remove key before maintenance. (Fig. 26) Remove spark plug cable before maintenance. (Fig. 27) Beware of thrown objects. (Fig. 28) Keep distance ...
Page 10 - Safety instructions for operation
Not sufficient airflow can cause injury or death because of asphyxiation or carbon monoxide. • When you use this product the engine makes an electromagnetic field. The electromagnetic field can cause damage to medical implants. Speak to your physician and medical implant manufacturer before you oper...
Page 11 - Safety instructions for maintenance
until refueling is complete. Do not use a nozzle lock-open device. • Replace gasoline cap securely and wipe up spilled fuel. • If fuel is spilled on clothing, change clothing immediately. • Use extension cords and receptacles as specified by the manufacturer for all units with electric drive motors ...
Page 12 - Assembly
very dangerous gas. Do not start the engine indoors or in closed spaces. • Before you do the maintenance on the product, stop the engine and remove the ignition cable from the spark plug. • Use protective gloves when you do maintenance on the blades. The blades are very sharp and cuts can easily occ...
Page 13 - Operation
Operation Before you start the product • Keep persons and animals away from the work area. • Do daily maintenance. See Maintenance schedule on page 16. • Make sure the ignition lead fits correctly on the spark plug. • Add oil or gasoline, if necessary. See Technical data on page 23. To fill the engi...
Page 16 - Maintenance; Introduction
Maintenance Introduction When the product is in use, bolts can loosen and components can become worn. This can cause malfunction like incorrect tolerance clearance, increased oil consumption, or misalignment of various components. Do regular maintenance on the product to prevent malfunction. Mainten...
Page 20 - Troubleshooting
Troubleshooting Troubleshooting Problem Possible cause Solution The product does not start The safety ignition key is not inserted. Insert the safety ignition key. The product is out of fuel. Fill the fuel tank with fresh, clean gasoline. The ON/OFF key is OFF. Move the ON/OFF key to ON posi- tion. ...
Page 22 - Transportation, storage and disposal; Transportation and storage
Problem Possible cause Solution Loss of traction drive/ slowing of drive speed Loss of snow discharge or slowing of snow dis- charge The belt slips. Adjust the cable. Adjust the belt. The belt is worn. Check / replace the belt. Adjust the pulley. The belt is off the pulley. Check / reinstall the bel...
Page 23 - Disposal; Technical data
• Keep the product in a locked area to prevent access for children or persons that are not approved. • Keep the product in a dry and frost free area. Disposal • Obey the local recycling requirements and applicable regulations. • Discard all chemicals, such as engine oil or fuel, at a service center ...
Page 24 - Declaration of Conformity; EU Declaration of Conformity
Declaration of Conformity EU Declaration of Conformity We, Husqvarna AB, SE 561 82 Huskvarna, SWEDEN, declare under our sole responsibility that the represented product: Description Snow thrower Brand Husqvarna Platform / Type / Model ST 324, ST 327, ST 330 Batch Serial number dating 2021 and onward...
Page 25 - UK Declaration of Conformity
UK Declaration of Conformity We, Husqvarna AB, SE-561 82 Huskvarna, Sweden, tel: +46-36-146500, declare on our sole responsibility that the product: Description Snow thrower Brand Husqvarna Type / Model ST 324, ST 327, ST 330 Identification Serial numbers dating 2021 and onwards complies fully with ...
Page 26 - Aperçu du produit
Sommaire Introduction............................................................. 26Sécurité................................................................... 27Montage.................................................................. 30Utilisation.....................................................
Page 27 - Sécurité; Définitions de sécurité
(Fig. 18) Transmission motrice activée. (Fig. 19) Ne retirez pas les carters lorsque le moteur tourne. (Fig. 20) Protection d'oreilles recommandée. (Fig. 21) Portez des gants de protection. (Fig. 22) Niveau de puissance sonore. (Fig. 23) Ne pas utiliser sur des pentes d'une inclinaison supérieure à ...
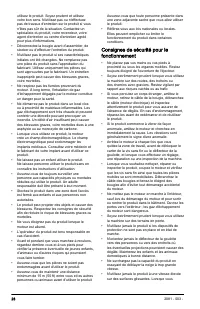
Page 30 - Consignes de sécurité pour; Montage; Pour retirer le produit du carton
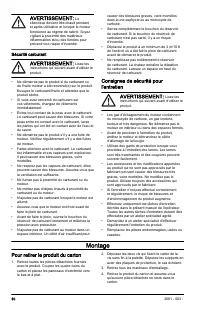
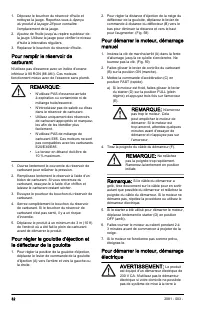
AVERTISSEMENT: Le silencieux devient très chaud pendant et après utilisation et lorsque le moteur fonctionne au régime de ralenti. Soyez vigilant à proximité des matériaux inflammables et/ou des fumées pour prévenir tout risque d'incendie. Sécurité carburant AVERTISSEMENT: Lisez les instructions qui...
Page 31 - Utilisation
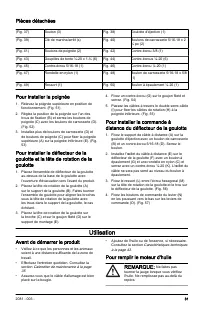
Pièces détachées (Fig. 37) Bouton (3) (Fig. 38) Goulotte d'éjection (1) (Fig. 39) Clé de marche/arrêt (s) (Fig. 40) Boulons de carrosserie 5/16-18 x 2 ¼ po (2) (Fig. 41) Boutons de poignée (2) (Fig. 42) Contre-écrou 3/8 (1) (Fig. 43) Goupilles de tonte ¼-20 x 1-¾ (6) (Fig. 44) Contre-écrous ¼-20 (6)...
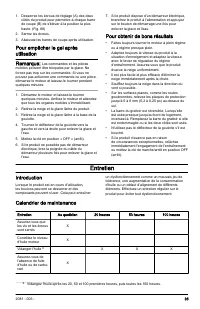
Page 35 - Entretien
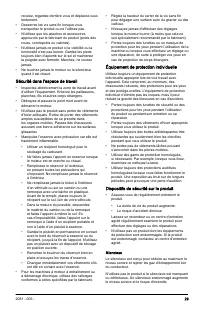
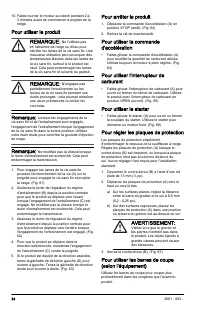
1. Desserrez les écrous de réglage (A) des deux côtés du produit pour permettre à chaque barre de coupe (B) de s'élever à la position la plus haute. (Fig. 68) 2. Serrez les écrous.3. Abaissez les barres de coupe après utilisation. Pour empêcher le gel après utilisationRemarque: Les commandes et les ...
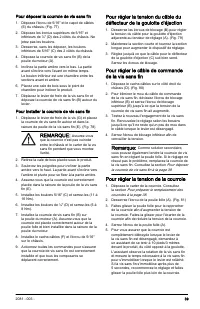
Page 39 - Pour régler la tension du câble du
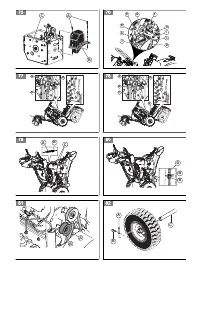
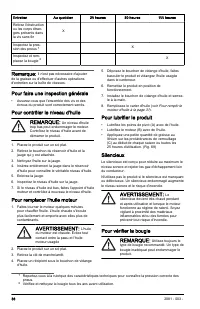
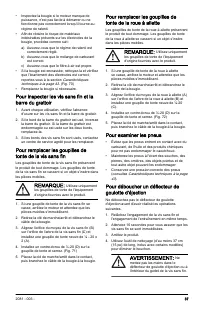
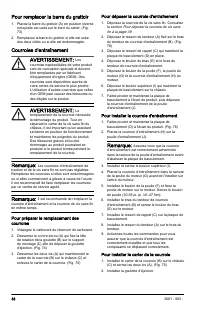
Pour déposer la courroie de vis sans fin 1. Déposez l'écrou de 5/16" et le capot de câbles (E) du châssis. (Fig. 77) 2. Déposez les écrous supérieurs de 5/16" et inférieurs de ¼" (D) des 2 côtés du châssis. Ne jetez pas les boulons. 3. Desserrez, sans les déposer, les boulons inférieurs ...
Page 40 - Dépannage
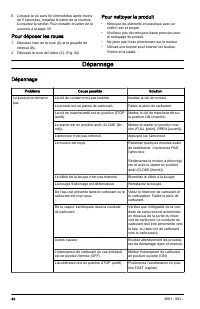
6. Lorsque la vis sans fin s'immobilise après moins de 5 secondes, installez le carter de la courroie. Consultez la section Pour installer le carter de la courroie à la page 38. Pour déposer les roues 1. Déposez l'axe de la roue (A) et la goupille de retenue (B). 2. Déposez la roue de l'arbre (C). (...
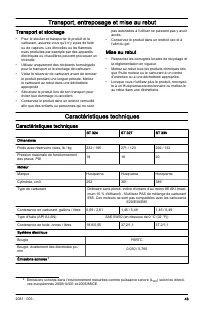
Page 43 - Transport, entreposage et mise au rebut; Transport et stockage; Caractéristiques techniques
Transport, entreposage et mise au rebut Transport et stockage • Pour le stocker et transporter le produit et le carburant, assurez-vous qu'il n'y a pas de fuite ou de vapeurs. Les étincelles ou les flammes nues produites par exemple par des appareils électriques ou chaudières peuvent provoquer un in...
Page 45 - Déclaration de conformité; Déclaration de conformité UE
Déclaration de conformité Déclaration de conformité UE Nous, Husqvarna AB, SE 561 82 Huskvarna, SUÈDE, déclarons sous notre responsabilité exclusive que le produit représenté : Description Fraise à neige Marque Husqvarna Plate-forme / Type / Modèle ST 324, ST 327, ST 330 Lot Numéro de série à partir...
Page 46 - Productoverzicht
Inhoud Inleiding...................................................................46Veiligheid................................................................ 47Montage.................................................................. 50Werking..........................................................
Page 47 - Schade aan het product; Veiligheid; Veiligheidsdefinities
(Fig. 19) Verwijder de beschermingen niet terwijl de motor draait. (Fig. 20) Gehoorbescherming aanbevolen. (Fig. 21) Draag veiligheidshandschoenen. (Fig. 22) Geluidsvermogenniveau. (Fig. 23) Niet bedienen op hellingen van meer dan 20 graden. (Fig. 24) Valrisico. (Fig. 25) Verwijder de sleutel voor onde...
Page 48 - Veiligheidsinstructies voor bediening
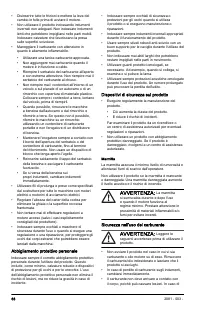
contact op met een productexpert, uw dealer, servicewerkplaats of erkende servicepunt. • Koppel de bougiekabel los voordat u het product monteert, het product opslaat of onderhoudswerkzaamheden uitvoert. • Gebruik het product niet als de oorspronkelijke specificatie is gewijzigd. Vervang geen onderdel...
Page 50 - Veiligheidsinstructies voor; Het product uit de verpakking
in de buurt van brandbare materialen en/of dampen om brand te voorkomen. Brandstofveiligheid WAARSCHUWING: Lees de volgende waarschuwingen voordat u het product gaat gebruiken. • Start het product niet als er brandstof of motorolie op het product aanwezig is. Verwijder de ongewenste brandstof/olie en...
Page 51 - Werking
Losse onderdelen (Fig. 37) Knop (3) (Fig. 38) Uitworptrechter (1) (Fig. 39) AAN/UIT-sleutel (s) (Fig. 40) Slotbouten 5/16-18 x 2¼” (2) (Fig. 41) Knoppen hendel (2) (Fig. 42) Borgmoer 3/8 (1) (Fig. 43) Breekpennen ¼-20 x 1-¾ (6) (Fig. 44) Borgmoeren ¼-20 (6) (Fig. 45) Borgmoer 5/16-18 (1) (Fig. 46) B...
Page 55 - Onderhoud; Inleiding
Onderhoud Inleiding Wanneer het product in gebruik is, kunnen de bouten losraken en onderdelen slijten. Dit kan een storing veroorzaken, zoals een onjuiste speling, een verhoogd olieverbruik of een verkeerde uitlijning van diverse onderdelen. Voer periodiek onderhoud aan het product uit om storingen t...
Page 60 - Probleemoplossing
Probleemoplossing Probleemoplossing Probleem Mogelijke oorzaak Oplossing Het product start niet De veiligheidscontactsleutel is niet ingesto- ken. Plaats de veiligheidscontactsleutel. Het product bevat geen brandstof meer. Vul de brandstoftank met nieuwe, schone benzine. De AAN/UIT-sleutel is UIT. Ze...
Page 62 - Vervoer, opslag en verwerking; Transport en opslag
Probleem Mogelijke oorzaak Oplossing Verlies van tractieaan- drijving/afname van de rijsnelheid Verlies van sneeuwlo- zing of langzaam wor- dende sneeuwlozing De riem slipt. Pas de kabellengte aan. Pas de riem aan. De riem is versleten. Controleer/vervang de riem. Pas de poelie aan. De riem is van de p...
Page 63 - Afvoeren; Technische gegevens
• Zet het product tijdens het vervoer veilig vast om schade en ongevallen te voorkomen. • Bewaar het product in een afgesloten ruimte om toegang door kinderen of onbevoegde personen te verhinderen. • Bewaar het product in een droge en vorstvrije ruimte. Afvoeren • Neem de plaatselijk geldende wet- en r...
Page 64 - Verklaring van overeenstemming; EU-verklaring van overeenstemming
Verklaring van overeenstemming EU-verklaring van overeenstemming Wij, Husqvarna AB, SE 561 82 Huskvarna, ZWEDEN, verklaren onder onze alleenverantwoordelijkheid dat het gerepresenteerde product: Beschrijving Sneeuwblazer Merk Husqvarna Platform / Type / Model ST 324, ST 327, ST 330 Partij Serienummer va...
Page 65 - Panoramica del prodotto
Sommario Introduzione............................................................ 65Sicurezza................................................................ 66Montaggio............................................................... 69Utilizzo............................................................
Page 66 - Sicurezza; Definizioni di sicurezza
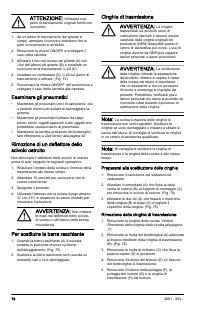
(Fig. 21) Usare guanti protettivi. (Fig. 22) Livello potenza acustica. (Fig. 23) Nessun intervento su pendii maggiori di 20 gradi. (Fig. 24) Pericolo di caduta. (Fig. 25) Togliere la chiave prima della manutenzione. (Fig. 26) Smontare il cavo della candela prima della manutenzione. (Fig. 27) Prestar...
Page 69 - Montaggio; Per rimuovere il prodotto dalla
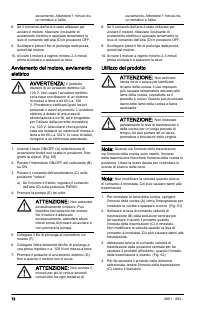
contatto del carburante con il corpo, rimuoverlo con acqua e sapone. • Non avviare il prodotto se il motore presenta una perdita. Esaminare regolarmente il motore per verificare la presenza di eventuali perdite. • Prestare la massima attenzione con il carburante. Il carburante è infiammabile e i fum...
Page 70 - Utilizzo
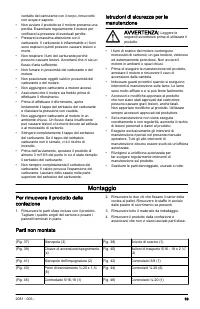
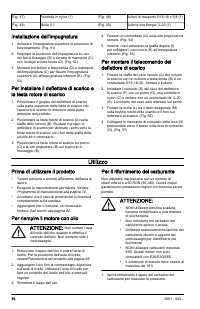
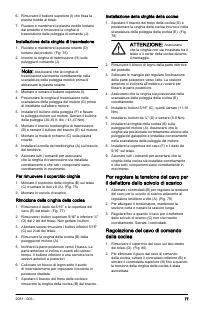
(Fig. 47) Rondella in nylon (1) (Fig. 48) Bulloni di trasporto 5/16-18 x 5/8 (1) (Fig. 49) Molla (1) (Fig. 50) Bullone con flangia ¼-20 (1) Installazione dell'impugnatura 1. Sollevare l'impugnatura superiore in posizione di funzionamento. (Fig. 51) 2. Regolare la posizione dell'impugnatura su uno de...
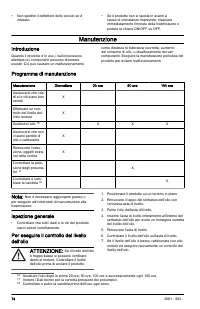
Page 74 - Manutenzione; Introduzione
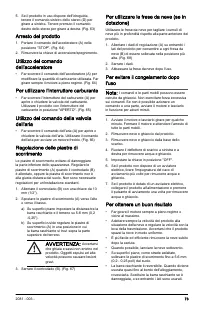
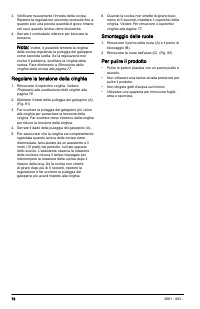
• Non spedire il deflettore dello scivolo se è intasato. • Se il prodotto non si sposta in avanti a causa di circostanze impreviste, rilasciare immediatamente l'innesto della trasmissione o portare la chiave ON/OFF su OFF. Manutenzione Introduzione Quando il prodotto è in uso, i bulloni possono alle...
Page 77 - Per regolare la tensione del cavo per
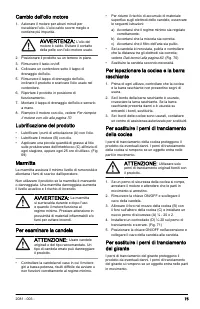
6. Rimuovere il bullone superiore (I) che fissa la piastra mobile al telaio 7. Ruotare e mantenere la piastra mobile lontano dal prodotto e rimuovere la cinghia di trasmissione dalla puleggia di comando (J). Installazione della cinghia di trasmissione 1. Ruotare e mantenere la piastra rotante (D) lo...
Page 79 - Ricerca guasti; Ricerca dei guasti
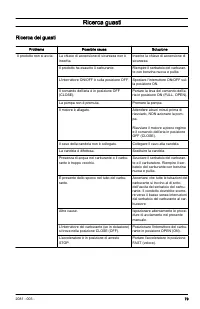
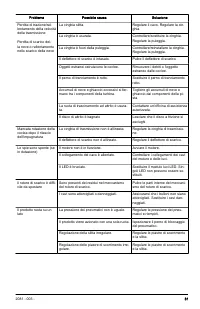
Ricerca guasti Ricerca dei guasti Problema Possibile causa Soluzione Il prodotto non si avvia La chiave di accensione di sicurezza non è inserita. Inserire la chiave di accensione di sicurezza. Il prodotto ha esaurito il carburante. Riempire il serbatoio del carburan- te con benzina nuova e pulita. ...
Page 82 - Trasporto, stoccaggio e smaltimento; Trasporto e conservazione; Dati tecnici
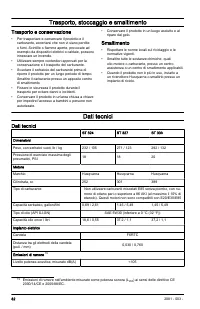
Trasporto, stoccaggio e smaltimento Trasporto e conservazione • Per trasportare e conservare il prodotto e il carburante, accertarsi che non vi siano perdite o fumi. Scintille o fiamme aperte, provocate ad esempio da dispositivi elettrici o caldaie, possono innescare un incendio. • Utilizzare sempre...
Page 84 - Dichiarazione di conformità; Dichiarazione di conformità UE
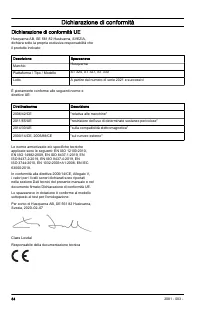
Dichiarazione di conformità Dichiarazione di conformità UE Husqvarna AB, SE 561 82 Huskvarna, SVEZIA, dichiara sotto la propria esclusiva responsabilità che il prodotto indicato: Descrizione Spazzaneve Marchio Husqvarna Piattaforma / Tipo / Modello ST 324, ST 327, ST 330 Lotto A partire dal numero d...
Page 85 - Descripción del producto
Contenido Introducción............................................................ 85Seguridad................................................................86Montaje................................................................... 89Funcionamiento....................................................
Page 86 - Seguridad; Definiciones de seguridad
(Fig. 18) Tracción activada. (Fig. 19) No desmonte las protecciones mientras el motor está en marcha. (Fig. 20) Se recomienda utilizar protectores auriculares. (Fig. 21) Utilice guantes protectores. (Fig. 22) Nivel de potencia acústica. (Fig. 23) No realice ninguna operación en pendientes de más de ...
Page 89 - Instrucciones de seguridad para el; Montaje; Extracción del producto de su
ADVERTENCIA: El silenciador se calienta mucho durante el uso y también cuando el motor se encuentra al ralentí. Tenga cuidado cuando se encuentre cerca de materiales o gases inflamables para evitar incendios. Seguridad en el uso del combustible ADVERTENCIA: Lea las siguientes instrucciones de advert...
Page 90 - Funcionamiento
Piezas sueltas (Fig. 37) Mando (3) (Fig. 38) Conducto de expulsión (1) (Fig. 39) Llaves de encendido/apagado (s) (Fig. 40) Pernos de 5/16-18 x 2 ¼ in (2) (Fig. 41) Pomos del manillar (2) (Fig. 42) Contratuerca de 3/8 (1) (Fig. 43) Pasadores de seguridad de ¼-20 x 1-¾ (6) (Fig. 44) Contratuercas de ¼...
Page 94 - Para obtener un buen resultado; Mantenimiento; Introducción
4. Mueva el deflector del conducto a la izquierda y a la derecha para retirar el hielo y el agua. 5. Sitúe la llave en la posición "OFF" (apagado).6. Si el producto no cuenta con mecanismo de arranque eléctrico, tire de la empuñadura de la cuerda de arranque varias veces para retirar el hiel...
Page 98 - Ajuste de la tensión del cable del
5. Instale el perno de la polea (F) y fije la polea del motor al motor. Apriete el perno de la polea (30-35 ft lb / 41-47 Nm). 6. Instale el brazo del tensor de la correa de transmisión (B) y apriete el perno del brazo (E) en el motor. 7. Instale el muelle de retorno (C) en la placa oscilante. 8. In...
Page 100 - Resolución de problemas
Resolución de problemas Resolución de problemas Problema Causa posible Solución El producto no arranca La llave de encendido de seguridad no está insertada. Introduzca la llave de encendido de seguridad. El producto no tiene combustible. Llene el depósito de combustible con gasolina nueva y limpia. ...
Page 103 - Transporte, almacenamiento y eliminación; Transporte y almacenamiento; Datos técnicos
Transporte, almacenamiento y eliminación Transporte y almacenamiento • Para el transporte y almacenamiento del producto y del combustible, asegúrese de que no haya fugas ni humos. Las chispas o llamas abiertas, por ejemplo, de dispositivos eléctricos o calderas, pueden producir un incendio. • Use si...
Page 105 - Declaración de conformidad; Declaración de conformidad CE
Declaración de conformidad Declaración de conformidad CE Nosotros, Husqvarna AB, SE 561 82 Huskvarna, SUECIA, declaramos bajo nuestra exclusiva responsabilidad que el producto representado: Descripción Quitanieves Marca Husqvarna Plataforma/tipo/modelo ST 324, ST 327, ST 330 Lote Número de serie a p...
Page 106 - Geräteübersicht
Inhalt Einleitung.............................................................. 106Sicherheit.............................................................. 107Montage................................................................ 111Betrieb..............................................................
Page 107 - Sicherheit; Sicherheitsdefinitionen
(Abb. 19) Entfernen Sie die Abdeckungen nicht, während der Motor läuft. (Abb. 20) Gehörschutz empfohlen. (Abb. 21) Tragen Sie Schutzhandschuhe. (Abb. 22) Schallleistungspegel. (Abb. 23) Betrieb an Hängen mehr mit als 20 Grad Steigung/Gefälle nicht möglich. (Abb. 24) Sturzgefahr. (Abb. 25) Entfernen ...
Page 108 - Sicherheitshinweise für den Betrieb
• Diese Bedienungsanleitung kann nicht alle Situationen abdecken, die bei der Verwendung des Geräts auftreten können. Seien Sie immer vorsichtig und arbeiten Sie mit gesundem Menschenverstand. Führen Sie keine Arbeiten mit oder Wartungen am Gerät durch, wenn Sie sich in einer Situation unsicher sind...
Page 110 - Sicherheitshinweise für die Wartung
• Dies erhöht die Lebensdauer des Geräts.• Die Gefahr von Unfällen sinkt.Lassen Sie einen Vertragshändler oder ein autorisiertes Service Center das Gerät regelmäßig überprüfen, um Einstellungen oder Reparaturen vorzunehmen. • Benutzen Sie kein Gerät mit defekten Schutzvorrichtungen. Wenn das Gerät b...
Page 112 - Betrieb
Betrieb Bevor Sie das Produkt starten • Sorgen Sie dafür, dass sich im Arbeitsbereich keine Unbefugten oder Tiere aufhalten. • Warten Sie das Gerät täglich. Siehe Wartungsplan auf Seite 116. • Stellen Sie sicher, dass das Zündkabel ordnungsgemäß mit der Zündkerze verbunden ist. • Füllen Sie Öl oder ...
Page 115 - Wartung
So stellen Sie die Gleitplatten ein Die Gleitplatten verhindern Schäden an der Unterseite der Schneefräse. Stellen Sie die Gleitplatten (A) ein, wenn die Sicherungsmutter (B) locker ist, sonst haben die Gleitplatten nicht den richtigen Abstand zum Boden. Für die Standardinstallation ist kein Einstel...
Page 121 - Fehlerbehebung
Fehlerbehebung Fehlerbehebung Störung Mögliche Ursache Lösung Das Gerät springt nicht an Der Sicherheitszündschlüssel ist nicht einge- steckt. Stecken Sie den Sicherheitszünd- schlüssel ein. Das Gerät erhält keinen Kraftstoff. Füllen Sie frischen sauberen Kraft- stoff in den Kraftstofftank. Der EIN-...
Page 124 - Transport, Lagerung und Entsorgung; Transport und Lagerung; Technische Angaben; Technische Daten
Störung Mögliche Ursache Lösung Das Gerät zieht beim Fahren nach einer Seite Der Reifendruck ist nicht auf beiden Seiten identisch. Passen Sie den Reifendruck an und füllen Sie Luft auf die Reifen auf. Das Gerät fährt mit nur einem Rad. Prüfen Sie den Sicherungsstift der Reifen. Ungleichmäßige Einst...
Page 126 - Konformitätserklärung; EU-Konformitätserklärung
Konformitätserklärung EU-Konformitätserklärung Wir, Husqvarna AB, SE 561 82 Huskvarna, SCHWEDEN, erklären in alleiniger Verantwortung, dass das beschriebene Gerät: Beschreibung Schneefräse Marke Husqvarna Plattform/Typ/Modell ST 324, ST 327, ST 330 Charge Seriennummer ab 2021 die folgenden EU-Vorsch...


 Husqvarna 115iHD55
User Manual
Husqvarna 115iHD55
User Manual
 Husqvarna 115iL
User Manual
Husqvarna 115iL
User Manual
 Husqvarna 115iPT4
User Manual
Husqvarna 115iPT4
User Manual
 Husqvarna 120
User Manual
Husqvarna 120
User Manual
 Husqvarna 120iTK4-P
User Manual
Husqvarna 120iTK4-P
User Manual
 Husqvarna 120 Mark II
User Manual
Husqvarna 120 Mark II
User Manual
 Husqvarna 122C
User Manual
Husqvarna 122C
User Manual
 Husqvarna 122HD45
User Manual
Husqvarna 122HD45
User Manual
 Husqvarna 122L
Quick Guide
Husqvarna 122L
Quick Guide
 Husqvarna 122LK
User Manual
Husqvarna 122LK
User Manual
 Husqvarna 122LKE
Quick Guide
Husqvarna 122LKE
Quick Guide
 Husqvarna 122LKH
Quick Guide
Husqvarna 122LKH
Quick Guide
 Husqvarna 122LKP
Quick Guide
Husqvarna 122LKP
Quick Guide
 Husqvarna 122RJ
Quick Guide
Husqvarna 122RJ
Quick Guide
 Husqvarna 125B
User Manual
Husqvarna 125B
User Manual