Electrolux EVEP916SB - Manuals
User Manual Electrolux EVEP916SB


Summary
2 electrolux.com.au CONGRATULATIONS Thank you for purchasing an Electrolux cooker. You’ve chosen a product that brings with it decades of professional experience and innovation. Ingenious and stylish, it has been designed with you in mind. So whenever you use it, you can be safe in the knowledge tha...
3 CAUTION! Read the following carefully to avoid an electric shock or fire. It is important to use your appliance safely. Check these safety points before using your appliance. Installation, cleaning and servicing • An authorised person must install this appliance. (Certificate of Compliance to be r...
4 electrolux.com.au WARNING! OVEN • During use the appliance becomes hot. Care should be taken to avoid touching the hot surfaces inside the oven. • Always use gloves when handling hot items inside the oven. • Switch the appliance off before removing the oven light glass for globe replacement. • To ...
Electrolux Ovens Manuals
-
 Electrolux EDEE63CS
User Manual
Electrolux EDEE63CS
User Manual
-
Electrolux EDEE63CS
Manual
-
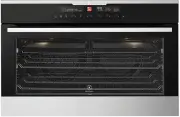
 Electrolux EOA 93434 AK (AX)
User Manual
Electrolux EOA 93434 AK (AX)
User Manual
-
 Electrolux EOA 93450 AX
User Manual
Electrolux EOA 93450 AX
User Manual
-
 Electrolux EOA 93451 AX
User Manual
Electrolux EOA 93451 AX
User Manual
-
 Electrolux EOA5220AOR
User Manual
Electrolux EOA5220AOR
User Manual
-
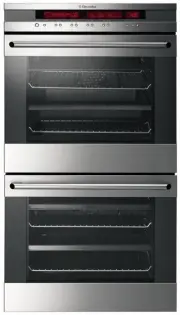
Electrolux EOA5220AOV
User Manual
-
 Electrolux EOB 33300 X
User Manual
Electrolux EOB 33300 X
User Manual
-
 Electrolux EOB 53001 R
User Manual
Electrolux EOB 53001 R
User Manual
-
 Electrolux EOB 68000 X
User Manual
Electrolux EOB 68000 X
User Manual
-
 Electrolux EOB 93402 AX
User Manual
Electrolux EOB 93402 AX
User Manual
-
 Electrolux EOB 93430 CK (CW) (CX)
User Manual
Electrolux EOB 93430 CK (CW) (CX)
User Manual
-
 Electrolux EOB 93450 AX
User Manual
Electrolux EOB 93450 AX
User Manual
-
 Electrolux EOC 55956 AAX
User Manual
Electrolux EOC 55956 AAX
User Manual
-
 Electrolux EOC 66800 X
User Manual
Electrolux EOC 66800 X
User Manual
-
 Electrolux EOD3C50TX
User Manual
Electrolux EOD3C50TX
User Manual
-
 Electrolux EOD6C77V
User Manual
Electrolux EOD6C77V
User Manual
-
 Electrolux EOF3H00BX
User Manual
Electrolux EOF3H00BX
User Manual
-
 Electrolux EOF3H40BX
User Manual
Electrolux EOF3H40BX
User Manual
-
 Electrolux EOF3H50BK
User Manual
Electrolux EOF3H50BK
User Manual