Page 3 - PRODUCT LABEL; AS/NZS CISPR 14.1 Electromagnetic Compatibility Requirements.
3 Dear Customer, Thank you for having purchased and given your preference to our product. The safety precautions and recommendations reported below are for your own safety and that of others. They will also provide a means by which to make full use of the features offered by your appliance. Please k...
Page 4 - IMPORTANT SAFETY PRECAUTIONS AND RECOMMENDATIONS; professionally qualified technician.; This film must be removed before using the; IMPORTANT: The use of suitable protective clothing/gloves is
4 IMPORTANT SAFETY PRECAUTIONS AND RECOMMENDATIONS IMPORTANT: This appliance is designed and manufactured solely for the cooking of domestic (household) food and is not suitable for any non domestic application and therefore should not be used in a commercial environment. The appliance guarantee wil...
Page 5 - WARNING: During use the appliance and its accessible parts
5 • Do not use a steam cleaner because the moisture can get into the appliance therefore making it unsafe. • Do not touch the appliance with wet or damp hands (or feet). • Do not use the appliance whilst in bare feet. • If you should decide not to use this appliance any longer (or decide to substitu...
Page 8 - INSTALLATION; FITTING REQUIREMENTS; The oven can be fitted in standard units, 60 cm width and depth.
8 INSTALLATION CAUTION: ■ This appliance must be installed in accordance with these installation instructions. ■ This appliance shall only be serviced by authorised personnel. ■ This appliance is to be installed only by an authorised person in compliance with the current electrical regulations and i...
Page 10 - FIXING THE OVEN; fixing is only complementary.; Note; adjacent cabinets due to an increase in temperature.; Do not lift this oven by the door handle.; the furniture door and the oven frame.; Figure 3
10 FIXING THE OVEN Introduce the oven into the furniture opening and fix it with 4 screws (not supplied) as figure 3. It is essential that the oven rests on a surface which will support its weight, as the screw fixing is only complementary. Note It is essential that when installing your oven adequat...
Page 11 - Please take extra care not to damage the lower trim of the oven.; clearance between the bottom of the door and the lower trim.; resulting from incorrect installation.; Air Flow; Figure 4
11 IMPORTANT: Please take extra care not to damage the lower trim of the oven. Ensure the oven sits on wooden blocks or similar supports when it is removed from the carton as shown in above diagram. This will prevent any damage to the lower trim.Should the lower trim become damaged, straighten the t...
Page 12 - ELECTRICAL REQUIREMENTS; the load specified on the plate.; electrical regulations.
12 ELECTRICAL REQUIREMENTS ■ The appliance must be connected to the mains checking that the voltage corresponds to the value given in the rating plate and that the electrical cable sections can withstand the load specified on the plate. ■ A suitable isolating switch providing full disconnection from...
Page 13 - REPLACING THE POWER SUPPLY CABLE; To connect the supply cable:; VOLTAGE AND POWER CONSUMPTION; Figure 6
13 REPLACING THE POWER SUPPLY CABLE Important! This appliance must be connected to the electricity supply only by an authorised person. To connect the supply cable: ■ Unhook the terminal board cover by inserting a screwdriver into the two hooks “ A ” (fig. 5). ■ Open the cable gland by unscrewing sc...
Page 14 - Figure 8
14 ELECTRIC DIAGRAM 1 9 9a 6 14 4 12 12a 3 11 8 16 16a 2 10 10a 7 15 15a 5 13 13a 1a 6a 3a 8a 2a 7a 5a L N F1 V LF GIR ST1 ST3 ST4 CIR G C S INT . S EXT . TH PR CF R TL DL T M SL ST SD TL1 1 2 3 4 5 6 7 34 33 4 3 2 ST2 Figure 8
Page 15 - ELECTRIC DIAGRAM KEY
15 ELECTRIC DIAGRAM KEY F1 Oven switch TH Safety thermostat ST1 Oven temperature sensor ST3 Oven door switch ST4 Encoder switch PR Oven programmer TL Thermal overload TL1 Thermal overload DL Door locking safety device CF Cooling fan motor LF Oven lamp R Resistance V Oven fan motor GIR Rotisserie mot...
Page 16 - USE AND CARE; Safety catch; Figure 9; inappropriate and therefore dangerous.; USING THE OVEN FOR THE FIRST TIME; Keep attention to insert the shelves correctly.; The tray does not fit into the side formed; 5 minutes in the position.
16 USE AND CARE Safety catch Figure 9 CAUTION: ■ This appliance must be used only for the task it has explicitly been designed for, that is for domestic cooking of foodstuffs. Any other form of usage is to be considered as inappropriate and therefore dangerous. ■ Do NOT place combustible materials o...
Page 17 - Baking tray
17 Figure 10 WRONG CORRECT Baking tray Grill tray (baking tray + grill grid fitted above)
Page 18 - MULTIFUNCTION PYROLYTIC OVEN; GENERAL FEATURES; This oven has special operating features.
18 Temperature knob (potentiometer) Function selector knob Digital electronic programmer Temperature pilot light Line pilot light Door locked pilot light A U T O P MULTIFUNCTION PYROLYTIC OVEN GENERAL FEATURES This oven has special operating features. Five different functions can be used to satisfy ...
Page 20 - SELECTING THE FUNCTIONS; and after five minutes; door; OVEN LIGHT; dEF; HOT AIR COOKING
20 SELECTING THE FUNCTIONS The cooking function is selected by turning the function selector knob and matching the knob mark with the symbol printed on the control panel. Important: In all cooking functions the oven must always be used with the DOOR CLOSED.If the door stays open “ door ” appears on ...
Page 22 - filtered by a special catalyst in the upper part of the appliance.; Before starting the pyrolytic cycle:
22 PYROLYSIS FUNCTION GENERAL INFORMATION ■ In this function the residual cooking greases on the inside walls of the oven cavity are pulverised by the high temperature. The fumes produced during this process are filtered by a special catalyst in the upper part of the appliance. ■ Smells and fumes pr...
Page 23 - SETTING THE COOKING (ONLY FOR THE COOKING FUNCTIONS); flashes on the display for 3 seconds.
23 Temperature knob (potentiometer) Function selector knob A U T O P Figure 14 SETTING THE COOKING (ONLY FOR THE COOKING FUNCTIONS) Way 1: SETTING THE COOKING TEMPERATURE WITH THE TEMPERATURE KNOB (POTENTIOMETER) NOTE: The temperature knob (potentiometer) turns to right and left only to symbols + an...
Page 24 - is not flashing press key 4 of the programmer.; OFF
24 Figure 15 Function selector knob Digital electronic programmer A U T O P SETTING THE COOKING (ONLY FOR THE COOKING FUNCTIONS) Way 2: SETTING THE COOKING TEMPERATURE WITH THE PROGRAMMER 4 5 6 2a 2b The temperature set is shown on the electronic programmer display and can be varied, with 5 °C inter...
Page 25 - booklet carefully.; PYROLYTIC OVEN - QUICK GUIDE; PROGRAMMER; WHAT; TO; DO; cooking
1 2 3 4 5 6 A U T O Key 1: Timer Key 2: Cooking time or pryolysis time Key 3: Finish cooking time or agreement to start pyrolysis cycle Key 4: Set oven temperature Key 5: Function figures backwards Key 6: Function figures forwards Timer working Heating elements working Programme set or in progress A...
Page 26 - End; bell symbol
PROGRAMMER MESSAGE MESSAGE MEANING WHAT TO DO variable Cooking time set or oven temperature measured by the internal sensor. To change the cooking temperature press key 4 of the programmer, then keys 5 or 6. A temperature below 50°C has been set. The oven has switched off. Press key 4 of the program...
Page 27 - door locked; Waste of energy symbol.
PROGRAMMER MESSAGE MESSAGE MEANING WHAT TO DO After the Pyrolysis cycle AUTO and P flashing. The door is unlocked and can be opened. Turn the oven function selector knob to 0 . During the Pyrolysis cycle AUTO and P flashing. The door has been opened and closed again. The Pyrolysis cycle is cancelled...
Page 29 - HOW TO START THE PYROLYSIS CYCLE; Turn the oven selector knob to the pyrolysis; This combined confirmation operation offers greater; If the door is open or not closed properly the oven
25 HOW TO START THE PYROLYSIS CYCLE Important: the pyrolysis cycle must only be performed with the oven empty; so, before starting the cycle take all the accessories (shelves, baking/grill tray and anti- grease filter) out of the oven cavity and dry any traces of overflowed liquid. Do not use any de...
Page 30 - PROBLEMS ON STARTING AND DURING THE PYROLYSIS CYCLE; been opened before the cycle has been started with confirmation; flashes; with
26 PROBLEMS ON STARTING AND DURING THE PYROLYSIS CYCLE 1. Steady door The function selector has been turned to the pyrolysis position with the oven door open or not perfectly closed. Or the door has been opened before the cycle has been started with confirmation from key 3 What to do: Close the door...
Page 31 - HOW TO STOP THE PYROLYSIS CYCLE; ACCIDENTAL INTERRUPTION OF THE; do•Lo
27 HOW TO STOP THE PYROLYSIS CYCLE 1. Turn the function selector to 0 (oven OFF) ■ If the oven cavity temperature is higher than 300 °C 1a do•Lo (door locked) appears steadily on the programmer display. 1b When the oven cavity temperature drops below 300°C: • the time appears on the programmer displ...
Page 32 - WHAT TO DO WHEN THE PYROLYSIS CYCLE HAS FINISHED
28 WHAT TO DO WHEN THE PYROLYSIS CYCLE HAS FINISHED 1. P0.00 with AUTO flashing. Wait for the oven to cool down and the door to unlock. The pyrolytic cycle has finished. P0.00 will remain until the door is unlocked. The door remains locked until the cavity temperature has dropped below 300 °C. 2. Th...
Page 33 - ABNORMAL SITUATIONS AND/OR OPERATION PROBLEMS; Wait for the countdown to finish.
29 ABNORMAL SITUATIONS AND/OR OPERATION PROBLEMS During cooking or the pyrolysis cycle. 1. 30 F0 or 30 F1 appear during the cooking or pyrolysis cycle Oven temperature sensor broken or not working properly. The cooling fan stays on and if the pyrolysis cycle is in progress the door remains locked. W...
Page 34 - If after this procedure the display is still off:
30 2c The oven function selector has been moved to 0 (oven OFF) to cancel the Pyrolysis cycle. What to do: 1. Wait for the door to unlock. This happens automatically when the temperature inside the oven has dropped below 300 °C. 2. The time appears and the oven can be used. 3. do.Lo appears during c...
Page 35 - COOKING ADVICE; STERILISATION; To obtain classical roasting, it is necessary to remember:; COOKING DIFFERENT DISHES AT THE SAME TIME
31 COOKING ADVICE STERILISATION Sterilisation of foods to be conserved, in full and hermetically sealed jars, is done in the following way: a. Set the function . b. Set the temperature at 175 °C and preheat the oven.c. Fill the grill pan with hot water.d. Set the jars into the grill pan making sure ...
Page 36 - deflector; USE OF THE GRILL; Always grill with the oven door closed.; USE OF THE ROTISSERIE; the protection deflector “; ATTENTION: The oven door becomes very hot during operation.
32 Insert the spit moving deflector B sideways Spit is inserted correctly Figure 17 B C A D Figure 16 USE OF THE GRILL Turn the switch knob to position . Set the temperature if a temperature different from the pre-set one is required. Leave to warm up for approximately 5 minutes with the door closed...
Page 37 - HOW TO USE THE ELECTRONIC PROGRAMMER; Description of the pushbuttons:
33 HOW TO USE THE ELECTRONIC PROGRAMMER The electronic programmer is a device which groups together the following functions: ■ 24 hours clock with illuminated display. ■ Timer (up to 23 hours and 59 minutes). ■ Program for semi-automatic oven cooking. ■ Program for automatic oven cooking. ■ Manageme...
Page 38 - SWITCHING ON FOR THE FIRST TIME OR AFTER A BLACK-OUT; flashes on the display.
34 2 3 I I I I I I I I I I II I I I I I I I I I I II I I I I I I I I 2 3 5 6 I I III I I I I I I SWITCHING ON FOR THE FIRST TIME OR AFTER A BLACK-OUT SETTING THE TIME AUDIBLE SIGNAL After the appliance has been connected to the mains or after a black-out, the programmer must be activated so that it ...
Page 39 - During cooking; Note: At the end of the programme always turn the
35 SEMI-AUTOMATIC COOKING Start immediate cooking and switch the oven off automatically after the programmed cooking time. Setting 1. Set the cooking function by turning the oven selector to the function required. 2. The cooking temperature appears on the display. To change it proceed as described i...
Page 40 - AUTOMATIC COOKING; programmed cooking time.; Setting; Starting cooking
36 AUTOMATIC COOKING Start cooking at the programmed time and switch the oven off automatically after the programmed cooking time. Setting 1. Set the cooking function by turning the oven selector to the function required. 2. The cooking temperature appears on the display. To change it proceed as des...
Page 41 - Press key 3 to display when the cooking will finish.; At the end of cooking; Note: At the end of the programme always turn the function; CANCELLING A SET PROGRAMME; Note: if during a set programme the function selector is turned
37 During cooking 10. During the cooking cycle, the display shows the oven temperature measured by the probe. Press key 2 to display the length of cooking set. Press key 3 to display when the cooking will finish. The cooking time, end of cooking time and cooking temperature can be varied at any time...
Page 42 - EXAMPLES OF PROGRAMMING AUTOMATIC COOKING
38 Figure 18 P A U T O 2 3 4 5 6 7 8 9 10 11 1 12 P A U T O P A U T O Time needed to cook the food (2 hours) Time when the food to be cooked must be ready Time when cooking the food is programmed (08:00) Programmable functions 2 5 6 5 3 6 EXAMPLES OF PROGRAMMING AUTOMATIC COOKING
Page 43 - CLEANING AND MAINTENANCE; GENERAL ADVICE; and disconnected from the electrical power supply.; Avoid using cleaning products with a chlorine or acidic base.; handling or cleaning of this appliance.; ENAMELLED PARTS; Dry preferably with a microfibre or soft cloth.; PRINTED SURFACES; Clean using an appropriate product.; irreparably damage the surface.; GLASS CONTROL PANEL; Clean using an appropriate product. Always dry thoroughly.
39 CLEANING AND MAINTENANCE GENERAL ADVICE ■ Before you begin cleaning, you must ensure that the appliance is switched off and disconnected from the electrical power supply. ■ It is advisable to clean when the appliance is cold and especially when cleaning the enamelled parts. ■ Avoid leaving alkali...
Page 44 - INSIDE OF OVEN; To use this function see the specific chapters.; Manual cleaning of the oven:; GRILL HEATING ELEMENT; the possibility of electric shock.; Refit the protective cover.
40 A B Figure 19 INSIDE OF OVEN The oven has a specific “PYROLYSIS FUNCTION” which can clean the cavity by pulverising the residual cooking greases by high temperature. Do not wait for the oven to be very greasy before performing this cleaning. It should not be performed after every cooking, either,...
Page 45 - REMOVING THE OVEN DOOR
41 B A C REMOVING THE OVEN DOOR ■ Take care, the oven door is heavy. If you have any doubts, do not attempt to remove the door. ■ Make sure the oven and all its parts have cooled down. Do not attempt to handle the parts of a hot oven. ■ Take extreme care when handling the door. Avoid the panes of gl...
Page 46 - SERVICE AND MAINTENANCE; SERVICING THE APPLIANCE; Authorised Delonghi Service Agent:; Servicing shall be carried out only by authorized personnel.; TROUBLESHOOTING; nearest Authorised Delonghi Service Agent.
42 SERVICE AND MAINTENANCE SERVICING THE APPLIANCE Service may be obtained by contacting our Customer Service Centre to locate the nearest Authorised Delonghi Service Agent: Servicing shall be carried out only by authorized personnel. The appliance shall not be modified. TROUBLESHOOTING If you exper...
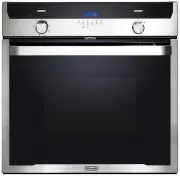


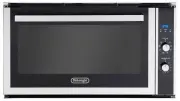
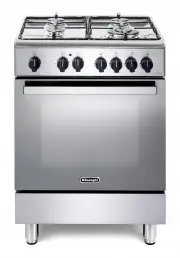
 DeLonghi DE6038MD
User Manual
DeLonghi DE6038MD
User Manual
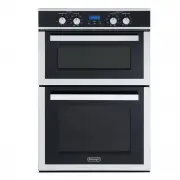
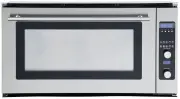
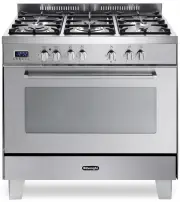
 DeLonghi DE608M
User Manual
DeLonghi DE608M
User Manual
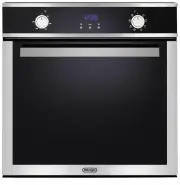
 DeLonghi DE62MPB
User Manual
DeLonghi DE62MPB
User Manual
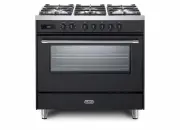
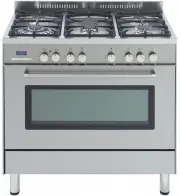 DeLonghi DE906GWF
User Manual
DeLonghi DE906GWF
User Manual
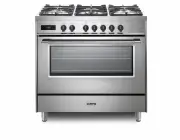
 DeLonghi DE908M
User Manual
DeLonghi DE908M
User Manual
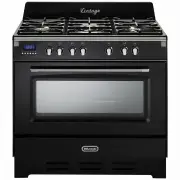
 DeLonghi DE91PYROS
User Manual
DeLonghi DE91PYROS
User Manual
 DeLonghi DEF1407A
User Manual
DeLonghi DEF1407A
User Manual
 DeLonghi DEF1407S
User Manual
DeLonghi DEF1407S
User Manual
 DeLonghi DEF605E
User Manual
DeLonghi DEF605E
User Manual
 DeLonghi DEF605GW
User Manual
DeLonghi DEF605GW
User Manual
 DeLonghi DEF905EX1
User Manual
DeLonghi DEF905EX1
User Manual
 DeLonghi DEF905GW1X1
User Manual
DeLonghi DEF905GW1X1
User Manual
 DeLonghi DEF908S
User Manual
DeLonghi DEF908S
User Manual
 DeLonghi DEFL605E
User Manual
DeLonghi DEFL605E
User Manual
 DeLonghi DEFL605G
User Manual
DeLonghi DEFL605G
User Manual
 DeLonghi DEFP907S
User Manual
DeLonghi DEFP907S
User Manual
 DeLonghi DEFV908BK
User Manual
DeLonghi DEFV908BK
User Manual
 DeLonghi DEFV908CR
User Manual
DeLonghi DEFV908CR
User Manual
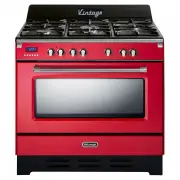 DeLonghi DEFV908R
User Manual
DeLonghi DEFV908R
User Manual
 DeLonghi DEL6038D
User Manual
DeLonghi DEL6038D
User Manual