Zanussi ZWY180 - User Manual
Zanussi ZWY180 – User Manual, read for free online in PDF format. We hope this helps you resolve any issues you may have. If you have further questions, please contact us through the contact form.


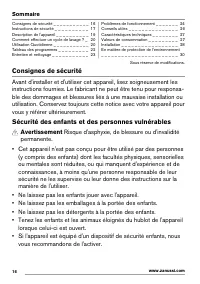
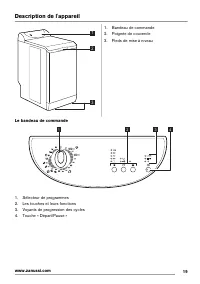
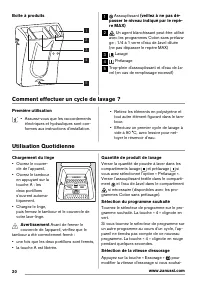
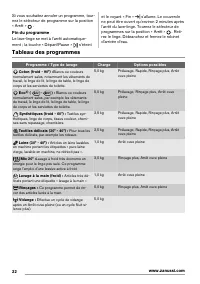
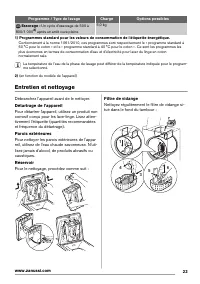
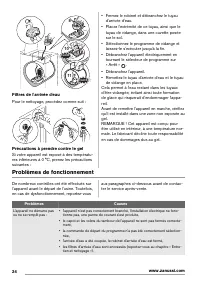
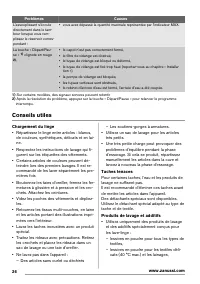
Table of Contents:
- Page 2 – Contents; Subject to change without notice.; Safety information
- Page 3 – Installation
- Page 4 – Product description
- Page 5 – How to run a wash cycle?; Using for the first time
- Page 6 – Daily Use
- Page 7 – Programmes table
- Page 8 – Care and cleaning; Unplug the appliance before cleaning.; Descaling the appliance
- Page 9 – Water inlet filters; Operating Problems
- Page 11 – Helpful hints and tips; The laundry load
- Page 13 – Unpacking
- Page 14 – Water supply; Check if the; Drainage; Electrical connection; Environment concerns
- Page 16 – Sommaire; Sous réserve de modifications.; Consignes de sécurité; Avertissement; • Cet appareil n'est pas conçu pour être utilisé par des personnes
- Page 17 – Sécurité générale; Instructions
- Page 19 – Description de l'appareil; Le bandeau de commande
- Page 22 – Fin du programme; et le voyant « Fin »; Tableau des programmes
- Page 23 – Entretien et nettoyage; Débranchez l’appareil avant de le nettoyer.; Détartrage de l’appareil
- Page 24 – Précautions à prendre contre le gel; • Fermez le robinet et débranchez le tuyau; Problèmes de fonctionnement
- Page 26 – Conseils utiles; Chargement du linge
- Page 28 – Déballage
- Page 29 – Vérifiez; Vidange
- Page 30 – En matière de protection de l'environnement; Mise au rebut de l'appareil; sont recyclables. Pour leur mise; Protection de l’environnement; • d'utiliser l'appareil à sa capacité maximale
EN
User manual
2
FR
Notice d'utilisation
16
Washing Machine
Lave-linge
ZWY 1100
ZWY 180
"Loading the manual" means you need to wait until the file loads and becomes available for online reading. Some manuals are very large, and the time they take to appear depends on your internet speed.
Was this manual helpful?
Helpful for 3 of 3 readers
About this manual
- Brand
- Zanussi
- Model
- ZWY180
- Document type
- User Manual
- Language(s)
- English, French
- Pages
- 32
- File size
- 5.6 MB
- Format
Summary
Contents Safety information _ _ _ _ _ _ _ _ _ _ _ _ _ _ 2Safety instructions _ _ _ _ _ _ _ _ _ _ _ _ _ _ 3Product description _ _ _ _ _ _ _ _ _ _ _ _ _ 4How to run a wash cycle? _ _ _ _ _ _ _ _ _ 5Daily Use _ _ _ _ _ _ _ _ _ _ _ _ _ _ _ _ _ _ _ 6Programmes table _ _ _ _ _ _ _ _ _ _ _ _ _ _ 7Care and...
• Obey the maximum load volume of 5 kg (refer to the “Pro- gramme chart” chapter). • If the supply cord is damaged, it must be replaced by the manu- facturer, its service agent or similarly qualified persons in orderto avoid a hazard. • The operating water pressure (minimum and maximum) must be betw...
• The appliance is to be connected to the wa- ter mains using the new supplied hose-sets.Old hose sets must not be reused. • Before you connect the appliance to new pipes or pipes not used for a long time, letthe water flow until it is clean. • The first time you use the appliance, make sure that th...
Ask a question
Related manuals
Popular Zanussi Other


More Zanussi Other models
 Zanussi ZWT7142WA User Manual
 Zanussi ZWT 9120 Manual
 Zanussi ZWT 71201 WA Manual
 Zanussi ZWT71201WA User Manual
 Zanussi ZWT71401WA User Manual
 Zanussi ZWX 1605 W Manual
 Zanussi ZWY50904WA User Manual
 Zanussi ZWY60804SA User Manual
 Zanussi ZWY61024SI User Manual
 Zanussi ZXC60/25 User Manual
 Zanussi ZYB590XL User Manual
 Zanussi ZZB20601XV User Manual