Page 3 - ENGLISH; IMPORTANT SAFEGUARDS
5 ENGLISH IMPORTANT SAFEGUARDS When using electrical appliances, basic safety precautions should always be followed including the following: 1 Read all instructions. 2 Do not touch hot surfaces. Use handles or knobs. 3 To protect against electrical shock do not immerse cord, plugs or appliance in wa...
Page 4 - SAVE THESE INSTRUCTIONS
6 ENGLISH it still does not fit, contact a qualified electrician. Do not attempt to modify the plug in any way. 21 Oversize foods or metal utensils must not be inserted in the appliance as they may create a fire or risk of electric shock. 22 A fire may occur if the appliance is covered or touching f...
Page 5 - Table of Contents
7 ENGLISH Table of Contents IMPORTANT SAFEGUARDS 5 Introduction 8 General description (Fig. 1) 8 Airfryer and accessories 9 Before first use 9 Preparing for use 9 Placing the removable mesh bottom and fat reducer 9 Placing the EasyClick handle 10 Food table 10 Cooking table for presets 12 Using the ...
Page 6 - Introduction
8 ENGLISH Introduction Congratulations on your purchase and welcome to Philips! To fully benefit from the support that Philips offers, register your product at www.philips.com/welcome . Your new Airfryer allows you to prepare your favorite ingredients and snacks in a healthier way. The Airfryer uses...
Page 7 - Airfryer and accessories; Preparing for use; Placing the removable mesh bottom and fat reducer; Note
9 ENGLISH Airfryer and accessories Refer to the table in Fig. 2 and see the in pack accessories for your Airfryer. The type number of your Airfryer starts with “HD97XX”. You can find the type number on the packaging or on the bottom of the appliance.Some Airfryers and accessories may not be availabl...
Page 8 - Placing the EasyClick handle; Warning; Food table
10 ENGLISH Placing the EasyClick handle Warning • Always make sure the basket and the handle have cooled down before you attach or detach the EasyClick handle. Note • The EasyClick handle also fits to the non-stick grill pan. It helps you clean and store the appliance in an easy way. To attach the E...
Page 10 - Cooking table for presets
12 ENGLISH Ingredients Min.- max. amount (g/oz) Time (minut es) Tem per a ture (°C/°F) Shake/Tu rn Additional information Fried banana chips 150 g5.3 oz 22–25 160°C/325°F Use plantain bananas; cut into 5 mm / 3/16 in slices; add 1 teaspoon of oil. Cooking table for presets The grams/oz in bold repre...
Page 11 - Using the appliance; Airfrying; Caution
13 ENGLISH Using the appliance Airfrying Caution • This is an Airfryer that works on hot air. Do not fill the pan with oil or frying fat. (Fig. 13) • Do not touch hot surfaces. Use handles or knobs. Only hold the pan by the basket handle. Handle the fat reducer with oven-safe gloves. • This product ...
Page 12 - Tip
14 ENGLISH 8 The temperature indication blinks and is set to 350°F/180°C by default. (Fig. 19) » To change the temperature, turn the QuickControl dial to the desired setting. (Fig. 20) » To confirm the temperature, push the QuickControl dial. (Fig. 21) 9 After the temperature is confirmed, the time ...
Page 13 - Changing the cooking temperature during cooking
15 ENGLISH Tip • To remove large or fragile ingredients, use a pair of tongs to lift the ingredients out of the basket. Note • When a batch of ingredients is ready, the Airfryer is instantly ready for preparing another batch. Changing the cooking temperature during cooking 1 During cooking, press th...
Page 14 - Choosing the keep warm mode; Making home-made fries
16 ENGLISH Choosing the keep warm mode 1 Press the keep warm button (you can activate the keep warm mode at each time). (Fig. 41) » The keep warm indication goes on. » The keep warm timer is set to 30 minutes. You cannot adjust the keep warm time. To stop the keep warm mode, simply switch off the ap...
Page 15 - Using the double-layer rack; Using the non-stick grill pan
17 ENGLISH Using the double-layer rack Use the double-layer rack to maximize your cooking space. Note • If cooking different ingredients at the same time, make sure that the cooking temperature and time is the same for each type of ingredient. • Always position meats on lower level and vegetables ab...
Page 16 - Using the baking pan; Cleaning
18 ENGLISH 1 Follow steps 1 to 5 of section ‘Airfrying’. 2 Hold the lid with the top side facing you. Insert the two hooks of the lid into the two slots on the front side of the basket. Push the lid down until it locks into position (‘click’ on both sides). (Fig. 47) 3 Proceed with step 6 to 11 of s...
Page 17 - Storage
19 ENGLISH 1 Press the On/Off button to switch off the appliance, remove the plug from the wall outlet and let the appliance cool down for 10 minutes. Tip • Remove the pan and the basket to let the Airfryer cool down more quickly. (Fig. 15) 2 Remove the fat reducer from the pan using rubber tipped t...
Page 18 - Disposal
20 ENGLISH Disposal Your product is designed and manufactured with high quality materials and components, which can be recycled and reused. For recycling information, please contact your local waste management facilities or visit www.recycle.philips.com Troubleshooting This chapter summarizes the mo...
Page 20 - Warranty; One year limited warranty
22 ENGLISH Problem Possible cause Solution Breading or coating did not adhere properly to the food. Tiny pieces of airborne breading can cause white smoke. Firmly press breading or coating to food to ensure it sticks. Warranty If you need information, support, or if you have a problem, please visit ...
Page 21 - ESPAÑOL; PRECAUCIONES
23 ESPAÑOL PRECAUCIONES IMPORTANTES Si utiliza un artefacto eléctrico siempre debe tomar medidas de seguridad básicas, tales como: 1 Lea todas las instrucciones. 2 No toque las superficies calientes. Utilice los mangos o las perillas 3 No sumerja el cable de alimentación, los conectores ni el artefa...
Page 23 - CONSERVE ESTAS
25 ESPAÑOL 39 Desconecte inmediatamente el artefacto si ve que se desprende humo negro de él. Espere a que se detenga la emisión de humo antes de retirar el sartén del artefacto. CONSERVE ESTAS INSTRUCCIONES El consumo de carnes, aves, pescados y mariscos o huevos crudos o sin cocinar puede incremen...
Page 24 - Tabla de contenido
26 ESPAÑOL Tabla de contenido PRECAUCIONES IMPORTANTES 23 Introducción 27 Información general (figura 1) 27 Airfryer y accesorios 28 Antes del primer uso 28 Preparación inicial 28 Montaje del fondo de malla extraíble y reductor de grasa 28 Montaje del mango EasyClick 29 Tabla de alimentos 29 Tabla d...
Page 25 - Introducción
27 ESPAÑOL Introducción ¡Felicitaciones por su compra y bienvenido a Philips! Para acceder a los servicios de asistencia técnica de Philips, registre su producto en www.philips.com/welcome . La nueva Airfryer le permite preparar sus ingredientes y aperitivos favoritos de una manera más sana. La Airf...
Page 26 - Airfryer y accesorios; Preparación inicial; Montaje del fondo de malla extraíble y reductor de grasa; Nota
28 ESPAÑOL Airfryer y accesorios Consulte la tabla de la figura 2 para ver los accesorios que incluye su Airfryer. El número de modelo de su Airfryer empieza con "HD97XX". Puede encontrar el número de modelo en el embalaje o en la parte inferior del artefacto.Es posible que algunos modelos y...
Page 27 - Montaje del mango EasyClick; Advertencia; Tabla de alimentos
29 ESPAÑOL Montaje del mango EasyClick Advertencia • Asegúrese siempre de que la cesta y el mango se enfríen antes de conectar o desconectar el mango EasyClick. Nota • El mango EasyClick también encaja en el sartén grill antiadherente. Le permite limpiar y guardar el artefacto con facilidad. Para fi...
Page 29 - Tabla de cocción para preajustes
31 ESPAÑOL Ingredientes Min.- máx. cantidad (g/oz) Tiempo (minutos) Temperatura (°C/°F) Agitar/girar Información adicional Moluscos 100-400 g 3,5-14 oz De 9 a 17 180 °C/ 350 °F Pollo apanado con migas de pan 100-300 g 3,5-10,5 oz De 10 a 17 180 °C/ 350 °F Agregue el aceite y el pan rallado. Tiras cr...
Page 30 - Uso del artefacto; Precaución
32 ESPAÑOL Preajustes Cantidad (g/oz) Tiempo (minutos) Información adicional Muslos de pollo (parte inferior) 300 g/10,5 oz 450 g/16 oz 600 g/21 oz 750 g/26,5 oz 19 22 25 28 Si cocina en más de un nivel, deberá dar la vuelta a los muslos de pollo a mitad del tiempo de cocción. Un muslo de pollo ente...
Page 31 - Sugerencia
33 ESPAÑOL Nota • La Airfryer puede preparar una gran variedad de ingredientes. Consulte la "Tabla de alimentos" para conocer las cantidades adecuadas y los tiempos de cocción aproximados. • No exceda la cantidad indicada en la sección "Tabla de alimentos" ni permita que los ingredie...
Page 32 - Cambio de la temperatura de cocción durante la preparación
34 ESPAÑOL 11 Cuando escuche el timbre del temporizador, habrá terminado el tiempo de cocción. (figura 26) Nota • El exceso de aceite de los ingredientes se acumula en el fondo del recipiente, debajo del reductor de grasa. • Si prepara varias tandas de ingredientes grasosos (p. ej., muslos de pollo,...
Page 33 - Cambio del tiempo de cocción durante la preparación; Selección del modo de conservación del calor
35 ESPAÑOL Cambio del tiempo de cocción durante la preparación 1 Durante la cocción, presione el botón del temporizador. (figura 33) » Para cambiar el tiempo de cocción, gire el dial QuickControl hasta la posición deseada. (figura 34) » Para confirmar el tiempo de cocción, presione el dial QuickCont...
Page 34 - Preparación de patatas fritas caseras
36 ESPAÑOL Nota • Si activa el modo de conservación del calor durante la cocción, el artefacto mantendrá los alimentos calientes durante 30 minutos después de que transcurra el tiempo de cocción. • Durante el modo de conservación del calor, el ventilador y el calentador del interior del artefacto se...
Page 35 - Uso de la rejilla de dos niveles; Uso del sartén grill antiadherente; Uso de la tapa a prueba de salpicaduras
Uso de la rejilla de dos niveles Use la rejilla de dos niveles para maximizar el espacio de cocción. Nota • Si cocina ingredientes diferentes al mismo tiempo, asegúrese de que la temperatura y el tiempo de cocción sean los mismo para cada ingrediente. • Siempre coloque las carnes en los niveles infe...
Page 36 - Uso del molde para pasteles
38 ESPAÑOL 1 Siga los pasos 1 a 5 de la sección "Fritura con aire caliente (Airfrying)". 2 Sostenga la tapa con el lado superior hacia usted. Inserte los dos ganchos de la tapa en las dos ranuras en la parte frontal de la cesta. Presione la tapa hacia abajo para ubicarla en la posición que l...
Page 37 - Limpieza
39 ESPAÑOL Limpieza Advertencia • Antes de limpiar, deje enfriar completamente la cesta, el recipiente, el reductor de grasa, los accesorios y la parte interior del artefacto (fig. 51) • Extraiga el reductor de grasa del sartén con tenazas con punta de goma. NO lo extraiga con sus dedos, ya que deba...
Page 38 - Almacenamiento; Eliminación
40 ESPAÑOL 6 Frote el exterior del artefacto y el panel de control solo con un paño húmedo. (figura 53) 7 Limpie el interior del artefacto con un paño húmedo. (figura 54) Este artefacto no cuenta con piezas que puedan ser reparadas por el usuario. Para asistencia solo en los EE. UU. o Canadá, llame ...
Page 41 - Garantía; Garantía limitada de un año
43 ESPAÑOL Garantía Si necesita más información, asistencia o si tiene problemas, visite www.philips.com/support o llame al 1-866-309-8817 para solicitar asistencia, solo disponible en Estados Unidos y Canadá. Garantía limitada de un año Philips garantiza que este producto está libre de defectos en ...
Page 42 - FRANÇAIS; MISES EN GARDE
44 FRANÇAIS MISES EN GARDE IMPORTANTES Quand vous utilisez un produit électrique, suivez toujours les mesures de sécurité fondamentales, notamment ce qui suit : 1 Lisez toutes les instructions. 2 Ne touchez pas les surfaces chaudes. Servez-vous des poignées ou des boutons. 3 Pour prévenir les risque...
Page 44 - CONSERVEZ CES
46 FRANÇAIS 37 Ne placez jamais l'appareil sur ou à proximité de matériaux combustibles, comme une nappe ou des rideaux. 38 Ne laissez jamais l'appareil fonctionner sans surveillance. 39 Débranchez immédiatement l’appareil si vous apercevez de la fumée foncée en sortir. Attendez que l’émission de fu...
Page 45 - Table des matières
47 FRANÇAIS Table des matières MISES EN GARDE IMPORTANTES 44 Introduction 48 Description générale (Fig. 1) 48 Friteuse Airfryer et accessoires 49 Avant la première utilisation 49 Avant l'utilisation 49 Placement du fond en maille amovible et du réducteur de gras 49 Placement du manche EasyClick 50 T...
Page 47 - Friteuse Airfryer et accessoires; Placement du fond en maille amovible et du réducteur de gras; Remarque
49 FRANÇAIS Friteuse Airfryer et accessoires Consultez le tableau dans la Fig. 2 pour voir les accessoires compris avec votre friteuse Airfryer. Le numéro de type de votre friteuse Airfryer commence par « HD97XX ». Vous trouverez le numéro de type sur l'emballage ou sur le dessous de l'appareil.Cert...
Page 48 - Placement du manche EasyClick; Avertissement; Tableau des aliments
50 FRANÇAIS Placement du manche EasyClick Avertissement • Vérifiez toujours que le panier et le manche ont refroidi avant de fixer ou de détacher le manche EasyClick. Remarque • Le manche EasyClick s'adapte aussi à la poêle à griller antiadhésive. Cela vous permet de nettoyer et de ranger l'appareil...
Page 51 - Tableau de cuisson pour préréglages; Utilisation de l'appareil
53 FRANÇAIS Tableau de cuisson pour préréglages Les g/oz en gras indiquent la quantité d'aliments prévue pour le préréglage établi. Si vous cuisez une quantité différente, adaptez le temps de cuisson en conséquence. Vous pouvez aussi adapter le temps de cuisson selon vos préférences personnelles en ...
Page 53 - Conseil
55 FRANÇAIS Conseil • Pour interrompre la cuisson, appuyez sur le cadran QuickControl. Pour reprendre la cuisson, appuyez sur le cadran QuickControl. Remarque • Certains aliments nécessitent d'être remués ou retournés en cours de cuisson (voir le tableau des aliments). Pour secouer les aliments, app...
Page 54 - Changer la température de cuisson pendant la cuisson
56 FRANÇAIS Remarque • Aussitôt que la cuisson d'un lot d'aliments est terminée, la friteuse est instantanément prête à cuire un autre lot. Changer la température de cuisson pendant la cuisson 1 Pendant la cuisson, appuyez sur le bouton de la température. (Fig. 30) » Pour changer la température de c...
Page 55 - Sélectionner le mode de maintien au chaud; Cuisson des frites maison
57 FRANÇAIS Sélectionner le mode de maintien au chaud 1 Appuyez sur le bouton de maintien au chaud (vous pouvez activer le mode de maintien au chaud de façon systématique). (Fig. 41) » L'indicateur de maintien au chaud s'allume. » La minuterie de maintien au chaud est réglée à 30 minutes. Le mode de...
Page 56 - Utilisation de la grille double hauteur; Utilisez la poêle à griller antiadhésive.
58 FRANÇAIS Remarque • N'inclinez pas le bol pour verser d'un coup les bâtonnets dans le panier, pour éviter que l'excès d'huile ne coule dans la cuve. 6 Mettez les bâtonnets dans le panier. 7 Cuisez les bâtonnets de pommes de terre et secouez le panier à mi-cuisson. Secouez le panier 2 à 3 fois si ...
Page 57 - Utilisation du couvercle antiéclaboussures; Utiliser un plat à cuisson
59 FRANÇAIS 7 À la fin de la cuisson, pour retirer les aliments, appuyez sur le bouton de déverrouillage, retirez la poêle à griller antiadhésive de la cuve de l'Airfryer puis posez-la sur une surface résistante à la chaleur. Utilisation du couvercle antiéclaboussures Utilisez le couvercle antiéclab...
Page 58 - Nettoyage
60 FRANÇAIS Nettoyage Avertissement • Laissez le panier, la cuve, le réducteur de gras, les accessoires et l'intérieur de l'appareil refroidir complètement avant de les nettoyer (fig. 51) • Retirez le réducteur de gras de la cuve à l’aide de pinces dont l’extrémité est en caoutchouc. PAS à l’aide de...
Page 59 - Entreposage; Mise au rebut
61 FRANÇAIS 6 Essuyez l'extérieur de l'appareil et le panneau de commande à l'aide d'un linge humide seulement. (Fig. 53) 7 Nettoyez l'intérieur de l'appareil à l'aide d'un linge humide. (Fig. 54) Cette lampe ne contient aucune pièce pouvant être réparée par l'utilisateur. Pour obtenir de l'aide aux...
Page 62 - Garantie; Garantie limitée d'un an
64 FRANÇAIS Garantie Si vous avez besoin de renseignements supplémentaires, d'assistance ou si vous avez un problème particulier, visitez notre site Web www.philips.com/support ou composez le 1 866 309-8817 pour obtenir de l'aide (aux États-Unis ou au Canada seulement). Garantie limitée d'un an Phil...
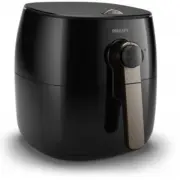


 Philips HD9411/70 User Manual
 Philips HD9641/56 User Manual
 Philips HD9641/96 User Manual
 Philips HD9643/11 User Manual
 Philips HD9650/90 User Manual
 Philips HD9650/96 User Manual
 Philips HD9750/90R1 User Manual
 Philips HD9762/90 User Manual
 Philips HD9860/90 User Manual
 Philips HD9867/90 User Manual
 Philips HD9870/20 User Manual
 Philips HD9875/90 User Manual