Page 2 - ENGLISH; TABLE OF CONTENTS
2 ENGLISH TABLE OF CONTENTS Important 3 Introduction 5 General description 5 Before first use 7 Preparing for use 7 Placing the removable mesh bottom and fat reducer 7 Food table for manual time/temperature settings 8 Using the appliance 10 Airfrying 10 Food table for Smart Chef programs 14 Cooking ...
Page 3 - Important; Danger
3 ENGLISH Important Read this important information carefully before you use the appliance and save it for future reference. Danger - Never immerse the appliance in water nor rinse it under the tap. - Do not let any water or other liquid enter the appliance to prevent electric shock. - Always put th...
Page 5 - Introduction
5 ENGLISH Automatic shut-off This appliance is equipped with an automatic shut-off function. When the time of the timer has elapsed, the device will shut off automatically. If you do not press a button within 30 minutes, the appliance switches off automatically. To switch off the appliance manually,...
Page 7 - Before first use; Placing the removable mesh bottom and fat reducer
7 ENGLISH Before first use 1 Remove all packing material. 2 Remove any stickers or labels (if available) from the appliance. 3 Thoroughly clean the appliance before first use, as indicated in the cleaning chapter. Preparing for use Placing the removable mesh bottom and fat reducer 1 Open the drawer ...
Page 8 - Put the basket in the pan.; Food table for manual time/temperature settings; Note; Ingredients
8 ENGLISH 5 Put the basket in the pan. 6 Slide the drawer back into the Airfryer by the handle. Note • Never use the pan without the fat reducer or the basket in it. Food table for manual time/temperature settings The table below helps you select the basic settings for the types of food you want to ...
Page 10 - Using the appliance; Airfrying; Caution; This appliance is for household use only.; surface. Make sure the drawer can be opened completely.; Pull the power cord out of the cord storage compartment at the back
10 ENGLISH Using the appliance Airfrying Caution • This is an Airfryer that works on hot air. Do not fill the pan with oil, frying fat or any other liquid. • Do not touch hot surfaces. Use handles or knobs. Handle the hot pan and fat reducer with oven-safe gloves. • This appliance is for household u...
Page 11 - The temperature indication blinks on the screen.
11 ENGLISH 5 Put the ingredients in the basket. Note • The Airfryer can prepare a large range of ingredients. Consult the ‘Food table’ for the right quantities and approximate cooking times. • Do not exceed the amount indicated in the ‘Food table’ section or overfill the basket beyond the ‘MAX’ indi...
Page 12 - Push the QuickControl dial to confirm the selected temperature.; Push the QuickControl dial to confirm the selected time.; Tip; When you hear the timer bell, the cooking time has elapsed.
12 ENGLISH 10 Push the QuickControl dial to confirm the selected temperature. » After the temperature is confirmed, the time indication starts blinking on the screen. 11 Turn the QuickControl dial to choose your desired cooking time. Note • If you press the favorite button you will save this cooking...
Page 13 - Open the drawer by pulling the handle and check if the ingredients; Empty the basket contents into a bowl or onto a plate. Always remove
13 ENGLISH 15 Open the drawer by pulling the handle and check if the ingredients are ready. Note • If the ingredients are not ready yet, simply slide the drawer back into the Airfryer by the handle and add a few extra minutes to the set time. 16 To remove small ingredients (e.g. fries), lift the bas...
Page 14 - Smart Chef programs for
14 ENGLISH Food table for Smart Chef programs Note • This appliance is for indoor use only. Start the automatic cooking programs with the appliance at room temperature—do not pre-heat. • Always distribute the food evenly in the basket. • Turn/shake the food if indicated by the appliance. Keep the dr...
Page 15 - Press the On/Off button
15 ENGLISH Cooking with Smart Chef programs Season your ingredients as desired. Put the food inside the basket and slide the basket inside the appliance. Note • Do not use honey, syrups or any other sugary ingredients to season your food, since the browning will get very dark. 1 Press the On/Off but...
Page 16 - Making home-made fries; To make great home-made fries in the Airfryer:; Choosing the keep warm mode; The keep warm indication lights up with pulsing effect.
16 ENGLISH 4 When you hear the bell and see the shake indication blinking, open the drawer and turn the ingredients or shake the basket with the ingredients. Then slide the basket back into the appliance. 5 When you hear the bell and the timer has elapsed to 0, the food is ready. Note • If your food...
Page 17 - Save your favorite setting
17 ENGLISH » The keep warm timer is set to 30 minutes. To change the keep warm time (1–30 min), press the timer button , turn the QuickControl dial and then push it to confirm. You cannot adjust the keep warm temperature. 2 To pause the keep warm mode, push the QuickControl dial. To resume the keep ...
Page 19 - Cleaning; Warning
19 ENGLISH Cooking with a favorite setting1 Press the On/Off button to switch on the appliance. 2 Press the favorite button . 3 Press the QuickControl dial to start the cooking process. Note • You can overwrite your favorite setting by applying the same procedure as mentioned above. • Pressing the f...
Page 21 - Storage; Unplug the appliance and let it cool down.; Recycling; If you need information or support, please visit
21 ENGLISH Cleaning table Storage 1 Unplug the appliance and let it cool down. 2 Make sure all parts are clean and dry before storing. 3 Insert the cord into the cord storage compartment. Note • Always hold the Airfryer horizontally when you carry it. Make sure that you also hold the drawer on the f...
Page 22 - Troubleshooting; Problem
22 ENGLISH Troubleshooting This chapter summarizes the most common problems you could encounter with the appliance. If you are unable to solve the problem with the information below, visit www.philips.com/support for a list of frequently asked questions or contact the Consumer Care Center in your co...
Page 24 - DEUTSCH; INHALTSVERZEICHNIS
24 DEUTSCH INHALTSVERZEICHNIS Wichtig! 25 Einführung 27 Allgemeine Beschreibung 27 Vor dem ersten Gebrauch 29 Für den Gebrauch vorbereiten 29 Einsetzen des abnehmbaren Gitterbodens und des Fettabscheiders 29 Lebensmitteltabelle für die manuelle Zeit-/ Temperatureinstellung 30 Das Gerät benutzen 32 G...
Page 26 - Elektromagnetische Felder
26 DEUTSCH - Lagerung von Kartoffeln: Die Temperatur sollte für die gelagerte Kartoffelsorte passend sein und über 6°C liegen, um der Gefahr von Acrylamidaufnahme über die fertigen Gerichte vorzubeugen. - Stellen Sie das Gerät nicht auf einen heißen Gas- oder Elektroherd jeglicher Art, elektrische K...
Page 27 - Automatische Abschaltung; Einführung
27 DEUTSCH Automatische Abschaltung Dieses Gerät ist mit einer automatischen Abschaltungsfunktion ausgestattet. Wenn die Zeit am Timer abgelaufen ist, schaltet sich das Gerät automatisch aus. Wenn innerhalb von 30 Minuten keine Taste gedrückt wird, schaltet sich das Gerät automatisch aus. Um das Ger...
Page 29 - Vor dem ersten Gebrauch; Einsetzen des abnehmbaren Gitterbodens und
29 DEUTSCH Vor dem ersten Gebrauch 1 Entfernen Sie sämtliches Verpackungsmaterial. 2 Entfernen Sie gegebenenfalls sämtliche Aufkleber oder Etiketten vom Gerät. 3 Reinigen Sie das Gerät vor der ersten Verwendung gründlich, wie im Reinigungskapitel angegeben. Für den Gebrauch vorbereiten Einsetzen des...
Page 30 - Setzen Sie den Korb in die Pfanne.; Lebensmitteltabelle für die manuelle Zeit-/; Hinweis; Inhaltsstoffe
30 DEUTSCH 5 Setzen Sie den Korb in die Pfanne. 6 Schieben Sie die Schublade mit dem Griff zurück in den Airfryer. Hinweis • Verwenden Sie die Pfanne nie ohne den Fettabscheider oder den Korb. Lebensmitteltabelle für die manuelle Zeit-/ Temperatureinstellung Die folgende Tabelle hilft Ihnen dabei, d...
Page 32 - Das Gerät benutzen; Garen mit dem Airfryer; Vorsicht; Dieses Gerät ist nur für den Gebrauch im Haushalt bestimmt.; Stellen Sie das Gerät auf eine stabile, waagerechte, ebene und
32 DEUTSCH Inhaltsstoffe Min./Max. Menge Zeit (Min.) Temperatur Hinweis Kuchen 500 g/18 oz 28 180 °C/350 °F • Verwenden Sie eine Kuchenform. Muffinsca. 50 g/1,8 oz 1 bis 9 12 bis 14 180 °C/350 °F • Verwenden Sie hitzebeständige Muffinförmchen aus Silikon. Quiche (Durchmesser 21 cm/8,3 in) 1 15 180 °...
Page 33 - Ziehen Sie das Netzkabel aus dem Kabelfach an der Rückseite des
33 DEUTSCH Hinweis • Legen Sie keine Gegenstände auf oder neben dem Gerät ab. Dies kann den Luftstrom stören und das Garergebnis beeinträchtigen. 2 Ziehen Sie das Netzkabel aus dem Kabelfach an der Rückseite des Geräts. 3 Stecken Sie den Stecker in die Steckdose. 4 Ziehen Sie zum Öffnen der Schublad...
Page 34 - Die Temperaturanzeige blinkt auf dem Bildschirm.; Zeitanzeige auf dem Bildschirm.
34 DEUTSCH 6 Schieben Sie die Schublade mit dem Griff zurück in den Airfryer. Vorsicht • Verwenden Sie die Pfanne nie ohne den Fettabscheider oder den Korb. Wenn Sie das Gerät ohne Korb aufheizen, verwenden Sie Ofenhandschuhe, um die Schublade zu öffnen. Die Ränder und die Innenseite der Schublade w...
Page 35 - Drehen Sie den QuickControl-Regler, um die gewünschte Garzeit; Tipp
35 DEUTSCH 11 Drehen Sie den QuickControl-Regler, um die gewünschte Garzeit auszuwählen. Hinweis • Durch Drücken der Favoritentaste werden diese Einstellungen für Garzeit und -temperatur als Ihre bevorzugten Gareinstellungen gespeichert. Zuvor gespeicherte Einstellungen werden überschrieben. Weitere...
Page 36 - Öffnen Sie die Schublade durch Ziehen am Griff, und überprüfen Sie,; den Korb am Griff aus der Pfanne.; Nehmen Sie den Korb zum Entleeren immer aus der Pfanne, da sich
36 DEUTSCH 14 Wenn das Timer-Signal ertönt, ist die Garzeit abgelaufen. 15 Öffnen Sie die Schublade durch Ziehen am Griff, und überprüfen Sie, ob die Zutaten fertig gegart sind. Hinweis • Wenn die Zutaten noch nicht fertig gegart sind, schieben Sie die Schublade einfach am Griff zurück in den Airfry...
Page 37 - Smart Chef programme für
37 DEUTSCH Lebensmitteltabelle für Smart Chef-Programme Hinweis • Dieses Gerät ist nur für den Gebrauch in Innenräumen vorgesehen. Starten Sie die automatischen Garprogramme bei Raumtemperatur – heizen Sie das Gerät nicht vor. • Verteilen Sie die Lebensmittel stets gleichmäßig im Korb. • Wenden bzw....
Page 38 - Wenn Sie das Smart Chef-Programm ändern möchten, drehen Sie den
38 DEUTSCH Garen mit den Smart Chef-Programmen Würzen Sie Ihre Zutaten nach Geschmack. Legen Sie die Speisen in den Korb, und schieben Sie den Korb in das Gerät. Hinweis • Verwenden Sie zum Würzen keinen Honig oder Sirup und keine anderen zuckerhaltigen Zutaten, da die Speisen andernfalls sehr stark...
Page 39 - Zubereiten von hausgemachten Pommes Frites
39 DEUTSCH 4 Wenn Sie das Signal hören und die Schüttelanzeige blinkt, öffnen Sie die Schublade, und wenden Sie die Speisen, bzw. schütteln Sie den Korb mit den Zutaten. Schieben Sie den Korb dann wieder in das Gerät. 5 Wenn Sie das Signal hören und der Timer abgelaufen ist, sind die Speisen fertig ...
Page 40 - Drücken Sie die Warmhaltetaste
40 DEUTSCH Auswählen des Warmhaltemodus 1 Drücken Sie die Warmhaltetaste (Sie können den Warmhaltemodus jederzeit aktivieren). » Die Warmhalteanzeige blinkt. » Der Warmhalte-Timer ist auf 30 Minuten voreingestellt. Zum Ändern der Warmhaltezeit (1 bis 30 Min.) drücken Sie die Timer-Taste , drehen Sie...
Page 41 - Drücken Sie die Temperaturtaste
41 DEUTSCH Speichern Sie Ihre bevorzugte Einstellung 1 Drücken Sie den Ein-/Aus-Schalter , um das Gerät einzuschalten. 2 Drücken Sie die Temperaturtaste . 3 Drehen Sie den QuickControl-Regler, um die Temperatur auszuwählen. 4 Drücken Sie den QuickControl-Regler, um die ausgewählte Temperatur zu best...
Page 42 - Drücken Sie die Favoritentaste
42 DEUTSCH 6 Drücken Sie die Favoritentaste , um Ihre Einstellung zu speichern. Sie hören einen Signalton, wenn die Einstellung gespeichert wurde. 7 Drücken Sie den QuickControl-Regler, um den Garvorgang zu starten. Garen mit einer Favoriteneinstellung1 Drücken Sie den Ein-/Aus-Schalter , um das Ger...
Page 43 - Pflege; Achtung; Ziehen Sie dann den Stecker aus der Steckdose, und lassen Sie das; Entfernen Sie mithilfe einer Zange mit gummierten Spitzen den
43 DEUTSCH Pflege Achtung • Lassen Sie den Korb, die Pfanne, den Fettabscheider und die Innenseite des Geräts vollständig abkühlen, bevor Sie mit dem Reinigungsvorgang beginnen. • Entfernen Sie mithilfe einer Zange mit gummierten Spitzen den Fettabscheider aus der Pfanne. Entfernen Sie den Einsatz n...
Page 44 - Reinigen Sie die Oberflächen des Geräts mit einem feuchten Tuch.; Reinigen Sie das Heizelement mit einer Reinigungsbürste, um; Reinigungstabelle
44 DEUTSCH 4 Reinigen Sie die Oberflächen des Geräts mit einem feuchten Tuch. Hinweis • Vergewissern Sie sich, dass keine Feuchtigkeit auf dem Bedienfeld zurückbleibt. Trocknen Sie das Bedienfeld mit einem Tuch, nachdem Sie es gereinigt haben. 5 Reinigen Sie das Heizelement mit einer Reinigungsbürst...
Page 45 - Aufbewahrung; Ziehen Sie den Netzstecker, und lassen Sie das Gerät abkühlen.; , oder lesen Sie die; Fehlerbehebung; für eine Liste mit häufig
45 DEUTSCH Aufbewahrung 1 Ziehen Sie den Netzstecker, und lassen Sie das Gerät abkühlen. 2 Stellen Sie sicher, dass alle Teile sauber und trocken sind, bevor Sie das Gerät verstauen. 3 Verstauen Sie das Kabel im Netzkabelfach. Hinweis • Halten Sie den Airfryer beim Tragen immer horizontal. Achten Si...
Page 48 - FRANÇAIS; TABLE DES MATIÈRES
48 FRANÇAIS TABLE DES MATIÈRES Important 49 Introduction 51 Description générale 51 Avant la première utilisation 53 Avant utilisation 53 Installation du fond alvéolé amovible et du réducteur de graisse 53 Tableau des aliments pour le réglage manuel du temps de cuisson et de la température 54 Utilis...
Page 53 - Avant la première utilisation; Installation du fond alvéolé amovible et du
53 FRANÇAIS Avant la première utilisation 1 Retirez tout l'emballage. 2 Le cas échéant, retirez tous les autocollants et étiquettes de l'appareil. 3 Nettoyez soigneusement l'appareil avant la première utilisation, comme indiqué dans le chapitre relatif au nettoyage. Avant utilisation Installation du...
Page 54 - Placez le panier dans la cuve.; Tableau des aliments pour le réglage manuel du; Remarque; Ingrédients
54 FRANÇAIS 5 Placez le panier dans la cuve. 6 Replacez le tiroir dans l'Airfryer grâce à la poignée. Remarque • N'utilisez jamais la cuve sans y avoir préalablement installé le réducteur de graisse ou le panier. Tableau des aliments pour le réglage manuel du temps de cuisson et de la température Le...
Page 56 - Utilisation de l'appareil; Cuisson à l'air chaud; Attention; Cet appareil est destiné à un usage domestique uniquement.; Placez l'appareil sur une surface horizontale, stable, plane et; Retirez le cordon d'alimentation du compartiment de rangement à
56 FRANÇAIS Ingrédients Min.- max. quantité Temps (min) Température Remarque Pain frais 700 g/25 oz 38 160 °C/325 °F • La forme doit être aussi plate que possible afin d'éviter que le pain touche la résistance lorsqu'il gonfle. Petits pains fraisEnviron 80 g/2,8 oz 1-6 pièces 18-20 160 °C/325 °F Châ...
Page 57 - Branchez la fiche sur la prise murale.; Replacez le tiroir dans l'Airfryer grâce à la poignée.; Appuyez sur le bouton marche/arrêt
57 FRANÇAIS 3 Branchez la fiche sur la prise murale. 4 Ouvrez le tiroir en tirant la poignée. 5 Mettez les aliments dans le panier. Remarque • La friteuse Airfryer permet de préparer une grande variété d'aliments. Consultez le tableau de cuisson des aliments pour connaître les bonnes quantités et le...
Page 58 - Appuyez sur le bouton de température; Tournez le bouton QuickControl pour choisir la température de; L'appareil démarre la cuisson une fois que le temps de cuisson a été
58 FRANÇAIS 8 Appuyez sur le bouton de température . » La température clignote à l'écran. Remarque • Si vous appuyez d'abord sur le minuteur , l'appareil démarrera la cuisson une fois que le temps de cuisson a été confirmé. 9 Tournez le bouton QuickControl pour choisir la température de cuisson dési...
Page 59 - Conseil; panier de la cuve par la poignée.
59 FRANÇAIS Conseil • Pour suspendre le processus de cuisson, appuyez sur le bouton QuickControl. Pour reprendre le processus de cuisson, appuyez à nouveau sur le bouton QuickControl. • Pour modifier la température ou le temps de cuisson pendant la cuisson, répétez les étapes 8 à 10. • Pour annuler ...
Page 60 - Videz le contenu du panier dans un saladier ou un plat. Retirez; Tableau des aliments pour les programmes; Programmes prédé2nis
60 FRANÇAIS 17 Videz le contenu du panier dans un saladier ou un plat. Retirez toujours le panier de la cuve pour vider son contenu, car de l'huile chaude peut se trouver au fond de la cuve. Remarque • Pour sortir les aliments épais ou fragiles, utilisez des pinces. • L'excès d'huile et la graisse f...
Page 61 - Cuisiner avec les programmes Smart Chef; Mettez l'appareil en marche en appuyant sur le bouton marche/arrêt
61 FRANÇAIS Programmes prédé2nis Instructions Frites maison Coupées maison(10 x 10 mm) 500–1400g • Utilisez des pommes de terre farineuses crues. Ne les précuisez pas. • N'utilisez pas de pommes de terre stockées au-dessous de 6 °C. • Pour un résultat optimal, suivez la recette des frites fraîches.&...
Page 62 - Préparation de frites maison
62 FRANÇAIS 3 Pour confirmer le programme Smart Chef, appuyez sur le bouton QuickControl. » L'appareil calcule automatiquement la température et le temps de cuisson idéaux. L'écran affiche une première estimation de la température et du temps de cuisson au bout de quelques minutes. Pendant ce temps,...
Page 63 - Sélection du mode de maintien au chaud; Le bouton de maintien au chaud clignote.
63 FRANÇAIS Remarque • N'inclinez pas le saladier pour verser directement les pommes de terre coupées dans le panier afin d'éviter qu'une trop grande quantité d'huile se retrouve dans la cuve. 6 Mettez les bâtonnets dans le panier. 7 Démarrez le programme Smart Chef pour frites maison . La sonnerie ...
Page 64 - Sauvegardez vos réglages favoris
64 FRANÇAIS Remarque • Si vous activez le mode de maintien au chaud durant la cuisson (le voyant de maintien au chaud s'allume), l'appareil gardera les aliments chauds pendant 30 minutes une fois le temps de cuisson écoulé. • En mode de maintien au chaud, le ventilateur et l'élément chauffant à l'in...
Page 66 - Nettoyage; Avertissement
66 FRANÇAIS 3 Appuyez sur le bouton QuickControl pour démarrer la cuisson. Remarque • Vous pouvez remplacer le réglage favori en appliquant la même procédure que celle indiquée ci-dessus. • Appuyer sur le bouton favori en mode manuel vous permet de remplacer le réglage favori. Pour appliquer le régl...
Page 67 - Nettoyez l'élément chauffant avec une brosse de nettoyage pour
67 FRANÇAIS Conseil • Si des résidus d'aliments adhèrent à la cuve, au réducteur de graisse ou au panier, vous pouvez les laisser tremper dans de l'eau chaude et du liquide vaisselle pendant 10 à 15 minutes. Les résidus d'aliments se détacheront et pourront être facilement éliminés. Assurez-vous que...
Page 68 - Rangement; Veillez à nettoyer et sécher tous les éléments avant de ranger; Recyclage
68 FRANÇAIS Tableau relatif au nettoyage Rangement 1 Débranchez l'appareil et laissez-le refroidir. 2 Veillez à nettoyer et sécher tous les éléments avant de ranger l'appareil. 3 Rangez le cordon dans son compartiment. Remarque • Tenez toujours la friteuse Airfryer horizontalement lorsque vous la tr...
Page 69 - Garantie et assistance; Problème
69 FRANÇAIS Garantie et assistance Si vous avez besoin d'une assistance ou d'informations supplémentaires, consultez le site Web www.philips.com/support ou lisez le dépliant séparé sur la garantie internationale. Dépannage Cette rubrique présente les problèmes les plus courants que vous pouvez renco...
Page 72 - NEDERLANDS; INHOUDSOPGAVE
72 NEDERLANDS INHOUDSOPGAVE Belangrijk 73 Introductie 75 Algemene beschrijving 75 Voor het eerste gebruik 77 Klaarmaken voor gebruik 77 De uitneembare gaasbodem en de vetverminderaar plaatsen 77 Etenswarentabel voor handmatige tijd-/ temperatuurinstellingen 78 Het apparaat gebruiken 80 Heteluchtfrit...
Page 73 - Belangrijk; Gevaar
73 NEDERLANDS Belangrijk Lees deze belangrijke informatie zorgvuldig door voordat u het apparaat gaat gebruiken. Bewaar het boekje om het indien nodig later te kunnen raadplegen. Gevaar - Dompel het apparaat nooit in water en spoel het nooit af onder de kraan. - Zorg dat er geen water of een andere ...
Page 75 - Automatische uitschakeling
75 NEDERLANDS Automatische uitschakeling Dit apparaat heeft een functie voor automatische uitschakeling. Als de timer is afgelopen, wordt het apparaat automatisch uitgeschakeld. Als u niet binnen 30 minuten op een knop drukt, wordt het apparaat automatisch uitgeschakeld. Om het apparaat handmatig ui...
Page 77 - Voor het eerste gebruik; De uitneembare gaasbodem en de vetverminderaar plaatsen
77 NEDERLANDS Voor het eerste gebruik 1 Verwijder al het verpakkingsmateriaal. 2 Verwijder eventuele stickers of labels van het apparaat. 3 Reinig het apparaat grondig vóór het eerste gebruik, zoals aangegeven in het hoofdstuk 'Reinigen'. Klaarmaken voor gebruik De uitneembare gaasbodem en de vetver...
Page 78 - Plaats de mand in de pan.; temperatuurinstellingen; Opmerking; Ingrediënten
78 NEDERLANDS 5 Plaats de mand in de pan. 6 Schuif de lade aan het handvat terug in de Airfryer. Opmerking • Gebruik de pan nooit zonder de vetverminderaar of mand. Etenswarentabel voor handmatige tijd-/ temperatuurinstellingen De onderstaande tabel vermeldt de basisstanden voor veelvoorkomende eten...
Page 80 - Het apparaat gebruiken; Heteluchtfrituren; Let op; Dit apparaat is uitsluitend bedoeld voor huishoudelijk gebruik.; Plaats het apparaat op een stabiele, horizontale, vlakke en
80 NEDERLANDS Ingrediënten Min. - max. hoeveelheid Bewerkingstijd (min) Temperatuur Opmerking Voorgebakken geroosterd brood/broodjes 1-6 6-7 180 °C/ 350°F Vers brood 700 g/25 oz 38 160 °C/ 325°F • Het brood moet zo plat mogelijk zijn om te voorkomen dat het tijdens het rijzen tegen het verwarmingsel...
Page 82 - De temperatuuraanduiding knippert op het scherm.; Zodra de temperatuur is bevestigd, begint de tijdsaanduiding op
82 NEDERLANDS 8 Druk op de temperatuurknop . » De temperatuuraanduiding knippert op het scherm. Opmerking • Als u eerst op de timerknop drukt, begint het apparaat meteen met koken zodra de kooktijd is bevestigd. 9 Draai aan de QuickControl-knop om de gewenste bereidingstemperatuur te kiezen. 10 Druk...
Page 83 - Wanneer u het belsignaal hoort, is de bereidingstijd verstreken.; het handvat uit de pan.
83 NEDERLANDS Tip • Om het bereidingsproces te pauzeren, drukt u op de QuickControl-knop. Om het bereidingsproces te hervatten, drukt u nogmaals op de QuickControl-knop. • Herhaal de stappen 8–10 om de bereidingstemperatuur of -tijd tijdens het koken te wijzigen. • Druk op de terugknop om een proces...
Page 84 - Leeg de mand in een schaal of op een bord. Haal altijd de mand uit de; Etenswarentabel voor Smart Chef-programma's; Aanwijzigen
84 NEDERLANDS 17 Leeg de mand in een schaal of op een bord. Haal altijd de mand uit de pan om de inhoud eruit te halen aangezien onder in de pan nog hete olie kan zitten. Opmerking • Om grote of kwetsbare etenswaren uit de mand te verwijderen, kunt u het beste een tang gebruiken. • Overtollige olie ...
Page 85 - Druk op de aan-uitknop
85 NEDERLANDS Smart Chef-programma's voor Aanwijzigen Handgesneden frieten Handgesneden(10x10 mm) 500–1400g • Gebruik kruimige, rauwe aardappelen. Kook de aardappelen niet voor. • Gebruik geen aardappelen die onder 6°C zijn bewaard. • Volg het recept voor verse frites voor het beste resultaat. Vis E...
Page 86 - Zelfgemaakte frites maken
86 NEDERLANDS 3 Druk op de QuickControl-knop om het Smart Chef-programma te bevestigen. » Het apparaat berekent automatisch de ideale bereidingstemperatuur en -tijd. Op het scherm wordt de eerste geschatte bereidingstemperatuur en tijd na enkele minuten weergegeven. Gedurende deze tijd is het appara...
Page 87 - De warmhoudmodus kiezen; De warmhoudknop knippert nu.
87 NEDERLANDS Opmerking • Kantel de kom niet om alle staafjes in één keer in de mand te doen. Zo voorkomt u dat overtollige olie onder in de pan terechtkomt. 6 Leg de aardappelreepjes in de mand. 7 Start het Smart Chef-programma voor zelfgemaakte frites . Wanneer u de frites moet schudden, hoort u d...
Page 88 - Uw favoriete instelling opslaan
88 NEDERLANDS Opmerking • Als u de warmhoudmodus tijdens het bereiden activeert (de warmhoudknop knippert), houdt het apparaat uw etenswaren warm gedurende 30 minuten na het aflopen van de bereidingstijd. • Tijdens de warmhoudmodus gaan de ventilator en het verwarmingselement in het apparaat zo nu e...
Page 90 - Reiniging; Waarschuwing
90 NEDERLANDS 3 Druk op de QuickControl-knop om het bereidingsproces te starten. Opmerking • U kunt uw favoriete instelling overschrijven door dezelfde procedure toe te passen als hierboven beschreven. • Als u in de handmatige modus op de favorietenknop drukt, wordt uw favoriete instelling overschre...
Page 91 - Veeg de buitenkant van het apparaat schoon met een vochtige doek.; Maak het verwarmingselement schoon met een
91 NEDERLANDS Tip • Als er voedselresten aan de pan, de vetverminderaar of de mand vastzitten, kunt u deze 10 tot 15 minuten in heet water met afwasmiddel laten weken. Het weken maakt de voedselresten los, waarna u deze gemakkelijk kunt verwijderen. Gebruik een afwasmiddel dat olie en vet kan oploss...
Page 92 - Opbergen; Haal de stekker uit het stopcontact en laat het apparaat afkoelen.
92 NEDERLANDS Schoonmaaktabel Opbergen 1 Haal de stekker uit het stopcontact en laat het apparaat afkoelen. 2 Controleer of alle onderdelen schoon en droog zijn voordat u het apparaat opbergt. 3 Duw het snoer in de snoeropbergruimte. Opmerking • Houd de Airfryer altijd horizontaal wanneer u deze dra...
Page 93 - Garantie en ondersteuning; Probleem
93 NEDERLANDS Garantie en ondersteuning Als u informatie of ondersteuning nodig hebt, bezoek dan www.philips.com/support of lees het 'worldwide guarantee'-vouwblad. Problemen oplossen Dit hoofdstuk behandelt in het kort de problemen die u kunt tegenkomen tijdens het gebruik van uw apparaat. Als u he...
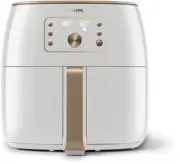


 Philips HD9650/90 User Manual
 Philips HD9650/96 User Manual
 Philips HD9654/90 Quick Guide
 Philips HD9762/90 User Manual
 Philips HD9860/90 User Manual
 Philips HD9867/90 User Manual
 Philips HD9875/90 User Manual
 Philips HD9876/20 User Manual
 Philips HD9876/25 User Manual
 Philips HD9876/90 User Manual
 Philips HD9921/00 User Manual
 Philips HD9960/00 User Manual