Page 3 - ENGLISH; TABLE OF CONTENTS
3 ENGLISH TABLE OF CONTENTS Important 4 Introduction 9 General description 9 Before first use 10 Preparing for use 10 Placing the removable mesh bottom and fat reducer 10 Food table 11 Using the appliance 14 Airfrying 14 Changing to another preset during cooking 18 Using the manual mode 19 Changing ...
Page 4 - Important; Read this important information carefully before you use the; Danger
4 ENGLISH Important Read this important information carefully before you use the appliance and save it for future reference. Danger - Always put the ingredients to be fried in the basket, to prevent them from coming into contact with the heating elements. - Do not cover the air inlet and the air out...
Page 6 - Caution
6 ENGLISH - Do not place the appliance on or near a hot gas stove or all kinds of electric stove and electric cooking plates, or in a heated oven. - Never use light ingredients or baking paper in the appliance. - Do not place the appliance on or near combustible materials such as a tablecloth or cur...
Page 9 - Introduction
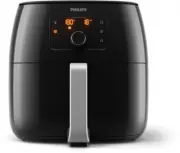
9 ENGLISH Introduction Congratulations on your purchase and welcome to Philips! To fully benefit from the support that Philips offers, register your product at www.philips.com/welcome . Philips Airfryer XXL uses hot air to fry your favorite food with little or no added oil. It is built to fry as cri...
Page 10 - Before first use; Placing the removable mesh bottom and fat reducer
10 ENGLISH Before first use 1 Remove all packing material. 2 Remove any stickers or labels from the appliance. 3 Thoroughly clean the appliance before first use, as indicated in the cleaning table. Preparing for use Placing the removable mesh bottom and fat reducer 1 Open the drawer by pulling the h...
Page 11 - Put the basket in the pan.; Food table; The table below helps you select the basic settings for the; Note
11 ENGLISH 5 Put the basket in the pan. 6 Slide the drawer back into the Airfryer by the handle. Note • Never use the pan without the fat reducer or the basket in it. Food table The table below helps you select the basic settings for the types of food you want to prepare. Note • Keep in mind that th...
Page 14 - Using the appliance; Airfrying; This appliance is for household use only.
14 ENGLISH Using the appliance Airfrying Caution • This is an Airfryer that works on hot air. Do not fill the pan with oil, frying fat or any other liquid. • Do not touch hot surfaces. Use handles or knobs. Handle the hot pan and fat reducer with oven-safe gloves. • This appliance is for household u...
Page 15 - Put the ingredients in the basket.; Slide the drawer back into the Airfryer by the handle.; To change the preset, turn the QuickControl dial to the
15 ENGLISH 5 Put the ingredients in the basket. Note • The Airfryer can prepare a large range of ingredients. Consult the ‘Food table’ for the right quantities and approximate cooking times. • Do not exceed the amount indicated in the ‘Food table’ section or overfill the basket beyond the ‘MAX’ indi...
Page 16 - To confirm the selected cooking time, push the
16 ENGLISH 9 To change the cooking time, turn the QuickControl dial to the desired setting. » To confirm the selected cooking time, push the QuickControl dial. Note • Refer to the food table with basic cooking settings for different types of food. 10 The appliance starts cooking after the cooking ti...
Page 17 - of the pan by the handle.; Empty the basket contents into a bowl or onto a plate.; When a batch of ingredients is ready, the Airfryer is instantly
17 ENGLISH Note • If the ingredients are not ready yet, simply slide the drawer back into the Airfryer by the handle and add a few extra minutes to the set time. 13 To remove small ingredients (e.g. fries), lift the basket out of the pan by the handle. Caution • After the cooking process, the pan, t...
Page 18 - Changing to another preset during cooking; Turn the QuickControl dial to select another preset.
18 ENGLISH Changing to another preset during cooking 1 Press the preset ( ) button. 2 Turn the QuickControl dial to select another preset. 3 To confirm the selected preset, push the QuickControl dial. The cooking time indication blinks on the screen. 4 To change the cooking time, turn the QuickContr...
Page 19 - Using the manual mode; Push the QuickControl dial to enter the manual mode.
19 ENGLISH Using the manual mode 1 Press the preset ( ) button. 2 Turn the QuickControl dial to select the manual mode ( ). 3 Push the QuickControl dial to enter the manual mode. » The default temperature is 180°C. 4 To change the temperature, turn the QuickControl dial. » To confirm the temperature...
Page 20 - Changing the cooking temperature or time at any time; To change the cooking temperature or time, turn the
20 ENGLISH Changing the cooking temperature or time at any time 1 Press the temperature ( ) or timer ( ) button. 2 To change the cooking temperature or time, turn the QuickControl dial. » To confirm the cooking temperature or time, push the QuickControl dial or the temperature/timer button again. No...
Page 21 - Choosing the keep warm mode; The keep warm button lights up with pulsing effect.; Tip; To make great home-made fries in the Airfryer:
21 ENGLISH Choosing the keep warm mode 1 Press the keep warm ( ) button (you can activate the keep warm mode at any time). » The keep warm button lights up with pulsing effect. » The keep warm timer is set to 30 minutes. To change the keep warm time (1-30 min), press the timer button ( ), turn the Q...
Page 22 - Cleaning; Warning; Clean the appliance after every use. Remove oil and fat from
22 ENGLISH - Shake the basket 2-3 times during the airfrying process. 1 Peel the potatoes and cut into sticks (8x8mm / 0.3 in thick). 2 Soak the potato sticks in a bowl of water for at least 30 minutes. 3 Empty the bowl and dry the potato sticks with a dish towel or paper towel. 4 Pour a half tables...
Page 24 - Storage; Unplug the appliance and let it cool down.; Recycling
24 ENGLISH Storage 1 Unplug the appliance and let it cool down. 2 Make sure all parts are clean and dry before storing. 3 Insert the cord into the cord storage compartment. Note • Always hold the Airfryer horizontally when you carry it. Make sure that you also hold the drawer on the front part of th...
Page 25 - Problem
25 ENGLISH Problem Possible cause Solution The outside of the appliance becomes hot during use. The heat inside radiates to the outside walls. This is normal. All handles and knobs that you need to touch during use stay cool enough to touch. The pan, basket, fat reducer, and the inside of the applia...
Page 27 - DEUTSCH; INHALTSVERZEICHNIS
27 DEUTSCH INHALTSVERZEICHNIS Wichtig! 28 Elektromagnetische Felder 31 Automatische Abschaltung 31 Einführung 33 Allgemeine Beschreibung 33 Vor dem ersten Gebrauch 34 Für den Gebrauch vorbereiten 34 Einsetzen des abnehmbaren Siebbodens und des Fettabscheiders 34 Grillzeiten-Tabelle 35 Das Gerät benu...
Page 28 - Lesen Sie diese wichtigen Informationen vor dem Gebrauch; Achtung
28 DEUTSCH Wichtig! Lesen Sie diese wichtigen Informationen vor dem Gebrauch des Geräts aufmerksam durch, und bewahren Sie sie für eine spätere Verwendung auf. Achtung! - Geben Sie die zu bratenden Zutaten in den Korb, damit sie nicht mit den Heizelementen in Kontakt kommen. - Lufteinlass und Luftau...
Page 30 - Vorsicht
30 DEUTSCH - Die Pfanne, der Korb und die Zubehörteile im Inneren des Airfryer werden während des Gebrauchs heiß. Gehen Sie deshalb vorsichtig mit diesen Teilen um. - Stellen Sie das Gerät nicht auf einen heißen Gas- oder Elektroherd jeglicher Art, elektrische Kochplatten oder in den beheizten Ofen....
Page 31 - Elektromagnetische Felder; Dieses Philips Gerät erfüllt sämtliche Normen und Regelungen; Automatische Abschaltung; Dieses Gerät ist mit einer automatischen Abschaltungsfunktion
31 DEUTSCH reparieren, da andernfalls Ihre Garantie erlischt. - Bei unsachgemäßem Gebrauch oder Verwendung für halbprofessionelle oder professionelle Zwecke oder bei Nichtbeachtung der Anweisungen in der Bedienungsanleitung erlischt die Garantie. In diesem Fall lehnt Philips jegliche Haftung für ent...
Page 33 - Einführung
33 DEUTSCH Einführung Herzlichen Glückwunsch zu Ihrem Kauf und willkommen bei Philips! Um das Kundendienstangebot von Philips vollständig nutzen zu können, sollten Sie Ihr Produkt unter www.philips.com/welcome registrieren. Der Philips Airfryer XXL verwendet Heißluft, um Ihre Lieblingsspeisen mit ga...
Page 34 - Vor dem ersten Gebrauch; Einsetzen des abnehmbaren Siebbodens und des
34 DEUTSCH Vor dem ersten Gebrauch 1 Entfernen Sie sämtliches Verpackungsmaterial. 2 Entfernen Sie sämtliche evtl. vorhandenen Aufkleber oder Etiketten vom Gerät. 3 Reinigen Sie das Gerät vor der ersten Verwendung gründlich, wie in der Reinigungstabelle angegeben. Für den Gebrauch vorbereiten Einset...
Page 35 - Setzen Sie den Korb in die Pfanne.; Die folgende Tabelle hilft Ihnen dabei, die grundlegenden; Hinweis
35 DEUTSCH 5 Setzen Sie den Korb in die Pfanne. 6 Schieben Sie die Schublade am Griff zurück in den Airfryer. Hinweis • Verwenden Sie die Pfanne nie ohne den Fettabscheider oder den Korb. Grillzeiten-Tabelle Die folgende Tabelle hilft Ihnen dabei, die grundlegenden Einstellungen für die Lebensmittel...
Page 39 - Das Gerät benutzen; Garen mit dem Airfryer; Dieses Gerät ist nur für den Gebrauch im Haushalt bestimmt.
39 DEUTSCH Das Gerät benutzen Garen mit dem Airfryer Vorsicht • Dieser Airfryer funktioniert mit Heißluft. Füllen Sie die Pfanne nicht mit Öl, Frittierfett oder anderen Flüssigkeiten. • Berühren Sie die heißen Oberflächen nicht. Verwenden Sie immer die Griffe. Berühren Sie die heiße Pfanne und den F...
Page 40 - Geben Sie die Zutaten in den Korb.; Schieben Sie die Schublade am Griff zurück in den Airfryer.; Drehen Sie zum Ändern der Voreinstellung den
40 DEUTSCH 5 Geben Sie die Zutaten in den Korb. Hinweis • Der Airfryer kann viele verschiedene Zutaten zubereiten. Die richtigen Mengen und entsprechenden Garzeiten finden Sie in der Lebensmitteltabelle. • Überschreiten Sie niemals die in der Lebensmitteltabelle angegebene Menge, und füllen Sie den ...
Page 41 - Drehen Sie zum Ändern der Garzeit den QuickControl-; Der Garvorgang beginnt, sobald die Garzeiteinstellung; Tipp; Wenn das Signal der Zeitschaltuhr ertönt, ist die
41 DEUTSCH 9 Drehen Sie zum Ändern der Garzeit den QuickControl- Regler auf die gewünschte Einstellung. » Drücken Sie den QuickControl-Regler, um die ausgewählte Garzeit zu bestätigen. Hinweis • Weitere Informationen finden Sie in der Tabelle mit grundlegenden Gareinstellungen für verschiedene Arten...
Page 43 - Wenn Ihre Zutaten fertig sind, können Sie sofort weitere
43 DEUTSCH Wenn Ihre Zutaten fertig sind, können Sie sofort weitere Zutaten im Airfryer zubereiten. Hinweis • Wiederholen Sie Schritt 1 bis 14, um weitere Speisen im Airfryer zuzubereiten. Wechseln zu einer anderen Voreinstellung während des Garens 1 Drücken Sie die Voreinstellungstaste ( ). 2 Drehe...
Page 44 - Drücken Sie den QuickControl-Regler, um die; Verwenden des manuellen Modus; Drehen Sie den QuickControl-Regler, um den manuellen
44 DEUTSCH » Drücken Sie den QuickControl-Regler, um die ausgewählte Garzeit zu bestätigen. Verwenden des manuellen Modus 1 Drücken Sie die Voreinstellungstaste ( ). 2 Drehen Sie den QuickControl-Regler, um den manuellen Modus auszuwählen ( ). 3 Drücken Sie den QuickControl-Regler, um den manuellen ...
Page 45 - Ändern der Gartemperatur oder -zeit; Drehen Sie den QuickControl-Regler, um die
45 DEUTSCH » Drücken Sie den QuickControl-Regler, um die Temperatureinstellung zu bestätigen. 5 Nachdem Sie die Temperatureinstellung bestätigt haben, blinkt die Zeitanzeige "- -". 6 Drehen Sie den QuickControl-Regler, um die Garzeit einzustellen. » Drücken Sie den QuickControl-Regler, um di...
Page 46 - Auswählen des Warmhaltemodus; Die Warmhaltetaste blinkt.
46 DEUTSCH Auswählen des Warmhaltemodus 1 Drücken Sie die Warmhaltetaste ( ) (Sie können den Warmhaltemodus jederzeit aktivieren). » Die Warmhaltetaste blinkt. » Der Warmhalte-Timer ist auf 30 Minuten voreingestellt. Zum Ändern der Warmhaltezeit (1–30 Min.) drücken Sie die Timer-Taste ( ), drehen Si...
Page 47 - Zubereiten von hausgemachten Pommes Frites; So bereiten Sie köstliche hausgemachte Pommes Frites im
47 DEUTSCH Zubereiten von hausgemachten Pommes Frites So bereiten Sie köstliche hausgemachte Pommes Frites im Airfryer zu: - Wählen Sie eine Kartoffelsorte, die sich zur Herstellung von Pommes frites eignet, z. B. frische, (leicht) mehlig kochende Kartoffeln. - Garen Sie die Pommes frites am besten ...
Page 48 - Pflege; Reinigen Sie das Gerät nach jedem Gebrauch. Entfernen Sie
48 DEUTSCH Pflege Achtung • Lassen Sie den Korb, die Pfanne, den Fettabscheider und die Innenseite des Geräts vollständig abkühlen, bevor Sie mit dem Reinigungsvorgang beginnen. • Entfernen Sie mithilfe einer Zange mit gummierten Spitzen den Fettabscheider aus der Pfanne. Entfernen Sie den Einsatz n...
Page 49 - Aufbewahrung
49 DEUTSCH 4 Reinigen Sie die Oberflächen des Geräts mit einem feuchten Tuch. Hinweis • Vergewissern Sie sich, dass keine Feuchtigkeit auf dem Bedienfeld zurückbleibt. Trocknen Sie das Bedienfeld mit einem Tuch, nachdem Sie es gereinigt haben. 5 Reinigen Sie das Heizelement mit einer Reinigungsbürst...
Page 53 - FRANÇAIS; TABLE DES MATIÈRES
53 FRANÇAIS TABLE DES MATIÈRES Important 54 Champs électromagnétiques (CEM) 57 Arrêt automatique 57 Introduction 59 Description générale 59 Avant la première utilisation 60 Avant utilisation 60 Installation du fond alvéolé amovible et du réducteur de graisse 60 Tableau de cuisson des aliments 61 Uti...
Page 54 - Lisez attentivement ces informations importantes avant
54 FRANÇAIS Important Lisez attentivement ces informations importantes avant d'utiliser l'appareil et conservez-les pour un usage ultérieur. Danger - Mettez toujours les aliments à frire dans le panier afin d’éviter qu’ils entrent en contact avec les résistances. - Ne couvrez pas les entrées et sort...
Page 56 - Attention
56 FRANÇAIS lors de l’utilisation. Soyez prudent(s) lorsque vous les manipulez. - Ne placez pas l’appareil sur ou à proximité d’une cuisinière chaude à gaz ou de tout type de cuisinière électrique ou de plaques de cuisson électriques, ou dans un four chaud. - N’utilisez jamais d’aliments légers ou d...
Page 57 - Cet appareil Philips est conforme à toutes les normes; Arrêt automatique; réglez le minuteur sur la position « 0 ».
57 FRANÇAIS - Confiez toujours l’appareil à un Centre Service Agréé Philips pour réparation ou vérification. N’essayez jamais de réparer l’appareil vous-même ; toute intervention indue entraîne l’annulation de la garantie. - S’il est employé de manière inappropriée, à des fins professionnelles ou se...
Page 60 - Avant la première utilisation; Installation du fond alvéolé amovible et du réducteur de
60 FRANÇAIS Avant la première utilisation 1 Retirez tout l'emballage. 2 Retirez tous les autocollants et étiquettes de l'appareil. 3 Nettoyez soigneusement l'appareil avant la première utilisation, comme indiqué dans le tableau de nettoyage. Avant utilisation Installation du fond alvéolé amovible et...
Page 61 - Placez le panier dans la cuve.; Le tableau ci-dessous vous aide à choisir les réglages de base
61 FRANÇAIS 5 Placez le panier dans la cuve. 6 Replacez le tiroir dans la friteuse Airfryer grâce à la poignée. Note • N'utilisez jamais la cuve sans y avoir préalablement installé le réducteur de graisse ou le panier. Tableau de cuisson des aliments Le tableau ci-dessous vous aide à choisir les rég...
Page 64 - Utilisation de l'appareil; Cuisson à l'air chaud; Cet appareil est destiné à un usage domestique uniquement.; Placez l'appareil sur une surface horizontale, stable, plane
64 FRANÇAIS Ingrédients Min.- max. quantité Temps (min) Tem- pérature Secouez, tournez, ou mé- langez à mi-cuis- son Note Pain frais 700 g 38 160 °C La forme doit être aussi plate que possible afin d'éviter que le pain touche la résistance lorsqu'il gonfle. Petits pains fraisEnviron 80 g 1-6 pièces ...
Page 65 - Retirez le cordon d'alimentation du compartiment de; Replacez le tiroir dans la friteuse Airfryer grâce à la
65 FRANÇAIS 2 Retirez le cordon d'alimentation du compartiment de rangement à l'arrière de l'appareil. 3 Branchez la fiche sur la prise murale. 4 Ouvrez le tiroir en tirant sur la poignée. 5 Mettez les aliments dans le panier. Note • La friteuse Airfryer permet de préparer une grande variété d'alime...
Page 66 - Pour confirmer la présélection choisie, appuyez sur le
66 FRANÇAIS Attention • N'utilisez jamais la cuve sans y avoir installé le réducteur de graisse ou le panier. Si vous faites chauffer l'appareil sans le panier, utilisez toujours des gants de cuisine pour ouvrir le tiroir. Les bords et l'intérieur du tiroir deviennent très chauds. • Ne touchez pas l...
Page 67 - Conseil; Lorsque vous entendez la sonnerie du minuteur, cela; Pour sortir des aliments de petite taille, comme les frites,
67 FRANÇAIS Conseil • Pour suspendre le processus de cuisson, appuyez sur le bouton QuickControl. Pour reprendre le processus de cuisson, appuyez à nouveau sur le bouton QuickControl. Note • Si vous ne réglez pas le temps de cuisson requis dans les 30 minutes, l'appareil s'éteint automatiquement pou...
Page 68 - Videz le contenu du panier dans un saladier ou un plat.; immédiatement en faire cuire un autre dans la friteuse Airfryer.
68 FRANÇAIS Attention • Une fois la cuisson terminée, la cuve, le réducteur de graisse, l'intérieur de l'appareil et les ingrédients sont chauds. En fonction du type d'aliments placés dans l'Airfryer, de la vapeur peut s'échapper de la cuve. 14 Videz le contenu du panier dans un saladier ou un plat....
Page 69 - Changer la présélection pendant la cuisson; Tournez le bouton QuickControl pour sélectionner une
69 FRANÇAIS Changer la présélection pendant la cuisson 1 Appuyez sur le bouton de présélection ( ). 2 Tournez le bouton QuickControl pour sélectionner une autre présélection. 3 Pour confirmer la présélection choisie, appuyez sur le bouton QuickControl. Le temps de cuisson clignote à l'écran. 4 Pour ...
Page 70 - Utilisation du mode manuel; Tournez le bouton QuickControl pour sélectionner le mode
70 FRANÇAIS Utilisation du mode manuel 1 Appuyez sur le bouton de présélection ( ). 2 Tournez le bouton QuickControl pour sélectionner le mode manuel ( ). 3 Appuyez sur le bouton QuickControl pour basculer en mode manuel. » La température par défaut est de 180°C. 4 Pour changer la température, tourn...
Page 71 - Changer la température ou le temps de cuisson à tout; Appuyez sur le bouton de température ( ) ou le minuteur
71 FRANÇAIS Changer la température ou le temps de cuisson à tout moment 1 Appuyez sur le bouton de température ( ) ou le minuteur ( ). 2 Pour changer le temps de cuisson, tournez le bouton QuickControl. » Pour confirmer la température ou le temps de cuisson, appuyez sur le bouton QuickControl, ou de...
Page 72 - Sélection du mode de maintien au chaud; pouvez activer le mode de maintien au chaud à chaque
72 FRANÇAIS Sélection du mode de maintien au chaud 1 Appuyez sur le bouton de maintien au chaud ( ) (vous pouvez activer le mode de maintien au chaud à chaque fois). » Le bouton de maintien au chaud s'allume avec l'effet d'impulsion. » Le minuteur de maintien au chaud est réglé sur 30 minutes. Pour ...
Page 73 - Préparation de frites maison; Pour préparer de délicieuses frites maison dans l'Airfryer :
73 FRANÇAIS Préparation de frites maison Pour préparer de délicieuses frites maison dans l'Airfryer : - Choisissez une variété de pommes de terre qui convient à la préparation de frites, par ex. des pommes de terre fraîches, (légèrement) farineuses. - Il est préférable de faire frire les frites par ...
Page 74 - Nettoyage; Avertissement; Nettoyez l'appareil après chaque utilisation. Videz l'huile et la
74 FRANÇAIS Nettoyage Avertissement • Laissez refroidir entièrement le panier, la cuve, le réducteur de graisse et l'intérieur de l'appareil avant de commencer le nettoyage. • Retirez le réducteur de graisse de la cuve à l'aide de pinces. Ne le retirez pas avec les doigts, car le réducteur de graiss...
Page 75 - Rangement
75 FRANÇAIS 4 Essuyez l'extérieur de l'appareil à l'aide d'un chiffon humide. Note • Assurez-vous qu'aucune trace d'humidité ne subsiste sur le panneau de commande. Séchez le panneau de commande avec un chiffon après l'avoir nettoyé. 5 Nettoyez l'élément chauffant avec une brosse de nettoyage pour é...
Page 76 - Recyclage; Problème
76 FRANÇAIS Recyclage - Ce symbole signifie que ce produit ne doit pas être mis au rebut avec les ordures ménagères (2012/19/UE). - Respectez les règles en vigueur dans votre pays pour la mise au rebut des produits électriques et électroniques. Une mise au rebut correcte contribue à préserver l'envi...
Page 79 - NEDERLANDS; INHOUDSOPGAVE; Tabel voor etenswaren
79 NEDERLANDS INHOUDSOPGAVE Belangrijk 80 Introductie 84 Algemene beschrijving 86 Voor het eerste gebruik 86 Klaarmaken voor gebruik 86 De mand met uitneembare gaasbodem plaatsen en vetverminderaar 86 Tabel voor etenswaren 88 Het apparaat gebruiken 91 Heteluchtfrituren 91 Tijdens de bereiding een an...
Page 80 - Belangrijk; Lees deze belangrijke informatie zorgvuldig door voordat u het; Gevaar
80 NEDERLANDS Belangrijk Lees deze belangrijke informatie zorgvuldig door voordat u het apparaat gaat gebruiken. Bewaar het boekje om het indien nodig later te kunnen raadplegen. Gevaar - Doe de etenswaren die u wilt bakken altijd in de mand om te voorkomen dat ze met de verwarmingselementen in cont...
Page 82 - Let op
82 NEDERLANDS hete stoom en lucht wanneer u de pan uit het apparaat haalt. - De aanraakbare oppervlakken kunnen tijdens gebruik heet worden. - De pan, de mand en de accessoires in de Airfryer worden heet tijdens gebruik. Wees voorzichtig wanneer u deze aanraakt. - Plaats het apparaat niet op of in d...
Page 84 - Automatische uitschakeling; Introductie
84 NEDERLANDS is heet en de randen van metalen onderdelen zijn scherp. Elektromagnetische velden (EMV) Dit Philips-apparaat voldoet aan alle toepasselijke richtlijnen en voorschriften met betrekking tot elektromagnetische velden. Automatische uitschakeling Dit apparaat heeft een functie voor automat...
Page 86 - Algemene beschrijving; Verwijder al het verpakkingsmateriaal.; Klaarmaken voor gebruik; De mand met uitneembare gaasbodem plaatsen en
86 NEDERLANDS Algemene beschrijving 1 Lade 2 Mand met uitneembare gaasbodem 3 Uitneembare gaasbodem 4 Vetverminderaar 5 Pan 6 Snoeropbergruimte 7 Luchtuitlaatopeningen 8 MAX-aanduiding 9 Voedingskabel 10 Luchtinlaat 11 Configuratiescherm A. Temperatuuraanduiding B. Knop Temperature (Temperatuur) C. ...
Page 87 - Haal de mand eruit door deze op te tillen aan het handvat.; Plaats de mand in de pan.; Opmerking
87 NEDERLANDS 2 Haal de mand eruit door deze op te tillen aan het handvat. 3 Plaats de vetverminderaar in de pan. 4 Steek de uitneembare gaasbodem in de sleuf rechtsonder in de mand. Duw de gaasbodem naar beneden totdat deze vastklikt ('klik' aan beide zijden). 5 Plaats de mand in de pan. 6 Schuif d...
Page 88 - De onderstaande tabel vermeldt de basisstanden voor
88 NEDERLANDS Tabel voor etenswaren De onderstaande tabel vermeldt de basisstanden voor veelvoorkomende etenswaren die u wilt bereiden. Opmerking • Houd er rekening mee dat deze standen slechts indicaties zijn. Aangezien etenswaren verschillen in herkomst, grootte, vorm en merk, kunnen we niet de be...
Page 91 - Het apparaat gebruiken; Heteluchtfrituren; Dit apparaat is uitsluitend bedoeld voor huishoudelijk gebruik.
91 NEDERLANDS Het apparaat gebruiken Heteluchtfrituren Let op • Dit is een Airfryer en dit apparaat werkt met hete lucht. Vul de pan niet met olie, frituurvet of een andere vloeistof. • Raak hete oppervlakken niet aan. Gebruik handgrepen of knoppen. Draag ovenwanten wanneer u met de hete pan en vetv...
Page 92 - Als u de geselecteerde voorgeprogrammeerde instelling
92 NEDERLANDS 5 Doe de etenswaren in de mand. Opmerking • Met de Airfryer kunt u een grote verscheidenheid aan etenswaren bereiden. Raadpleeg de ‘Tabel voor etenswaren’ voor de juiste hoeveelheden en de kooktijden bij benadering. • De hoeveelheden uit de ‘Tabel voor etenswaren’ mogen niet worden ove...
Page 93 - Als u de geselecteerde bereidingstijd wilt bevestigen,; Nadat de bereidingstijd bevestigd is, begint het apparaat; Wanneer u het belsignaal hoort, is de ingestelde
93 NEDERLANDS » Als u de geselecteerde bereidingstijd wilt bevestigen, drukt u op de QuickControl-knop. Opmerking • Raadpleeg de etenswarentabel met standaardbereidingsinstellingen voor verschillende soorten voedsel. 10 Nadat de bereidingstijd bevestigd is, begint het apparaat met de bereiding. Tip ...
Page 94 - mand aan het handvat uit de pan.; Leeg de mand in een schaal of op een bord. Haal altijd de; Zodra er een portie klaar is, kunt u direct een volgende portie
94 NEDERLANDS 13 Om kleine etenswaren (bijv. frites) te verwijderen, tilt u de mand aan het handvat uit de pan. Let op • Na het bereidingsproces zijn de pan, de vetverminderaar, de mand, de binnenkant van de behuizing en de etenswaren erg heet. Afhankelijk van het type etenswaren in de Airfryer kan ...
Page 95 - Tijdens de bereiding een andere voorgeprogrammeerde; Draai de QuickControl-knop naar een andere
95 NEDERLANDS Tijdens de bereiding een andere voorgeprogrammeerde instelling kiezen 1 Druk op de snelkeuzeknop ( ). 2 Draai de QuickControl-knop naar een andere voorgeprogrammeerde instelling. 3 Als u de geselecteerde voorgeprogrammeerde instelling wilt bevestigen, drukt u op de QuickControl-knop. D...
Page 96 - De handmatige modus gebruiken; Draai aan de QuickControl-knop om de handmatige
96 NEDERLANDS De handmatige modus gebruiken 1 Druk op de snelkeuzeknop ( ). 2 Draai aan de QuickControl-knop om de handmatige modus ( ) te selecteren. 3 Druk op de QuickControl-knop om de handmatige modus te starten. » De standaardtemperatuur is 180 °C. 4 Om de temperatuur te wijzigen, draait u aan ...
Page 97 - De bereidingstemperatuur of bereidingstijd op elk gewenst; Om de bereidingstemperatuur of -tijd te wijzigen, draait u; warmhoudmodus op elk gewenst moment activeren).
97 NEDERLANDS De bereidingstemperatuur of bereidingstijd op elk gewenst moment wijzigen 1 Druk op de temperatuurknop ( ) of de timerknop ( ). 2 Om de bereidingstemperatuur of -tijd te wijzigen, draait u aan de QuickControl-knop. » Om de bereidingstemperatuur of bereidingstijd te bevestigen, drukt u ...
Page 98 - Ga als volgt te werk om zelfgemaakte frites in de Airfryer te
98 NEDERLANDS » De warmhoudtimer is ingesteld op 30 minuten. Als u de warmhoudtijd wilt wijzigen (1–30 min.), drukt u op de timerknop ( ), draait u aan de QuickControl-knop en drukt u hier vervolgens op om te bevestigen. U kunt de warmhoudtemperatuur niet wijzigen. 2 Als u de warmhoudmodus wilt onde...
Page 99 - Reiniging; Waarschuwing; Maak het apparaat na ieder gebruik schoon. Haal na elk
99 NEDERLANDS 4 Giet ½ eetlepel olie die geschikt is om te bakken en frituren in een kom, leg de staafjes in de kom en meng het geheel totdat de aardappelstaafjes met een laagje olie bedekt zijn. 5 Verwijder de aardappelstaafjes met de hand of met keukengerei uit de kom zodat overtollige olie in de ...
Page 101 - Maak de binnenkant van het apparaat schoon met warm; Opbergen; Haal de stekker uit het stopcontact en laat het apparaat; - Dit symbool betekent dat dit product niet bij het gewone; Garantie en ondersteuning; Als u informatie of ondersteuning nodig hebt, bezoek dan
101 NEDERLANDS 6 Maak de binnenkant van het apparaat schoon met warm water en een niet-schurend sponsje. Opbergen 1 Haal de stekker uit het stopcontact en laat het apparaat afkoelen. 2 Controleer of alle onderdelen schoon en droog zijn voordat u het apparaat opbergt. 3 Duw het snoer in de snoeropber...
Page 102 - Problemen oplossen; Probleem
102 NEDERLANDS Problemen oplossen Dit hoofdstuk behandelt in het kort de problemen die u kunt tegenkomen tijdens het gebruik van uw apparaat. Als u het probleem niet met de onderstaande informatie kunt oplossen, ga dan naar www.philips.com/support voor een lijst met veelgestelde vragen of neem conta...


 Philips HD9411/70 User Manual
 Philips HD9641/56 User Manual
 Philips HD9641/96 User Manual
 Philips HD9650/90 User Manual
 Philips HD9650/96 User Manual
 Philips HD9654/90 Quick Guide
 Philips HD9860/90 User Manual
 Philips HD9867/90 User Manual
 Philips HD9870/20 User Manual
 Philips HD9875/90 User Manual
 Philips HD9876/20 User Manual
 Philips HD9876/25 User Manual