Page 3 - ENGLISH; TABLE OF CONTENTS
3 ENGLISH TABLE OF CONTENTS Important 4 Introduction 8 General description 8 Before first use 10 Preparing for use 10 Placing the removable mesh bottom and fat reducer 10Food table for manual time/temperature settings 11 Using the appliance 13 Airfrying 13 Food table for Smart Chef programs 17 Cooki...
Page 4 - Important
4 ENGLISH Important Read this important information carefully before you use the appliance and save it for future reference. Danger - Always put the ingredients to be fried in the basket, to prevent them from coming into contact with the heating elements. - Do not cover the air inlet and the air out...
Page 6 - Caution
6 ENGLISH - The pan, basket and accessories inside the Airfryer become hot during use. Be careful when you handle them. - Do not place the appliance on or near a hot gas stove or all kinds of electric stove and electric cooking plates, or in a heated oven. - Never use light ingredients or baking pap...
Page 8 - Introduction
8 ENGLISH Introduction Congratulations on your purchase and welcome to Philips!To fully benefit from the support that Philips offers, register your product at www.philips.com/welcome . With Philips Airfryer, you can now enjoy perfectly cooked fried food—crispy on the outside tender on the inside—Fry...
Page 10 - Before first use; Placing the removable mesh bottom and fat reducer
10 ENGLISH Before first use 1 Remove all packing material. 2 Remove any stickers or labels (if available) from the appliance. 3 Thoroughly clean the appliance before first use, as indicated in the cleaning chapter. Preparing for use Placing the removable mesh bottom and fat reducer 1 Open the drawer...
Page 11 - Put the basket in the pan.; Food table for manual time/temperature settings; Note
11 ENGLISH 5 Put the basket in the pan. 6 Slide the drawer back into the Airfryer by the handle. Note • Never use the pan without the fat reducer or the basket in it. Food table for manual time/temperature settings The table below helps you select the basic settings for the types of food you want to...
Page 13 - Using the appliance; Airfrying; resistant surface. Make sure the drawer can be opened; Pull the power cord out of the cord storage compartment
13 ENGLISH Ingredients Min.– max. amount Time (min) Tem per a ture Note Chestnuts 200–2000 g/7–70 oz 15–30 200°C/400°F • Shake, turn, or stir halfway Mixed vegetable (roughly chopped) 300–800 g/11–28 oz 10–20 200°C/400°F • Set the cooking time according to your own taste. • Shake, turn, or stir half...
Page 14 - The temperature indication blinks on the screen.
14 ENGLISH 4 Open the drawer by pulling the handle. 5 Put the ingredients in the basket. Note • The Airfryer can prepare a large range of ingredients. Consult the ‘Food table’ for the right quantities and approximate cooking times. • Do not exceed the amount indicated in the ‘Food table’ section or ...
Page 15 - Turn the QuickControl dial to choose your desired cooking; Push the QuickControl dial to confirm the selected time.; Tip
15 ENGLISH 9 Turn the QuickControl dial to choose your desired cooking temperature. 10 Push the QuickControl dial to confirm the selected temperature. » After the temperature is confirmed, the time indication starts blinking on the screen. 11 Turn the QuickControl dial to choose your desired cooking...
Page 16 - When you hear the timer bell, the cooking time has; of the pan by the handle.
16 ENGLISH Note • If you do not set the required cooking time within 30 minutes, the appliance automatically shuts off for safety reasons. • If “- -” is selected as the time indication, the appliance goes into preheating mode. • Some ingredients require shaking or turning halfway through the cooking...
Page 17 - Empty the basket contents into a bowl or onto a plate.; Food table for Smart Chef programs
17 ENGLISH 17 Empty the basket contents into a bowl or onto a plate. Always remove the basket from the pan to empty contents as hot oil may be in bottom of the pan. Note • To remove large or fragile ingredients, use a pair of tongs to lift out ingredients. • Excess oil or rendered fat from the ingre...
Page 18 - Cooking with Smart Chef programs; Press the On/Off button
18 ENGLISH Smart Chef programs for Directions Home- made fries Home made cut(10x10mm) 500–1400g • Use floury, raw potatoes. Do not pre-cook potatoes. • Do not use potatoes stored below 6°C. • Follow the fresh fries recipe for best results. Fish Salmon fillet 2–5 pcs (150–200g/pc) up to 750g • Do not...
Page 19 - Making home-made fries
19 ENGLISH 3 To confirm the Smart Chef program, press the QuickControl dial. » The appliance automatically calculates the ideal cooking temperature and time. The screen displays the first estimated cooking temperature and time after a few minutes. During this time the appliance has already started c...
Page 20 - Choosing the keep warm mode; The keep warm indication lights up with pulsing effect.
20 ENGLISH 3 Empty the bowl and dry the potato sticks with a dish towel or paper towel. 4 Pour 1–3 tablespoons of cooking oil in the bowl, put the sticks in the bowl and mix until the sticks are coated with oil. 5 Remove the sticks from the bowl with your fingers or a slotted kitchen utensil so exce...
Page 21 - Save your favorite setting
21 ENGLISH 3 To exit the keep warm mode, press the return button or the On/Off button . Tip • If food like French fries loses too much crispness during the keep warm mode, either shorten the keep warm time by switching off the appliance earlier or crisp them up for 2–3 minutes at the temperature of ...
Page 23 - Cleaning; Warning
23 ENGLISH 2 Press the favorite button . 3 Press the QuickControl dial to start the cooking process. Note • You can overwrite your favorite setting by applying the same procedure as mentioned above. • Pressing the favorite button in the manual mode will overwrite your favorite setting. To apply your...
Page 25 - Storage; Unplug the appliance and let it cool down.; Recycling; This symbol means that this product shall not be disposed
25 ENGLISH Cleaning table Storage 1 Unplug the appliance and let it cool down. 2 Make sure all parts are clean and dry before storing. 3 Insert the cord into the cord storage compartment. Note • Always hold the Airfryer horizontally when you carry it. Make sure that you also hold the drawer on the f...
Page 26 - Guarantee and support; Problem
26 ENGLISH Guarantee and support If you need information or support, please visit www.philips.com/support or read the separate worldwide guarantee leaflet. Troubleshooting This chapter summarizes the most common problems you could encounter with the appliance. If you are unable to solve the problem ...
Page 29 - DEUTSCH; INHALTSVERZEICHNIS
29 DEUTSCH INHALTSVERZEICHNIS Wichtig! 30 Einführung 34 Allgemeine Beschreibung 34 Vor dem ersten Gebrauch 36 Für den Gebrauch vorbereiten 36 Einsetzen des abnehmbaren Gitterbodens und des Fettabscheiders 36 Lebensmitteltabelle für die manuelle Zeit-/Temperatureinstellung 37 Das Gerät benutzen 40 Ga...
Page 30 - Achtung
30 DEUTSCH Wichtig! Lesen Sie diese wichtigen Informationen vor dem Gebrauch des Geräts aufmerksam durch, und bewahren Sie sie für eine spätere Verwendung auf. Achtung! - Geben Sie die Zutaten so in den Korb, dass sie nicht mit dem Heizelement in Kontakt kommen. - Lufteinlass und Luftaustrittsöffnun...
Page 32 - Vorsicht
32 DEUTSCH auf heißen Dampf und heiße Luft, wenn Sie die Pfanne aus dem Gerät nehmen. - Die zugänglichen Oberflächen können während des Betriebs heiß werden. - Die Pfanne, der Korb und die Zubehörteile im Inneren des Airfryer werden während des Gebrauchs heiß. Gehen Sie deshalb vorsichtig mit diesen...
Page 33 - Elektromagnetische Felder
33 DEUTSCH Hotels, Motels, Pensionen oder anderen Gastgewerben bestimmt. - Geben Sie das Gerät zur Überprüfung bzw. Reparatur stets an ein Philips Service- Center. Versuchen Sie nicht, das Gerät selbst zu reparieren, da andernfalls Ihre Garantie erlischt. - Bei unsachgemäßem Gebrauch oder Verwendung...
Page 34 - Einführung
34 DEUTSCH schaltet sich das Gerät automatisch aus. Wenn innerhalb von 30 Minuten keine Taste gedrückt wird, schaltet sich das Gerät automatisch aus. Um das Gerät manuell auszuschalten, drücken Sie einmal den Ein-/Aus-Schalter. Einführung Herzlichen Glückwunsch zu Ihrem Kauf und willkommen bei Phili...
Page 36 - Vor dem ersten Gebrauch; Einsetzen des abnehmbaren Gitterbodens und des
36 DEUTSCH Vor dem ersten Gebrauch 1 Entfernen Sie sämtliches Verpackungsmaterial. 2 Entfernen Sie gegebenenfalls sämtliche Aufkleber oder Etiketten vom Gerät. 3 Reinigen Sie das Gerät vor der ersten Verwendung gründlich, wie im Reinigungskapitel angegeben. Für den Gebrauch vorbereiten Einsetzen des...
Page 37 - Setzen Sie den Korb in die Pfanne.; Lebensmitteltabelle für die manuelle Zeit-/; Hinweis
37 DEUTSCH 5 Setzen Sie den Korb in die Pfanne. 6 Schieben Sie die Schublade mit dem Griff zurück in den Airfryer. Hinweis • Verwenden Sie die Pfanne nie ohne den Fettabscheider oder den Korb. Lebensmitteltabelle für die manuelle Zeit-/ Temperatureinstellung Die folgende Tabelle hilft Ihnen dabei, d...
Page 40 - Das Gerät benutzen; Garen mit dem Airfryer
40 DEUTSCH Das Gerät benutzen Garen mit dem Airfryer Vorsicht • Dieser Airfryer funktioniert mit Heißluft. Füllen Sie die Pfanne nicht mit Öl, Frittierfett oder anderen Flüssigkeiten. • Berühren Sie die heißen Oberflächen nicht. Verwenden Sie immer die Griffe. Berühren Sie die heiße Pfanne und den F...
Page 41 - Die Temperaturanzeige blinkt auf dem Bildschirm.
41 DEUTSCH 5 Geben Sie die Zutaten in den Korb. Hinweis • Der Airfryer kann viele verschiedene Zutaten zubereiten. Die richtigen Mengen und entsprechenden Garzeiten finden Sie in der Lebensmitteltabelle. • Überschreiten Sie niemals die in der Lebensmitteltabelle angegebene Menge, und füllen Sie den ...
Page 42 - Nachdem Sie die Temperatureinstellung bestätigt; Tipp
42 DEUTSCH 10 Drücken Sie den QuickControl-Regler, um die ausgewählte Temperatur zu bestätigen. » Nachdem Sie die Temperatureinstellung bestätigt haben, blinkt die Zeitanzeige auf dem Bildschirm. 11 Drehen Sie den QuickControl-Regler, um die gewünschte Garzeit auszuwählen. Hinweis • Durch Drücken de...
Page 44 - Lebensmitteltabelle für Smart Chef-Programme
44 DEUTSCH Hinweis • Um große oder zerbrechliche Zutaten herauszunehmen, verwenden Sie eine Zange, um die Zutaten aus dem Korb zu heben. • Überschüssiges Öl oder ausgeschmolzenes Fett von den Speisen sammelt sich am Boden der Pfanne unter dem Fettabscheider. • Je nach Art der gegarten Speisen sollte...
Page 46 - Wenn Sie das Smart Chef-Programm ändern möchten,
46 DEUTSCH Garen mit den Smart Chef-Programmen Würzen Sie Ihre Zutaten nach Geschmack. Legen Sie die Speisen in den Korb, und schieben Sie den Korb in das Gerät. Hinweis • Verwenden Sie zum Würzen keinen Honig oder Sirup und keine anderen zuckerhaltigen Zutaten, da die Speisen andernfalls sehr stark...
Page 47 - Zubereiten von hausgemachten Pommes Frites
47 DEUTSCH 4 Wenn Sie das Signal hören und die Schüttelanzeige blinkt, öffnen Sie die Schublade, und wenden Sie die Speisen, bzw. schütteln Sie den Korb mit den Zutaten. Schieben Sie den Korb dann wieder in das Gerät. 5 Wenn Sie das Signal hören und der Timer abgelaufen ist, sind die Speisen fertig ...
Page 48 - Drücken Sie die Warmhaltetaste
48 DEUTSCH Auswählen des Warmhaltemodus 1 Drücken Sie die Warmhaltetaste (Sie können den Warmhaltemodus jederzeit aktivieren). » Die Warmhalteanzeige blinkt. » Der Warmhalte-Timer ist auf 30 Minuten voreingestellt. Zum Ändern der Warmhaltezeit (1 bis 30 Min.) drücken Sie die Timer-Taste , drehen Sie...
Page 49 - Drücken Sie die Temperaturtaste
49 DEUTSCH Speichern Sie Ihre bevorzugte Einstellung 1 Drücken Sie den Ein-/Aus-Schalter , um das Gerät einzuschalten. 2 Drücken Sie die Temperaturtaste . 3 Drehen Sie den QuickControl-Regler, um die Temperatur auszuwählen. 4 Drücken Sie den QuickControl-Regler, um die ausgewählte Temperatur zu best...
Page 51 - Pflege
51 DEUTSCH Hinweis • Sie können Ihre Favoriteneinstellung überschreiben, indem Sie noch einmal wie oben beschrieben vorgehen. • Durch Drücken der Favoritentaste im manuellen Modus wird Ihre Favoriteneinstellung überschrieben. Um Ihre Favoriteneinstellung aufzurufen, drücken Sie zunächst die Zurück-T...
Page 52 - Reinigen Sie die Oberflächen des Geräts mit einem; Reinigen Sie das Heizelement mit einer Reinigungsbürste,; Reinigungstabelle
52 DEUTSCH Tipp • Wenn an der Pfanne, dem Fettabscheider oder am Korb Lebensmittelreste festsitzen, weichen Sie die Teile 10 bis 15 Minuten in heißem Wasser mit Spülmittel ein. Durch das Einweichen lösen sich die Lebensmittelreste und lassen sich leichter entfernen. Stellen Sie sicher, dass Sie ein ...
Page 53 - Aufbewahrung; Ziehen Sie den Netzstecker, und lassen Sie das Gerät; Sie die internationale Garantieschrift.; Fehlerbehebung; für eine Liste mit häufig gestellten
53 DEUTSCH Aufbewahrung 1 Ziehen Sie den Netzstecker, und lassen Sie das Gerät abkühlen. 2 Stellen Sie sicher, dass alle Teile sauber und trocken sind, bevor Sie das Gerät verstauen. 3 Verstauen Sie das Kabel im Netzkabelfach. Hinweis • Halten Sie den Airfryer beim Tragen immer horizontal. Achten Si...
Page 57 - FRANÇAIS; TABLE DES MATIÈRES
57 FRANÇAIS TABLE DES MATIÈRES Important 58 Introduction 62 Description générale 62 Avant la première utilisation 64 Avant utilisation 64 Installation du fond alvéolé amovible et du réducteur de graisse 64 Tableau des aliments pour le réglage manuel du temps de cuisson et de la température 65 Utilis...
Page 60 - Attention
60 FRANÇAIS lors de l'utilisation. Soyez prudent(s) lorsque vous les manipulez. - Ne placez pas l'appareil sur ou à proximité d'une cuisinière chaude à gaz ou de tout type de cuisinière électrique ou de plaques de cuisson électriques, ou dans un four chaud. - N'utilisez jamais d'aliments légers ou d...
Page 61 - Arrêt automatique
61 FRANÇAIS - Confiez toujours l'appareil à un Centre Service Agréé Philips pour réparation ou vérification. N'essayez jamais de réparer l'appareil vous-même ; toute intervention indue entraîne l'annulation de la garantie. - S'il est employé de manière inappropriée, à des fins professionnelles ou se...
Page 64 - Avant la première utilisation; Installation du fond alvéolé amovible et du
64 FRANÇAIS Avant la première utilisation 1 Retirez tout l'emballage. 2 Le cas échéant, retirez tous les autocollants et étiquettes de l'appareil. 3 Nettoyez soigneusement l'appareil avant la première utilisation, comme indiqué dans le chapitre relatif au nettoyage. Avant utilisation Installation du...
Page 65 - Insérez le fond alvéolé amovible dans le logement situé en; Tableau des aliments pour le réglage manuel du; Remarque
65 FRANÇAIS 4 Insérez le fond alvéolé amovible dans le logement situé en bas à droite du panier. Poussez le fond alvéolé vers le bas jusqu'à ce qu'il s'enclenche (« clic » des deux côtés). 5 Placez le panier dans la cuve. 6 Replacez le tiroir dans l'Airfryer grâce à la poignée. Remarque • N'utilisez...
Page 68 - Utilisation de l'appareil; Cuisson à l'air chaud
68 FRANÇAIS Utilisation de l'appareil Cuisson à l'air chaud Attention • Cette friteuse Airfryer fonctionne avec de l'air chaud. Ne remplissez pas la cuve d'huile, de graisse de friture, ni d'aucun autre liquide. • Ne touchez pas les surfaces chaudes. Utilisez les poignées ou les boutons. Manipulez l...
Page 69 - Mettez les aliments dans le panier.; Replacez le tiroir dans l'Airfryer grâce à la poignée.; Appuyez sur le bouton marche/arrêt; Appuyez sur le bouton de température
69 FRANÇAIS 5 Mettez les aliments dans le panier. Remarque • La friteuse Airfryer permet de préparer une grande variété d'aliments. Consultez le tableau de cuisson des aliments pour connaître les bonnes quantités et les temps de cuisson approximatifs. • Ne dépassez pas la quantité indiquée dans le t...
Page 70 - Une fois la température confirmée, le voyant de temps; Conseil
70 FRANÇAIS 9 Tournez le bouton QuickControl pour choisir la température de cuisson désirée. 10 Appuyez sur le bouton QuickControl pour confirmer la température choisie. » Une fois la température confirmée, le voyant de temps commence à clignoter à l'écran. 11 Tournez le bouton QuickControl pour cho...
Page 71 - Lorsque vous entendez la sonnerie du minuteur, cela; Pour sortir des aliments de petite taille, comme les frites,
71 FRANÇAIS Remarque • Si vous ne réglez pas le temps de cuisson requis dans les 30 minutes, l'appareil s'éteint automatiquement pour des raisons de sécurité. • Si vous sélectionnez l'indication de temps « - - », l'appareil passe en mode préchauffage. • Certains aliments doivent être mélangés ou tou...
Page 72 - Videz le contenu du panier dans un saladier ou un plat.; Tableau des aliments pour les programmes
72 FRANÇAIS 17 Videz le contenu du panier dans un saladier ou un plat. Retirez toujours le panier de la cuve pour vider son contenu, car de l'huile chaude peut se trouver au fond de la cuve. Remarque • Pour sortir les aliments épais ou fragiles, utilisez des pinces. • L'excès d'huile et la graisse f...
Page 73 - Cuisiner avec les programmes Smart Chef
73 FRANÇAIS Programmes prédé2nis Instructions Frites surgelées Fines (7 x 7 mm)Moyennes (10 x 10 mm)En-cas surgelés à base depommes de terre 200–1400g • Utilisez des frites surgelées directement sorties du congélateur. Ne les décongelez pas avant cuisson. • Le programme est destiné aux frites surgel...
Page 74 - Pour changer le programme Smart Chef, tournez le bouton; Lorsque vous entendez la sonnerie et que vous constatez
74 FRANÇAIS 1 Mettez l'appareil en marche en appuyant sur le bouton marche/arrêt . 2 Pour changer le programme Smart Chef, tournez le bouton QuickControl jusqu'à ce que l'icône souhaitée clignote. 3 Pour confirmer le programme Smart Chef, appuyez sur le bouton QuickControl. » L'appareil calcule auto...
Page 75 - Préparation de frites maison; Pour préparer de délicieuses frites maison dans l'Airfryer :
75 FRANÇAIS 5 Lorsque vous entendez la sonnerie et que le minuteur est arrivé à 0, le plat est prêt. Remarque • Si votre plat n'est pas assez cuit ou que vous ne le trouvez pas assez bruni, continuez la cuisson pendant plusieurs minutes en appuyant sur le minuteur (voir les étapes 11-12 dans le chap...
Page 76 - Le bouton de maintien au chaud clignote.
76 FRANÇAIS Sélection du mode de maintien au chaud 1 Appuyez sur le bouton de maintien au chaud (vous pouvez activer le mode de maintien au chaud à n'importe quel moment). » Le bouton de maintien au chaud clignote. » Le minuteur de maintien au chaud est réglé sur 30 minutes. Pour modifier le temps d...
Page 79 - Nettoyage; Avertissement
79 FRANÇAIS Remarque • Vous pouvez remplacer le réglage favori en appliquant la même procédure que celle indiquée ci-dessus. • Appuyer sur le bouton favori en mode manuel vous permet de remplacer le réglage favori. Pour appliquer le réglage favori, appuyez d'abord sur le bouton de retour pour quitte...
Page 80 - Nettoyez l'élément chauffant avec une brosse de
80 FRANÇAIS Conseil • Si des résidus d'aliments adhèrent à la cuve, au réducteur de graisse ou au panier, vous pouvez les laisser tremper dans de l'eau chaude et du liquide vaisselle pendant 10 à 15 minutes. Les résidus d'aliments se détacheront et pourront être facilement éliminés. Assurez-vous que...
Page 81 - Rangement; Veillez à nettoyer et sécher tous les éléments avant de; Recyclage
81 FRANÇAIS Tableau relatif au nettoyage Rangement 1 Débranchez l'appareil et laissez-le refroidir. 2 Veillez à nettoyer et sécher tous les éléments avant de ranger l'appareil. 3 Rangez le cordon dans son compartiment. Remarque • Tenez toujours la friteuse Airfryer horizontalement lorsque vous la tr...
Page 82 - Garantie et assistance; Problème
82 FRANÇAIS Garantie et assistance Si vous avez besoin d'une assistance ou d'informations supplémentaires, consultez le site Web www.philips.com/support ou lisez le dépliant séparé sur la garantie internationale. Dépannage Cette rubrique présente les problèmes les plus courants que vous pouvez renco...
Page 85 - NEDERLANDS; INHOUDSOPGAVE
85 NEDERLANDS INHOUDSOPGAVE Belangrijk 86 Introductie 90 Algemene beschrijving 90 Voor het eerste gebruik 92 Klaarmaken voor gebruik 92 De uitneembare gaasbodem en de vetverminderaar plaatsen 92 Etenswarentabel voor handmatige tijd-/temperatuurinstellingen 93 Het apparaat gebruiken 95 Heteluchtfritu...
Page 86 - Belangrijk
86 NEDERLANDS Belangrijk Lees deze belangrijke informatie zorgvuldig door voordat u het apparaat gaat gebruiken. Bewaar het boekje om het indien nodig later te kunnen raadplegen. Gevaar - Doe de etenswaren die u wilt bakken altijd in de mand om te voorkomen dat ze met de verwarmingselementen in cont...
Page 88 - Let op
88 NEDERLANDS hete stoom en lucht wanneer u de pan uit het apparaat haalt. - De aanraakbare oppervlakken kunnen tijdens gebruik heet worden. - De pan, de mand en de accessoires in de Airfryer worden heet tijdens gebruik. Wees voorzichtig wanneer u deze aanraakt. - Plaats het apparaat niet op of in d...
Page 90 - Automatische uitschakeling
90 NEDERLANDS Automatische uitschakeling Dit apparaat heeft een functie voor automatische uitschakeling. Als de timer is afgelopen, wordt het apparaat automatisch uitgeschakeld. Als u niet binnen 30 minuten op een knop drukt, wordt het apparaat automatisch uitgeschakeld. Om het apparaat handmatig ui...
Page 92 - Voor het eerste gebruik; De uitneembare gaasbodem en de vetverminderaar
92 NEDERLANDS Voor het eerste gebruik 1 Verwijder al het verpakkingsmateriaal. 2 Verwijder eventuele stickers of labels van het apparaat. 3 Reinig het apparaat grondig vóór het eerste gebruik, zoals aangegeven in het hoofdstuk 'Reinigen'. Klaarmaken voor gebruik De uitneembare gaasbodem en de vetver...
Page 93 - Plaats de mand in de pan.; temperatuurinstellingen; Opmerking
93 NEDERLANDS 5 Plaats de mand in de pan. 6 Schuif de lade aan het handvat terug in de Airfryer. Opmerking • Gebruik de pan nooit zonder de vetverminderaar of mand. Etenswarentabel voor handmatige tijd-/ temperatuurinstellingen De onderstaande tabel vermeldt de basisstanden voor veelvoorkomende eten...
Page 95 - Het apparaat gebruiken; Heteluchtfrituren
95 NEDERLANDS Ingrediënten Min. - max. hoeveelheid Bewerkingstijd (min) Temperatuur Opmerking Cake 500 g/18 oz 28 180 °C/ 350°F • Cakevorm gebruiken. MuffinsOngeveer 50 g/1,8 oz 1-9 12-14 180 °C/ 350°F • Gebruik hittebestendige siliconen muffinvormpjes. Quiche (diameter 21 cm/8,3 in) 1 15 180 °C/ 35...
Page 97 - De temperatuuraanduiding knippert op het scherm.; Zodra de temperatuur is bevestigd, begint de
97 NEDERLANDS 6 Schuif de lade aan het handvat terug in de Airfryer. Let op • Gebruik de pan nooit zonder de vetverminderaar of mand. Gebruik ovenwanten om de lade te openen als u het apparaat laat opwarmen zonder mand. De randen en binnenkant van de lade worden erg heet. • Raak de pan, de vetvermin...
Page 98 - Draai aan de QuickControl-knop om de gewenste; Druk op de QuickControl-knop om de geselecteerde tijd te; Wanneer u het belsignaal hoort, is de bereidingstijd
98 NEDERLANDS 11 Draai aan de QuickControl-knop om de gewenste bereidingstijd te kiezen. Opmerking • Als u op de favorietenknop drukt, slaat u deze bereidingstemperatuur en -tijd op als uw favoriete kookinstellingen. Alle eerder opgeslagen instellingen worden overschreven. Raadpleeg het hoofdstuk 'U...
Page 102 - Zelfgemaakte frites maken
102 NEDERLANDS 4 Wanneer u de bel hoort en de schudindicatie knippert, opent u de lade en draait u de etenswaren om of schudt u de mand met de etenswaren. Vervolgens schuift u de mand terug in het apparaat. 5 Wanneer u de bel hoort en de timer op 0 staat, is het eten klaar. Opmerking • Als uw etensw...
Page 103 - De warmhoudknop knippert nu.; Uw favoriete instelling opslaan
103 NEDERLANDS De warmhoudmodus kiezen 1 Druk op de warmhoudknop (u kunt de warmhoudmodus op elk gewenst moment activeren). » De warmhoudknop knippert nu. » De warmhoudtimer is ingesteld op 30 minuten. Als u de warmhoudtijd wilt wijzigen (1–30 min.), drukt u op de timerknop , draait u aan de QuickCo...
Page 105 - Druk op de QuickControl-knop om het bereidingsproces te
105 NEDERLANDS 7 Druk op de QuickControl-knop om het bereidingsproces te starten. Koken met een favoriete instelling1 Druk op de aan-uitknop om het apparaat in te schakelen. 2 Druk op de favorietenknop . 3 Druk op de QuickControl-knop om het bereidingsproces te starten. Opmerking • U kunt uw favorie...
Page 106 - Reiniging; Waarschuwing
106 NEDERLANDS Reiniging Waarschuwing • Laat de mand, de pan, de vetverminderaar en de binnenkant van het apparaat volledig afkoelen voordat u begint met reinigen. • Haal de vetverminderaar uit de pan met behulp van een tang met rubberen uiteinden. Doe dit niet met uw vingers, aangezien de hete olie...
Page 107 - Veeg de buitenkant van het apparaat schoon met een; Maak het verwarmingselement schoon met een; Schoonmaaktabel
107 NEDERLANDS 4 Veeg de buitenkant van het apparaat schoon met een vochtige doek. Opmerking • Zorg ervoor dat er geen vocht achterblijft op het bedieningspaneel. Droog het bedieningspaneel met een doek nadat u het hebt schoongemaakt. 5 Maak het verwarmingselement schoon met een schoonmaakborsteltje...
Page 108 - Opbergen; Haal de stekker uit het stopcontact en laat het apparaat; Als u informatie of ondersteuning nodig hebt, bezoek dan; Problemen oplossen; voor een lijst met
108 NEDERLANDS Opbergen 1 Haal de stekker uit het stopcontact en laat het apparaat afkoelen. 2 Controleer of alle onderdelen schoon en droog zijn voordat u het apparaat opbergt. 3 Duw het snoer in de snoeropbergruimte. Opmerking • Houd de Airfryer altijd horizontaal wanneer u deze draagt. Zorg er oo...
Page 109 - Probleem
109 NEDERLANDS Probleem Mogelijke oorzaak Oplossing De buitenkant van het apparaat wordt heet tijdens gebruik. De warmte in het apparaat straalt uit naar de buitenwanden. Dit is normaal. Alle handgrepen en knoppen die u tijdens het gebruik moet aanraken, blijven koel genoeg om aan te raken.De pan, d...
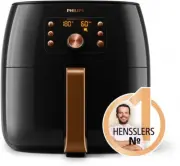


 Philips HD9641/96 User Manual
 Philips HD9650/90 User Manual
 Philips HD9650/96 User Manual
 Philips HD9654/90 Quick Guide
 Philips HD9762/90 User Manual
 Philips HD9860/90 User Manual
 Philips HD9870/20 User Manual
 Philips HD9875/90 User Manual
 Philips HD9876/20 User Manual
 Philips HD9876/25 User Manual
 Philips HD9876/90 User Manual
 Philips HD9921/00 User Manual