Philips HD9643/11 - User Manual
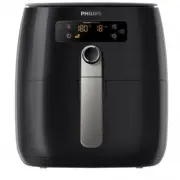
Philips HD9643/11 – User Manual, read for free online in PDF format. We hope this helps you resolve any issues you may have. If you have further questions, please contact us through the contact form.


Table of Contents:
- Page 2 – ENGLISH; TABLE OF CONTENTS
- Page 3 – Important; Read this important information carefully before you use the; Danger; Do not fill the pan with oil as this may cause a fire hazard.; Warning; Keep the appliance and its cord out of reach of children.
- Page 4 – The accessible surfaces may become hot during use.; Caution; Always unplug the appliance after use.
- Page 5 – Introduction
- Page 7 – Airfryer and accessories
- Page 8 – Before first use; Placing the removable mesh bottom
- Page 9 – Placing the EasyClick handle
- Page 10 – Food table
- Page 11 – Cooking table for presets
- Page 12 – Using the appliance; Airfrying; This product is for household use only.; Place the appliance on a stable, horizontal, level and; Note; Unwind the power cord from the cord storage wrap.
- Page 13 – If the basket or non-stick grill pan is placed back into
- Page 14 – After the temperature is confirmed, the time indication; Tip; When you hear the timer bell, the set preparation time has
- Page 16 – Changing the cooking temperature during; During cooking, press the temperature button.; Changing the cooking time during; To change the cooking time, turn the QuickControl dial.
- Page 17 – To confirm the cooking time, push the QuickControl dial.; Choosing the preset modes; After the appliance is switched on, press the preset
- Page 18 – Push the QuickControl dial again to confirm the cooking; Press the keep warm button (you can activate the keep; Making home-made fries; To make great home-made fries in the Airfryer:
- Page 19 – Using the double-layer rack; Use the double-layer rack to maximize your cooking space.
- Page 20 – Using the non-stick grill pan; Use the splatter-proof lid if you are cooking light-weight
- Page 21 – Using the baking pan
- Page 22 – Cleaning; Clean the appliance after every use. Remove oil and fat from
- Page 23 – Clean the inside of the appliance with a moist cloth.; Cleaning table
- Page 24 – Storage; Unplug the appliance and let it cool down.; Recycling; Problem
Always here to help you
Register your product and get support at
www.philips.com/welcome
User manual
HD9640, HD9641
HD9642, HD9643
HD9645, HD9646
HD9647
"Loading the manual" means you need to wait until the file loads and becomes available for online reading. Some manuals are very large, and the time they take to appear depends on your internet speed.
Was this manual helpful?
About this manual
- Brand
- Philips
- Model
- HD9643/11
- Document type
- User Manual
- Language(s)
- English
- Pages
- 27
- File size
- 7.9 MB
- Format
Summary
2 ENGLISH HD9640 , HD9641, HD9642, HD9643, HD9645, HD9646, HD9647 TABLE OF CONTENTS Important 3 Electromagnetic fields (EMF) 4 Introduction 5 General description 5 Airfryer and accessories 7 Before first use 8 Preparing for use 8 Placing the removable mesh bottom 8 Placing the EasyClick handle 9 Foo...
3 ENGLISH Important Read this important information carefully before you use the appliance and save it for future reference. Danger - Always put the ingredients to be fried in the basket, to prevent them from coming into contact with the heating elements. - Do not cover the air inlet and the air out...
4 ENGLISH - The accessible surfaces may become hot during use. - The Airfryer accessories become hot when you use them in the Airfryer. Be careful when you handle them. Caution - This appliance is intended for normal household use only. It is not intended for use in environments such as staff kitche...
Ask a question
Related manuals
Popular Philips Other


More Philips Other models
 Philips HD9395/90R1 User Manual
 Philips HD9396/90 User Manual
 Philips HD9411/00 User Manual
 Philips HD9411/70 User Manual
 Philips HD9641/56 User Manual
 Philips HD9641/96 User Manual
 Philips HD9650/90 User Manual
 Philips HD9650/96 User Manual
 Philips HD9741/56 User Manual
 Philips HD9750/90R1 User Manual
 Philips HD9762/90 User Manual
 Philips HD9860/90 User Manual