Page 2 - Introduction
2 EN Introduction • The contents of this document may be changed in the future without advanced notice. Contact our Customer Support Center for the latest information relating to product names and model numbers. • The illustration of the screen and the recorder shown in this manual may dif fer from ...
Page 3 - Table of contents
3 EN 1 2 3 4 5 Table of contents Introduction Safety precautions ...................................... 4 1 Getting started Main features .............................................. 9Identification of parts ................................10 Display status indicators (LCD panel) ....................
Page 4 - Safety precautions; Convention used in this manual; Danger
4 EN Safety precautions Before using your new recorder, read this manual carefully to ensure that you know how to operate it safely and correctly. Keep this manual in an easily accessible location for future reference. • The warning symbols indicate important safety related information. To protect y...
Page 5 - Safety precautions; Handling the recorder
5 EN Safety precautions • Avoid recording or playing back near cellular phones or other wireless equipment, as they may cause interference and noise. If you experience noise, move to another place, or move the recorder further away from such equipment. • Do not use organic solvents such as alcohol a...
Page 8 - LCD monitor
8 EN Safety precautions • Use only power supply of the correct voltage, as indicated on the adapter. In case: • ... the internal parts of the AC adapter are exposed because it has been dropped or otherwise damaged: • ... the AC adapter is dropped in water, or if water, metal flammable substances or ...
Page 9 - Main features; DSS Pro QP; Getting started
9 1 EN Main features Main features s Slide switch operation for ease of use and fast response. s Supports two types of memory: SD card and microSD card. s Three Programmable smart buttons F1,F2 and F3 ( ☞ P.44). s Recording in Digital Speech Standard Pro (DS2 format). s Two recording modes, [ DSS Pr...
Page 10 - Identification of parts
10 1 EN 6 7 $ 12 3 4 ! 89 5 @ 0 ) ( * & ^ % - # Id entific a tion of par ts Identification of parts 1 SD card slot 2 Built-in microphone 3 NEW button 4 Slide ( REC / STOP / PLAY / REV ) switch 5 ERASE button 6 Record indicator light 7 Display (LCD panel) 8 + (Volume) button 9 Fast Forward ( 9 ) ...
Page 12 - Inserting the battery; Lightly press down on the battery cover
12 1 EN In se rt in g th e ba tt e ry 1 2 3 Inserting the battery This recorder uses a lithium ion batter y specified by Olympus (LI- 42B). Do not use any other type of batter y. 1 Lightly press down on the battery cover release button, then open the battery cover, as shown in the illustration below...
Page 13 - Connect the AC adapter to the docking; Charging the battery; Charging directly via USB cable; Connect the USB cable to the recorder.
13 1 EN 1 2 Ch a rg in g t h e ba tt e ry Af ter loading the batter y into the recorder, you can charge it by connecting the USB cable to the recorder, or by using the docking station in combination with the USB cable or the AC adapter. Fully charge the batter y (approx. 3 hours) before use. Chargin...
Page 14 - Using the lithium ion battery
14 1 EN Ch a rg in g t h e ba tt e ry For customers in Germany: Olympus has a contract with the GRS (Joint Batter y Disposal Association) in Germany to ensure environmentally friendly disposal. Recommended temperature range of use: During operation: 0°C - 42°C/ 32°F - 107.6°F Charging: 5°C - 35°C/ 4...
Page 15 - Power supply from AC adapter or USB cable; Verify that the recorder is in stop mode.
15 1 EN Power s u p p ly f ro m AC a d a p te r or USB ca b le Use the AC adapter or USB cable when recording for extended period of time. The "Standard" version of the DS-7000 does not include the docking station and the AC adapter (optional). Using the AC adapter Plug the AC adapter into a...
Page 16 - Turning on the recorder; Compatible cards; Memory card
16 1 EN Tu rn in g on t h e re co rd e r/ Me m o ry c a rd Move the POWER switch to [ ON] position to activate the recorder. Turning on the recorder This recorder uses two types of memories: a microSD card as internal memor y, and an SD card as additional memor y. You can remove the content recorded...
Page 17 - rd; Memory card
17 1 EN Memory c a rd Memory card Inserting and ejecting a SD card Inserting a SD card Insert the SD card fully into the card slot, facing the direction shown in the illustration below, until it clicks into place. • Insert the card keeping it straight. Card recognition Notes • Inserting the card the...
Page 19 - Device Menu; EXIT
19 1 EN Se tt in g tim e a n d da te Setting time and date Changing the time and date If the current time and date is not correct, set it using the procedure below. 1 While the recorder is in stop mode, press the OK/MENU button. 2 Press the 9 or 0 button to select [ Device Menu ] tab. • You can chan...
Page 20 - Basic operations; Recording
2 20 EN Reco rd in g Basic operations By default, the recorder has five folders, [ A ], [ B ], [ C ], [ D ], [ E ] and you can select folder by pressing the F1 ( FOLDER ) button. These five folders can be selectively used to distinguish the kind of recording. Up to 200 messages can be recorded per f...
Page 21 - NEW
2 21 EN Reco rd in g a b 3 Recording 1 2 2 New recording Create a new file to record in. 1 Press the NEW button to create a new file. • It is possible to select the Work Type from the work type list by using the ODMS sof tware ( ☞ P.44). a New file number b Remaining recording time 2 Move the slide ...
Page 22 - Overwrite recording; Select and play the file you want to; Move the slide switch to the
2 22 EN a b Recording 2 1 3 Reco rd in g Overwrite recording You can overwrite a previously recorded file starting from any point within the file. When using overwriting, the overwritten part will be erased. 1 Select and play the file you want to overwrite. • Stop the playback in the point you want ...
Page 23 - INSERT; STOP
2 23 EN Reco rd in g 2 Recording 1 3 4 Insert recording Additional recording can be inserted into previously recorded file. 1 Select and play the file you want to insert an additional recording into. 2 While playing the file, press the F1 ( INSERT ) button to insert an additional recording. • [ Inse...
Page 24 - cording; Hands-free recording
2 24 EN H a nds-free recording / R e cording m o nito r The recorder can be used as a hands-free recording device. To set up the recorder for hands-free operation, connect the optional Olympus Foot Switch to the back of the docking station and place the recorder in the docking station as shown in th...
Page 25 - PLAY; Playback
2 25 EN Pl a yb a ck 2 1 3 You can playback a file starting from any point. 1 Select the file, then move the slide switch to the PLAY ( ` ) position to start playback. 2 Press the + or – button to adjust the volume. • The volume can be adjusted within a range from [ 00 ] to [ 30 ]. 3 Move the slide ...
Page 26 - yb
2 26 EN Playback Pl a yb a ck Playback functions Operation How to cancel Fast Forward (FF) Press the 9 button once while in stop mode. Move the slide switch to a position other than the STOP ( 4 ) position. • The recorder star ts the operation of the set position. Press the OK /MENU button. Rewind (...
Page 27 - Erasing; Erasing files; ERASE
2 27 EN Eras in g 5 2 3 4 Erasing Erasing files 1 Select the file you want to erase. 2 Press the ERASE button. 5 Press the + button to select [ Start ], then press the OK/MENU button. • The display changes to [ Erase ! ] and erasing will start. • [ Erase Done ] is displayed when the file is erased. ...
Page 28 - Start playback the file you want to erase; In the position you want to end partial
2 28 EN 2 3 Eras in g Erasing Partially erasing a file 1 Start playback the file you want to erase partially. 2 Press the ERASE button at the point you want to start erasing. • While playback continues, [ Erase Start ] will appear on the display. • If the press the F2 ( ) button, playback will skip ...
Page 29 - Press the
2 29 EN Eras in g 4 Erasing 4 Press the ERASE button to confirm the erasure. • The display changes to [ Partial erasing ! ] and erasing will start. • When [ Partial erase completed. ] appears on the display, partial erase is complete. Notes • If the ERASE button is not pressed within 8 seconds af te...
Page 30 - FOLDER; INFO; Selecting folders and files; Advanced operations
30 3 EN Se le ct in g fo ld e rs an d file s/ D is p la yi n g f ile in fo rm a tio n b a Changing folders 1 While the recorder is in stop mode, press the F1 ( FOLDER ) button. • The folder list screen will be displayed. 2 Press the + , – or F1 ( FOLDER ) button to select the folder, then press the ...
Page 31 - ENTER; Device lock function
31 3 EN Devi ce lock f u nc tion Access to the recorder can be restricted by using the Device Lock function. Password authentication can be safer for your data in case the recorder is lost. The password can be set by using the ODMS sof tware ( ☞ P.44). When the password has been registered, you will...
Page 32 - Setting the Author ID and Work Type
32 3 EN Se tt in g th e Au th o r ID a n d Wo rk T yp e Ever y file recorded on the recorder will include the Author ID and Work Type as part of its header information. To create multiple Author IDs and Work Types on the recorder, use the bundled ODMS sof tware to create and upload a data list (list...
Page 33 - l C; Verbal Comment
33 3 EN a Verb a l C o m m e n t Verbal comments are useful to append vocal instructions while recording. It is possible to search and playback Verbal comment using the ODMS and DSS Player sof tware. Verbal comments are also useful to give instructions to transcriptionists. Setting a Verbal Comment ...
Page 34 - Index marks
34 3 EN In d e x ma rk s Index marks can be placed into a file during recording or playback. Index marks are used to provide a quick and easy way to identif y important or significant parts within the file. Setting an index mark 1 While the recorder is in recording mode or in playback mode, press th...
Page 35 - How to use the menu
35 3 EN H o w to u se th e me n u How to use the menu Items in menus are categorized by tabs, so select a tab first and move to a desired item to quickly set it. You can set each menu item as follows. 1 While the recorder is in stop mode, press the OK/MENU button. • The menu will appear on the displ...
Page 37 - it; Rec Menu; On; Menu items
37 3 EN Men u it e m s Rec Menu Mic Sense You can switch between two microphone sensitivities to meet recording needs: [ Dictation ] for oral dictation and [ Conference ] which is suited for situations like meetings and conferences with a small number of people. [ Conference ]: High-sensitivity mode...
Page 38 - Menu items; Lighting Time; or
38 3 EN Menu items b a c Men u it e m s LCD/Sound Menu Backlight By default, the display will remain lit for about 10 seconds when a button on the recorder is pressed. 1 Select [ Lighting Time ], [ Dim Light Time ] or [ Brightness ]. 2 Select the options. When [Lighting Time] is selected: [ 5seconds...
Page 39 - Sound
39 3 EN Men u it e m s Menu items Time & Date Setting the time and date beforehand enables easier file management. For details, see “ Setting time and date [Time & Date] ” ( ☞ P.18). USB Class You can set the USB class of this recorder with a USB connection to [ Composite ] or [ Storage Clas...
Page 40 - Editing the Work Type information; Edit Work Type
40 3 EN Menu items Men u it e m s Editing the Work Type information 1 Select the file for which you want to edit the Work Type information ( ☞ P.30). 2 Select [ Work Type ] at the [ File Menu ] screen, then press the OK/MENU button. a b c d 5 Press the + or – button on the Work Type information scre...
Page 43 - Formatting the card
43 3 EN Fo rm a tt in g t h e ca rd Formatting the card Notes • The time required to format a card varies according to the capacity of the card to be formatted.Do not interrupt the formatting process with the following actions. Doing so may damage the data or the card. - Remove the card. - Remove th...
Page 44 - General; Customizing the recorder; Device Security
44 3 EN Cu st omizing the record er You can customize various settings of the recorder using the ODMS sof tware ( ☞ P.46). For more details, refer to the online help for ODMS sof tware ( ☞ P.47). Common settings You can set the default values for each of the recorder’s Menu items. Administrative set...
Page 45 - Device Folders; Hands Free
45 3 EN Cu st omizing the record er Customizing the recorder ❏ Device Folders You can perform various settings related to the recorder’s folders. Enabled: • Change the number of usable folders. Folder name: • Change the folder name. Worktype: • Set the folder's work type. AutoLock: • Set the Auto Lo...
Page 46 - Managing files on your PC; Minimum requirement; ODMS and DSS Player software
46 4 EN O D M S a n d DSS Play e r s o ft w a re Managing files on your PC The ODMS (Windows) and DSS Player (Macintosh) software is a fully featured software tool that provides a simple to use but sophisticated method for managing your recordings. Some of the features of the ODMS and DSS Player sof...
Page 47 - While ODMS software is running, select
47 4 EN O D M S a n d DSS Play e r s o ft w a re Browser: Microsof t Internet Explorer 6.0 or later Drive: CD -ROM, CD -R, CD -RW, DVD -ROM drive Display: 1024 x 768 pixels or more, 65,536 colors or more (16,770,000 colors or more is recommended) USB port: One or more free ports Others: With the Dic...
Page 48 - Connecting to your PC; Connecting to your PC using the USB cable; Boot
48 4 EN Co nnec ting t o y o ur P C Connecting to your PC Connecting to your PC using the USB cable 1 Boot the PC. 2 Connect the USB cable to the USB port of the PC. 3 Connect the USB cable to the connecting terminal on the bottom of the recorder. • [ Remote (Composite) ] is displayed on the recorde...
Page 49 - Disconnecting from your PC; Safely remove USB Mass Storage Device
49 4 EN Co nnec ting t o y o ur P C Connecting to your PC Connecting to your PC using the docking station Place the recorder in the docking station 1 Connect the USB cable to the USB port of the PC. 2 Connect the USB cable to the docking station as shown in the illustration. 3 Set the recorder in th...
Page 50 - Other information; Alarm message list; Message
50 5 EN Alarm message list Other information Alarm message list Message Explanation Action [Battery Low] The batter y power is low. Charge the batter y ( ☞ P.13). [Power Supply Error Remove Power Plug] Voltage outside of the allowable limit has been detected. Use the included AC Adapter ( ☞ P.15). [...
Page 51 - Troubleshooting; Symptom
51 5 EN Troubleshooting Troubleshooting Symptom Probable cause Action Nothing appears on the display The batter y power is low. Charge the batter y ( ☞ P.13). The recorder is turned of f. Turn the power on ( ☞ P.16). The recorder is currently in Power Save mode. Press any button. Unable to record Th...
Page 54 - Specifications
54 5 EN Specifi c ations Specifications General points 4 Recording format: DS2 (Digital Speech Standard Pro) 4 Recording media: microSD, SD card (512 MB to 32 GB) 4 Sampling frequency: [ DSS Pro QP ] 16 kHz [ DSS Pro SP ] 12 kHz 4 Speaker: Built-in ø23 mm round dynamic speaker 4 MIC/EAR jack: ø3.5 m...
Page 55 - For customers in Europe:; Technical assistance and support
55 5 EN Tested To Comply With FCC StandardsFOR HOME OR OFFICE USE Technic al assistance and suppor t “CE” mark indicates that this product complies with the European requirements for safety, health, environment and customer protection. For customers in Europe: This symbol [crossed-out wheeled bin Di...


 Olympus DS-40 Manual
 Olympus DS-50 Manual
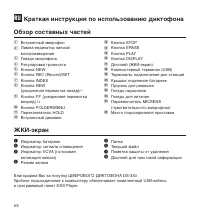 Olympus DS-330 Manual
 Olympus DS-3500 Manual
 Olympus LS-10 Manual
 Olympus LS-11 Manual
 Olympus LS-20M Manual
 Olympus LS-100 Manual
 Olympus VN-750 User Manual
 Olympus VN-4100(PC) User Manual
 Olympus VN-5500 User Manual
 Olympus W-10 Manual
 Olympus WS-100 Manual
 Olympus WS-300M Manual