Page 2 - Table of Contents; Getting Started; Switching Between the Voice Recorder and; When Using the Recorder as a; Using the Variable Control; Using the Recorder on Your PC
2 Table of Contents Table of Contents ...................................... 2 Safe and Proper Usage ............................. 4 General Precautions .................................. 4 1 Getting Started Main Features ............................................ 6 Identification of Parts ..........
Page 3 - Using as External Memory; Other Information
3 Music Playback ........................................ 53 Selecting Play Mode (Play Mode) ........... 58 Repeat Playback (Repeat) ...................... 59 Random Playback (Random) .................. 60 Increasing the WOW Effect (WOW) ........ 61 Selecting Equalizer (EQ) ............................
Page 4 - General Precautions; Avoid strong vibrations or shocks.
4 Safe and ProperUsage Before using your new recorder, read thismanual carefully to ensure that you knowhow to operate it safely and correctly. Keept h i s m a n u a l i n a n e a s i l y a c c e s s i b l elocation for future reference. • The warning symbols indicate important safety related inform...
Page 5 - Battery; Warning; • Battery should never be exposed to; ecautions
5 Battery Warning • Battery should never be exposed to f l a m e , h e a t e d , s h o r t - c i r c u i t e d o rdisassembled. • Do not attempt to recharge alkaline, lithium or any other non-rechargeablebattery. • Never use any battery with a torn or cracked outer cover. • K e e p b a t t e r y o u...
Page 6 - Recording time; Getting Started
6 1 Main Features of the DigitalVoice Recorder ● The recorder stores highly compressedWMA format voice messages in integratedflash memory. ( ☞ P.15) ● By using the built-in stereo microphone, a stereorecording mode, which is ST HQ (Stereo HighQuality), and 3 types of monaural recordingmodes, which a...
Page 7 - You can insert or delete index marks.; Playback time
7 1 Main Features ● The five folders can hold 199 files each,for the maximum of 995 recordings.( ☞ P.15) ● It has a built-in Variable Control VoiceActuator (VCVA) function. ( ☞ P.18) ● You can insert or delete index marks. * 2 ( ☞ P.32) ● The playback speed can be controlled aspreferred. ( ☞ P.25) M...
Page 8 - Main unit
8 1 1 EAR (Earphone) jack 2 MIC (Microphone) jack 3 Built-in stereo microphone (R) 4 REC (Record) button 5 STOP button 6 PLAY button 7 Built-in speaker 8 USB terminal 9 VOL (+) button 0 9 button ! VOL (–) button @ FOLDER/INDEX button # ERASE button $ OK button % 0 button ^ Display (LCD panel) & ...
Page 9 - The display appears when recording.
9 1 1 Folder indicator 2 Battery indicator 3 Microphone sensitivity indicator 4 V C VA ( Va r i a b l e C o n t r o l Vo i c eActuator) indicator 5 Stereo indicator 6 Memory remaining indicator (E/F bar) 7 Record mode indicator 8 Erase lock indicator 9 Total number of recorded files inthe folder Ide...
Page 10 - Close the battery cover completely.; Replacing the Battery; When; Notes; Ni-MH Rechargeable Battery
10 1 3 2 Inserting Battery 1 Lightly press down on the arrow and slide the batterycover open. 2 Insert size-AAA alkaline battery, observing the correctpolarity. 3 Close the battery cover completely. Replacing the Battery The battery indicator on the display changes as the battery losespower. ➜ ➜ Whe...
Page 11 - Turning Off the Power; Move the; Turning On the Power; Release the; Standby Mode and Display Shut Off
11 1 Power Supply When the recorder is not used, setting it to HOLD turns off the recorder, suppressing theconsumption of the battery to a minimum.Even if the power is turned off, the existing data, settings of each mode, and clock setting will bemaintained. To turn the power on, cancel the HOLD swi...
Page 12 - Follow the same steps by pressing the; OK; • You can choose between 12 and 24 hour
12 1 If you set the date and time beforehand, the information when the file is recorded is automaticallystored for each file. Setting the date and time beforehand enables easier file management. Setting Time/Date (Time&Date) Setting T ime/Date (T ime&Date) 1 Press the 9 or 0 button to select...
Page 13 - Changing the Time/Date; Note; See; • You can choose the order of the year, month, day by pressing; STOP
13 1 Setting T ime/Date (T ime&Date) Changing the Time/Date ..................................................................................................................................................... Note • If you press the OK button during the setup operation, the recorder will save t...
Page 14 - This device can be used as a voice recorder or as a music player.; Using the mode switch, choose between; For recording or playing back voice files.; Meaning of icons in this manual
14 1 Switching Between the Voice Recorder andMusic Player This device can be used as a voice recorder or as a music player. Switching Between the V oice Recorder and Music Player Using the mode switch, choose between VOICE and MUSIC option. VOICE: For recording or playing back voice files. MUSIC: Fo...
Page 15 - When Using the Recorder as a Voice Recorder; F O L D E R; R E C
15 2 Recording The recorder provides five folders, A , B , C , D and E , and each message recorded in a folder is saved as a Windows Media Audio (WMA) file. These five folders can be selectivelyused to distinguish the kind of recording; for example, Folder A might be used to store private informatio...
Page 16 - Pause; REC; Resume Recording; Press the; REC
16 2 Recording Notes • To ensure recording from the beginning, start speaking after you see the red record/play indicator light on.• A beep will sound when remaining recording time reaches 60 seconds, 30 seconds, and 10 seconds while recording. • When remaining recording time is less than 60 seconds...
Page 17 - Listening While Audio is Recorded (Recording Monitor); Connect the earphone to the EAR jack on the recorder
17 2 Recording Listening While Audio is Recorded (Recording Monitor) If you start recording after inserting the earphone into the EAR jackon the recorder, you can hear the sound being recorded. The soundvolume on the recording monitor can be adjusted by pressing theVOL (+) or VOL (–) button. Connect...
Page 18 - The VCVA setup process begins.
18 2 Using the Variable Control Voice Actuator(VCVA) Using the V ariable Control V oice Actuator (VCV A) 1 Press and hold the OK button for 1 second or longer. The menu opens ( ☞ P.38, 74). 2 Press the + or – button to choose “VCVA”. 3 Press the OK or 9 button. The VCVA setup process begins. 4 Press...
Page 19 - Adjust the Start/Stop Actuation Level; P r e s s t h e; e Actuator
19 2 Using the V ariable Control V oice Actuator (VCV A) 7 7 P r e s s t h e R E C b u t t o n t o s t a r t recording. When the sound volume is lower than thepreset threshold sound level, recordinga u t o m a t i c a l l y s t o p s a f t e r 1 s e capproximately, and “Standby” flashes onthe displa...
Page 21 - sounds in all directions.; Microphone sensitivity is adjustable to meet recording needs.
21 2 ...................................................................................................................................................... Notes • When the speakers voice is to be recorded clearly, set to Dict (dictation) mode and move the built-in stereo microphone close to the spe...
Page 22 - Recording with External Microphone; Applicable External Microphones (optional); Stereo microphone: ME51S
22 2 The external microphone and other devices can be connected and the sound can be recorded.Connect as follows by the device to be used. Recording with External Microphone Connect the external microphone to the microphone jackof the recorder. When the external microphone is connected to the microp...
Page 23 - ophone
23 2 ...................................................................................................................................................... Notes • The input level cannot be adjusted on this recorder. When you connect the recorder to an external device, execute a test recording and a...
Page 24 - If you keep pressing the; PLAY; S T O P; You can change the display patterns (
24 2 1 P r e s s t h e F O L D E R b u t t o n t o choose a folder. 2 Press the 9 or 0 button to choose the file that you want toplay. If you keep pressing the 9 or 0 b u t t o n i n s t o p m o d e , t h e r e c o r d e rcontinuously skips to the beginnings offiles. 3 Press the PLAY button to start...
Page 26 - Rewind
26 2 Playing Rewind Press and hold the 0 button while playing a file. ➥ When you release the 0 button, the recorder will resume normal playback. • When the index mark is shown in the middle of a file, it will stop temporarily in the position of the index mark. • The recorder stops when it reaches th...
Page 27 - When Playing Back or Fast Forwarding to the End of the Last File
27 2 Playing When Playing Back or Fast Forwarding to the End of the Last File When it reaches to the end of the last file, “End” will flash for 5seconds, and stops at the starting position of the last file. While “End”is flashing, the following operation can be executed. • If you press the 0 button,...
Page 29 - P L AY; File playback begins.; Press and hold the; Even while “
29 2 Repeat Playback Repeat Playback 1 C h o o s e t h e f i l e f o r R e p e a tP l a y b a c k , a n d p r e s s t h e P L AY button. File playback begins. 2 Press and hold the OK button for 1 second or longer. “ Start?” will flash on the display. 3 Press the OK button briefly at the point you wa...
Page 30 - Cancel the Continuous Playback Function
30 2 Repeat Playback 4 Press the OK button briefly again at the position you want repeatplayback to end. The recorder repeatedly plays back thesection between the start and the endp o s i t i o n s u n t i l y o u c a n c e l r e p e a tplayback. 4 Cancel the Continuous Playback Function Press the O...
Page 31 - Perform normal cueing.
31 2 1 Press the + or – button in the sub menu screen, and select the “BackSpace”. See ☞ P.38, 75 regarding the sub menu. 2 Press the OK or 9 button. T h e a u t o b a c k s p a c e r e v i e w s e t u pprocess begins. 3 Press the + or – button to choose from “Off”, “1 Sec” and “2 Sec”. Off: Perform...
Page 32 - Setting an Index Mark; INDEX; An index number appears on the display.; Locating an Index Mark; ERASE; The index mark is erased.
32 2 Index Marks Index Marks Setting an Index Mark 1 Press the INDEX button during recording or playback to set anindex mark. An index number appears on the display. Locating an Index Mark 2 Hold the 9 or 0 button while playing a file. The recorder stops for 1 second when itreaches the index mark. C...
Page 34 - “Lock” will be displayed on the screen.; The file locking setup process begins.
34 2 Locking Files (Lock) 1 P r e s s t h e F O L D E R b u t t o n t o choose a folder. 2 Press the 9 or 0 button to choose the file you want to lock. 3 Press and hold the OK button for 1 second or longer. The menu opens ( ☞ P.38,74). 4 Press the + or – button to choose “Sub Menu”. 5 Press the OK o...
Page 36 - While in Stop or Playback Mode; File length; While in Stop Mode; Memory remaining; Each time the OK button is pressed, the recorder will display; While the STOP button is being pressed down,
36 2 LCD Display Information You can select an option for the display of the recorder. This helps review and confirm differentrecorder settings and file information. LCD Display Information While in Stop or Playback Mode 1 File length (Count up indicator)Indicates the length of the fileand playback ...
Page 37 - While in Record Mode; While in Recording in VCVA Mode
37 2 LCD Display Information While in Record Mode 1 Recording levelmeter (Count up indicator)Displays the audio inputlevel with the meter atthe bottom, remainingmemory with the E / Fbar and recordingelapsed time with thecounter. 2 Recording levelmeter (Count down indicator)Displays the audioinput le...
Page 38 - Menu
38 2 Rec Mode ( ☞ P.20) Mic Sense ( ☞ P.21) VCVA L P S P O n O f f ( ☞ P.18) ( ☞ P.75) Sub Menu H Q C o n f D i c t ST HQ L B a c k A l l Ti m e F o C o B a c B Menu List (VOICE Mode) Menu List (VOICE Mode) Menu ...........................................................................................
Page 39 - Sub Menu
39 2 ( ☞ P.34) ( ☞ P.31) ( ☞ P.28) ( ☞ P.79) ( ☞ P.12) L o c k B a c k S p a c e A l l P l a y Ti m e & D a t e F o r m a t ( ☞ P.78) ( ☞ P.77) ( ☞ P.76) 06 O f f O n O f f O n O f f 1 Sec 2 Sec O f f O n C a n c e l S t a r t O f f O n C o n t r a s t B a c k l i g h t B e e p Menu List (VOICE ...
Page 40 - Precautions on Using the Recorder Connected to a PC; Saving Files in Your PC; Using the Recorder on Your PC
40 3 By being connected to a PC, the recorder enables you to do the following:• You can save (back-up) the files stored in the recorder on your PC. Also, you can transfer the files from your PC to the recorder. • Playback voice files on your PC. The voice file recorded by this recorder can be played...
Page 42 - Connecting to Your PC; Slide the; The display will turn off.; RELEASE; ” a n d
42 3 Connecting to Your PC Connecting to Y our PC Connecting to Your PC 1 Slide the HOLD switch to the hold side, turn the recorder off. The display will turn off. 2 Detach the battery compartmentpressing the RELEASE button of the rear side. 3 C o n n e c t t h e r e c o r d e r ’s U S Bterminal to ...
Page 43 - Disconnecting to Your PC; Click the
43 3 Connecting to Y our PC Disconnecting to Your PC 1 Click the on the task bar l o c a t e d a t t h e l o w e r - r i g h tc o r n e r o f t h e s c r e e n . C l i c k[Safely Remove Hardware]. It will read [Stop USB Disk-Drive] forWindows Me. The drive letter willdiffer depending on the computer...
Page 44 - Copyright and Copyright Protection Feature (DRM); Using the Recorder as a Music Player
44 4 Using the Recorder as a Music Player/Using W indows Media Player Using the Recorder as a Music Player The recorder supports music files in WMA and MP3 formats, which can be transferred from thePC to the corresponding music folder of the recorder. Using Windows Media Player By using Windows Medi...
Page 45 - Window Names; Windows Media Player 10
45 4 1 Features taskbar 2 Quick AccessPannel button 3 Seek slider 4 Rewind button 5 Play button 6 Stop button 7 Previous button 8 Next button 9 Mute button 0 Volume slider ! Shuffle/Repeat button @ Fast Forward button Window Names Window Names Windows Media Player 10 1 2 34 5 6 78 9 0 ! @
Page 46 - Windows Media Player 9
46 4 Window Names 1 0 ! 2 3 4 5 67 8 9 1 Features taskbar 2 Seek slider 3 Rewind button 4 Play button 5 Stop button 6 Previous button 7 Next button 8 Mute button 9 Volume slider 0 Quick Access box ! Fast Forward button Window Names Windows Media Player 9
Page 48 - Transferring Music File to the Recorder; Click on the upper right corner and
48 4 Transferring Music File to the Recorder 1 Connect the recorder to a PC andstart Windows Media Player. 2 From the Features taskbar, clickthe [Sync]. 3 From the pull down menu on theleft side window, select the play listto be transferred to the recorderand put the check marks on themusic file tha...
Page 49 - rder
49 4 rder 6 Click the [Start Sync]. The file is transferred to the recorder. The music file transferred to the recorder is displayedin Item on Device. After transferring a language-learning file to the music folder, if you further transfer or copy thefile to your desired voice folder (DSS_FLDA to DS...
Page 50 - Select the destination folder.; To transfer to “Root” folder; empty
50 4 T ransferring Music File to the Recorder Transferring Music File to the Recorder 5 Select the destination folder. To transfer to “Root” folder The empty column part of the item on thedevice (Root of the drive) isselected. To transfer to “Music” folder Select the “Music” folder. Creating the“Art...
Page 51 - Folder
51 4 About the Music Folders This recorder can save the music files (WMA, MP3 files) transferred from the PC in the 2 musicfolders, the original “Root” folder and its subsidiary “Music” folder.Also, this recorder can create the folders in up to 2 layers within the “Music” folder. It is convenientto ...
Page 52 - Selecting the Folders and Files; List display; Moves the cursor up and; or; Opens the selected; FOLDER; Returns to the upper
52 4 About the Music Folders Selecting the Folders and Files List display The folders and files recorded in thisrecorder are displayed. File display Information of the selected file is displayed.Enters in playback standby mode. Upper (selected) folder Scroll bar (appears when the whole contents cann...
Page 53 - Set the Mode switch to; The folder list or file list is displayed.; Music Playback
53 4 Music Playback This recorder supports WMA and MP3 formats. To playback the music files using the musicplayer, you need to transfer (copy) the corresponding music files from the PC to this recorder’sfolders for music ( ☞ P.48). 1 Set the Mode switch to MUSIC . The folder list or file list is dis...
Page 54 - this recorder can be played continuously.; When the Playback Reaches to the End of the Last File
54 4 5 Press the + or – button to select the proper sound volume. The display shows the volume level. Youcan choose between 0 and 30. 6 P r e s s t h e S T O P b u t t o n a t a n y p o i n t y o u w a n t t o s t o p t h eplayback. Resume playback by pressing PLAY orOK button again. The next track ...
Page 55 - Fast Forward; Forwarding and Rewinding
55 4 Fast Forward Press and hold the 9 button while playing a file. ➥ When you release the 9 button, the recorder will resume normal playback. • The recorder stops when it reaches the end of the file. If you press and hold the 9 button, it continues fast forwarding within the playback range selected...
Page 56 - Skip a Music File While Playing It
56 4 Press the 9 button while playing a file. ➥ The recorder skips to the beginning of the next track and startsplaying it. • It cues within the playback range selected in “Play Mode”( ☞ P.58). If “Random” ( ☞ P.60) is “On”, it cues the next file randomly. Press the 0 button while playing a music fi...
Page 57 - Menu Setting During Playback
57 4 In music mode, the following functions relating playback areavailable. They can be set during playback. Press the OK button while playing a file. ➥ You can enter the menu settingwhile continuing playback, and sett h e f o l l o w i n g r e l a t i n g p l a y b a c k .For how to set each menu, ...
Page 58 - The play mode setup process begins.
58 4 1 Press and hold the OK button for 1 second or longer. “Play Mode” will be displayed on thescreen ( ☞ P.68, 74). 2 Press the OK or 9 button. The play mode setup process begins. 3 Press the + or – button to choose between “Folder” and “All”. Folder: Plays the music files within the folder. All: ...
Page 59 - The repeat setup process begins.
59 4 1 Press and hold the OK button for 1 second or longer. The menu opens ( ☞ P.68, 74). 2 Press the + or – button to choose “Repeat”. 3 Press the OK or 9 button. The repeat setup process begins. 4 Press the + or – button to choose from “On”, “Off” and “Single”. On: Repeats playback of the music fi...
Page 60 - The random setup process begins.
60 4 Random Playback (Random) 1 Press and hold the OK button for 1 second or longer. The menu opens ( ☞ P.68, 74). 2 Press the + or – button to choose “Random”. 3 Press the OK or 9 button. The random setup process begins. 4 Press the + or – button to choose between “On” and “Off”. On: Plays the musi...
Page 61 - Enriches the low sounds.; “SRS 3D” will be displayed on the screen.
61 4 Increasing the WOW Effect (WOW) Increasing the WOW Effect (WOW) The recorder has WOW, an audio processing technology that increases sound clarity and bassquality. The level of the surround effect (SRS 3D) and the bass effect (TruBass) may be individuallyadjusted through three levels of processi...
Page 64 - When Changing the User Equalizer; The equalizer setup process begins.
64 4 Selecting Equalizer (EQ) Selecting Equalizer (EQ) When Changing the User Equalizer You can customize your own equalizer by changing the User settings. 1 Press and hold the OK button for 1 second or longer. The menu opens ( ☞ P.68, 74). 2 Press the + or – button to choose “EQ”. 3 Press the OK or...
Page 66 - Lists up the files in the current folder.
66 4 Moving the Tracks (Move) 1 Press and hold the OK button for 1 second or longer. The menu opens ( ☞ P.68, 74). 2 Press the + or – button to choose “Move”. 3 Press the OK or 9 button. Lists up the files in the current folder. 4 Press the + or – button to choose the file. 5 Press the OK or 9 butto...
Page 68 - button for 1 second or longer.
68 4 Play Mode Random WOW Move SRS 3D TruBass F l a t R o c k EQ O ff L o w H i g h M i d d l e Repeat ( ☞ P.58) ( ☞ P.59) ( ☞ P.60) ( ☞ P.61) ( ☞ P.63) ( ☞ P.66) ( ☞ P.75) P o p Sub Menu O f f O n O f f S i n g l e O n F o l d e r A l l Ti m e F o C o B a c B J a z z U s e r Menu List (MUSIC mode) ...
Page 70 - Erasing; The “Cancel” indicator flashes.; Erasing One File at a Time; A selected file can be erased from a folder.; Features Common to the Voice Recorder and Music Player
70 5 Erasing Erasing 1 Select the file you want to delete. In the stop status, display the file or placethe cursor on the file in the list display. 2 Press the ERASE button. The “Cancel” indicator flashes. 3 Press the + or – button to choose “Erase”. 4 Press the ERASE or OK button. The display chang...
Page 71 - E R A S E; Erase All Files from a Folder
71 5 1 Select the folder in which you wantto erase all files. 2 P r e s s t h e E R A S E b u t t o n f o r 3 seconds or longer. The “Cancel” indicator flashes. 3 Press the + or – button to choose “All Erase”. 4 Press the ERASE or OK button. The display changes to “All Erase!” anderasing will start....
Page 73 - Setting the
73 5 Hold Setting the HOLD switch to the HOLD position. If you set the recorder to HOLD status by sliding the HOLDswitch in the direction of the arrow, the current conditions willbe preserved, and all buttons and switches except the HOLDswitch will be disabled. This feature is useful when the record...
Page 74 - Each item of the menu list (; Menu Setting Method; Menu Setting
74 5 Each item of the menu list ( ☞ P.38, 68) can be set by the following method. Menu Setting Method Menu Setting Method Menu Setting 1 Press and hold the OK button for 1 second or longer. The menu opens ( ☞ P.38, 68). 2 Press the + or – button to move to the item to be set. 3 Press the OK or 9 but...
Page 75 - Moves to the setting of the selected item.; Sub Menu Setting
75 5 1 Press and hold the OK button for 1 second or longer. The menu opens ( ☞ P.38, 68, 74). 2 Press the + or – button to choose “Sub Menu”. 3 Press the OK or 9 button. The sub menu opens. 4 Press the + or – button to move to the item to be set. 5 Press the OK or 9 button. Moves to the setting of t...
Page 76 - The system sound setup process begins.
76 5 The recorder beeps to alert you to button operations or warn you of errors. System soundsmay be turned off. System Sounds (Beep) 1 Press the + or – button in the sub m e n u s c r e e n , a n d s e l e c t t h e“Beep”. See ☞ P.38, 68, 75 regarding the sub menu. 2 Press the OK or 9 button. The s...
Page 77 - The backlight setup process begins.
77 5 Backlight (Backlight) The recorder display backlight is On by default. The display will remain lit for about 10 secondswhen a button on the recorder is pressed. 1 Press the + or – button in the sub m e n u s c r e e n , a n d s e l e c t t h e“Backlight”. See ☞ P.38, 68, 75 regarding the sub me...
Page 79 - The “Start” indicator flashes.
79 5 Formatting the Recorder (Format) Formatting the Recorder (Format) 1 Press the + or – button in the sub m e n u s c r e e n , a n d s e l e c t t h e“Format”. See ☞ P.38, 68, 75 regarding the sub menu. 2 Press the OK or 9 button. The “Cancel” indicator flashes. 3 Press the + or – button to choos...
Page 81 - Example: Copying Data from PC to Recorder using Explorer, etc.; Other Practical Use Methods; Connect the recorder to your PC.; For the connection procedure, refer to “Connecting to Your PC ” (; Open the Explorer window.; The recorder will appear as a removable drive icon.
81 6 Using as External Memory of the Computer With the recorder connected to your PC, you can download data from the memory to your PCand upload data stored on your PC to the memory. Example: Copying Data from PC to Recorder using Explorer, etc. 6 Other Practical Use Methods 1 Start Windows. 2 Conne...
Page 82 - Explanation; Other Information
82 7 Alarm Message List Explanation Battery power is getting low. Tried to delete a locked file. The file is full of index marks(maximum of 16 marks). Tried to incorporate WMA fileindex marks into the musicfiles or the files not recordedwith the recorder. The folder is full of files(maximum of 199 f...
Page 83 - Troubleshooting; Probable cause; Action
83 7 Troubleshooting Probable cause The battery is not loaded properly. The battery is dead. The recorder is in HOLD mode. The recorder is in HOLD mode. The battery is dead. Low remaining internal flash memory. The maximum number of files has beenreached. MUSIC mode is active. The earphone is connec...
Page 84 - High-efficiency rechargeable long life batteries.; Tie clip microphone: ME15
84 7 Accessories (optional) Stereo microphone: ME51S The high fidelity of the recording, which only stereo can perform. Furthermore, it gives clearsound quality with less noise. Noise-cancellation monaural microphone: ME12 (Dictation microphone)Used to get crisp recordings of your own voice by reduc...
Page 85 - For the Digital Voice Recorder
85 7 Specifications For the Digital Voice Recorder Recording format WMA (Windows Media Audio) Input level –70 dBv Sampling frequency ST HQ mode: 44.1 kHzHQ mode: 44.1 kHzSP mode: 22 kHzLP mode: 8 kHz Overall frequency response ST HQ mode: 100Hz to 15 kHzHQ mode: 100Hz to 12 kHzSP mode: 100Hz to 5 kH...
Page 86 - Common Specifications; Built-in ø18 mm round dynamic speaker
86 7 Common Specifications Recording medium Built-in NAND FLASH memory1 GB (WS-320M)512 MB (WS-310M)256 MB (WS-300M) Speaker Built-in ø18 mm round dynamic speaker MIC jack ø3.5, impedance 2k Ω EAR jack ø3.5, impedance 8 Ω or more Maximum working output (3 V DC) 70 mW or more (8 Ω speaker) Input powe...
Page 87 - Technical Assistance And Support
87 7 Technical Assistance And Support The following is contact information for technical support for Olympus recorders and software only. ◆ Technical Hotline Number in the U.S. and Canada1-888-553-4448 ◆ User Support E-mail address in the U.S. and [email protected] ◆ Technical Hotline Number ...


 Olympus VN-4100(PC) User Manual
 Olympus VN-5500 User Manual
 Olympus W-10 Manual
 Olympus WS-100 Manual
 Olympus DM-20 Manual
 Olympus DM-550 Manual
 Olympus DM-901 Manual
 Olympus DR-2100 User Manual
 Olympus DS-30 Manual
 Olympus DS-40 Manual
 Olympus DS-50 Manual
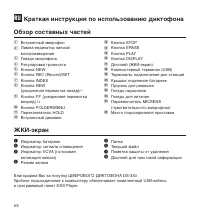 Olympus DS-330 Manual
 Olympus DS-3500 Manual
 Olympus DS-7000 Manual