Page 2 - Trademarks; Introduction
2 Introduction ● The contents of this document may be changed in the future without advanced notice.Contact our Customer Support Center for the latest information relating to product namesand model numbers. ● The utmost care has been taken to ensure the integrity of the contents of this document. In...
Page 3 - INDEX
3 INDEX 1 2 6 8 10 3 5 7 9 12 11 Table of Contents Safe and Proper Usage 4 Getting Started About Recording About Playback Erase and other functions Display and Sound Functions Menu Setting Using the Recorder on Your PC Managing Files on Your PC DSS Player Expanded Functions Importing content for lis...
Page 4 - Table of Contents; Getting Started
4 Table of Contents Introduction ............................................... 2INDEX ...................................................... 3Table of Contents ...................................... 4Safe and Proper Usage ............................ 6General Precautions .............................
Page 5 - Importing Content for Listening on the; Enjoy Audible Content
5 7 Using the Recorder on Your PC Saving Files in Your PC .......................... 96Using DSS Player Software .................... 98Installing Software ................................ 100Uninstalling Software ............................ 103Using Online Help ................................. 10...
Page 6 - General Precautions; Avoid strong vibrations or shocks.
6 General Precautions Safe and ProperUsage Before using your new recorder, read thismanual carefully to ensure that you knowhow to operate it safely and correctly.Keep this manual in an easily accessiblelocation for future reference. • The warning symbols indicate important safety related informatio...
Page 7 - Batteries; Warning; • Batteries should never be exposed to
7 General Precautions ● D o n o t o p e r a t e t h e u n i t w h i l eo p e r a t i n g a v e h i cl e ( s u c h a s abicycle, motorcycle, or go-cart). ● Keep the unit out of the reach ofchildren. <Warning regarding data loss> Recorded content in memory may bed e s t r o y e d o r e r a s e d...
Page 8 - AC Adapter; • Do not attempt to disassemble, repair; In case; do not touch any of the exposed parts
8 General Precautions AC Adapter Warning • Do not attempt to disassemble, repair or modify the AC adapter in any way. • Keep foreign objects including water, metal, or flammable substances fromgetting inside the product. • Do not moisten the AC adapter or touch it with a wet hand. • Do not use the A...
Page 9 - It uses a removable stereo microphone.; Getting Started
9 1 This product is equipped with the followingfeatures. Main Features Main Features ● This “IC recorder” is optimally suited forplaying back audio recordings, such asconferences or business scenes, languagestudies, Podcasts, and other audible content.The recorder stores highly compressedWMA (Window...
Page 11 - Identification of Parts
11 1 Identification of Parts Identification of P arts e = - ) q w ^ % $ &* ( 1 3 4 5 # ! 0 @ 6 7 8 2 9 # FOLDER / button $ VOLUME ( + ) button % 9 (Fast Forward) button ^ VOLUME ( - ) button & 0 (Rewind) button * OK/MENU button ( ERASE button ) EAR (Earphone) jack - MIC SENSE(MicrophoneSensi...
Page 12 - Clip
12 1 t r y r MIC (Microphone) jack t REC/STOP switch y Clip Identification of P arts 1 Folder name indicator 2 Erase lock indicator 3 Current file number 4 Play position bar indicator 5 Total number of recorded files in the folder 6 Record mode indicator 7 Character information display 8 Icon displa...
Page 13 - Inserting Batteries; POWER; When
13 1 Inserting Batteries Inser ting Batteries 1 Lightly press down on the arrow and slide the battery cover open. 2 Insert two AAA alkaline batteries, observing the correct polarity. 3 Close the battery cover completely by pressing to the direction A , then sliding to the direction B . 4 Slide the P...
Page 14 - Using the AC Adapter
14 1 Notes • Be sure to stop the recorder before replacingthe batteries. Unloading the batteries while the recorder is in use may corrupt the file. If youare recording into a file and the batteries runout, you will lose your currently recorded filebecause the file header will not be able to close.It...
Page 15 - Power Supply; Turning On the Power; Power save mode
15 1 Power Supply When the recorder is not being used, turn the power off to reduce battery consumption to aminimum. Even if the power is turned off, existing data, mode settings, and clock settings willbe maintained. Turning On the Power While the recorder's power is off, slide the POWER/HOLD switc...
Page 16 - Set the recorder to HOLD mode; Exit HOLD mode; Notes
16 1 Set the recorder to HOLD mode Slide the POWER / HOLD switch to the HOLD position. After “Hold” appears on the display, therecorder is set to HOLD mode. Exit HOLD mode Slide the POWER / HOLD switch to the A position. HOLD If you bring the POWER/HOLD switch to the HOLD position,the current condit...
Page 17 - Follow the same steps by pressing the
17 1 Setting Time/Date (Time&Date) If you set the date and time beforehand, the information when the file is recorded is automatically stored for each file. Setting the date and time beforehand enables easier file management. 1 Press the 9 or 0 button to select the item to set. Select the item f...
Page 18 - Changing the Time/Date
18 1 1 Press the + or – button in the menu screen, and select the “Time&Date”. See P91, 93 regarding the menu. 2 Press the OK or 9 button. The Time/Date screen appears. The hourindicator flashes, indicating the start of theTime/Date setup process.The following stepsare the same as Step 1 through...
Page 19 - Notes on the Folders; “Audible” folder can be purchased from an Audible web site (
19 1 Notes on the Folders There are a total of eight folders in the recorder that are in a tree format. Under the “Root” folderare “Folder A” through “Folder E”, “Audible” and “Music” folders, and recorded or transferredlanguage and music data from a computer can be saved as “files”. “Folder A” thro...
Page 20 - Selecting the Folders and Files; Press the FOLDER button to switch folders
20 1 Notes on the Folders Notes on the Folder s Selecting the Folders and Files List display The folders and files recordedin this recorder are displayed. File display Information of the selected file is displayed.Enters in playback standby mode. Upper (selected) folder Scroll bar(appears whenthe wh...
Page 21 - How to select a folder and file
21 1 Notes on the Folder s How to select a folder and file You can select a desired folder and file even without using the Folder button or the Podcastbutton. Selecting“Folder A” folder Selecting“DS500001” file If a folder or file isselected with theOK button,playback will begin. If a folder or file...
Page 23 - Before recording; About Recording; Stereo recording using the exclusive stereo microphone
23 2 Before recording 2 About Recording This recorder offers a wide range of recording options by using the exclusive stereo microphone, built-in monaural microphone, and exclusive remote control (provided with the DS-50 only). Choose a recording method according to your need. Bef ore recor ding Ste...
Page 24 - Use the remote control for operation; Use it as a remotely controlled stereo microphone
24 2 Before recording Bef ore recor ding Use the remote control for operation Plug the exclusive remote control into the recorder's MIC/REMOTEjack to use the remote control to operate the recorder. Connect the exclusive remote control to the recorder'sMIC/REMOTE jack. ➥ Use the REC/STOP switch on th...
Page 25 - FOLDER; STOP; Recording
25 2 Recor ding 1 Press the FOLDER button to choose a folder in which to make a recording. Every time the FOLDER button ispressed,folders will switch( ☞ P20). 2 Press the REC button to start recording. The record/play indicator light glows red.Turn the microphone in the direction of thesource to be ...
Page 27 - Listening While Audio is Recorded; Connect the earphone to the EAR jack on the recorder.; After recording has started, you can hear the sound being
27 2 To EAR(earphone)jack Recor ding Recording Listening While Audio is Recorded If you start recording after inserting the earphone into the EAR jackon the recorder, you can hear the sound being recorded. The soundvolume on the recording monitor can be adjusted by pressing theVOLUME (+) or VOLUME (...
Page 28 - Using the Variable Control Voice Actuator (VCVA); MENU; The VCVA setup process begins.; On; OK; If the; button to close the menu screen.
28 2 Using the Variable Control Voice Actuator (VCVA) When the microphone senses that sounds have reached a preset threshold volume level, thebuilt-in Variable Control Voice Actuator (VCVA) starts recording automatically, and stops whenthe volume drops below the threshold level.The VCVA feature exte...
Page 29 - R E C; Using the Variable Control Voice Actuator(VCVA)
29 2 7 P r e s s t h e R E C b u t t o n t o s t a r t recording. When the sound volume is lower than the presetthreshold sound level, recording automaticallystops after 1 sec approximately, and “Standby”flashes on the display. The record/play indicatorlight glows red when recording starts and flash...
Page 30 - The recording mode setup process begins.
30 2 Recording Modes (Rec Mode) 1 While the recorder is stopped, press the MENU button for 1 second or longer. “Rec Mode” will be displayed on the screen( ☞ P91, 93). 2 Press the OK or 9 button. The recording mode setup process begins. 3 Press the + or – button to choose from “ST XQ”, “ST HQ”, “HQ”,...
Page 31 - Microphone Sensitivity; Microphone sensitivity is adjustable to meet recording needs.; Highest recording sensitivity
31 2 Micr ophone Sensitivity Microphone Sensitivity Microphone sensitivity is adjustable to meet recording needs. .................................................................................................................................................. Notes • When the speaker's voice is to ...
Page 32 - The Low Cut Filter setup process begins.; If it is set to “On”, will appear on the display.
32 2 Set the Low Cut Filter (LowCut Filter) Set the Lo w Cut Filter The recorder has a Low Cut Filter function to minimize low-frequency sounds and recordvoices more clearly. This function can reduce noise from air conditioners, projectors andother similar noises. 1 While the recorder is stopped ord...
Page 33 - Press the; button to close the; Recommended settings by recording condition
33 2 Conferences with large crowds and lectures in large rooms Meetings and business negotiations with a small number of people Dictation with a lot of background noise Music playing, wild birds singing, and railway sounds Dictation in a quiet environment Recoding Modes STXQ STXQ, STHQ STXQ, STHQ, H...
Page 34 - Recording with External Microphone; Applicable External Microphones (optional); Recording from External Microphone or Other Devices
34 2 The external microphone and other devices can be connected and the sound can be recorded.Connect as follows by the device to be used. Recor ding fr om External Micr ophone or Other De vices Recording with External Microphone Connect an external microphone to the MIC jack of therecorder or the e...
Page 36 - The timer recording setup process begins.
36 2 Timer Recording (Timer Rec) Timer Recor ding Timer recording is the function to execute a recording at a set time. You can program up tothree desired settings (Preset 1-3) (“On/Off”, “Day”, “Time”, “Rec Mode”, “Folder”, and “MicSense”). 1 While the recorder is stopped, pressthe MENU button for ...
Page 39 - Completing the setting.; Press the + or – button to choose “Finish”.
39 2 8 Completing the setting. 1 Press the + or – button to choose “Finish”. 2 Press the OK button to complete thesetup screen. Programmed settings will be applied and thescreen will return to the preset numberselection menu. If the On/Off setting is setto On, and (Timer indicator) will appear on th...
Page 41 - Playing; About Playback
41 3 1 Press the FOLDER button to choose a folder. Every time the FOLDER button is pressed, itcycles through folders and the List display willappear ( ☞ P20). 2 Press the + or – button to choose the file that you want to play. If the 9 button is pressed, the File display will open.In the File displa...
Page 42 - PLAY; You can change the display patterns (
42 3 Playing 3 Press the PLAY or OK button to start playback. The record/play indicator light glows green.For files created using machines other thanthis recorder, the file format will appear on thedisplay. ....MP3 files ....WMA files a Play position bar indicator b Current playback time c File name...
Page 43 - Forwarding; Rewinding
43 3 Forwarding Press and hold the 9 button while the recorder is stopped. ➥ If you release the button, it will stop. Pressthe PLAY or OK button to start playing backfrom where it was stopped. a File length Press and hold the 9 button while playing a file. ➥ When you release the 9 button the recorde...
Page 44 - Locating the Beginning of the File
44 3 Pla ying Playing Locating the Beginning of the File Press the 9 button during playback, slow playback, or fast playback. ➥ The next file is cued and playback starts at the previously setspeed. Press the 0 button during playback, slow playback, or fast playback. ➥ The file being played is cued a...
Page 45 - Playback Through Earphone
45 3 Playing Pla ying Playback Through Earphone An earphone can be connected to the EAR jack of the recorder forlistening. ➥ When the earphone is used, the recorder speaker will beswitched-off. ....................................................................................................... No...
Page 47 - Note
47 3 Set Skip Space (Skip Space) Set Skip Space .................................................................................................................................................. Note • If there is an index mark/temp mark or a cue closer than the skip space, the recorder will forward...
Page 48 - Change playback speed; P r e s s t h e; Change playback speed setting
48 3 Changing the Playback Speed (Play Speed) The playback speed of the file can be changed between 0.5 and 1.5 times speed in incrementsof 0.125. Change the speed according to need such as listening to meeting content at a fastspeed or reviewing spots that you couldn't catch in a language lesson at...
Page 49 - The playback speed setup process begins.
49 3 2 Press the + or – button to choose “Play Speed”. 3 Press the OK or 9 button. The playback speed setup process begins. 4 Press the + or – button to choose between “S. Play” and “F. Play”. 5 Press the OK or 9 button. Start setting each of “S. Play” and “F. Play”. 6 Press the + or – button to set...
Page 51 - A l l R e p e a t (
51 3 Select Pla y Mode Select Play Mode (Play Mode) 1 While the recorder is stopped orduring playback, press the MENU button for 1 second or longer. The menu opens ( ☞ P91,93). 2 Press the + or – button to choose “Play Mode”. 3 Press the OK or 9 button. Start setting a play mode. a Current play mode...
Page 52 - button to
52 3 Select Pla y Mode 5 Press the OK button to complete the setup screen. If the 0 button is pressed, the setting will be canceled and it will return to the menu. 6 Press the STOP button to close the menu. If the recorder goes to the menu screenduring playback, press the 0 button to close the menu ...
Page 53 - How to begin segment repeat playback
53 3 1 Choose a file that contains a segmentyou want to play back repeatedly, andpress the PLAY or OK button. File playback begins. 2 Press the button at the point you w a n t t o s t a r t s e g m e n t r e p e a tplayback. “ End?” will flash on the display. Even while “ End?” is flashing, changing...
Page 55 - The noise cancel setup process begins.
55 3 1 While the recorder is stopped or during playback, press the MENU button for 1 second or longer. The menu opens ( ☞ P91,93). 2 Press the + or – button to choose “Noise Cancel”. 3 Press the OK or 9 button. The noise cancel setup process begins. 4 Press the + or – button to choose between “High”...
Page 56 - button to close the menu
56 3 6 Press the STOP button to close the menu. If the recorder goes to the menu screen duringplayback, press the 0 button to close the menu screen. The will appear on the display. a Noise Cancel indicator .................................................................................................
Page 59 - The alarm playback setup process begins.
59 3 Alarm Playback Function (Alarm) The alarm playback function can be set to play a selected file at a pre-set time.You can program up to three desired settings (Preset 1-3) (“On/Off”, “Day”, “Start Time”,“Volume”,“Alarm” and “Playback File”). Alarm Pla ybac k Function 1 While the recorder is stop...
Page 63 - The “Cancel” indicator flashes.; Erasing One File at a Time; A selected file can be erased from a folder.; Erase and other functions
63 4 1 Press the FOLDER button to choose a folder. Every time the FOLDER button is pressed, itcycles through folders and the List display willappear ( ☞ P20). 2 Press the + or – button to choose the file you want to erase. 3 Press the ERASE button. The “Cancel” indicator flashes. 4 P r e s s t h e +...
Page 64 - Erase All Files from a Folder
64 4 Erasing Erase All Files from a Folder All files in a folder can be erased simultaneously.The locked files ( ☞ P.68) and the files set to read-only on the PC will not be erased. 1 2 4 3 1 Press the FOLDER button to select the folder in which you want to eraseall files. 2 Press the ERASE button t...
Page 66 - Index Marks and Temp Marks; Setting an Index Mark or a Temp Mark
66 4 1 P r e s s t h e I N D E X bu t t o n d u r i n g recording or playing to set an indexmark or temp mark. A number appears on the display and anindex mark or temp mark will be placed.Even after an index or temp mark is placed,recording or playback will continue so youcan place index or temp mar...
Page 67 - ERASE; The index or temp mark is erased.; Clearing an Index Mark or a Temp Mark; Follow the procedures below to erase index or temp marks.
67 4 Index Marks and Temp Marks Inde x Marks and T emp Marks .................................................................................................................................................. Notes • Up to 16 index and temp marks can be set in a file. If you try to place more than 16...
Page 68 - The file locking setup process begins.
68 4 Locking Files (Lock) Loc king Files 1 Press the FOLDER button to choose a folder. 2 Press the + or – button to choose the file you want to lock. 3 Press the hold the MENU button for 1 second or longer. The menu opens ( ☞ P91,93). 4 Press the + or – button to choose “Lock”. 5 Press the OK or 9 b...
Page 70 - The folder name setup process begins.
70 4 Changing Folder Names (Folder Name) You can change the folder names of Folder A to Folder E for audio recording into names preset in the template (such as “Meeting”, “To Do”, and “Memo”). You can also change folder namesregistered in the template with DSS Player ( ☞ P116). 1 While the recorder ...
Page 72 - Show files in the current folder in a list.
72 4 Rearranging files (File Move) You can move a file in a folder to change the order of playback. First select the folder (file) forwhich you want to change the playback order. 1 Press the FOLDER button to choose a folder. 2 Press the hold the MENU button for 1 second or longer. The menu opens ( ☞...
Page 74 - If the recorder is formatted, data for guidance (
74 4 1 While the recorder is stopped, pressthe MENU button for 1 second or longer. The menu opens ( ☞ P91,93). 2 Press the + or – button to choose “Format”. 3 Press the OK or 9 button. The “Cancel” indicator flashes. 4 Press the + button to choose “Start”. Formatting the Recorder (Format) If you for...
Page 75 - “Format Done” displays when formatting ends.
75 4 5 Press the OK button. After the “Data Will Be Cleared” message ison for two seconds, “Cancel” will turn on. 6 Press the + button again to choose “Start”. 7 Press the OK button. Formatting begins and an indicator flasheson the display. “Format Done” displays when formatting ends. { Formatting t...
Page 77 - The USB class setup process begins.
77 4 Changing the USB Class (USB Class) Changing the USB Class When using this recorder as a USB microphone or USB speaker in the voice recognitionsoftware or other applications, it is necessary to set the USB class of this recorder to “AudioClass”. By using the USB microphone function, it enables e...
Page 78 - The power save setup process begins.; You can exit power save mode by pressing any button.
78 4 Changing Power Save (Power Save) Changing P o wer Sa ve If the recorder is on and stops for 10 minutes or longer (default), the display shuts off and itgoes into power save mode. You can set the time to enter power save from among “5 min”,“10 min”, “30 min”, “1 hour”, and “Off”. 1 While the rec...
Page 79 - The external input setup process begins.
79 4 Changing External Input Setting (Ext. Input) Changing External Input Setting This recorder is designed to recognize microphone jack conditions (including if a exclusivestereo microphone or a exclusive remote-control stereo microphone is plugged in) for properrecording according to recording mod...
Page 81 - You can check the recorder's information on the menu screen.; or
81 4 3 Viewing system information (System Info.) You can check the recorder's information on the menu screen. 1 While the recorder is stopped, press the MENU button for 1 second or longer. The menu opens ( ☞ P91,93). 2 Press the + or – button to choose “System Info.”. 3 Press the OK or 9 button. “Ca...
Page 82 - *If there is a long file name, scroll to the side to show all of it.; Display and Sound Functions; LCD Display Information; While in stop or playback mode; Time stamp
82 5 LCD Displa y Inf ormation *If there is a long file name, scroll to the side to show all of it. 5 Display and Sound Functions LCD Display Information The LCD screen on the recorder can display 3 different format of information by pressing theDISPLAY button. This help review and confirm different...
Page 83 - While in record mode; Remaining; While recording in VCVA mode; Displays
83 5 While in record mode Displays 1 and 2 alternately. 1 Remaining memorybars/recording time/Recording level meter Current elapsed recordingt i m e i s d i s p l a y e d i ni n c r e m e n t a l f i g u r e s ,w h e r e a s t h e r e m a i n i n gm e m o r y a n d a u d i o i n p u tl e v e l s a r...
Page 86 - The contrast setup process begins.; Display contrast can be adjusted in 12 levels.
86 5 1 While the recorder is stopped, pressthe MENU button for 1 second or longer. The menu opens ( ☞ P91,93). 2 Press the + or – button to choose “Contrast”. 3 Press the OK or 9 button. The contrast setup process begins. 4 Press the + or – button to set the contrast level. You can adjust the LCD di...
Page 87 - The voice guide setup process begins.
87 5 1 While the recorder is stopped, pressthe MENU button for 1 second or longer. The menu opens ( ☞ P.91,93). 2 Press the + or – button to choose “Voice Guide”. 3 Press the OK or 9 button. The voice guide setup process begins. 4 Press the + or – button to select the item to set. Select items you w...
Page 91 - Setup using a tab; Menu Setting; Menu Setting Method
91 6 1 While the recorder is stopped, pressthe MENU button for 1 second or longer. The menu opens ( ☞ P93). Menu items can be set during a recording orplayback ( ☞ P96). 2 Press the + or – button to move to the item to be set. Setup using a tab 1 Press the 0 button for each item to move to a tab. a ...
Page 92 - Moves to the setting of the selected item.
92 6 3 Press the OK or 9 button. Moves to the setting of the selected item. 4 Press the + or – button to change the setting. 5 Press the OK button to complete the setup screen. If the 0 button is pressed, the setting will be canceled and it will return to the menu. 6 Press the STOP button to close t...
Page 96 - Using the Recorder on Your PC; Saving Files in Your PC; Precautions on using the recorder connected to a PC
96 7 7 Using the Recorder on Your PC Saving Files in Y our PC Saving Files in Your PC By being connected to a PC, the recorder enables you to do the following: • Playback voice files on your PC. Audio files recorded using the recorder can be played using the DSS Player software included on the provi...
Page 97 - drive is shown as Read-only by the operating system of the PC.
97 7 Saving Files in Y our PC ● Data can be written or uploaded to the recorder even though the attribute of the recorder drive is shown as Read-only by the operating system of the PC. ● As the noise may cause adverse effects on electronics devices nearby the recorder, unplug the earphone when you c...
Page 98 - Using DSS Player Software; Basic Operating Environment of DSS Player
98 7 Using DSS Pla yer Software Using DSS Player Software Basic Operating Environment of DSS Player PC: OperatingSystem: CPU: RAM: Hard drive space: Drive: Sound card: Browser: Display: USB port: Audio I/Oterminals: Others: I BM PC/AT compatible PC Microsoft Windows 2000 Professional/XPProfessional,...
Page 100 - Inser t DSS Player into the CD-; T h e i n s t a l l a t i o n p r o g r a m w i l l s t a r t; software from the included Software CD.; Applications included with “DSS Player”; T h e i n s t a l l a t i o n L a n g u a g e; Click the desired language to select it.
100 7 1 Inser t DSS Player into the CD- ROM drive. T h e i n s t a l l a t i o n p r o g r a m w i l l s t a r t automatically. Once the program starts, jump to step 4. If it does not, follow the procedures in steps 2 and 3. 2 Click the [start] button and select [Run]. 3 Enter “D:\setup.exe” in the ...
Page 101 - Installing DSS Player; Register user information.; Select a program menu folder.; C o n f i r m a l l “ C u r r e n t S e t t i n g s ” . To; To change the program menu folder
101 7 Installing Software Installing DSS Player 5 Register user information. Enter your name, company name andserial number. For the serial number,see the label attached to the CD-ROMpackage provided with DSS Player.When entered, click [Next]. When theconfirmation dialog appears, click[Yes]. 6 Confi...
Page 102 - Installing the Device Driver
102 7 Installing Software Installing the Device Driver 11 Connect the recorder to yourPC, referring to “Connecting toYour PC” ( ☞ P105). When you connect the recorder toyour PC for the first time after installingDSS Player, the recorder’s driver willbe installed automatically. If the driveris instal...
Page 103 - follow the steps below.; Confirmation of Deleting the; An additional message may appear, if; When the [Maintenance; The voice files you made are stored in the
103 7 1 Exit DSS Player. 2 Select [Control Panel] from [start] menu. 3 Click [Add/Remove programs] in the control panel window. 4 A list of applications that have been installed is displayed. 5 Click [Change/Remove]. To uninstall any of the software component of the DSS player software installed on ...
Page 104 - Search by Contents; i c o n o f t h e d e s i r e d; The title of the topic is displayed.; Double-click the icon of the desired topic.; An explanation of the topic is displayed.; To open Online Help, you have the following options.; Search by Key word; Matching keywords are located automatically.
104 7 Search by Contents 1 Once the Online Help screen appears, clickthe Contents tab. 2 Double-click the i c o n o f t h e d e s i r e d topic heading. The title of the topic is displayed. 3 Double-click the icon of the desired topic. An explanation of the topic is displayed. Using Online Help To o...
Page 105 - r e c o r d e r i f t h e U S B c a b l e i s; Connecting to Your PC; Connecting to your PC using the USB cable
105 7 1 Turn the recorder's power ON. 2 Connect the USB connection cable to the USB port or the USB hub of the PC. 3 Confirm that the recorder has stopped and connect a USB cable to the connection port on the side of recorder. “Remote (Storage)” is displayed on r e c o r d e r i f t h e U S B c a b ...
Page 106 - Disconnecting from Your PC; Click the; The drive letter will differ; Disconnect the USB cable.
106 7 Disconnecting from Your PC 1 Click the on the task bar located at the lower-right corner of the screen. Click [Safely Remove Hardware]. The drive letter will differ depending on the PC being used. 2 Disconnect the USB cable. Connecting to Your PC ..................................................
Page 107 - Disabling automatic start; Right click on the; The application which enables setting will be displayed; T h e c h e c k m a r k o n [ D S S P l a y e r Ve r s i o n 7 ]; Running DSS Player
107 7 Disabling automatic start 1 Right click on the of the taskbar on the lower right of the screen, and select [Setting]. The application which enables setting will be displayed by dialog. 2 Click the of the [DSS Player Version 7]. T h e c h e c k m a r k o n [ D S S P l a y e r Ve r s i o n 7 ] d...
Page 108 - Play Control Bar
108 7 Windo w Names (DSS Pla y er) Window Names (DSS Player) 1 Play Control Bar Control buttons to play and stop voice files. 2 Dictation Folder Window Will display the directory structure of the DSS, WMA, MP3, WAVE-format files stored on your PC’s hard disk. 3 Device Manager Window Will display the...
Page 109 - Managing Files on Your PC; Download Voice Files from the Recorder; Download Selected Files; Select the voice file.
109 8 8 Managing Files on Your PC Download Voice Files from the Recorder 1 2 Download V oice Files fr om the Recor der There are 3 download options to transfer voice files from the recorder to the PC: • Download Selected Files Download one or several voice files to your PC. • Download Folders Downlo...
Page 110 - Download the voice file.; Do not disconnect the USB cable while the
110 8 3 Download the voice file. From the [Download] menu, click [Download Selected Files]. 4 Download complete. Do not disconnect the USB cable while the record/play indicator light on the recorder is flashing. Disconnecting the USB cable when the recorder lamp is flashing will result in data loss ...
Page 111 - Play a Voice File; File name
111 8 1 Select the folder. Select the folder that contains the voice file you would like to play. 2 Select the voice file. Select the voice file to play from the Voice File List Box. 3 Play the voice file. Click the (play) button of the Play Control Bar. Other playback control such as Rewind, Fast F...
Page 112 - Upload Voice Files to the Recorder
112 8 Upload Voice Files to the Recorder DSS Player has a feature to enable you to upload files from your PC to the recorder. 1 Select the folder. Select the folder that contains the voice file to upload from the Dictation Folder window. 2 Select the voice file. Select the voice file to upload from ...
Page 114 - Send Voice Files with E-mail; by attaching it to E-mail, select the file from the Message folder.; Changing User ID; Enter the user ID in the [Transfer User ID]; The new user ID will be transferred to the Digital
114 8 Send Voice Files with E-mail Audio files are stored in the Message folder on the hard disk. If you want to send a voice file by attaching it to E-mail, select the file from the Message folder. The Message folder location can be found from the [Tools] menu, [Options], and then “Download folder”...
Page 115 - Changing a Folder Name; Changing a folder name in the Voice Folder window; Editing File Comments
115 8 Changing a Folder Name/Editing File Comments Changing a Folder Name Changing a folder name in the Voice Folder window You can change a folder name using the [Rename Folder] command from the [Edit] menu. A folder name can be up to 20 characters long and cannot use \ /:*?"<>|. Changing...
Page 116 - Editing a Template
116 8 Editing a Template Templates of folder name that have been registered on the recorder can be changed on the “Edit & Upload Templates” screen. Select [Edit & Upload Templates] from [Download] to open the [Edit and Upload Template]window. The maximum number of characters that can be ente...
Page 117 - Copying Voice Guide Data; DSS Player to the recorder.; Make sure that the recorder's voice guide is set to “On”.; If the recorder does not have voice; Copy voice guide data.; v o i c e g u i d e d a t a , a n d a w i n d o w; Copying of the voice guide data
117 8 Copying Voice Guide Data If you format the recorder and erase data by mistake, you can copy the voice guide data from DSS Player to the recorder. 1 Make sure that the recorder's voice guide is set to “On”. If the recorder's voice guide is set to “Off” the voice guide data cannot be copied. 2 C...
Page 118 - USB Microphone/USB Speaker; Audio set up; Uses as a USB Speaker; the output destination.
118 8 USB Microphone/USB Speaker It is possible to use the recorder as a USB microphone or speaker with the DSS Player, to insert/add/overwrite recordings onto voice files downloaded onto a computer, or to save new recordings directly onto a computer. In addition, it is also possible to operate the ...
Page 119 - Uses as a USB microphone; Windows XP
119 8 USB Microphone/USB Speaker Uses as a USB microphone When the recorder is used as a USB microphone, it can used to make recordings with the DSS Player, and can also be used to input data on a computer using voice recognition software or other applications. When using the recorder as a USB micro...
Page 120 - Purchase and Upgrade; Start the DSS Player.; DSS Player Expanded Functions; Plus
120 9 The “DSS Player” enables upgrades (Options) to the “DSS Player Plus” which is equipped with more functions. In addition to the DSS Player functions, voice recognition using voice recognition software, joining of files, sharing of files and the menu setting of this recorder can be utilized. Pur...
Page 121 - The “Upgrade to DSS Player Plus” dialog; dialog, enter the license number of; When starting the application next time,; Upgrading to DSS Player Plus
121 9 3 Select [Upgrade to DSS Player Plus] from the [Help] menu. The “Upgrade to DSS Player Plus” dialog will be displayed. 4 In the [Upgrade to DSS Player Plus] dialog, enter the license number of your purchase , and click the [OK] button. When starting the application next time, DSS Player will b...
Page 122 - Using Voice Recognition Software
122 9 In conjunction with “ViaVoice” or “Dragon NaturallySpeaking”by Nuance Corp. Which are on the market, the files recorded in this recorder can be transferred to a computer and converted to text. Please see the instruction manual for the voice recognition software for details. The voice recogniti...
Page 123 - Voice Recognition in ViaVoice (Audio set up); Connect the recorder to your PC, and start the DSS Player Plus.; Follow the procedure in P77 to change the recorder to Audio Class.; F r o m t h e [ I B M V i a Vo i c e; The ViaVoice User Wizard window
123 9 Voice Recognition in ViaVoice (Audio set up) When the DSS Player Plus and Nuance’s voice recognition software “ViaVoice” are used together, execute the setting in the following procedure to record the voice accurately, acquired from the built-in microphone or speaker. 1 Connect the recorder to...
Page 124 - P r o c e e d w i t h t h e AU D I O S e t u p; During audio setup, enrollment, please input
124 9 Using Voice Recognition Software Using V oice Recognition Software 7 Select a sound card. When the [Selecting a Sound Card] window appears, select [USB Audio Device] for [Input] and follow the instructions on screen. ( S e l e c t [ M i c r o p h o n e C o n t r o l ( D V R ) ] f o r Windows X...
Page 125 - Voice Recognition in Dragon NaturallySpeaking (Training); Startup Dragon NaturallySpeaking.; [Dragon NaturallySpeaking; *If the user is already registered in Dragon; Description of Wizard.; Description of this wizard will be displayed.
125 9 Voice Recognition in Dragon NaturallySpeaking (Training) When the DSS Player Plus and Nuance’s “Dragon NaturallySpeaking” are used together, create the user in “Dragon NaturallySpeaking” in advance. It is necessary to execute the training. By executing the training, the features of your voice ...
Page 126 - Recording Training Text.
126 9 Using Voice Recognition Software Using V oice Recognition Software 5 Recording Training Text. Follow the instructions on the screen, and record the training text to this recorder. At this time, record with any one of, “ST XQ”, “ST HQ”,“HQ” “SP” for the recording mode, and “DICT” for the microp...
Page 127 - Executing Voice Recognition; be converted to text is stored.; From the Voice File List Box, select the; Start of voice recognition.; displays
127 9 Executing Voice Recognition DSS Player Plus can easily access ViaVoice and Dragon NaturallySpeaking from the menu, and it enables text conversion of the file in the Voice File List Box. 1 Select the folder. From the Dictation Folder Window,select the folder in which the folder to be converted ...
Page 129 - Notes on Recording For Voice Recognition
129 9 Notes on Recording For Voice Recognition When recording voice to be processedwith voice recognition, set up yourr e c o r d e r a s f o l l o w s t o i m p r o v erecognition accuracy. • Set the microphone sensitivity to “DICT” ( ☞ P31). • Set the recording mode other than “LP” mode ( ☞ P30). ...
Page 130 - Joining Files
130 9 In DSS Player Plus, designated multiple voice files can be joined and one voice file can be created. 1 Select the folder. From the Dictation Folder Window, select the folder which contains the files to be joined. 2 Select the voice files. From the Voice File List Box, select more than one file...
Page 131 - Set the order of files.
131 9 Joining Files Joining Files 4 Set the order of files. After joining, the playback order of the files can be changed. Select a file, and move the file to its appropriate position in t h e o r d e r u s i n g t h e [ U p ] a n d [ D o w n ] buttons. 5 Input File Names. The file name is created a...
Page 132 - Select the folder containing the file to; Select the voice files.; Select one file to split from the Voice; press the button.; The setting dialog of the file to be split will; Splitting Files
132 9 Splitting Files One designated voice file can be split into the two files in DSS Player Plus. 1 Select the folder. Select the folder containing the file to b e s p l i t f r o m t h e D i c t a t i o n F o l d e r Window. 2 Select the voice files. Select one file to split from the Voice File L...
Page 133 - Set the split position.
133 9 Splitting Files Splitting Files 4 Set the split position. Press the button to playback the file, and press the button in the position to be divided. Also, the playback slider position in the time axis shows the current playback position, and also shows the split position (slide the playback sl...
Page 134 - screen in the computer.; S e l e c t [ C o n f i g u r e r e c o r d e r; Menu Setting of this Recorder
134 9 Men u Setting of this Recor der The menu setting of this recorder can be changed in the “Configure recorder menu” screen in the computer. 1 S e l e c t [ C o n f i g u r e r e c o r d e r m e n u ] f ro m t h e [ D ow n l o a d ] menu. T h e “ C o n f i g u r e r e c o r d e r m e n u ” dialog...
Page 135 - Importing Content for Listening on the Recorder; Import files using Windows Media Player
135 10 10 Importing Content for Listening on the Recorder Importing Content for Listening on theRecorder You can transfer language content and music files imported from language CDs and the Internet using Windows Media Player for playing on the recorder. You can also use DSS Player to import and enj...
Page 136 - Using Windows Media Player; Copyright and Copyright Protection Feature (DRM); By using Windows Media Player, music files
136 10 Using Windows Media Player Copyright and Copyright Protection Feature (DRM) By the Copyright Act, any voice/music files and music CDs downloaded from the Internetwithout the copyright holder ’s permission may not be reproduced, distributed, publicized/re-publicized on the Internet, or convert...
Page 138 - Copying Music from CD
138 10 1 I n s e r t C D i n t o t h e C D - RO M drive and start Windows Media Player. 2 From the Features taskbar, click the [Rip] menu. For Windows Media Player 9 From the Features taskbar, click the [Copy from CD] menu. 3 Click the [View Album Info]. If Internet connectivity is available, CD inf...
Page 139 - files from the CD to your PC, see “Copying Music from CD” (; Windows Media Player 10; The recorder is recognized as a Removable Disk.; Transferring Music File to the Recorder
139 10 You can transfer the music files saved in your PC to this recorder. For how to copy the music files from the CD to your PC, see “Copying Music from CD” ( ☞ P138). Windows Media Player 10 1 Connect the recorder to a PC and start Windows Media Player. 2 From the Features taskbar, click the [Syn...
Page 140 - Windows Media Player 9; The order of music pieces can be
140 10 Windows Media Player 9 1 Connect the recorder to a PC a n d s t a r t W i n d o w s M e d i a Player. 2 From the Features taskbar, click t h e [ C o py t o C D o r D ev i c e ] menu. 3 S e l e c t t h e p l a y l i s t t o b e transferred to the recorder and p u t t h e ch e ck m a r k s o n ...
Page 141 - Select the destination folder.; Please see “Folder” (; empty
141 10 5 Select the destination folder. Please see “Folder” ( ☞ P.19) about the folder composition of this recorder. To transfer to “Root” folder The empty column part of the item onthe device (Root of the drive) isselected. To transfer to “Music” folder Select the “Music” folder. Creating the“Artis...
Page 142 - Register a Podcast program; Open a web browser and go to a; Importing Podcast Content
142 10 By registering favorite programs in DSS Player, you can download the latest broadcasting content automatically. Also the new content can be transferred onto the recorder simply by connecting it to a computer. Register a Podcast program 1 Start DSS Player. 2 Open a web browser and go to a Podc...
Page 143 - Update a program; S e l e c t a p r o g r a m y o u w a n t t o; Updating program starts.
143 10 Importing Podcast Content Update a program By default, programs registered in DSS Player will be automatically updated. To change update intervals, go to [Tools] then [Options], and change them in the Options dialog's Podcast tab. See the Online Help for details ( ☞ P104). If you don't want t...
Page 144 - Download the Content; content you want to download.; Content downloading will start.; Download will complete.; Downloaded content can be played and
144 10 Download the Content By default, if new content is found when a program is updated, the latest content will be automatically downloaded. This setting can be changed by selecting [Tools] then [Options] and going to the Options dialog's Podcast tab. See the Online Help for details ( ☞ P104). If...
Page 145 - Transfer Content to the Rrecorder; S e l e c t t h e c o n t e n t yo u w a n t t o; Content transfer will start.; Transfer will complete.; indicating a completed transfer. Press
145 10 Transfer Content to the Rrecorder In the default setting, the content automatically transferred into the “Podcast” folder on the recorder when the recorder connects to a computer. This setting can be changed by selecting [Options] under [Extras], and by selecting the “Podcast” tab displayed o...
Page 146 - Installing AudibleManager; to the procedure described below.; Start up the downloaded executable; The AudibleManager Setup screen will be; Loading Audible Content; Use the AudibleManager to load Audible content onto the recorder.
146 11 Installing AudibleManager When AudibleManager is not installed on a computer, install the AudibleManager according to the procedure described below. 1 Access one of Audible web sites from the web browser and download the AudibleManager. http://www.audible.com/ (United States) http://www.audib...
Page 147 - Adding Device to AudibleManager; the AudibleManager. Follow the procedure described below.; S e l e c t [ A d d N e w D e v i c e ] i n t h e; When the “Audible Manager License; Wait until process has been completed.
147 11 Adding Device to AudibleManager If AudibleManager has already been installed, add a device in order to handle the recorder in the AudibleManager. Follow the procedure described below. 1 S e l e c t [ A d d N e w D e v i c e ] i n t h e [Devices] menu. 2 When the dialog box displays, verify th...
Page 148 - Purchasing Audible Content; When the dialog box is displayed, check
148 11 Purchasing Audible Content Audible content can be purchased from the Audible web site. Access to the Audible web site using web browser and download the content by following the purchase procedures described on the web site. With the existing setting, content downloads to the Library folder i...
Page 149 - A list of content stored in the “Library” displays on the right side.; Transferring Audible Content; procedure described below.
149 11 1 Connect the recorder to a computer. 2 Select “Library” in the “Audible Folders” tree listing. A list of content stored in the “Library” displays on the right side. 3 Select the content to be transferring to the recorder and click the [Add to Device] button. 4 When the "Activate Your Dev...
Page 150 - Wait until the transfer of the content has been
150 11 Transferring Audible Content T ransf erring A udib le Content 5 The transfer begins. Wait until the transfer of the content has been completed. When it has been completed, the t r a n s f e r r e d c o n t e n t i s d i s p l a y e d i n t h e c o n t e n t s l i s t i n g o f t h e d e v i c...
Page 151 - Enjoy Audible Content with the Recorder; Audible Mode; File Display Screen in Audible Mode
151 11 Enjo y A udib le Content with the Recor der Enjoy Audible Content with the Recorder Audible content that has been transferred into the “Audible” folder on the recorder from a computer can be enjoyed with an exclusive mode optimally suited for the operation of Audible content. Audible Mode Whe...
Page 152 - Playback Position and Section; where the content distributor has preset the position.; Playback Position; Section; for each file by the distributor of the content.
152 11 Enjo y A udib le Content with the Recor der Enjoy Audible Content with the Recorder Playback Position and Section In the Audible mode, the starting position can be moved easily by referring to the “Playback Position,” which is the positional information stored from previous stops for each fil...
Page 153 - Enjoy Audible Content with Recorder; Operating Recorder in Audible Mode
153 11 Enjoy Audible Content with Recorder Forwarding Press and hold the 9 button while the recorder is stopped. ➥ When the button is released fast forwarding stops. The PlaybackPosition is not updated. When the PLAY or OK button is pressedplayback resumes from that position. Press and hold the 9 bu...
Page 154 - File Skip and Section Skip; Setting menu during playback
154 11 Enjoy Audible Content with the Recorder File Skip and Section Skip Press the 9 button while the recorder is stopped. ➥ The recorder skips to a playback position or the starting positionof a section, whichever is closer in the file, and stops.After a stop position, if there is no playback posi...
Page 155 - and upload data stored on your PC to the memory.; Example: Copying Data from PC to Recorder using Explorer; The product’s name is displayed.; Unplug the recorder from a computer.; Other Practical Use Methods
155 12 Using as External Memory of the Computer With the recorder connected to your PC, you can download data from the memory to your PC and upload data stored on your PC to the memory. Example: Copying Data from PC to Recorder using Explorer 1 Start Windows. 2 Connecting the recorder to your PC. Fo...
Page 156 - Alarm Message List; Other Information; Meaning
156 13 Alarm Messa g e List Alarm Message List 13 Other Information Meaning Low batterypower Erase-locked Index full Tempmark full Not an audio-recordingfolder. Folder full Error in theinternalmemory Illegally copiedfile Zeroremainingmemory No file Formattingerror Themanagement filecannot becreated....
Page 157 - Action; Troubleshooting; Symptom; Probable cause
157 13 Action Verify polarity is correct. Replace with new batteries ( ☞ P13). Turn the power on.( ☞ P15). Turn the power on.( ☞ P15). Release the recorder from HOLD( ☞ P16). Replace with new batteries ( ☞ P13). Erase unnecessary files ( ☞ P63). Check another folder. Unplug the earphones to use the ...
Page 160 - Built-in ø23 mm round dynamic speaker; Specifications
160 13 Specifications Recording format WMA (Windows Media Audio) Input level –70 dBv Sampling frequency STEREO XQ mode: 44.1 kHzSTEREO HQ mode: 44.1 kHzHQ mode: 44.1 kHzSP mode: 22 kHzLP mode: 8 kHz Overall frequency response STEREO XQ mode: 50 to 19,000 HzSTEREO HQ mode: 50 to 16,000 HzHQ mode: 50 ...
Page 161 - Technical Assistance and Support; Input power requirement; External power supply: AC adapter; External dimensions; Specifications/Technical Assistance and Support
161 13 Technical Assistance and Support The following are contact information for technical support for Olympus recorders and software only. ◆ Technical Hotline Number in the U.S. and Canada1-888-553-4448 ◆ User Support E-mail address in the U.S. and [email protected] ◆ Technical Hotline Numb...
Page 162 - Canadian RFI; For customers in Europe
Declaration of Conformity Model Number: DS-30/40/50 Trade Name: DIGITAL VOICE RECORDER Responsible Party: OLYMPUS IMAGING AMERICA INC. Address: 3500 Corporate Parkway, P.O. Box 610, Center Valley, PA 18034-0610, U.S.A. Telephone Number: 1-888-553-4448 This device Complies with Part 15 of the FCC Rul...


 Olympus DM-20 Manual
 Olympus DM-550 Manual
 Olympus DM-901 Manual
 Olympus DR-2100 User Manual
 Olympus DS-30 Manual
 Olympus DS-40 Manual
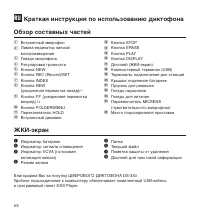 Olympus DS-330 Manual
 Olympus DS-3500 Manual
 Olympus DS-7000 Manual
 Olympus LS-10 Manual
 Olympus LS-11 Manual
 Olympus LS-20M Manual
 Olympus LS-100 Manual
 Olympus VN-750 User Manual