Jet 424463 - User Manual
Jet 424463 Band Saw – User Manual, read for free online in PDF format. We hope this helps you resolve any issues you may have. If you have further questions, please contact us through the contact form.


Table of Contents:
- Page 3 – On-off switch padlock
- Page 4 – Table of contents
- Page 5 – About this manual
- Page 6 – Specifications for HVBS-DMW series Band Saws
- Page 8 – Setup and assembly; Shipping contents; Coolant preparation; Electrical connections
- Page 9 – GROUNDING INSTRUCTIONS; Voltage conversion
- Page 10 – Extension cords; Adjustments; Handle adjustment
- Page 12 – Blade guide bearings; Tension
- Page 13 – Test cut to verify adjustment; Setting feed rate
- Page 14 – Counterbalance spring; Auto shut-off adjustment
- Page 15 – Operation; Blade selection
- Page 16 – General operating procedure; Evaluating cutting efficiency
- Page 17 – Lubrication
- Page 18 – Troubleshooting HVBS-DM series Band Saws
- Page 19 – Replacement Parts
- Page 20 – HVBS-8-DMW Bow Assembly – Exploded View
- Page 21 – HVBS-8-DMW Table Assembly – Exploded View
- Page 22 – HVBS-8-DMW Motor and Support Arm Assembly – Exploded View
- Page 31 – HVBS-10-DMW/DMWC Motor and Support Arm Assembly – Exploded View
- Page 39 – Electrical Connections for HVBS-DMW Band Saws
- Page 40 – Warranty and service
1
Operating Instructions and Parts Manual
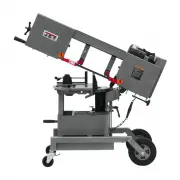
Portable Dual Mitering Band Saws
Models HVBS-8-DMW, HVBS-10-DMW, HVBS-10-DMWC
JET
427 New Sanford Road
LaVergne, Tennessee 37086
Part No. M-424460
Ph.: 800-274-6848
Edition 5 05/2017
www.jettools.com
Copyright © 2017 JET
Model HVBS-10-DMWC shown
For HVS-8-DMW after serial no. 1701BG00017
For HVS-10-DMW after serial no. 1701BK00017
This .pdf document is bookmarked
"Loading the manual" means you need to wait until the file loads and becomes available for online reading. Some manuals are very large, and the time they take to appear depends on your internet speed.
Summary
3 28. Do not stand on the machine. Serious injury could occur if the machine tips over. 29. Never leave the machine running unattended. Turn the power off and do not leave the machine until it comes to a complete stop. 30. Remove loose items and unnecessary work pieces from the area before starting ...
4 2.0 Table of contents Section Page 1.0 IMPORTANT SAFETY INSTRUCTIONS ....................................................................................................... 2 1.1 On-off switch padlock ....................................................................................................
5 3.0 About this manual This manual is provided by JET, covering the safe operation and maintenance procedures for a JET Model HVBS-DMW series Portable Band Saw. This manual contains instructions on installation, safety precautions, general operating procedures, maintenance instructions and parts br...