Electrolux EMF2527BA - User Manual
Electrolux EMF2527BA Microwave – User Manual, read for free online in PDF format. We hope this helps you resolve any issues you may have. If you have further questions, please contact us through the contact form.


Table of Contents:
- Page 2 – INFORMATION ON DISPOSAL; • Most of the packaging materials are recyclable.
- Page 3 – General safety; Do not use a steam cleaner to clean the appliance.; Children and vulnerable people safety.; Keep all packaging away from children.; GENERAL WARNINGS; Read the following carefully to avoid damage or injury.
- Page 4 – SAFETY INSTRUCTIONS
- Page 6 – BEFORE FIRST USE; Refer to chapter “Care and cleaning”.; Setting the time; You can set the time in a 24 hour clock system.; OFF
- Page 7 – DAILY USE; Refer to the safety chapters.
- Page 10 – AUTOMATIC PROGRAMMES
- Page 11 – Inserting the turntable set
- Page 12 – HELPFUL HINTS AND TIPS; You cannot find details for the amount of food prepared.
- Page 13 – Problem
- Page 14 – Built-in furniture – flush fit
- Page 15 – Built-in furniture – proud fit
- Page 16 – Preparing the cabinet
- Page 17 – Installation - Freestanding model EMF2527BA
- Page 18 – ELECTRICAL INSTALLATION
- Page 19 – Warranty; Important Notice
User manual
Built in microwave
EMB2527BA
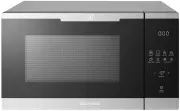
Freestanding microwave
EMF2527BA
"Loading the manual" means you need to wait until the file loads and becomes available for online reading. Some manuals are very large, and the time they take to appear depends on your internet speed.
Summary
2 WE’RE THINKING OF YOU Thank you for purchasing an Electrolux appliance. You’ve chosen a product that brings with it decades of professional experience and innovation. Ingenious and stylish, it has been designed with you in mind. So whenever you use it, you can be safe in the knowledge that you’ll ...
3 CAUTION! It is important to use your appliance safely. Check these safety points before using your appliance. General safety • Internally the appliance becomes hot when in operation. Do not touch the heating elements that are in the appliance. Always use oven gloves to remove or put in accessories...
4 SAFETY INSTRUCTIONS Installation WARNING! Only a qualified person must install this appliance. • Remove all the packaging. • Do not install or use a damaged appliance. • Obey the installation instructions supplied with the appliance. • Always be careful when you move the appliance because it is he...