Page 2 - Main Features; Shooting; Plays movies with sound; Editing; Edits movies; Printing; PictBridge; Uses of Recorded Images
0 Main Features Shooting z Automatically adjusts shooting settings to match particular conditions z Automatically detects camera orientation with an Intelligent Orientation sensor z Changes image colors to create special effects (My Colors modes) z Attaches the separately sold wide converter or tele...
Page 3 - Conventions Used in this Guide; See; Functions Available in Each Shooting Mode; Use of genuine Canon accessories is recommended.; Shooting Mode
1 Conventions Used in this Guide Icons appearing below titles indicate the modes in which the procedure can be used. See Functions Available in Each Shooting Mode ( p. 135 ). z In this guide, the Basic Camera User Guide is referred to as the Basic Guide , and the Advanced Camera User Guide is referr...
Page 4 - Table of Contents; Items marked with a
2 Table of Contents Items marked with a are lists or charts that summarize camera functions or procedures. Handling Precautions . . . . . . . . . . . . . . . . . . . . . . . . . . . . . 5 Please Read . . . . . . . . . . . . . . . . . . . . . . . . . . . . . . . . . . . . . . . 5Safety Precautions ...
Page 7 - Handling Precautions; Test Shots; Please Read
5 Handling Precautions Test Shots Before you try to photograph important subjects, we highly recommend that you shoot several trial images to confirm that the camera is operating and being operated correctly.Please note that Canon Inc., its subsidiaries and affiliates, and its distributors are not l...
Page 8 - Please see the; Camera Body Temperature; Safety Precautions
6 Video Format Please set the camera’s video signal format to the one used in your region before using it with a TV monitor ( p. 89 ). Language Setting Please see the Basic Guide (p. 4) to change the language setting. z Before using the camera, please ensure that you read the safety precautions desc...
Page 9 - Warnings; Equipment; • Wrist strap: Placement of the strap around the child’s neck could; Use only recommended power accessories.
7 Warnings Equipment z Do not aim the camera directly into the sun or at other intense light sources that could damage your eyesight. z Store this equipment out of the reach of children and infants. Accidental damage by a child could result in serious injury. • Wrist strap: Placement of the strap ar...
Page 10 - Battery; The batteries should not be immersed in water or sea water.
8 Battery z Do not place the batteries near a heat source or expose it to direct flame or heat. z The batteries should not be immersed in water or sea water. z Do not attempt to disassemble, alter or apply heat to the batteries. z Avoid dropping or subjecting the batteries to severe impacts that cou...
Page 11 - Others; Such items may lose data or stop working.; Cautions; Do not store the equipment in humid or dusty areas.
9 Others z Do not trigger the flash in close proximity to human or animal eyes. Exposure to the intense light produced by the flash may damage eyesight. In particular, remain at least one meter (39 inches) away from infants when using the flash. z Keep objects that are sensitive to magnetic fields (...
Page 12 - Flash; Doing so could result in burns.
10 z When not using the camera for extended periods of time, remove the batteries from the camera or battery charger and store the equipment in a safe place. If the batteries are left inside the camera, damage caused by leakage may occur. Flash z Do not operate the flash with dirt, dust or other ite...
Page 13 - Preventing Malfunctions; Avoid Strong Magnetic Fields; Stop using the camera immediately.
11 Preventing Malfunctions Avoid Strong Magnetic Fields z Never place the camera in close proximity to electric motors or other equipment generating strong electromagnetic fields. Exposure to strong magnetic fields may cause malfunctions or corrupt image data. Avoid Condensation Related Problems z W...
Page 14 - Before Using the Camera – The Components Guide; Front View; Wrist Strap Mount
12 Before Using the Camera – The Components Guide Front View a Wrist Strap Mount b Speaker c Microphone ( p. 79 ) d AF-assist Beam ( p. 24 ) e Red-Eye Reduction Lamp ( Basic Guide p. 9) f Self-Timer Lamp ( p. 35 ) g Viewfinder Window ( p. 19 ) h Flash ( Basic Guide p. 9) i Ring j Ring Release Button...
Page 15 - Back View; Basic Guide
13 B efore U sing the Came ra – Th e Com p o n ents Guid e Back View a LCD Monitor ( p. 15 , Basic Guide p. 3) b Viewfinder ( p. 19 ) c A/V OUT (Audio/Video output) Terminal ( p. 89 ) d DC IN Terminal ( p. 111 ) e DIGITAL Terminal ( Basic Guide p. 19) f Terminal Cover g Memory Card Slot Cover ( Basi...
Page 16 - Operation Panel; Power Lamp; MENU; Button
14 Operation Panel a Indicators ( p. 20 ) b Power Lamp c Power Button ( Basic Guide p. 5) d Zoom Lever ( p. 72 , Basic Guide p. 8) Shooting: (Wide Angle)/ (Telephoto) Playback: (Index)/ (Magnify) e Shutter Button ( Basic Guide p. 5) f Shooting Mode Dial ( Basic Guide p. 6) g Mode Switch h (Print/Sha...
Page 17 - Before Using the Camera – Basic Operations; Night Display; Using the LCD Monitor; The display mode changes as follows with each press.
15 B efore U sing the Came ra – Basic Operat ions Before Using the Camera – Basic Operations Night Display When shooting in dark conditions, the camera automatically brightens the LCD monitor to suit the brightness of the subject*, making it easier to frame the subject. * Noise will appear, and the ...
Page 18 - Information Displayed on the LCD Monitor
16 Shooting Information (Shooting Mode) * Appears even if the LCD monitor is set to Standard display. Information Displayed on the LCD Monitor Zoom Magnification* ( p. 31 ) • Stills: Recordable Shots• Movies (Sec.): Remaining Time/Elapsed Time * Spot AE Point Frame ( p. 53 ) AF Frame ( p. 45 ) * Low...
Page 19 - Standard; displays, this indicates that a slow shutter speed may
17 B efore U sing the Came ra – Basic Operat ions Playback Information (Playback Mode) Standard If the indicator blinks orange and the camera shake warning icon displays, this indicates that a slow shutter speed may have been selected due to insufficient illumination. Raise the ISO speed ( p. 66 )...
Page 20 - Detailed; The following information may also be displayed with some images.
18 Detailed The following information may also be displayed with some images. A sound file in a format other than the WAVE format is attached or the file format is not recognized.JPEG image not conforming to Design rule for Camera File System StandardsRAW imageUnrecognized data type Information fo...
Page 21 - Histogram Function; Using the Viewfinder
19 B efore U sing the Came ra – Basic Operat ions The viewfinder can be used to conserve power by turning the LCD monitor off ( p. 15 ) while shooting. Histogram Function The histogram is a graph that allows you to judge the brightness of the shot image. The greater the bias toward the left in the g...
Page 22 - Indicators; battery cover; Power Saving Function
20 The indicators light or blink when the power button or the shutter button is pressed. z Upper Indicator z Lower Indicator This camera is equipped with a power saving function. The power will shut off in the following circumstances. Press the power button again to restore power. * This time can be...
Page 23 - Formatting Memory Cards; Low Level Format
21 B efore U sing the Came ra – Basic Operat ions You should always format a new memory card or one from which you wish to erase all images and other data. z The power saving function will not activate during an Auto Play or while the camera is connected to a computer. z The power saving function se...
Page 24 - Menus and Settings
22 Menus are used to set the shooting and playback settings as well as such camera settings as the date/time and electronic beep. The following menus are available. z FUNC. Menu z Rec., Play, Set up and My Camera Menus FUNC. Menu This menu sets many of the common shooting functions. a Set the mode s...
Page 25 - You can also use the zoom lever to switch between menus.
23 B efore U sing the Came ra – Basic Operat ions Rec., Play, Set up and My Camera Menus Convenient settings for shooting or playback can be set with these menus. a Press the MENU button. b Use the or button to switch between menus. You can also use the zoom lever to switch between menus. c Use the ...
Page 26 - Menu List
24 FUNC. Menu The icons shown below are the default settings. Rec. Menu *Default setting Menu List Menu Item Reference Page Menu Item Reference Page ISO Speed p. 66 Metering Mode p. 52 White Balance p. 55 Compression p. 30 Drive Mode p. 32 , 35 Frame Rate (Movie) p. 30 Photo Effect p. 58 Resolution ...
Page 27 - Play Menu
25 B efore U sing the Came ra – Basic Operat ions Play Menu Set up Menu *Default setting Save Original On/Off* p. 61 Reverse Disp. On*/Off Basic Guide p. 3 Grid Lines On/Off* You can display grid lines (split into nine) to make it easier to judge the horizontal and vertical alignment of a photograph...
Page 28 - Menu Item
26 Volume Off/1/2*/3/4/5 Adjusts the volume of the start-up sound, operation sound, self-timer sound, shutter sound and playback sound. The volume cannot be adjusted if [Mute] is set to [On]. Start-up Vol. Adjusts the volume of the start-up sound when the camera is turned on. Operation Vol. Adjusts ...
Page 29 - My Camera Menu
27 B efore U sing the Came ra – Basic Operat ions My Camera Menu *Default setting Distance Units m/cm*/ft/in Sets the units for the MF indicator distance unit ( p. 48 ). Language Basic Guide p. 4 Video System NTSC/PAL p. 89 Reset All p. 28 Item Available Settings Reference Page Theme Selects a commo...
Page 30 - Resetting Settings to Their Default Values
28 Resetting Settings to Their Default Values 1 (Set up) Menu [Reset All]. See Menus and Settings ( p. 23 ). 2 Select [OK] and press . z When the camera is in shooting mode and the shooting mode dial is set to , only settings registered in will reset to default values. The settings will not reset to...
Page 31 - Approximate Values for Resolutions; Changing the Resolution and; Use the
29 Shooting Shooting Approximate Values for Resolutions * Paper sizes vary according to region. Changing the Resolution and Compression (Still Images) Shooting Mode 1 FUNC. Menu * (Resolution)/ * (Compression). See Menus and Settings ( p. 22 ). * Default setting. z Use the or button to select resolu...
Page 32 - Memory Cards and Estimated Capacities; Changing Resolutions and Frame
30 Approximate Values for Compression Settings You can change the resolution and frame rate when the movie mode is set to (Standard) or (My Colors) ( p. 37 ). Resolutions and Frame Rates Compression Purpose Superfine High Quality Normal Shoot higher quality images Fine Shoot normal quality images No...
Page 33 - Using the Digital Zoom; Press the zoom lever toward and shoot.
31 Shooting * Frame rates indicate the number of frames recorded or played back each second. The higher the frame rate, the smoother the appearance of motion. * The resolution and frame rate are fixed in the and modes. You can shoot zoomed images using the combined digital and optical zooms. z Still...
Page 34 - To Cancel Continuous Shooting; Follow procedure 1 to display; Continuous Shooting
32 In the mode, the camera shoots continuously while the shutter button is held down.If you use the recommended memory card*, you can shoot continuously (smooth continuous shooting) at a set shooting interval until the memory card is full ( p. 124 ). *Recommended Memory Card: Super high-speed SDC-51...
Page 35 - Postcard Date Imprint Mode; The digital zoom cannot be used in this mode.
33 Shooting You can shoot images with the optimal settings for postcards by composing them inside the print area (width-to-height ratio of approximately 3:2) shown in the LCD monitor. Postcard Date Imprint Mode Shooting Mode 1 FUNC. Menu * (Resolution) (Postcard). See Menus and Settings ( p. 22 ). *...
Page 36 - Embedding the Date in the Image Data; You can embed the date in image data when; LCD monitor display
34 Embedding the Date in the Image Data You can embed the date in image data when (Postcard Date Imprint Mode) is selected. 1 (Rec.) Menu [Date Stamp] [Date]/ [Date & Time]. See Menus and Settings ( p. 23 ). z LCD monitor display : [Off]: [Date]/[Date & Time] z Ensure that the camera’s date/...
Page 37 - To Cancel the Self-Timer
35 Shooting You can set a 10 sec. ( ) or 2 sec. ( ) delay, or a custom delay time and the number of shots ( Custom Timer), for shooting after the shutter button is pressed. To Cancel the Self-Timer Follow procedure 1 to display . Using the Self-Timer Shooting Mode 1 FUNC. Menu * (Drive Mode) / / . S...
Page 38 - Changing the Delay Time and Number of; button and change the settings using
36 Changing the Delay Time and Number of Shots ( ) 1 . See Menus and Settings ( p. 22 ). 2 Select [Delay]/[Shots] using the or button and change the settings using the or button. z The self-timer sound will behave as follows.- The self-timer sound will start 2 sec. before the shutter releases. - If ...
Page 39 - The following four movie modes are available.; Movie Shooting; • Maximum Clip Length: 1 minute; Compact; • Maximum Clip Length: 3 minutes; My Colors; You can change image colors and then shoot (
37 Shooting The following four movie modes are available. z The recording time will vary according to the capacity of the memory card you use ( p. 124 ). Movie Shooting Shooting Mode Standard You can select the resolution and frame rate and record until the memory card is full (when a super high-spe...
Page 40 - In
38 1 Select a movie mode using the or button. z In or mode, you can change the resolution and frame rate ( p. 30 ). 2 Shoot. z Pressing the shutter button halfway automatically sets the exposure, focus and white balance settings. z Pressing the shutter button fully starts recording video and sound s...
Page 41 - Shooting Panoramic Images; Use the or button to select a shooting; Left to right horizontally
39 Shooting Stitch Assist can be used to shoot overlapping images that can later be merged (stitched) to create one panoramic image on a computer. QuickTime 3.0 or later is required to play back movies (Data type: AVI/Compression method: Motion JPEG) on a computer. QuickTime (for Windows) is include...
Page 45 - Setting the Aperture; Aperture Value Display; Safety Shift
43 Shooting The aperture adjusts the amount of light entering through the lens. When you set the aperture value, the camera automatically selects a shutter speed to match the brightness.Selecting a lower aperture value (opening the aperture) allows you to blur the background and create a beautiful p...
Page 46 - Manually Setting the Shutter Speed
44 You can manually set the shutter speed and aperture to shoot images. z When you press the shutter button halfway, the difference between the standard exposure* and the selected exposure appears on the LCD monitor. If the difference is more than ±2 stops, “–2” or “+2” appears in red. * Standard ex...
Page 47 - Selecting an AF Frame
45 Shooting The AF frame indicates the area of the composition on which the camera focuses. You can set the AF frame in the following ways. Selecting an AF Frame Shooting Mode LCD monitor display Menu selection Explanation AiAF The camera automatically selects between 9 AF frames to focus on accordi...
Page 48 - Selecting an AF Frame Manually; Turn on the LCD monitor; If you hold down the
46 Selecting an AF Frame Manually (when [FlexiZone] is selected) 1 Turn on the LCD monitor 2 Press the button several times until the AF frame turns green. z Depending on the shooting mode, you can switch between the following setting options by pressing the button. 3 Use the , , or button to move t...
Page 50 - To Release the AF Lock; Shooting in Manual Focus Mode
48 To Release the AF Lock Press the button. Shooting in Manual Focus Mode The focus can be manually set.The manual focus cannot be used in the and modes, and when is set to . 3 Press and hold the shutter button halfway and press the button. z The icon and the MF indicator will appear on the LCD moni...
Page 51 - To Cancel the Manual Focus; Locking the Exposure Setting
49 Shooting To Cancel the Manual Focus Press the button. You can set the exposure and focus separately. This is effective when the contrast is too strong between the subject and background or when a subject is backlit. z Depending on the shooting mode, pressing the button will switch between the set...
Page 52 - To Release the AE Lock; Changing the shutter speed and
50 To Release the AE Lock Operate a button other than the or button. 4 Re-aim the camera to compose the shot as desired and press the shutter button fully. You can use the FE lock when using the flash ( p. 51 ). Changing the shutter speed and aperture value combination The automatically selected com...
Page 53 - To Release the FE Lock; Operate a button other than the; Locking the Flash Exposure Setting
51 Shooting You can lock the flash exposure so that the exposure settings are correctly set regardless of the composition of your subject. To Release the FE Lock Operate a button other than the or button. Locking the Flash Exposure Setting (FE Lock) Shooting Mode 1 Turn on the LCD monitor. 2 Press t...
Page 54 - Metering Methods; Switching between Metering Modes; SET
52 Metering Methods Switching between Metering Modes Shooting Mode 1 FUNC. Menu * (Evaluative) See Menus and Settings ( p. 22 ). * Default setting. z Use the or button to select the metering mode and press the FUNC./ SET button. Evaluative Appropriate for standard shooting conditions, including back...
Page 55 - It cannot be selected when the shooting mode is
53 Shooting Move the spot AE point to the same position as the selected AF frame/Lock the spot AE point to the center of the LCD monitor 1 (Rec.) Menu [Spot AE Point] [Center]/[AF Point] See Menus and Settings ( p. 23 ). z When [Spot AE Point] is set to [Center], the spot AE point frame appears at t...
Page 56 - To Cancel the Exposure Compensation; Adjusting the Exposure Compensation; Turn on the LCD monitor.
54 Adjust the exposure compensation setting to avoid making the subject too dark when it is backlit or shot against a bright background or to avoid making lights appear too bright in night shots. To Cancel the Exposure Compensation Restore the compensation value to [0]. Adjusting the Exposure Compen...
Page 57 - White Balance Settings
55 Shooting Normally, the (Auto) white balance setting selects an optimal white balance. When the (Auto) setting cannot produce natural looking colors, change the white balance using a setting appropriate for the light source. White Balance Settings Adjusting the Tone (White Balance) Shooting Mode 1...
Page 58 - Using the Custom White Balance; Aim the camera at a piece of white
56 This setting cannot be adjusted when the or photo effect is selected. Using the Custom White Balance You can set a custom white balance to obtain the optimal setting for the shooting conditions by having the camera evaluate an object, such as a piece of white paper or cloth, or a photo-quality gr...
Page 59 - You are recommended to set the shooting mode to
57 Shooting z You are recommended to set the shooting mode to and the exposure compensation setting to [±0] before setting a custom white balance.The correct white balance may not be obtained when the exposure setting is incorrect (image appears completely black or white). z Shoot with the same sett...
Page 60 - Photo Effect Settings; Changing the Photo Effect
58 By setting a photo effect before you shoot, you can change the look and feel of the pictures you take. Photo Effect Settings Changing the Photo Effect Shooting Mode 1 FUNC. Menu * (Effect Off). See Menus and Settings ( p. 22 ). * Default setting. z Use the or button to select a photo effect and p...
Page 61 - when shooting still images.; My Colors Settings; Shooting in a My Colors Mode; Vivid Blue
59 Shooting A My Colors mode easily changes the colors in an image when it is shot, allowing you to alter the balance between red, green and blue, transform pale or tanned skin or change a color specified in the LCD monitor into a different color. Since they work with both stills and movies, these m...
Page 62 - Color Swap; Modes; Setting the Camera to the Color Accent Mode
60 * The skin colors of non-human subjects may also be altered.* You may not obtain the expected results depending on the skin color. Color Accent Use this option to have only the color specified in the LCD monitor remain and to transform all others to black and white. Color Swap Use this option to ...
Page 63 - - Only the altered image is shown in the LCD monitor
61 Shooting Changing the Save Method for the Original Image When you are shooting still images in a My Colors mode, you can specify whether or not both the altered image and the original image are recorded. 1 (Rec.) Menu [Save Original] [On]/ [Off]. See Menus and Settings ( p. 23 ). z If [On] is sel...
Page 64 - Aim the camera so that the color you
62 Setting the Camera to the Color Accent Mode Colors other than the color specified in the LCD monitor are shot in black and white. 1 (Color Accent) . See Menus and Settings ( p. 22 ). z The camera will switch to color input mode and the display will alternate between the original image and the col...
Page 65 - Aim the camera so that the original; Only one color can be specified.
63 Shooting Setting the Camera to the Color Swap Mode This mode allows you to transform a color specified in the LCD monitor into another. 1 (Color Swap) . See Menus and Settings ( p. 22 ). z The camera will switch to color input mode and the display will alternate between the original image and the...
Page 66 - button at this point, you will; Setting the Camera to a Custom Color
64 3 Aim the camera so that the desired color appears at the center of the LCD monitor and press the button. z Only one color can be specified. 4 . z This completes the setting. z If you press the MENU button at this point, you will return to the screen where you can select a My Colors mode. Setting...
Page 68 - Adjusting the ISO Speed; Switching between Flash Adjustment
66 Raise the ISO speed when you wish to reduce the effects of camera shake, turn the flash off when shooting in a dark area, or use a fast shutter speed. Although the built-in flash will fire with automatic flash adjustments (except in the mode), it is also possible to set it so that it fires withou...
Page 69 - Flash Output
67 Shooting Compensating the Flash Adjustment / Flash Output Shooting Mode +/– (Flash) (Flash Exposure Compensation) z When the shooting mode is set to , , , , , or when [Flash Adjust] is set to [Auto] ( p. 66 ) in or mode, settings can be adjusted in 1/3-stop increments in the range of –2 to +2 sto...
Page 71 - Saving Custom Settings; Switch to the shooting mode you wish to; Functions which can be saved in
69 Shooting You can save frequently used shooting modes and various shooting settings to the (Custom) mode. When necessary, you can then shoot images with previously saved settings by simply turning the mode dial to . Settings that are not memorized when the shooting mode is changed or when the powe...
Page 72 - Setting the Auto Rotate Function; is
70 Your camera is equipped with an Intelligent Orientation sensor that detects the orientation of an image shot with the camera held vertically and automatically rotates it to the correct orientation when viewing it in the LCD monitor. Setting the Auto Rotate Function Shooting Mode Playback Mode 1 (...
Page 73 - File No. Reset Function; Resetting the File Number; On; See the
71 Shooting The images you shoot are automatically assigned file numbers. You can select how the file number is assigned. File No. Reset Function Resetting the File Number Shooting Mode Playback Mode 1 (Set up) Menu [File No. Reset] [On]/[Off]. See Menus and Settings ( p. 23 ). On The file number is...
Page 74 - Basic Camera User Guide; To Cancel the Magnified Display; Magnifying Images; Press the zoom lever toward .
72 Playback/Erasing Please also see the Basic Camera User Guide (p. 11). To Cancel the Magnified Display Press the zoom lever toward . (You can also cancel it immediately by pressing the MENU button.) Magnifying Images 1 Press the zoom lever toward . z will display and a magnified portion of the ima...
Page 75 - Viewing Images in Sets of Nine; Press the zoom lever toward; Switching between Sets of Nine Images
73 Playb ack/Erasin g To Return to Single Image Playback Press the zoom lever toward . Viewing Images in Sets of Nine (Index Playback) 1 Press the zoom lever toward . z Up to nine images can be viewed at once in index playback. z Use the , , or button to change the image selection. Switching between...
Page 76 - Jumping to Images; In single image playback
74 When you have many images recorded onto a memory card, it is handy to use the four search keys below to jump over images to find the object of your search. To Return to Single Image Playback Press the MENU button. Jumping to Images Jump 10 Images Jumps over 10 images at a time. Jump 100 Images Ju...
Page 77 - Playb; Operating the Movie Control Panel; Viewing Movies; Display a movie and press; Direct Print User Guide
75 Playb ack/Erasin g Operating the Movie Control Panel Viewing Movies Movies cannot be played in the index playback mode. 1 Display a movie and press . z Images with a icon are movies. 2 Select (Play) and press . z The movie will pause if you press the FUNC./SET button during playback. It will resu...
Page 78 - Editing Movies; control panel and press
76 You can delete portions of recorded movies. z Use the television’s controls to adjust the volume when playing a movie on a TV set ( p. 89 ). z The sound cannot be played in slow motion playback. Editing Movies Movies 1 second or longer before editing can be edited in 1-second increments, but thos...
Page 79 - button while saving the movie, saving is cancelled.
77 Playb ack/Erasin g 4 Select [New File] or [Overwrite] and press . z [New File] saves the edited movie under a new file name. The pre-edit data is left unchanged.Note, if you press the FUNC./SET button while saving the movie, saving is cancelled. z [Overwrite] saves the edited movie with its origi...
Page 80 - Images can be rotated clockwise 90° or 270° in the display.; Rotating Images in the Display; Use the or button to select an image to; This also can be set in the index playback mode.
78 Images can be rotated clockwise 90° or 270° in the display. Rotating Images in the Display 1 (Play) Menu . See Menus and Settings ( p. 23 ). 2 Use the or button to select an image to rotate and press to rotate it. z Cycle through the 90°/270°/original orientations with each press of the FUNC./SET...
Page 81 - Attaching Sound Memos to Images; The sound memo control panel will display.
79 Playb ack/Erasin g In playback mode (including single image playback and index playback), you can attach sound memos (up to 60 seconds) to an image. The sound data is saved in the WAVE format. Attaching Sound Memos to Images 1 (Play) Menu . See Menus and Settings ( p. 23 ). 2 Use the or button to...
Page 82 - Sound Memo Panel
80 Sound Memo Panel Use this feature to automatically play back all of the images in the memory card. The LCD monitor displays each image for approximately 3 seconds. ExitRecordPausePlayEraseSelect [Erase] in the confirmation screen and press the FUNC./ SET button. z You cannot attach sound memos to...
Page 83 - Protecting Images; Select an image to protect and press; Pressing the
81 Playb ack/Erasin g You can protect important images and movies from accidental erasure. Protecting Images 1 (Play) Menu . See Menus and Settings ( p. 23 ). 2 Select an image to protect and press . z Pressing the FUNC./SET button again cancels the setting. z You can also protect images in the inde...
Page 84 - Erasing All Images; Protected images cannot be erased with this function.
82 Erasing All Images z Note that erased images cannot be recovered. Exercise adequate caution before erasing an image. z Protected images cannot be erased with this function. 1 (Play) Menu . See Menus and Settings ( p. 23 ). 2 Select [OK] and press . z To exit instead of erasing, select [Cancel]. P...
Page 85 - Print Settings/Transfer Settings; Single Images; Setting the DPOF Print Settings; The
83 Print Setting s/Trans fer Setting s Print Settings/Transfer Settings You can select images on a memory card for printing and specify the number of print copies in advance using the camera. This is extremely convenient for printing on a direct print compatible printer, or for sending the images to...
Page 86 - All the Images on a Memory Card; Select images for printing.; Select an image, press the; button and use the
84 All the Images on a Memory Card 3 Select images for printing. z Selection methods differ for the Print Type settings ( p. 85 ). - (Standard)/ (Both) Select an image, press the FUNC./ SET button and use the or button to select the number of print copies (up to 99). - (Index ) Select an image and p...
Page 87 - Setting the Print Style; Print settings cannot be set for movies.; Print Type; Prints one image per page.; Index; Adds the date to the print.
85 Print Setting s/Trans fer Setting s Setting the Print Style Set the print style after selecting the image to print. The following print settings can be selected. z The output of some printers or photo developing services may not reflect the specified print settings. z Print settings cannot be set...
Page 88 - then specify the settings.; Embedded dates in
86 2 Select [Set up] and press . 3 Select [Print Type], [Date] or [File No.] and then specify the settings. z The Date and File No. settings change according to the Print Type as follows.- Index [Date] and [File No.] cannot be set to [On] at the same time. - Standard or Both [Date] and [File No.] ca...
Page 89 - Software Starter Guide; Setting the DPOF Transfer Settings; Select an image to transfer
87 Print Setting s/Trans fer Setting s You can use the camera to specify settings for images before downloading to a computer. Refer to the Software Starter Guide for instructions on how to transfer images to your computer.The settings used on the camera comply with the Digital Print Order Format (D...
Page 90 - A maximum of 998 images can be selected.
88 All the Images on a Memory Card 1 (Play) Menu . See Menus and Settings ( p. 23 ). 2 Select [Mark all] and press . z Selecting [Reset] cancels all transfer order settings. 3 Select [OK] and press . z Images are transferred in order from oldest to newest by the shooting date. z A maximum of 998 ima...
Page 91 - Viewing Images on a TV set; setting varies between regions.
89 Viewing Imag es o n a T V set Viewing Images on a TV set You can use a video-compatible television as a monitor to shoot or play back images when it is connected to the camera with the supplied AV Cable. 1 Turn off the Camera and the TV. 2 Connect the AV cable to the camera’s A/V OUT terminal. z ...
Page 92 - Customizing the Camera (My Camera Settings); Changing My Camera Settings; Select the contents you wish to set.
90 Customizing the Camera (My Camera Settings) My Camera allows you to customize the start-up image and start-up, operation, self-timer and shutter sounds. You can change and register these settings, enabling you to customize the camera to suit your own tastes. Changing My Camera Settings 1 (My Came...
Page 93 - and; Registering My Camera Settings; Select
91 Customizing the Ca mera (My Ca mera Settings) Images recorded onto the memory card and newly recorded sounds can be added as My Camera settings to the and menu items. You can also use the supplied software to upload your computer’s images and sounds to the camera. Registering My Camera Settings A...
Page 94 - Select an image or record a sound.
92 3 Select an image or record a sound. z Start-up Image Select the image you wish to register and press the FUNC./SET button. z Start-up, Operation, Self-timer and Shutter Sounds Select (Record) and press the FUNC./SET button. After recording, select (Register) and press the FUNC./SET button. - Rec...
Page 95 - Troubleshooting; Camera; Camera will not operate.; Power is not turned on.; Sounds come from the camera interior.; When the power is turned on
93 Tr oubl es h ooti n g Troubleshooting Camera Camera will not operate. Power is not turned on. z Press the power button ( Basic Guide p. 5). Memory card slot cover or battery cover is open. z Confirm that the memory card slot cover or battery cover is securely closed ( Basic Guide p. 1). Batteries...
Page 96 - LCD monitor; Subject is too bright.
94 The Date/Time menu appears. The built-in rechargeable lithium battery charge is low. z Recharge the built-in lithium battery immediately ( Basic Guide p. 4). LCD monitor The display darkens. The image in the LCD monitor will darken in strong sunlight or bright light. z This does not constitute a ...
Page 97 - Camera will not record.
95 Tr oubl es h ooti n g Noise displays./Subject’s movements are irregular. Camera automatically lightened the image displayed on the LCD monitor to make it easier to see when shooting in a dark area ( p. 15 ). z There is no effect on the recorded image. Shooting Camera will not record. Mode switch ...
Page 98 - Setting the self-timer to; Subject in recorded image is too dark.; Insufficient light for shooting.
96 Image Seen in Viewfinder vs. Recorded Image Usually the recorded image contains more of the scene than is seen in the viewfinder. z Confirm the actual image size with the LCD monitor. Use the LCD monitor when taking close-up shots ( p. 15 ). Image is blurred or out of focus. AF-assist Beam is set...
Page 99 - Subject in recorded image is too bright.; Image flashes white. Image contains noise.
97 Tr oubl es h ooti n g Subject is too far away for flash to reach. z Shoot within correct shooting distance of the subject when using the built-in flash ( p. 119 ). z Raise the ISO sensitivity and then shoot ( p. 66 ). Subject in recorded image is too bright. Subject is too close, making the flash...
Page 100 - Continuous shooting slows down.
98 Eyes appear red. Light reflecting back from eyes can make them appear red when the flash is used in dark areas. z Use the (red-eye reduction) mode ( Basic Guide p. 9). For this mode to be effective, the subject must be looking right at the red-eye reduction lamp. Try asking them to look directly ...
Page 101 - Shooting Movies; The recording time may not display properly or; - Cards which have had; “!” displays frequently in the LCD monitor.; - Lower the resolution or frame; Zoom does not operate.
99 Tr oubl es h ooti n g Shooting Movies The recording time may not display properly or filming may stop unexpectedly. The following types of memory cards are used. - Slow recording cards.- Cards formatted on a different camera or a computer. - Cards which have had images recorded and erased repeate...
Page 102 - Playback; Software Starter; Movies cannot be edited.; Some movies shot with another camera cannot be edited.; Movies do not play back correctly.
100 Playback Cannot play back. You attempted to play back images shot with another camera or images edited with a computer. z Computer images that cannot be played back will play back if they are added to the camera using the supplied software program ZoomBrowser EX or ImageBrowser. File name was ch...
Page 103 - Batteries consumed quickly.; If using Canon AA-size NiMH batteries; TV monitor output; Image not showing on TV monitor.; Basic
101 Tr oubl es h ooti n g Battery Batteries consumed quickly. Batteries are not the right type. z Use only unused AA-size alkaline batteries or Canon AA-size NiMH batteries ( Basic Guide p. 1). Battery capacity drops due to low ambient temperatures. z If shooting in a cold location, warm the batteri...
Page 104 - List of Messages; No memory card; You turned on the camera without a memory card installed.; Memory card error; Memory card has experienced an anomaly.; Memory card full
102 List of Messages The following messages may appear on the LCD monitor during shooting or playback. Please refer to the Direct Print User Guide for the messages that display during a printer connection. Busy... Image is being recorded to, or read from, memory card. The playback mode is starting u...
Page 106 - Too many marks; Could not save the print or transfer settings.; Unselectable image; You attempted to set the print settings for a non-JPEG image.; Exx
104 Too many marks Too many images have been marked with print settings or transfer settings. Cannot process any more. Cannot complete! Could not save the print or transfer settings. Unselectable image You attempted to set the print settings for a non-JPEG image. Exx (xx: number) Camera malfunction....
Page 107 - ix; Appendix; Battery Handling; Battery Charge; The following icon and message will display.; Battery Handling Precautions; Never mix unused and partially used batteries.; The partially used batteries may leak.; Do not install the batteries with their terminals (
105 Appen d ix Appendix Battery Handling Battery Charge The following icon and message will display. Battery Handling Precautions z This camera uses AA-size alkaline batteries or Canon AA-size NiMH batteries (sold separately). While it is possible to use AA-size nickel-cadmium batteries, performance...
Page 108 - The batteries may be short circuiting.; WARNING; Never use batteries that look like this.
106 z Before installing the batteries, wipe the battery terminals well with a dry cloth. If the battery terminals are soiled with oil from one’s skin or other dirt, the number of recordable images may be considerably diminished, or reduced usage time. z At low temperatures, battery performance may b...
Page 109 - Handling the Memory Card; Cautions When Handling; Do not attempt to disassemble or alter the memory card.
107 Appen d ix Handling the Memory Card Write Protect Tab Cautions When Handling z Memory cards are high-precision electronic devices. Do not bend them, apply force to them, or subject them to shocks or vibration. z Do not attempt to disassemble or alter the memory card. z Do not allow dirt, water o...
Page 110 - Formatting; • The card supplied with the camera may be used without further
108 Formatting z Please note that formatting (initializing) an memory card erases all data, including protected images. z You are recommended to use memory cards that have been formatted in your camera. • The card supplied with the camera may be used without further formatting. • When the camera is ...
Page 111 - Using Rechargeable Batteries
109 Appen d ix Using Rechargeable Batteries (Battery and Charger Kit CBK4-200) This kit includes a battery charger and four rechargeable AA-size NiMH (nickel metal hydride) batteries. Charge batteries as shown below. The charge indicator blinks while charging, then remains lit when charging is finis...
Page 113 - Using the AC Adapter Kit ACK600
111 Appen d ix Using the AC Adapter Kit ACK600 It is best to power the camera with AC Adapter Kit ACK600 (sold separately) when you are using it for long periods of time or connecting it to a computer. z It takes approximately 4 hours 10 minutes for the charger to fully recharge the batteries after ...
Page 114 - Wide Converter WC-DC58N
112 The camera supports use of the separately sold Wide Converter WC-DC58N and Tele-converter TC-DC58N. In order to attach these lenses, you also need to use the separately sold Conversion Lens Adapter LA-DC58F. Wide Converter WC-DC58N Use this converter for taking wide-angle shots. The wide conve...
Page 115 - Attaching a Lens
113 Appen d ix Conversion Lens Adapter LA-DC58F This is a lens adapter required for attaching the wide converter and tele-converter (58 mm thread diameter). Attaching a Lens 1 Be sure that the camera is turned off. 2 Press the ring release button and hold it down, and turn the ring in the directio...
Page 116 - mode. It will not be possible to use the
114 5 Set the lens on the adapter, and turn it in the indicated direction to attach it securely. z Completely remove all dust and dirt from conversion lenses with a lens blower brush before use. The camera may focus on any dirt that remains. z Be careful when handling the lenses since it is easy to ...
Page 117 - Using an Externally Mounted Flash; When shooting in
115 Appen d ix High-Power Flash HF-DC1 This flash is used to supplement the camera’s built-in flash when the subject is too far away for proper illumination. Use the following procedures to affix the camera and High-Power Flash to the supporting bracket.Please read the instructions accompanying the ...
Page 118 - Batteries; Charge becomes Severely Limited; A tripod can be used even when the flash is attached.
116 Batteries z Charge becomes Severely Limited If the battery usage time has considerably diminished, wipe the battery terminals well with a dry cloth. The terminals may be dirty from fingerprints. z Usage in Cold Temperatures (Less than 0°C/32°F) Get a spare generic lithium battery (CR123A or DL...
Page 119 - Camera Body; Camera Care and Maintenance; Warranty
117 Appen d ix Camera Body Gently wipe dirt off the camera body with a soft cloth or eyeglass lens wiper. Lens First use a lens blower brush to remove dust and dirt, then remove any remaining dirt by wiping the lens lightly with a soft cloth. Viewfinder and LCD Monitor Use a lens blower brush to rem...
Page 120 - Specifications
118 All data is based on Canon’s standard testing methods. Subject to change without notice. PowerShot A620/A610 Specifications (W): Max. wide angle (T): Max. telephoto Camera Effective Pixels : PowerShot A620: Approx. 7.1 million PowerShot A610: Approx. 5.0 million Image Sensor : PowerShot A620: 1/...
Page 124 - Operating Humidity
122 * 1 This digital camera supports Exif 2.2 (also called “Exif Print”). Exif Print is a standard for enhancing the communication between digital cameras and printers. By connecting to an Exif Print-compliant printer, the camera’s image data at the time of shooting is used and optimized, yielding e...
Page 125 - Battery Capacity
123 Appen d ix Battery Capacity z The actual figures will vary according to the shooting conditions and settings. z Movie data is excluded. z At low temperatures, the battery performance may diminish and the low battery icon may appear very rapidly. In these circumstances, the performance can be imp...
Page 127 - : Card included with the camera
125 Appen d ix PowerShot A610 : Card included with the camera • Capable of smooth continuous shooting ( p. 32 ). • This reflects standard shooting criteria established by Canon. Actual results may vary according to the subject and shooting conditions. Resolution Compres- sion SDC-16M SDC-128M SDC-...
Page 128 - Movie
126 Movie * Maximum movie clip length at : 1 min., at : 3 min. The figures indicate the maximum continuous recording time. Resolution Frame Rate SDM- 16M SDC- 32M SDC- 128M SDC- 512MSH Standard 640 x 480 pixels 6 sec. 14 sec. 1 min. 4 sec. 4 min. 9 sec. 14 sec. 30 sec. 2 min. 7 sec. 8 min. 14 sec. M...
Page 130 - SD Memory Card
128 SD Memory Card NiMH Battery NB-2AH (Supplied with the separately sold NiMH Battery NB4-200 set or the Battery and Charger Kit CBK4-200) Battery Charger CB-4AH/CB-4AHE (Supplied with the separately sold Battery and Charger Kit CBK4-200) Interface Compatible with SD memory card standards Dimension...
Page 133 - INDEX
131 INDEX A AC Adapter Kit ACK600 .......111 AE Lock ..................................49 AF ...........................................45 AF Frame ..........................16 , 45 AF Lock ..................................47 AF-assist Beam ................24 , 96 AiAF ................................
Page 137 - mode, you can shoot using your saved settings (
135 Functions Available in Each Shooting Mode The following chart shows the functions and settings available in each shooting mode.In mode, you can shoot using your saved settings ( p. 69 ). Function 1) Ref. Page Resolu-tion Large { * { * { * { * { * { * U * – { * { * { * { * p. 29 , 30 Medium 1 { {...
Page 139 - Advanced; ENGLISH; Camera User Guide; This guide explains camera features and procedures in detail.
DIGITA L CAMERA Ad va nced Cam er a User Guid e Before Using the Camera Shooting Playback/Erasing Print/Transfer Settings Viewing Images on a TV set Customizing the Camera Troubleshooting List of Messages Appendix Advanced ENGLISH Camera User Guide This guide explains camera features and procedures ...


 Canon PowerShot A540, A530 Manual
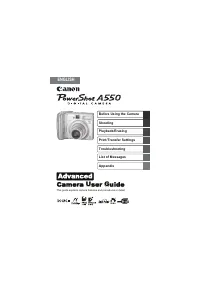 Canon PowerShot A550 User Manual
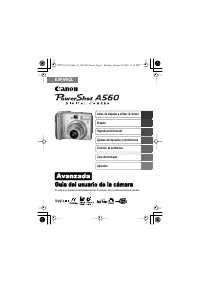 Canon PowerShot A560 User Manual
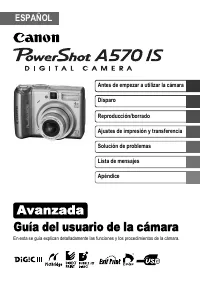 Canon Powershot A570 IS User Manual
 Canon PowerShot A580 User Manual
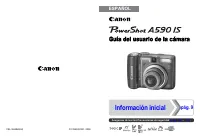 Canon PowerShot A590 IS User Manual
 Canon POWERSHOT A620 User Manual
 Canon PowerShot A620, A610 Manual
 Canon POWERSHOT A630 User Manual
 Canon POWERSHOT A640 User Manual
 Canon PowerShot A640, A630 Manual
 Canon Powershot A650 IS User Manual