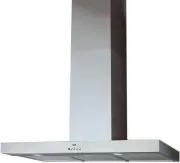
Smeg KSEV97X2 - Manuals
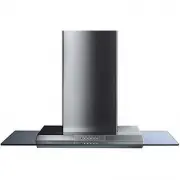
User Manual Smeg KSEV97X2


Summary
11 GB CONTENTS Dear Customer, If you follow the recommendationscontained in this Instruction Manual,your appliance will give you constanthigh performance and will remainefficient for many years to come. RECOMMENDATIONS AND SUGGESTIONS 12 CHARACTERISTICS 13 INSTALLATION 14 USE 17 MAINTENANCE 18
12 GB RECOMMENDATIONS AND SUGGESTIONS INSTALLATION • The manufacturer will not be held liable for any damages resulting from incorrect or improper installation. • The minimum safety distance between the cooker top and the extractor hood is 650 mm. • Check that the mains voltage corresponds to that i...
13 GB 898 500 68 300 260 310 740 740 min 950 max 80 2.1 2.2 2 1 14.1 15 12c 11 12a 12a 7.2.1 11 10 CHARACTERISTICS Dimensions Components Ref. Q.ty Product Components 1 1 Hood Body, complete with: Controls, Light,Blower, Filters 2 1 Telescopic Chimney comprising: 2.1 1 Upper Section 2.2 1 Lower Secti...
Smeg Range Hoods Manuals
-
 Smeg 30403
User Manual
Smeg 30403
User Manual
-
 Smeg CI2000SS
User Manual
Smeg CI2000SS
User Manual
-
 Smeg CK2000LED
User Manual
Smeg CK2000LED
User Manual
-
 Smeg CK2000SS
User Manual
Smeg CK2000SS
User Manual
-
 Smeg CLASSIC591SS
User Manual
Smeg CLASSIC591SS
User Manual
-
 Smeg CLASSIC592SS
User Manual
Smeg CLASSIC592SS
User Manual
-
 Smeg CLASSIC791SS
User Manual
Smeg CLASSIC791SS
User Manual
-
 Smeg CLASSIC792SS
User Manual
Smeg CLASSIC792SS
User Manual
-
 Smeg CMVERTIGO
User Manual
Smeg CMVERTIGO
User Manual
-
 Smeg CMZOOM
User Manual
Smeg CMZOOM
User Manual
-
 Smeg IS7088D150SS
User Manual
Smeg IS7088D150SS
User Manual
-
 Smeg IS7088D180SS
User Manual
Smeg IS7088D180SS
User Manual
-
 Smeg IS7099X90
User Manual
Smeg IS7099X90
User Manual
-
 Smeg IS7599ENC-2
User Manual
Smeg IS7599ENC-2
User Manual
-
 Smeg K181X70
User Manual
Smeg K181X70
User Manual
-
 Smeg K7088D150SS
User Manual
Smeg K7088D150SS
User Manual
-
 Smeg K7088D180SS
User Manual
Smeg K7088D180SS
User Manual
-
 Smeg K90X
User Manual
Smeg K90X
User Manual
-
 Smeg KA1VA
User Manual
Smeg KA1VA
User Manual
-
 Smeg KA1VA2
User Manual
Smeg KA1VA2
User Manual