Smeg KSEV97X2 - User Manual
Smeg KSEV97X2 Range Hood – User Manual, read for free online in PDF format. We hope this helps you resolve any issues you may have. If you have further questions, please contact us through the contact form.


Table of Contents:
- Page 2 – CONTENTS; RECOMMENDATIONS AND SUGGESTIONS
- Page 3 – INSTALLATION
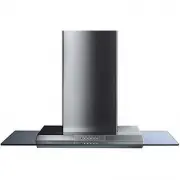
- Page 4 – CHARACTERISTICS; Dimensions
- Page 5 – Wall drilling and bracket fixing
- Page 6 – RECIRCULATION VERSION AIR OUTLET; Mounting the hood body; Connections; DUCTED VERSION AIR EXHAUST SYSTEM
- Page 7 – ELECTRICAL CONNECTION; Flue assembly
- Page 8 – USE; Control panel; V1 Speed
- Page 9 – MAINTENANCE; Grease filters; CLEANING METAL SELF- SUPPORTING GREASE FILTERS
- Page 10 – Activated charcoal filter (Recirculation version); REPLACING THE ACTIVATED CHARCOAL FILTER; Lighting; LIGHT REPLACEMENT
Libretto Istruzioni
Instruction Manual
Manuel d’Instructions
Bedienungsanleitung
Gebruiksaanwijzing
Manual de Instrucciones
NL
38
DE
29
FR
20
GB
11
IT
2
ES
47
KSEV97X
"Loading the manual" means you need to wait until the file loads and becomes available for online reading. Some manuals are very large, and the time they take to appear depends on your internet speed.
Summary
11 GB CONTENTS Dear Customer, If you follow the recommendationscontained in this Instruction Manual,your appliance will give you constanthigh performance and will remainefficient for many years to come. RECOMMENDATIONS AND SUGGESTIONS 12 CHARACTERISTICS 13 INSTALLATION 14 USE 17 MAINTENANCE 18
12 GB RECOMMENDATIONS AND SUGGESTIONS INSTALLATION • The manufacturer will not be held liable for any damages resulting from incorrect or improper installation. • The minimum safety distance between the cooker top and the extractor hood is 650 mm. • Check that the mains voltage corresponds to that i...
13 GB 898 500 68 300 260 310 740 740 min 950 max 80 2.1 2.2 2 1 14.1 15 12c 11 12a 12a 7.2.1 11 10 CHARACTERISTICS Dimensions Components Ref. Q.ty Product Components 1 1 Hood Body, complete with: Controls, Light,Blower, Filters 2 1 Telescopic Chimney comprising: 2.1 1 Upper Section 2.2 1 Lower Secti...