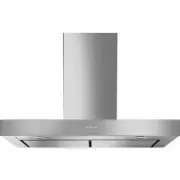
Page 2 - CHARACTERISTICS; Components
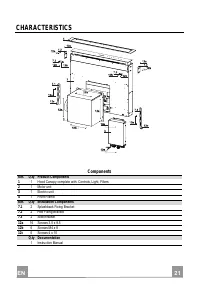
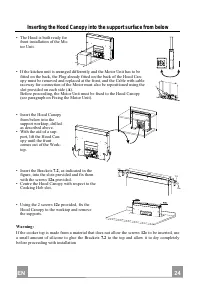
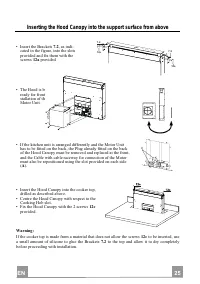
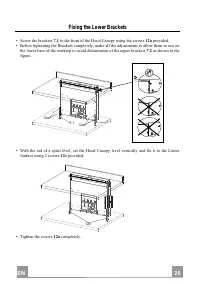
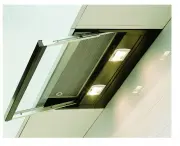
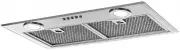
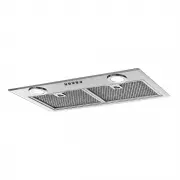
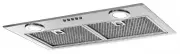
EN 2 21 CHARACTERISTICS Components Ref. Q.ty Product Components 1 1 Hood Canopy complete with: Controls, Light, Filters 2 1 Motor unit 3 1 Electric unit 4 1 Front Frame Ref. Q.ty Installation Components 7.1 2 Splashback Fixing Bracket 7.2 2 Hob Fixing Bracket 7.3 2 Side Bracket 12a 16 Screws 3.5 x 9...
Page 3 - Dimensions
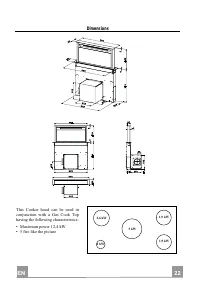
EN 2 22 Dimensions This Cooker hood can be used in conjunction with a Gas Cook Top having the following characteristics: • Maximum power 12,4 kW • 5 fire like the picture 2,6 kW 5 kW 1,9 kW 1,9 kW 1 kW
Page 4 - INSTALLATION; Ducting version; Recirculation version; Sequence of operations - Installation; Warning; IMPORTANT
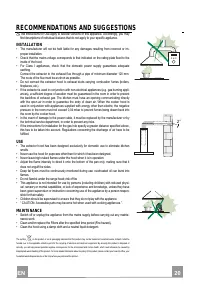
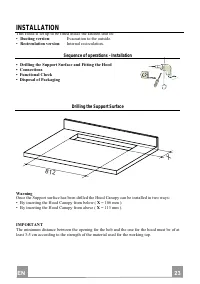
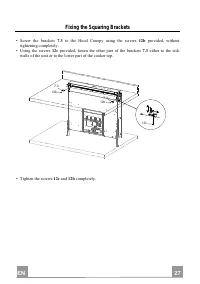
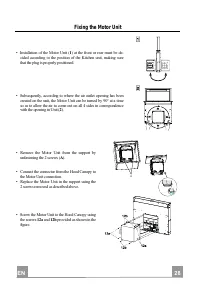
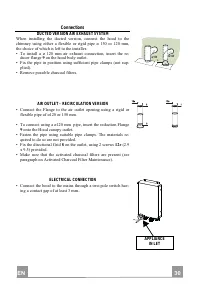
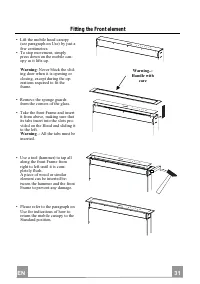
EN 2 23 INSTALLATION This Hood is set up to be fitted inside the kitchen unit in: • Ducting version : Evacuation to the outside. • Recirculation version : Internal recirculation. Sequence of operations - Installation • Drilling the Support Surface and Fitting the Hood • Connections • Functional Chec...
Page 5 - Inserting the Hood Canopy into the support surface from below
EN 2 24 7.2 12a 7.2 12a A Inserting the Hood Canopy into the support surface from below • The Hood is built ready for front installation of the Mo-tor Unit. • If the kitchen unit is arranged differently and the Motor Unit has to be fitted on the back, the Plug already fitted on the back of the Hood ...
Page 6 - Inserting the Hood Canopy into the support surface from above
EN 2 25 Inserting the Hood Canopy into the support surface from above • Insert the Brackets 7.2 , as indi- cated in the figure, into the slots provided and fix them with the screws 12a provided. • The Hood is built ready for front in-stallation of the Motor Unit. • If the kitchen unit is arranged di...
Page 7 - Fixing the Lower Brackets
EN 2 26 12c 12a 7.1 12a 7.1 Fixing the Lower Brackets • Screw the brackets 7.1 to the front of the Hood Canopy using the screws 12a provided. • Before tightening the Brackets completely, make all the adjustments to allow them to rest on the lower base of the worktop to avoid deformation of the upper...
Page 8 - Fixing the Squaring Brackets
EN 2 27 Fixing the Squaring Brackets • Screw the brackets 7.3 to the Hood Canopy using the screws 12b provided, without tightening completely. • Using the screws 12c provided, fasten the other part of the brackets 7.3 either to the side walls of the unit or to the lower part of the cooker top. 12b 7...
Page 9 - Fixing the Motor Unit
EN 2 28 A Fixing the Motor Unit • Installation of the Motor Unit ( 1 ) at the front or rear must be de- cided according to the position of the Kitchen unit, making sure that the plug is properly positioned. • Subsequently, according to where the air outlet opening has been created on the unit, the M...
Page 10 - Fixing the Electric Unit
EN 2 29 Fixing the Electric Unit • Connect the Electric cables that come out of the lower right hand part of the Hood Canopy to the Connectors on the Electric unit. • Each cable connector has a corresponding connector on the Electric Unit, so take care not to make mistakes when connecting up. • Fix ...
Page 11 - Connections; DUCTED VERSION AIR EXHAUST SYSTEM
EN 3 30 Connections DUCTED VERSION AIR EXHAUST SYSTEM When installing the ducted version, connect the hood to the chimney using either a flexible or rigid pipe ø 150 or 120 mm, the choice of which is left to the installer. • To install a ø 120 mm air exhaust connection, insert the re- ducer flange 9...
Page 12 - Fitting the Front element
EN 3 31 Warning..: Handle with care Fitting the Front element • Lift the mobile hood canopy (see paragraph on Use) by just a few centimetres. • To stop movement, simply press down on the mobile can-opy as it lifts up. Warning : Never block the slid- ing door when it is opening or closing, except dur...
Page 13 - Surround Suction Panel
EN 3 32 Surround Suction Panel • Open the Hood Door (see USE). • Remove the 2 strips of adhesive tape fastening the panel during transport.
Page 14 - USE; Control panel
EN 3 33 USE Control panel But ton Function LED button A The button only works when the door is open. Turns the motor On/Off at speed one. Press and hold the button for approximately 5 seconds, with all the loads turned off (Motor and Lights), to turn the Remote control On/Off. IR+Dot (Flashes twice)...
Page 15 - Remote control panel; Use
EN 3 34 REMOTE CONTROL (OPTIONAL) The appliance can be controlled using a remote control powered by a 1.5 V carbon-zinc alkaline batteries of the standard LR03-AAA type (not included). • Do not place the remote control near to heat sources. • Used batteries must be disposed of in the proper manner. ...
Page 16 - MAINTENANCE; Cleaning the Comfort Panels; Metal grease filters; Resetting the alarm signal
EN 3 35 MAINTENANCE Cleaning the Comfort Panels • Open the Comfort Panel by pulling it at the top. • Unhook the security chain by opening the spring catch. • Disconnect the panel from the hood canopy. • The comfort panel must never be washed in the dishwasher. • Clean the outside with a damp cloth a...
Page 17 - Activated Charcoal Filter (Recirculation Version); Activating the alarm signal; Lighting unit
EN 3 36 Activated Charcoal Filter (Recirculation Version) Can be washed in the dishwasher. It must be washed when is displayed or at least once every 4 months, or more frequently if use is particularly intense. Guaranteed to operate after washing for up to a maximum of 5 times before requiring repla...