Smeg C9GMXA1 - Manuals
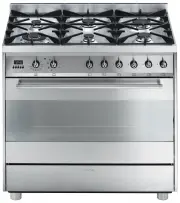
User Manual Smeg C9GMXA1


Summary
Precautions for use 4 1. PRECAUTIONS FOR USE THIS MANUAL IS AN INTEGRAL PART OF THE APPLIANCE. TAKE GOOD CARE OF IT AND KEEP ITTO HAND THROUGHOUT THE COOKER'S LIFE CYCLE. WE URGE YOU TO READ THIS MANUALAND ALL THE INFORMATION IT CONTAINS CAREFULLY BEFORE USING THE APPLIANCE. ALSOKEEP ALL THE NOZZLES...
Precautions for use 5 THE APPLIANCE IS NOT INTENDED FOR USE BY YOUNG CHILDREN OR INFIRM PERSONS UNLESSTHEY HAVE BEEN ADEQUATELY SUPERVISED BY A RESPONSIBLE PERSON TO ENSURE THEY CANUSE THE APPLIANCE SAFELY. YOUNG CHILDREN SHOULD BE SUPERVISED TO ENSURE THAT THEYDO NOT PLAY WITH THE APPLIANCE. DO NOT...
Instructions for the installer 6 2. INSTALLING THE APPLIANCE IIt is the law that all gas appliances are installed by authorised persons . Clearance around the cooker must comply with the requirements of AS5601. 2.1 Electrical connection After making the electrical and gas connections, level the the ...
Smeg Ovens Manuals
-
 Smeg A11X-7
User Manual
Smeg A11X-7
User Manual
-
 Smeg A11XPY-9
User Manual
Smeg A11XPY-9
User Manual
-
 Smeg A1PYID-7
User Manual
Smeg A1PYID-7
User Manual
-
 Smeg A1PYID-9
User Manual
Smeg A1PYID-9
User Manual
-
 Smeg A3AU-81
User Manual
Smeg A3AU-81
User Manual
-
 Smeg A5AU-81
User Manual
Smeg A5AU-81
User Manual
-
 Smeg ALFA1035EH
User Manual
Smeg ALFA1035EH
User Manual
-
 Smeg ALFA1035EHDS
User Manual
Smeg ALFA1035EHDS
User Manual
-
 Smeg ALFA1035EHT
User Manual
Smeg ALFA1035EHT
User Manual
-
 Smeg ALFA1035H
User Manual
Smeg ALFA1035H
User Manual
-
 Smeg ALFA1035H-2
User Manual
Smeg ALFA1035H-2
User Manual
-
 Smeg ALFA420EH
User Manual
Smeg ALFA420EH
User Manual
-
 Smeg ALFA420EHDS
User Manual
Smeg ALFA420EHDS
User Manual
-
 Smeg ALFA420EHT
User Manual
Smeg ALFA420EHT
User Manual
-
 Smeg ALFA625EH
User Manual
Smeg ALFA625EH
User Manual
-
 Smeg ALFA625EHDS
User Manual
Smeg ALFA625EHDS
User Manual
-
 Smeg ALFA625EHT
User Manual
Smeg ALFA625EHT
User Manual
-
 Smeg ALFA625H
User Manual
Smeg ALFA625H
User Manual
-
 Smeg ALFA625H-2
User Manual
Smeg ALFA625H-2
User Manual
-
 Smeg ALFA625HR-2
User Manual
Smeg ALFA625HR-2
User Manual