Smeg C9GMNA1 - Manuals
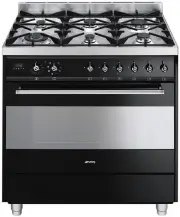
User Manual Smeg C9GMNA1


Summary
Contents 1. INSTRUCTIONS FOR USE ..................................................................................................... 42. SAFETY PRECAUTIONS ........................................................................................................ 63. ENVIRONMENTAL CARE .................
General instructions 4 1. INSTRUCTIONS FOR USE This manual is an integral part of the appliance. It must be kept in its entirety and in an accessible place for the whole working life of the appliance. We recommend reading this manual and all information itcontains carefully before using the applianc...
General instructions 6 2. SAFETY PRECAUTIONS Consult the installation instructions for safety standards on electrical or gas appliances and forventilation functions. In your interests and for your safety the law requires that the installation andservicing of all electrical and gas appliances be carr...
Smeg Ovens Manuals
-
 Smeg A11X-7
User Manual
Smeg A11X-7
User Manual
-
 Smeg A11XPY-9
User Manual
Smeg A11XPY-9
User Manual
-
 Smeg A1PYID-7
User Manual
Smeg A1PYID-7
User Manual
-
 Smeg A1PYID-9
User Manual
Smeg A1PYID-9
User Manual
-
 Smeg A3AU-81
User Manual
Smeg A3AU-81
User Manual
-
 Smeg A5AU-81
User Manual
Smeg A5AU-81
User Manual
-
 Smeg ALFA1035EH
User Manual
Smeg ALFA1035EH
User Manual
-
 Smeg ALFA1035EHDS
User Manual
Smeg ALFA1035EHDS
User Manual
-
 Smeg ALFA1035EHT
User Manual
Smeg ALFA1035EHT
User Manual
-
 Smeg ALFA1035H
User Manual
Smeg ALFA1035H
User Manual
-
 Smeg ALFA1035H-2
User Manual
Smeg ALFA1035H-2
User Manual
-
 Smeg ALFA420EH
User Manual
Smeg ALFA420EH
User Manual
-
 Smeg ALFA420EHDS
User Manual
Smeg ALFA420EHDS
User Manual
-
 Smeg ALFA420EHT
User Manual
Smeg ALFA420EHT
User Manual
-
 Smeg ALFA625EH
User Manual
Smeg ALFA625EH
User Manual
-
 Smeg ALFA625EHDS
User Manual
Smeg ALFA625EHDS
User Manual
-
 Smeg ALFA625EHT
User Manual
Smeg ALFA625EHT
User Manual
-
 Smeg ALFA625H
User Manual
Smeg ALFA625H
User Manual
-
 Smeg ALFA625H-2
User Manual
Smeg ALFA625H-2
User Manual
-
 Smeg ALFA625HR-2
User Manual
Smeg ALFA625HR-2
User Manual