Makita HR2611F - Manuals
Makita HR2611F Hammer Drill – Manual in PDF format online.
Manuals:
Manual Makita HR2611F


Summary
2 ENGLISH (Original instructions) SPECIFICATIONS Model HR2300 HR2310T HR2600 HR2601 HR2610 HR2610T HR2611F HR2611FT Concrete 23 mm 26 mm Core bit 68 mm 68 mm 68 mm Diamond core bit (dry type) 70 mm 80 mm 80 mm Steel 13 mm 13 mm 13 mm Capacities Wood 32 mm 32 mm 32 mm No load speed (min -1 ) 0 - 1,20...
4 wiring or its own cord. Cutting accessory contacting a "live" wire may make exposed metal parts of the power tool "live" and could give the operator an electric shock. 4. Wear a hard hat (safety helmet), safety glasses and/or face shield. Ordinary eye or sun glasses are NOT safety ...
5 Reversing switch action B A 1 010722 CAUTION: • Always check the direction of rotation before operation. • Use the reversing switch only after the tool comes to a complete stop. Changing the direction of rotation before the tool stops may damage the tool. • If the switch trigger can not be depress...
Makita Hammer Drills Manuals
-
 Makita DHR165RME
User Manual
Makita DHR165RME
User Manual
-
 Makita DHR171RTJ
User Manual
Makita DHR171RTJ
User Manual
-
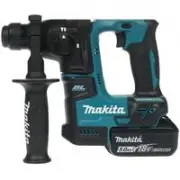
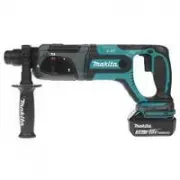
 Makita DHR182ZWJ
User Manual
Makita DHR182ZWJ
User Manual
-
 Makita DHR202RFJ
User Manual
Makita DHR202RFJ
User Manual
-
 Makita DHR241RFE
User Manual
Makita DHR241RFE
User Manual
-
 Makita DHR241RFJ
User Manual
Makita DHR241RFJ
User Manual
-
 Makita DHR242RFE
User Manual
Makita DHR242RFE
User Manual
-
 Makita DHR242Z
User Manual
Makita DHR242Z
User Manual
-
 Makita DHR263Z
User Manual
Makita DHR263Z
User Manual
-
 Makita DHR282ZJ
User Manual
Makita DHR282ZJ
User Manual
-
 Makita GPH01Z
User Manual
Makita GPH01Z
User Manual
-
 Makita GPH02D
User Manual
Makita GPH02D
User Manual
-
 Makita HR001GZ
User Manual
Makita HR001GZ
User Manual
-
 Makita HR004GZ
User Manual
Makita HR004GZ
User Manual
-
 Makita HR140DWAJ
User Manual
Makita HR140DWAJ
User Manual
-
 Makita HR140DZ
User Manual
Makita HR140DZ
User Manual
-
 Makita HR166DWAJ
User Manual
Makita HR166DWAJ
User Manual
-
 Makita HR166DZ
User Manual
Makita HR166DZ
User Manual
-
 Makita HR1840
User Manual
Makita HR1840
User Manual
-
 Makita HR1841F
User Manual
Makita HR1841F
User Manual