Page 2 - WARNING; CONDITIONS OF USE; Farm houses
2 electrolux.com.au CONTENTS Important instructions ______________________________ 3 Before using your appliance _____________________ 3 Information on disposal for users ________________ 3 Important safety instructions ____________________ 3 General cautions ______________________________ 4 Install...
Page 3 - Please remove all stickers and protective film from; IMPORTANT INSTRUCTIONS; Do not line the oven with foil. It will damage; IMPORTANT; INFORMATION ON DISPOSAL; ENVIRONMENT; IMPORTANT SAFETY INSTRUCTIONS
3 SOFTWARE LICENSES The software in this product contains components that are based on free and open source software. Electrolux gratefully acknowledges the contributions of the open software and robotics communities to the development project.To access the source code of these free and open source ...
Page 4 - Child safety; GENERAL CAUTIONS
4 electrolux.com.au IMPORTANT INSTRUCTIONS (CONTINUED) • Only authorised personnel should carry out servicing. (Certificate of Compliance to be retained) • Always ensure the appliance is switched off before cleaning or replacing parts. • For model EVEP618/619, do not open the oven door during steam ...
Page 5 - INSTALLATION OF THE APPLIANCE; Figure B – Proud Fit
5 INSTALLATION OF THE APPLIANCE WARNING The appliance must not be installed behind a decorative door in order to avoid overheating.To avoid any potential hazard, you must follow our instructions when you install your appliance. Failure to install the appliance correctly could invalidate any warranty...
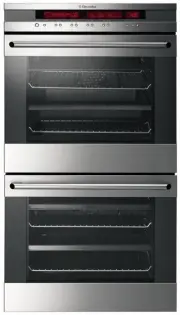
Page 6 - Double oven Cut-out dimensions; Pyrolytic underbench Cut-out dimensions; Duo oven Cut-out dimensions
6 electrolux.com.au Levelling oven Place a level in the oven as below making sure the level sits on the front and rear forms. The level needs to be correct to prevent slides from moving in or out with gravity. ✓ Underbench oven Your underbench oven looks best when the control panel is directly under...
Page 7 - Pyro proof slides
7 INSTALLING THE OVEN ACCESSORIES Slides (Telescopic runners) 1. Obtain left hand side rack and left hand slide – see image to identify. CLICK ! 1 2 3 2. The shaded wires indicate the wire the slide can be mounted on. Fit slide rear clips to the rear of wire at an angle as shown below. CLICK ! 1 2 3...
Page 8 - To fit a shelf or tray to telescopic slides:
8 electrolux.com.au Side racks 1. Insert the rear peg into the rear access hole provided, ensuring peg is fully inserted. 2. Then locate the front peg into the front access hole and push in firmly. NOTE: If you have purchased a two cavity appliance you will have additional side racks for the lower o...
Page 9 - Trays; Grill shelf and Roasting tray; USING THE APPLIANCE; With ‘Rapid Heat’ function; than the water container.
9 Trays The appliance is supplied with Baking tray, Roasting tray and on selected models Cast roasting dish/AirFry Plus tray.The baking tray and roasting dish can be placed on top of the shelves or can be suspended under the grill shelf. Grill shelf and Roasting tray Baking tray Cast roasting dishTh...
Page 10 - GETTING TO KNOW THE OVEN; ‘Simple Test Cake’; Preheat oven to moderate ‘180oC’ (170oC fan
10 electrolux.com.au GETTING TO KNOW THE OVEN Get to know your new oven with this ‘Simple Test Cake’ Although we strive for a perfect performing oven, it’s possible that there will be some variation in colour when baking. Therefore, we suggest to make this simple, easy and delicious Simple Test Cake...
Page 11 - TECHNICAL SPECIFICATIONS; Hard wiring details; Fit wires through hole in cover plate and make
11 TECHNICAL SPECIFICATIONS model product dimensions (h x w x d) mm electrical connection min. fuse rating max. power rating max. current rating EVE602 597 x 596 x 568 230-240V / 50Hz 16A 3.1kW 12.9A EVE614 597 x 596 x 568 230-240V / 50Hz 16A 3.1kW 12.9A EVE615 597 x 596 x 568 230-240V / 50Hz 16A 3....
Page 13 - BEFORE USING THE APPLIANCE; Setting the time; Before the appliance can be used, the time must be set.; Select the correct shelf location for food being cooked.; Oven shelf location
13 BEFORE USING THE APPLIANCE Setting the time Before the appliance can be used, the time must be set. After the appliance has been electrically connected ‘12:00’ will be displayed and the clock icon will flash.To set the time of day in hours and minutes touch the + or – symbols. Refer to the diagra...
Page 14 - COOKING FUNCTIONS; Symbol Function description
14 electrolux.com.au COOKING FUNCTIONS Symbol Function description Rapid Heat Heat comes from the element surrounding the fan as well as the smaller element above the food. This allows you to preheat your oven 30% quicker than on standard ‘Bake/Pizza’. ‘Rapid Heat’ is ideal for cooking frozen pre-co...
Page 15 - OPERATING SEQUENCE; Select the cooking function; Cooking with the timer
15 OPERATING SEQUENCE Select the cooking function Turn the function selector in any direction to the desired cooking function. The oven cavity light will come on. Select the temperature To set the temperature, turn the temperature selector in a clockwise direction to the desired setting. An indicato...
Page 16 - To check or cancel settings:; button until the clock no longer reverses (at; On completion of cooking; Touch the icon until the
16 electrolux.com.au To check or cancel settings: • To cancel ‘auto shut off’ touch the MODE symbol until the cook time icon flashes. Touch and hold the – button until the clock no longer reverses (at 0:00 a beep will be heard). This automatically cancels ‘auto shut off’. If the temperature and func...
Page 18 - Symbol Function description
18 electrolux.com.au COOKING FUNCTIONS Symbol Function description Fan Bake Heat comes from the element surrounding the fan. This fan circulates the hot air around the oven cavity so that you can put your food in different places in the oven and still cook them at the same time. You can use ‘Fan Bak...
Page 19 - Select the oven function; Control panel
19 OPERATING SEQUENCE Select the oven function Turn the oven function selector clockwise to select the desired oven function. NOTE: each oven function has a default temperature which can then be adjusted as outlined below. This knob cannot be turned anticlockwise from off position Selecting the oven...
Page 20 - BEFORE FIRST USE; Initial cleaning; CONDITION THE OVEN; Run in the empty oven before the first use.
20 electrolux.com.au The display with the maximum number of functions set. Display indicators Lock Assisted cooking Cleaning Settings Fast heat up Progress bar for temperature or time Steam cooking indicator Timer indicators Minute minder Cooking time Time delay Uptimer BEFORE FIRST USE WARNING Refe...
Page 21 - DAILY USE; Start cooking; Every dish in this submenu has a recommended function
21 2. Select Assisted Cooking. Press OK. 3. Select the dish. Press OK. Refer to "Menu structure" chapter. P1 - P41 4. Insert the dish into the oven. Confirm setting. DAILY USE Start cooking 1. Set a heating function. 2. Set the temperature. How to set: Assisted Cooking Every dish in this sub...
Page 22 - CLOCK FUNCTIONS; Clock function Application; Turn Temperature Selector to select Settings and
22 electrolux.com.au EVEP614 (CONTINUED) CLOCK FUNCTIONS Clock function Application Minute minder. When the timer ends, the signal sounds. Cooking time. When the timer ends, the signal sounds and the heating function stops. Time Delay. To postpone the start and / or end of cooking. Uptimer. Maximum ...
Page 23 - How to set: Minute minder; Set the Minute minder; How to set: Cooking time; Choose a heating function and set the temperature.; Timer starts counting down immediately.
23 How to set: Minute minder 1. Press The display shows: 2. Set the Minute minder 3. Press OK. Timer starts counting down immediately. How to set: Cooking time 1. Choose a heating function and set the temperature. 2 Press repeatedly: The display shows: h:min STOP 3. Set the cooking time. 4. Press OK...
Page 24 - How to set: Time Delay; The display shows: the time of day; START; How to set: Child lock
24 electrolux.com.au How to set: Time Delay 1. Select the heating function. 2. Press repeatedly: The display shows: the time of day h:min START STOP 3. Set the start time. 4. Press OK. The display shows: EVEP614 (CONTINUED) START STOP 5 Set the end time. 6 Press OK. Timer starts counting down immedi...
Page 26 - Assisted cooking settings
26 electrolux.com.au EVEP614 (CONTINUED) Assisted cooking settings P1 Jacket Potato Wedges P2 Hash Browns P3 Lasagne P4 Potato Gratin P5 Pasta Bake P6 Vegetable Gratin P7 Pizza P8 Pizza frozen P9 Quiche P10 Ciabatta P11 Rolls P12 Baguette P13 Wholegrain Bread P14 White Bread P15 Dark Bread P16 Almon...
Page 27 - PYROLYTIC CLEANING THE OVEN; After Pyrolytic cleaning
27 PYROLYTIC CLEANING THE OVEN Pyrolytic cleaning of the oven cavity The oven has the Pyrolytic self-cleaning function. It cleans by burning off the spatters and accumulated dirt and grease from the oven liner, at high temperature. This process produces ash which can then be wiped out of the oven ca...
Page 31 - Press
31 EVE615 / 636, EVEP615/ 616 / 618 / 619 / 626 USING THE APPLIANCE 170°C 1 On / Off Press and hold to turn the oven on and off 2 Menu Lists the oven functions 3 Favourites Lists the favourite settings 4 Touch display Shows the current settings of the oven 5 Light switch To turn the lamp on and off ...
Page 32 - DISPLAY; How to turn the oven on and off; Display indicators
32 electrolux.com.au EVE615 / 636, EVEP615/ 616 / 618 / 619 / 626 (CONTINUED) DISPLAY How to turn the oven on and off 12:34 If you do not use the oven for 2 minutes, the display goes to standby. 11min 150°C STOP When you cook, the display shows the set functions and other available options. 12:30 15...
Page 33 - Message
33 CONDITION THE OVEN (TO BURN OFF ANY RESIDUE) Run in the empty oven before the first use. 1. Remove all accessories and removable shelf supports from the oven. 2. Set the temperature to 180 ° C for the function: Fan cooking . Let the oven operate for 30 minutes. The oven can emit an odour and smok...
Page 34 - ADDITIONAL FUNCTIONS
34 electrolux.com.au EVE615 / 636, EVEP615/ 616 / 618 / 619 / 626 (CONTINUED) Take a shortcut! How to choose end option 1. Press 2. Press 3. Select End action from timer4. Press End action5. Select preferred option6. Press: . Repeat the action until the display shows the main screen. How to delay st...
Page 36 - COOKING FUNCTIONS - STANDARD
36 electrolux.com.au COOKING FUNCTIONS - STANDARD (Functions listed may not apply to all models.) Symbol Function description Fan cooking Heat comes from the element surrounding the fan. This fan circulates the hot air around the oven cavity so that you can put your food in different places in the o...
Page 38 - COOKING FUNCTIONS – SPECIAL
38 electrolux.com.au EVE615 / 636, EVEP615/ 616 / 618 / 619 / 626 (CONTINUED) COOKING FUNCTIONS – SPECIAL (Functions listed may not apply to all models.) Symbol Function description Keep warm The ‘Keep Warm’ function is a low temperature oven function designed to keep your food at a perfect eating t...
Page 39 - MENU
39 MENU Main menu Press: to open Menu Menu item Application Assisted cooking Lists automatic programmes. Cleaning Lists cleaning programmes. Favourites Lists the favourite settings. Options To set the oven configuration. Settings Setup To set the oven configuration Service Shows the software version...
Page 42 - PYROLYTIC CLEANING
42 electrolux.com.au PYROLYTIC CLEANING Pyrolytic cleaning of the oven cavity The oven has the Pyrolytic self-cleaning function, it cleans by burning off the spatters and accumulated dirt and grease from the oven liner, at high temperature. This process produces ash which can then be wiped out of th...
Page 43 - For; After Pyrolytic Cleaning
43 IMPORTANT At the beginning of Pyrolytic cleaning, the door will automatically lock and the lock symbol will appear on the display. During the Pyrolytic cleaning cycle there may be some burn off odours. It is advised to keep the room well ventilated during this cycle. EVEP626 For this model with t...
Page 44 - ASSISTED COOKING RECIPES
44 electrolux.com.au Food category Type of food Type Side / Oven Dishes Side Dishes Jacket Potato Wedges Hash Browns Oven Dishes LasagnePotato GratinPasta BakeVegetable Gratin Savoury Baking Pizza Pizza Quiche Quiche Bread CiabattaRollsBaguetteWholegrain BreadWhite BreadDark Bread Cake in Tin Almond...
Page 45 - STEAM ASSISTED COOKING
45 STEAM ASSISTED COOKING All Electrolux range of ovens have the ability to add steam while baking.Cooking with steam is a great addition to ‘hot air’ cooking. Steam brings out all the natural flavours and goodness in the food, cooks evenly from surface to centre and retains more nutrients and vitam...
Page 47 - COOKING FUNCTION –
47 EVEP618 / EVEP619 Steam product description STEAM ASSIST 1 2 3 4 1 SteamRoast 2 AirFry Plus 3 SteamBake 4 Steam Reheat 1 2 Water tank Level Indicator – Tank empty. – Water present. – Tank full. Overfill alarm will sound. Press ‘OK’ to continue. 1 Steam outlet. This is where steam is injected into...
Page 48 - STEAM COOKING OPERATION; STEAM MAINTENANCE; CAUTION
48 electrolux.com.au STEAM COOKING OPERATION The water drawer cover is in the control panel. WARNING Use only cold tap water. Do not use filtered (de-mineralised) or distilled water. Do not use other liquids. Do not put flammable or alcoholic liquids into the water drawer. WARNING The steam is not v...
Page 49 - STEAM SERVICE FUNCTIONS
49 if the procedure is not completed correctly, the display prompts to repeat the procedure. Descaling reminder There are two reminders which prompt you to descale the oven. You cannot disable the descaling reminder. Type Description Soft reminder Recommends you descale the oven Hard reminder Obliga...
Page 50 - WATER HARDNESS
50 electrolux.com.au Tank Emptying Use this function after cooking with a steam heating function to remove the residual water from the water drawer.Before you start:• Turn off the oven and wait until it is cold 1. Place the deep pan on the base of the oven.2. Select: Menu / Cleaning / Steam maintena...
Page 51 - COOKING GUIDE; Recipe
51 COOKING GUIDE Recipe Function Shelf position Temp (C) Preheat Cooking time (min excluding preheat) Size/portion Accessory Chicken nuggets AirFry Plus 3 220 Y 15-25 600g AirFry Plus Tray Croquettes AirFry Plus 3 220 Y 15-25 450g AirFry Plus Tray Crumbed fish AirFry Plus 3 220 Y 15-25 6pcs AirFry P...
Page 52 - ALL FOOD SENSOR/PROBE MODELS; USING THE FOOD SENSOR/PROBE
52 electrolux.com.au The Food Sensor/Probe measures the core temperature of the food. When the food reaches the desired set core temperature, the oven turns off. The Food Sensor/Probe has a core temperature range of 50-99°C.There are two temperatures to set:• The oven temperature • The core temperat...
Page 53 - NOTE: The estimated end time will be displayed after
53 Poultry Place the whole poultry on the wire rack breast side up. Insert the Food Sensor/probe with at least 75% of the Sensor/probe into the breast of the poultry. Place the Sensor/probe in a direction toward the neck end of the poultry. CAUTION To prevent the Food Sensor/probe from being damaged...
Page 54 - approximately 30 minutes.; Cook 2 trays of scones, small cakes or sausage rolls.; USING FOOD SENSOR/PROBE
54 electrolux.com.au approximately 30 minutes. Heating up STOP STOP 81°C 95°C 12:30 12:30 81°C 81°C STOP STOP 76°C 80°C 12:30 12:30 80°C NOTE: The Food Sensor/probe temperature will not be displayed until the oven is at the desired temperature. Once the oven is at the desired temperature, the Food S...
Page 57 - TRADITIONAL BAKING; food
57 TRADITIONAL BAKING food temperature °c oven shelf position* time in minutes scones – plain or fruit 220 2 or 3 10 biscuits – rolled 170 2 or 3 10-15 – spooned 190 2 or 3 12-15 – shortbread biscuits 160 2 or 3 30-35 meringues – hard – individual 110 2 or 3 90 – soft – individual 180 2 or 3 15-20 –...
Page 58 - STEAM COOKING
58 electrolux.com.au STEAM COOKING IMPORTANT For best results, preheat oven for 10 minutes. Refer to steam assisted cooking section for details. SteamBake function (EVE602, EVE614, EVE615, EVEP614, EVEP615, EVEP616, EVEP626, EVE636) food Water on cavity bottom (ml) Temperature °C Oven shelf position...
Page 59 - STEAMBAKE; GRILLING
59 STEAMBAKE food temperature °c oven shelf position* time in minutes bread – rolls 200 1 20-25 – loaves 180 1 35-45 – focaccia 200-210 1 15-25 GRILLING Grilling hints As a method of cooking, grilling can be used to:• Enhance the flavours of vegetables, fish, poultry and meat. • Seal the surface of ...
Page 60 - DEALING WITH COOKING PROBLEMS; problem
60 electrolux.com.au DEALING WITH COOKING PROBLEMS problem possible causes remedies Uneven cooking Incorrect shelf position • Select shelf suitable for cooking function. See cooking function tables in cooking guide Oven tray too large • Experiment with other trays or dishes Trays not centralised • C...
Page 61 - STEAM ASSISTED CLEANING; CLEANING THE APPLIANCE
61 STEAM ASSISTED CLEANING This function assists in the removal of food residue from inside the oven. This method is effective in removing light soiling only. It is not effective in removing stubborn baked-on stains. This function can only be used when the oven is cold. Procedure for cleaning: 1. Re...
Page 62 - CLEANING THE ACCESSORIES
62 electrolux.com.au CLEANING THE ACCESSORIES Removing the trays and shelves from the appliance 1. Slide the tray and shelves towards you until they reach the front stop. 2. Tilt them up at the front to clear the side supports, taking care not to spill the contents. 3. Lift them clear.4. Wash the tr...
Page 63 - Slowly close the oven door until it is stops against the; Removing the oven door top trim; Lift the black bordered glass panel out of the guide.
63 CLEANING THE DOUBLE/TRIPLE GLAZED DOOR (NON PYROLYTIC MODELS) WARNING Do not lift the door by the handle. Rough handling will cause glass to break. Removing the oven door The oven is equipped with a door that can be disassembled in order to clean all the panes of glass.Remove the door before clea...
Page 64 - Push the trim down with its top edge over glass panel; Fitting the oven door
64 electrolux.com.au Cleaning the door glass panels CAUTION • Do not to use harsh abrasives on the glass panes as the reflective surface plays a role in the function of the oven to keep the door cool. • Do not place glass in dishwasher. Hand wash only with a soft cloth and warm soapy water. When dry...
Page 65 - CLEANING THE QUAD GLAZED
65 Door column Stirrup in locked position CLEANING THE QUAD GLAZED DOOR (PYROLYTIC MODELS) WARNING Do not lift the door by the handle. Rough handling will cause glass to break. Removing the oven door The oven is equipped with a door that can be disassembled in order to clean all the panes of glass.R...
Page 66 - Replacing the top door trim
66 electrolux.com.au CLEANING THE APPLIANCE (CONTINUED) Do not misplace them! CAUTION • Do not to use harsh abrasives on the glass panes as the reflective surface plays a role in the function of the oven. • Do not place glass in dishwasher. Hand wash only with a soft cloth and warm soapy water. When...
Page 68 - TIPS AND TROUBLESHOOTING
68 electrolux.com.au TIPS AND TROUBLESHOOTING Before the first use, have you to set: • Language• Display brightness• Key tones• Buzzer volume• Water hardness• Time of day Start using the oven Quickstart Turn on the oven and start cooking with the default temperature and time of the function. • Press...
Page 70 - SHORTCUTS
70 electrolux.com.au SHORTCUTS Here you can see all the useful shortcuts. You can also find them in the dedicated chapters in the user manual. How to set: heating functions How to set: cooking with a steam heating function How to set: assisted cooking How to set: cooking time How to delay: start and...
Page 71 - TROUBLESHOOTING; Troubleshooting continued over page
71 TROUBLESHOOTING NOTE: We may charge for service even in the warranty period if your problem is due to the causes listed below. problem possible cause Oven or grill not working • Time of day is not set.• Power is not turned on.• Controls are incorrectly set . • Oven is in ‘Demo’ mode, refer to Add...
Page 73 - NOTES
Page 75 - Warranty; AUSTRALIA; NEW ZEALAND
75 This document sets out the terms and conditions of the product warranties for Electrolux Appliances. It is an important document. Please keep it with your proof of purchase documents in a safe place for future reference should there be a manufacturing defect in your Appliance. This warranty is in...
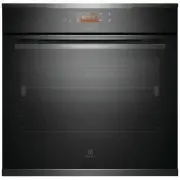


 Electrolux EDEE63CS
User Manual
Electrolux EDEE63CS
User Manual
 Electrolux EOA 93434 AK (AX)
User Manual
Electrolux EOA 93434 AK (AX)
User Manual
 Electrolux EOA 93450 AX
User Manual
Electrolux EOA 93450 AX
User Manual
 Electrolux EOA 93451 AX
User Manual
Electrolux EOA 93451 AX
User Manual
 Electrolux EOA5220AOR
User Manual
Electrolux EOA5220AOR
User Manual
 Electrolux EOB 33300 X
User Manual
Electrolux EOB 33300 X
User Manual
 Electrolux EOB 53001 R
User Manual
Electrolux EOB 53001 R
User Manual
 Electrolux EOB 68000 X
User Manual
Electrolux EOB 68000 X
User Manual
 Electrolux EOB 93402 AX
User Manual
Electrolux EOB 93402 AX
User Manual
 Electrolux EOB 93430 CK (CW) (CX)
User Manual
Electrolux EOB 93430 CK (CW) (CX)
User Manual
 Electrolux EOB 93450 AX
User Manual
Electrolux EOB 93450 AX
User Manual
 Electrolux EOC 55956 AAX
User Manual
Electrolux EOC 55956 AAX
User Manual
 Electrolux EOC 66800 X
User Manual
Electrolux EOC 66800 X
User Manual
 Electrolux EOD3C50TX
User Manual
Electrolux EOD3C50TX
User Manual
 Electrolux EOD6C77V
User Manual
Electrolux EOD6C77V
User Manual
 Electrolux EOF3H00BX
User Manual
Electrolux EOF3H00BX
User Manual
 Electrolux EOF3H40BX
User Manual
Electrolux EOF3H40BX
User Manual
 Electrolux EOF3H50BK
User Manual
Electrolux EOF3H50BK
User Manual