Page 2 - Congratulations; environmental tip; Information on disposal for users
2 contents electrolux e:line ovens Congratulations environmental tip Information on disposal for users • Most of the packing materials are recyclable. Please dispose of those materials through your local recycling depot or by placing them in appropriate collection containers. • If you wish to discar...
Page 3 - Important safety instructions
These warnings have been provided in the interest of safety. You MUST read them carefully before installing or using the appliance. The symbols you will see in this booklet have these meanings: warning This symbol indicates information concerning your personal safety This symbol indicates tips and i...
Page 4 - oven controls; electrolux e:line ovens; Rotary control ovens
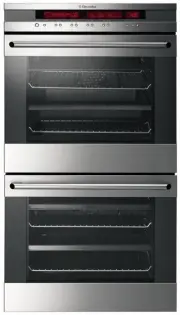
4 oven controls electrolux e:line ovens Rotary control ovens (EOEM61AS) Electronic touch control ovens (EOEK62AK) 1 9 2 10 3 11 1 Rotary control panel 2 Oven handle 3 Oven door 9 Electronic touch control panel 10 Oven handle 11 Oven door 4 5 6 4 Electronic control panel 5 Oven handle 6 Oven door 7 D...
Page 5 - control panel 5; Rotary control panel
electrolux e:line ovens control panel 5 Rotary control panel (EOEM61AS) Electronic control panel (EOEE62AS, EOEE63AS, EUEE63AS, EDEE63AS) Electronic control panel (EPEE63AS) Electronic touch control panel (EOEK62AK) 11 ON/OFF button 12 Upper/lower oven selector (EUEE63AS & EDEE63AS only) 13 Cook...
Page 6 - • The clock has a 24 hour display.; tips and information; • If you have purchased an EUEE63AS you will have; Before using your rotary control oven
6 before using your rotary control oven electrolux e:line ovens Preparing your oven 1. Please remove all stickers, leaflets and boxes from the door and from the floor of the oven before operation. 2. Please wipe out the oven interior prior to operation with warm soapy water and polish dry with a sof...
Page 7 - Cooking functions – rotary control oven
When fully inserted the shelf/tray should not interfere with the closed oven door. To fit a tray to telescopic slides: 1. Fully extend the slides on both sides. 2. Select the tray you wish to use and position the slots on one side on the respective tabs of the slide. 3. Drop the other side down so t...
Page 8 - oven; Operating sequence –; • If you are using water in cooking, this will turn to steam
8 operating sequence – rotary control oven electrolux e:line ovens Select the cooking function • Turn the function selector in any direction to the desired cooking function. The oven cavity light will come on. Select the temperature • To set the temperature, turn the temperature selector in a clockw...
Page 9 - • Remember to add pre-heating time if necessary.; Cooking with the timer –
electrolux e:line ovens cooking with the timer – rotary control oven 9 Your oven is equipped with a 3 button timer that has the following features: • Timer – you can set a countdown time that will beep when the set time has elapsed. • Cook time – you can set cooking duration. A timer will count down...
Page 10 - Before using your electronic control oven
Preparing your oven 1. Please remove all stickers, leaflets and boxes from the doors and the floor of the oven before operation. 2. Please wipe out the oven interior prior to operation with warm soapy water and polish dry with a soft clean cloth. Do not close the oven door until the oven is complete...
Page 11 - • If you have purchased an EUEE63AS you will have; • Shelves and trays
electrolux e:line ovens before using your electronic control oven 11 • Side racks and telescopic slides 1. Insert the largest peg into rear access hole provided. 2. Then locate the front peg into the front access hole and push in firmly. Note: • If you have purchased an EUEE63AS you will have additi...
Page 12 - Cooking functions – electronic touch control and control oven; 2 cooking functions – electronic touch control and control oven
function control oven touch control oven description Cook from frozen Function #1 The “Cook from Frozen” function is ideal for cooking frozen precooked foods such as savoury pastries, pizzas, mini meals (TV dinners), meat pies and fruit pies. Heat comes from the element surrounding the fan as well a...
Page 13 - cooking functions – electronic touch control and control oven 13
electrolux e:line ovens cooking functions – electronic touch control and control oven 13 function control oven touch control oven description Full grill Function #10 “Full Grill” direct radiant heat from two powerful upper elements onto the food. You can use “Full Grill” function for tender cuts of ...
Page 15 - On completion of cooking
electrolux e:line ovens cooking with the timer – electronic control oven (except EOEK62AK) 15 Your oven is equipped with a programmable controller that can be used to turn on and off the oven automatically. The cook time is used to automatically turn the oven off after a set amount of time. Setting ...
Page 16 - Additional functionality –
16 additional functionality – electronic control oven (except EOEK62AK) electrolux e:line ovens Adjusting the clock The time of day is independent of the oven and can be adjusted at any point. 1. To set the time of day in hours and minutes press and hold the and buttons simultaneously for 1 second u...
Page 18 - • This feature has no effect on the oven operation.
18 cooking with the timer – electronic touch control (EOEK62AK) electrolux e:line ovens On completion of cooking When the set time has elapsed, a signal will sound for 1 minute, the oven will switch off and the remaining time indication “0.00” will appear on the display. 1. To stop the signal, press...
Page 20 - Cooking guide; If the oven is still hot from cooking, the cooling fan will
• Select the correct shelf location for food being cooked. • Make sure dishes will fit into the oven before you switch it on. • Keep edges of non Electrolux baking dishes at least 40mm from the side of the oven. This allows free circulation of heat and ensures even cooking. • Do not open the oven do...
Page 21 - Low heat; Traditional Bake; Fan cooking
electrolux e:line ovens cooking guide 21 tips and information The following tables are intended as a guide and experience may show some variation in cooking times necessary to meet individual requirements. Temperature estimations If a recipe calls for Fahrenheit (°F) or no actual temperatures, use t...
Page 22 - • Always clean the grill/oven dish after every use.; Guide to better grilling; food; Grilling guide; Fan grill
22 grilling guide electrolux e:line ovens Grilling hints As a method of cooking, grilling can be used to: • Enhance the flavours of vegetables, fish, poultry and meat. • Seal the surface of the food and retain natural juices. • You can grill with the door open or closed. This table shows how to gril...
Page 23 - dealing with cooking problems 23; problem; Dealing with cooking problems
electrolux e:line ovens dealing with cooking problems 23 problem causes remedies Uneven cooking Incorrect shelf position Select shelf that puts the food in the centre of the oven Oven tray too large Experiment with other trays or dishes Trays not centralised Centre trays Air flow in oven uneven Rota...
Page 24 - • Make sure you follow the polish or brushing lines in the steel.; caution; Refer also to Pyrolitic oven cleaning on page 27.; Maintenance and cleaning
24 maintenance and cleaning electrolux e:line ovens warning • Do not use steam cleaners. • Do not line the bottom of the oven with foil or cookware. Stainless steel • All grades of stainless steel can stain, discolour or become greasy. You must clean these areas regularly by following the procedures...
Page 25 - warning; Replacing the oven top light
electrolux e:line ovens removing and replacing the oven top light (EPEE63AS model only) 25 warning IMPORTANT: Make sure the appliance is turned off before you remove or replace parts, to avoid the possibility of electric shock. Removing and replacing the oven back light and side light • Turn oven li...
Page 26 - Catalytic self cleaning panels
26 catalytic self cleaning panels electrolux e:line ovens Operation Catalytic self clean panels are coated with a specially formulated enamel coating, over a base of regular enamel. This enamel coating has a rough surface which is also porous. During normal cooking, fats and other food splatter is p...
Page 27 - Pyrolytic cleaning of the oven cavity
electrolux e:line ovens pyrolytic cleaning of the oven cavity (EPEE63AS model only) 27 Operation If your oven has the Pyro self-cleaning function, it cleans by burning off the spatters and accumulated dirt and grease from the oven liner, at high temperature. This process produces ash which can then ...
Page 28 - Cleaning the pyrolytic oven door
Your pyrolytic oven is equipped with an oven door that can be disassembled in order to clean all the panes of glass. Positioning the door for dismantling The door needs to be positioned at an angle to aid in the disassembly of the panes. • Open the oven door fully and flip out the hinge locating tab...
Page 29 - Cleaning the pyrolytic oven
electrolux e:line ovens cleaning the pyrolytic oven 29 When the pyrolytic cleaning function is on, it is advisable not to use a cooktop if it is fitted above the oven. This could cause overheating and damage to both appliances. warning IMPORTANT: Do not turn off the mains power supply to the oven du...
Page 30 - 0 troubleshooting; • Check the points listed below before calling for service.; Data plate; • Model; Customer Care Centre; Troubleshooting
30 troubleshooting electrolux e:line ovens Faults If there is a problem with the oven and/or grill, please: • Check the points listed below before calling for service. • It may be possible to avoid a call by fixing the problem yourself – and so continue cooking. Note: • We may charge for service eve...
Page 31 - • If a powerpoint is fitted it must be accessible with the; Installation; Your appliance must be mounted on a flat surface for the
electrolux e:line ovens installation 31 warning Please follow the points below when installing the appliance Use an authorised person • As stated in the local municipal building codes and other relevant statutory regulations: • Wiring connections must be in accordance with AS/NZS 3000 Wiring Rules a...
Page 32 - Duo oven Cut-out dimensions; type of fit; Double oven Cut-out dimensions; type of fit
32 installation electrolux e:line ovens Underbench oven Your underbench oven looks best when the control panel is directly under the benchtop. An upper infill panel may be added if the cooktop placed above the benchtop is too deep. Refer to cooktop installation instructions for required clearance be...
Page 33 - technical specifications 33; Technical specifications
electrolux e:line ovens technical specifications 33 Technical specifications model product dimensions (h x w x d) mm electrical connection min. fuse rating max. power rating max. current rating EOEM61AS 595 x 595 x 567 230-240v/50Hz 16A 3.1kW 12.9A EOEE62AS 595 x 595 x 567 230-240v/50Hz 16A 3.1kW 12...
Page 34 - This product is supplied with two optional termination; Other Potential complaints
34 technical specifications electrolux e:line ovens Technical specifications Hard wiring details 1. Remove terminal cover plate from rear panel of appliance. 2. Fit wires through hole in cover plate and make connections to terminals. 3. Engage wires into plastic clip. Secure plastic clip with two lo...
Page 35 - Warranty
electrolux e:line ovens warranty 35 This document sets out the terms and conditions of product warranties for Electrolux branded appliances. It is an important document. Please keep it with your proof of purchase documents in a safe place for future reference should you require service for your Elec...