Page 6 - Sicherheitshinweise
2 de Sicherheitshinweise Die Gebrauchsanleitung bitte sorgfältig durchlesen, danach handeln und auf bewahren! Bei Weitergabe des Geräts diese Anleitung beilegen. Dieses Gerät ist für die Verarbeitung haushaltsüblicher Mengen im Haushalt oder in haushaltsähnlichen, nicht-gewerblichen Anwendungen best...
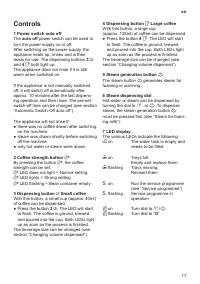
Page 9 - Bedienelemente
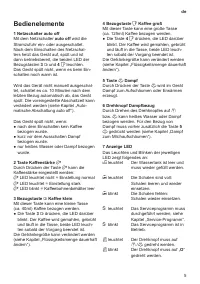
5 de Bedienelemente 1 Netzschalter auto off Mit dem Netzschalter auto off wird die Stromzufuhr ein- oder ausgeschaltet. Nach dem Einschalten des Netzschal- ters heizt das Gerät auf, spült und ist dann betriebsbereit, die beiden LED der Bezugstasten 3 E und 4 F leuchten. Das Gerät spült nicht, wenn e...
Page 10 - Wasserhärte einstellen; Mahlgrad einstellen
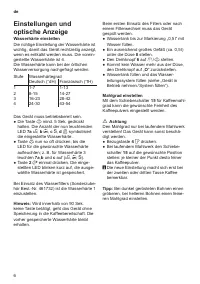
6 de Einstellungen und optische Anzeige Wasserhärte einstellen Die richtige Einstellung der Wasserhärte ist wichtig, damit das Gerät rechtzeitig anzeigt, wenn es entkalkt werden muss. Die vorein- gestellte Wasserhärte ist 4. Die Wasserhärte kann bei der örtlichen Wasserversorgung nachgefragt werden....
Page 11 - Zubereitung mit; nach
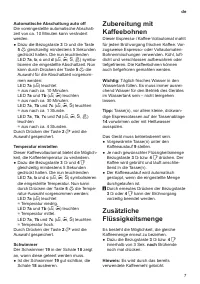
7 de Automatische Abschaltung auto off Die voreingestellte automatische Abschalt- zeit von ca. 10 Minuten kann verändert werden. ● Dazu die Bezugstaste 3 E und die Taste 5 h gleichzeitig mindestens 5 Sekunden gedrückt halten. Die nun leuchtenden LED 7a , b , c und d ( H , I , S , J ) symbo- lisieren...
Page 14 - Kombinierter
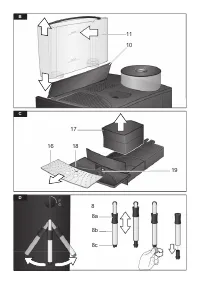
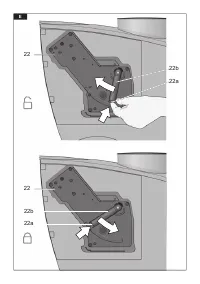
10 de Brüheinheit reinigen Die Brüheinheit kann zum Reinigen entnommen werden (Bild E ). ● Das Gerät mit dem Netzschalter 1 auto off ausschalten. ● Tür 21 zur Brüheinheit 22 öffnen. ● Den roten Knopf 22a gedrückt halten und den Griff 22b nach oben drehen, bis er hörbar einrastet. ● Die Brüheinheit 2...
Page 15 - unbedingt vor; Frostschutz
11 de Die LED der Taste h und H „Wasser füllen“ leuchten. ● Eine Reinigungstablette in den Schacht 13 geben. ● Wassertank mit lauwarmem Wasser füllen, Entkalkungsmittel zugeben und vollständig im Wasser auflösen (gesamte Flüssigkeitsmenge 0,5 Liter). oder: Fertige Entkalkungsmischung in den Wasserta...
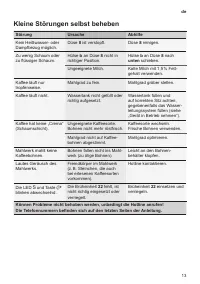
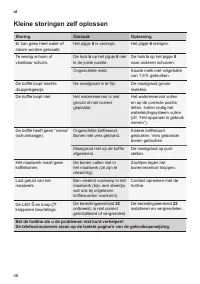
Page 17 - Kleine Störungen selbst beheben
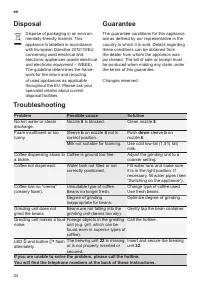
13 de Störung Ursache Abhilfe Kein Heißwasser- oder Dampfbezug möglich. Düse 8 ist verstopft. Düse 8 reinigen. Zu wenig Schaum oder zu flüssiger Schaum. Hülse b an Düse 8 nicht in richtiger Position. Hülse b an Düse 8 nach unten schieben. Ungeeignete Milch. Kalte Milch mit 1,5 % Fett- gehalt verwend...
Page 18 - Safety instructions; offi ces, agricultural and other small businesses or for use by
14 en Safety instructions Please read and follow the operating instructions carefully and keep them for later reference. Enclose these instructions when you give this appliance to someone else. This appliance is designed for the preparation of normal household quantities in the home, or in household...
Page 21 - Controls
17 en Controls 1 Power switch auto off The auto off power switch can be used to turn the power supply on or off. After switching on the power supply, the appliance heats up, rinses and is then ready for use. The dispensing buttons 3 E and 4 F both light up. The appliance does not rinse if it is stil...
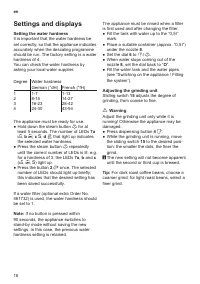
Page 22 - Settings and displays; Setting the water hardness
18 en Settings and displays Setting the water hardness It is important that the water hardness be set correctly, so that the appliance indicates accurately when the descaling programme should be run. The factory setting is a water hardness of 4. You can check the water hardness by asking your local ...
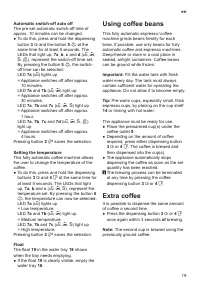
Page 23 - Using coffee beans; Extra coffee; of
19 en Automatic switch-off auto off The pre-set automatic switch-off time of approx. 10 minutes can be changed. ● To do this, press and hold the dispensing button 3 E and the button 5 h at the same time for at least 5 seconds. The LEDs that light up, 7a , b , c and d ( H , I , S , J ), represent the...
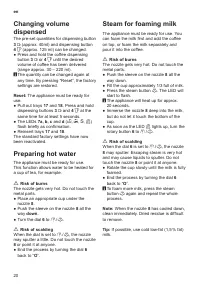
Page 24 - Preparing hot water; Steam for foaming milk; Risk of burns
20 en Changing volume dispensed The pre-set quantities for dispensing button 3 E (approx. 40ml) and dispensing button 4 F (approx. 125 ml) can be changed. ● Press and hold the coffee dispensing button 3 E or 4 F until the desired volume of coffee has been delivered (range approx. 30 – 220 ml). i The...
Page 25 - Steam for heating drinks; Maintenance and
21 en Steam for heating drinks ¡ Risk of burns The nozzle gets very hot. Do not touch the metal parts. The appliance must be ready for use. ● Push the sleeve on the nozzle 8 all the way up . ● Press the steam button h . The LED will start to flash. i The appliance will now heat up for approx. 20 sec...
Page 28 - Troubleshooting; Problem; down; If you are unable to solve the problem, please call the hotline.; Disposal
24 en Troubleshooting Problem Possible cause Solution No hot water or steam discharge. Nozzle 8 is blocked. Clean nozzle 8 . Foam insufficient or too runny. Sleeve b on nozzle 8 not in correct position. Push down sleeve b on nozzle 8 . Milk not suitable for foaming. Use cold low-fat (1,5 % fat) milk...
Page 29 - Consignes de sécurité; ambiante et jusqu’à 2 000 m au-dessus du niveau de la mer. Ne
25 fr Consignes de sécurité Lire attentivement ce mode d’emploi, s’y conformer lors de l’utilisation et le conserver ! Veuillez joindre ce mode d’emploi si vous passez l’appareil à quelqu’un d’autre. Cet appareil est conçu pour la préparation de quantités usuelles, dans le cadre d’un foyer ou d’un u...
Page 30 - immédiatement la fi che secteur ou couper la tension du réseau.; Risque d’étouffement !
26 fr Cet appareil peut être utilisé par des enfants à partir de 8 ans et par des personnes ayant des facultés physiques, sensorielles ou mentales réduites ou manquant d’expérience et/ou de connaissances à condition d’être surveillés ou d’avoir été informés quant à la bonne utilisation de l’appareil...
Page 31 - Présentation; Avant la première
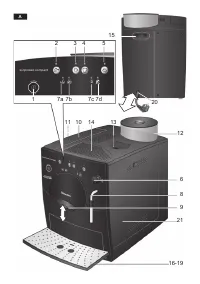
27 fr Présentation Figures A-E 1 Interrupteur électrique (marche / arrêt) auto off 2 Touche Intensité du café â 3 Touche de référence E 4 Touche de référence F 5 Touche h (Vapeur) 6 Sélecteur g / h (Eau chaude / Vapeur) 7 Affichage LED a Remplir d’eau H b Vider les bacs collecteurs I c Lancer le pro...
Page 32 - Affichage LED; Eléments de commande
28 fr 4 Touche de référence F Café long À l’aide de cette touche, il est possible de faire une grande tasse (env. 125 ml) de café. ● Appuyer sur la touche 4 F , la LED située au-dessus clignote. La machine moud le café, effectue la percolation et le café s’écoule dans la tasse. Les deux LED s’allume...
Page 33 - Réglages et affichages; Régler la dureté de l’eau
29 fr Réglages et affichages Régler la dureté de l’eau Le réglage correct de la dureté de l’eau est important car il permet à la machine d’indiquer le moment où un détartrage est nécessaire. Par défaut, la dureté de l’eau est réglée sur 4. La dureté de l’eau peut être demandée au Service des Eaux lo...
Page 34 - Arrêt automatique auto off; Régler la température; Flotteur; Préparation avec du
30 fr Arrêt automatique auto off Le temps jusqu’à l’arrêt automatique préré- glé d’environ 10 minutes peut être modifié. ● Pour cela, appuyer simultanément sur la touche de référence 3 E et la touche 5 h et les tenir enfoncées pendant 5 secondes minimum. Les LED 7a , b , c et d ( H , I , S , J ) all...
Page 35 - Modifier durablement la
31 fr Préparer de l’eau chaude La machine doit être prête à fonctionner. Cette fonction sert à préparer de l’eau chaude, par exemple pour une tasse de thé. ¡ Risque de brûlure La buse devient brûlante. La saisir uniquement par l’élément en plastique. ● Placer une tasse adaptée sous la buse 8 . ● Fai...
Page 36 - Entretien et; Réchauffer un liquide
32 fr Ne pas toucher la buse 8 et ne pas la diriger vers une personne. ● Pour arrêter l’opération, replacer le sélecteur 6 sur « O ». i Pour produire de nouveau de la vapeur, appuyer sur touche h et répéter toute l’opération. Remarque : Une fois que la buse 8 a refroidi, la nettoyer immédiatement. L...
Page 37 - Programme de
33 fr Remarque : Si la machine est mise en marche à froid ou arrêtée après la prépara- tion de café, elle se rince automatiquement. Elle se nettoie donc de manière autonome. Buse 8 Eau chaude / Vapeur ● Dévisser la buse 8 du tube de vapeur. ● Démonter toutes les pièces (Figure D ). ● Nettoyer avec d...
Page 38 - impérativement
34 fr Lancer le programme de maintenance La machine doit être prête à fonctionner. ● Vider le tiroir 17 et le bac 18 puis les replacer. ● Appuyer sur la touche 4 F et la touche 5 h et les tenir enfoncées pendant au moins 5 secondes. La LED S commence à clignoter et l’appareil rince 2x par l’écouleme...
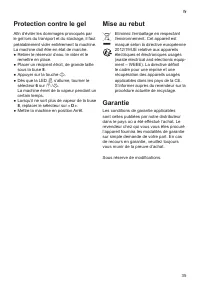
Page 39 - Protection contre le gel; Mise au rebut
35 fr Protection contre le gel Afin d’éviter les dommages provoqués par le gel lors du transport et du stockage, il faut préalablement vider entièrement la machine. La machine doit être en état de marche. ● Retirer le réservoir d’eau, le vider et le remettre en place. ● Placer un récipient étroit, d...
Page 40 - Eliminer soi-même les petites défaillances; Défaillance
36 fr Eliminer soi-même les petites défaillances Défaillance Cause Remède Production d’eau chaude ou de vapeur impossible. Buse 8 obturée. Nettoyer la buse 8 . Mousse insuffisante ou trop liquide. Positionnement incorrect de la douille b sur la buse 8 . Descendre la douille b sur la buse 8 . Qualité...
Page 41 - Veiligheidsaanwijzingen
37 nl Veiligheidsaanwijzingen Lees de gebruiksaanwijzing zorgvuldig door, neem deze altijd in acht en bewaar deze goed! Als u dit apparaat aan iemand anders geeft, lever dan ook deze gebruiksaanwijzing mee. Dit apparaat is bedoeld voor de verwerking van normale huishoudelijke hoeveelheden in huishou...
Page 42 - Gevaar voor brandwonden!
38 nl Dit apparaat mag door kinderen van 8 jaar en ouder en door personen met verminderde lichamelijke, zintuiglijke of geestelijke vermogens of gebrek aan ervaring en/of kennis worden gebruikt indien dit onder toezicht gebeurt of indien zij over het veilige gebruik van het apparaat zijn geïnstrueer...
Page 44 - Bedieningselementen; Knop koffiesterkte; kleine koffie; grote koffie
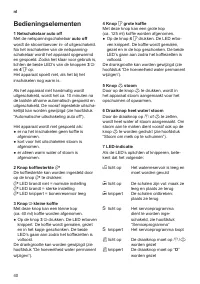
40 nl Bedieningselementen 1 Netschakelaar auto off Met de netspanningschakelaar auto off wordt de stroomtoevoer in- of uitgeschakeld. Na het inschakelen van de netspanning- schakelaar wordt het apparaat opgewarmd en gespoeld. Zodra het klaar voor gebruik is, lichten de beide LED’s van de knoppen 3 E...
Page 45 - De waterhardheid instellen
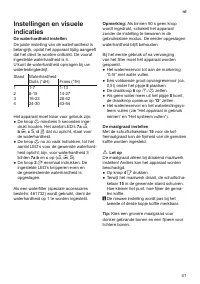
41 nl Instellingen en visuele indicaties De waterhardheid instellen De juiste instelling van de waterhardheid is belangrijk, opdat het apparaat tijdig aangeeft dat het dient te worden ontkalkt. De vooraf ingestelde waterhardheid is 4. U kunt de waterhardheid opvragen bij uw waterleidingbedrijf. Stan...
Page 46 - Koffiezetten met
42 nl Automatische uitschakeling auto off De vooraf ingestelde automatische uit- schakeltijd van ca. 10 minuten kan worden gewijzigd. ● Hiervoor de knoppen 3 E en 5 h tege- lijkertijd ten minste 5 seconden ingedrukt houden. De LED’s 7a , b , c en d ( H , I , S , J ) die nu branden, symboliseren de i...
Page 47 - Heet water maken; Stoom om melk op te
43 nl De hoeveelheid water permanent wijzigen De vooraf ingestelde hoeveelheden voor knop 3 E (ca. 40 ml) en knop 4 F (ca. 125 ml) kunnen worden gewijzigd. ● De knop 3 E of 4 F zo lang ingedrukt houden, tot de gewenste hoeveelheid koffie is doorgelopen (keuzemogelijkheid van ca. 30-220 ml). i De hoe...
Page 48 - Onderhoud en
44 nl Stoom om dranken op te warmen ¡ Verbrandingsgevaar Het pijpje wordt zeer heet; uitsluitend bij de kunststof greep vastpakken. Het apparaat moet gebruiksklaar zijn. ● De huls van het pijpje 8 naar boven schuiven. ● Op de knop h drukken. De LED van de knop begint te knipperen. i Het apparaat war...
Page 50 - in
46 nl De LED’s van de knoppen h en H “Water vullen” branden ● Eén reinigingstablet in de koker 13 doen. ● Het waterreservoir met lauwwarm water vullen, ontkalkingsmiddel toevoegen en volledig in het water oplossen (totale hoe- veelheid vloeistof: 0,5 l) of een kant-en-klare ontkalkingsoplossing in h...
Page 52 - Kleine storingen zelf oplossen; Storing
48 nl Kleine storingen zelf oplossen Storing Oorzaak Oplossing Er kan geen heet water of stoom worden gemaakt. Het pijpje 8 is verstopt. Het pijpje 8 reinigen. Te weinig schuim of vloeibaar schuim. De huls b op het pijpje 8 niet in de juiste positie. De huls b op het pijpje 8 naar onderen schuiven. ...
Page 53 - Indicaciones de seguridad; de tiendas, ofi cinas, empresas agrícolas y otras empresas
49 es Indicaciones de seguridad ¡Por favor, lea atentamente las Instrucciones de uso y a continuación proceda y guárdelas! No olvide adjuntar estas instrucciones si entrega el aparato a otra persona. Este aparato ha sido diseñado para la preparación de cantidades en uso doméstico o en aplicaciones n...
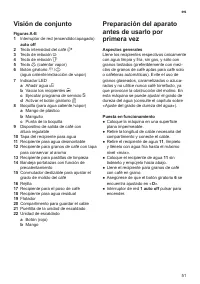
Page 55 - Visión de conjunto; Preparación del aparato; Aspectos generales; auto off
51 es Visión de conjunto Figuras A-E 1 Interruptor de red (encendido / apagado) auto off 2 Tecla intensidad del café â 3 Tecla de relación E 4 Tecla de relación F 5 Tecla h (calentar vapor) 6 Botón giratorio g / h (agua caliente /extracción de vapor) 7 Indicador LED a Añadir agua H b Vaciar los reci...
Page 57 - Indicador LED; Ajustes e; Ajuste del grado de dureza del agua
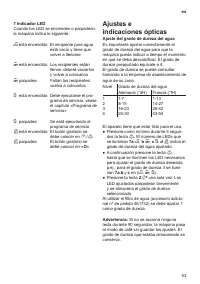
53 es 7 Indicador LED Cuando los LED se encienden o parpadean, la máquina indica lo siguiente: H está encendido El recipiente para agua está vacío y tiene que volver a llenarse I está encendido Los recipientes están llenos: deberá vaciarlos y volver a colocarlos I parpadea Faltan los recipientes: vu...
Page 59 - Flotador; Preparación con
55 es Flotador El flotador 19 indica cuando se debe vaciar el recipiente 18 . ● Si puede ver claramente el flotador 19 , el recipiente 18 se debe vaciar. Preparación con granos de café Está máquina automática de café espresso o normal muele los granos de café cada vez que se hace café. Utilice prefe...
Page 61 - Cuidados y limpieza diaria; ¡Peligro de electrocución!; Boquilla 8 para agua caliente; Limpieza de la unidad de escaldado
57 es ● Finalice el proceso colocando el botón giratorio 6 de nuevo en « O ». i Para volver a generar vapor, pulse la tecla h y repita todo el proceso. Atención: Limpie la boquilla 8 inmediata- mente después de que se enfríe, ya que los residuos secos son difíciles de eliminar. Cuidados y limpieza d...
Page 62 - Los productos de descalcificación (no
58 es Programa de servicio: incluye descalcificación y limpieza Si se enciende el LED S durante el servicio, se debe descalcificar y limpiar inmedia - tamente el aparato con el programa de servicio. En caso de que el programa no se ejecute a tiempo, pueden producirse daños en la máquina. Los product...
Page 63 - muy importante; Protección contra la
59 es El LED J parpadea. ● La máquina inicia el ciclo de limpieza al poner el botón giratorio 6 en « O » (duración: aprox. 10 minutos). El líquido, primero sale por el dispositivo de salida de café y luego fluye a través del interior de la máquina hasta llegar al recipiente 17 . El LED I se ilumina....
Page 64 - Garantía
60 es Garantía CONDICIONES DE GARANTIA PAE Siemens se compromete a reparar o reponer de forma gratuita durante un período de 24 meses, a partir de la fecha de compra por el usuario fi nal, las piezas cuyo defecto o falta de funcionamiento obedezca a causas de fabricación, así como la mano de obra ne...
Page 65 - Solución de problemas; Problema
61 es Solución de problemas Problema Causa Solución No se puede extraer agua caliente ni vapor. La boquilla 8 está bloqueada. Limpie la boquilla 8 . Muy poca espuma o espuma muy líquida. El manguito b de la boquilla 8 no está en la posición correcta. Desplace el manguito b de la boquilla 8 hacia aba...
Page 66 - Avisos de segurança; escritórios, explorações agrícolas e outros estabelecimentos; instalada. Certifi quese de que o sistema fi o terra da alimentação
62 pt Avisos de segurança Ler atentamente as instruções de utilização, agir em conformidade com as instruções e guardá-las! Entregar estas instruções de serviço sempre que o aparelho for cedido a terceiros. Este aparelho destina-se ao processamento de volumes habituais ao uso doméstico ou aplicações...
Page 67 - Perigo de ferimentos!
63 pt Este aparelho pode ser utilizado por crianças a partir dos 8 anos de idade e por pessoas com capacidades físicas, sensoriais ou mentais limitadas ou com falta de experiência e/ou conhecimentos, desde que supervisionadas ou informadas sobre como trabalhar com o aparelho de forma segura e instru...
Page 69 - Elementos de controlo
65 pt Elementos de controlo 1 Interruptor de corrente auto off O interruptor de corrente auto off permite ligar ou desligar a alimentação de corrente. Depois de ligar o interruptor de corrente, o aparelho aquece, lava e fica então pronto, as duas luzes do botão 3 E e 4 F acendem. O aparelho não lava...
Page 70 - Ajustes e visores; Ajustar a dureza da água
66 pt Ajustes e visores Ajustar a dureza da água É importante que a dureza da água esteja ajustada correctamente para que a máquina indique com precisão quando é que se dever proceder ao programa de descalcificação. O ajuste de fábrica para a dureza da água é 4. Poderá confirmar a dureza da água da ...
Page 71 - Utilizar grãos de café; Café extra; após
67 pt ● Para isso, mantenha os botões 3 E e 5 h pressionados em simultâneo durante pelo menos 5 segundos. As luzes 7a , b , c e d ( H , I , S , J ) agora acesas simbolizam o tempo para o desligar ajustado. Agora já é possível proceder à selecção do tempo para desligar a máquina pressionando o botão ...
Page 72 - Preparar água quente; Vapor para realizar
68 pt Alterar o volume do café tirado As quantidades ajustadas de fábrica para o botão 3 E (aprox. 40 ml) e para o botão 4 F (aprox. 125 ml) podem ser alteradas. ● Pressione e mantenha o botão 3 E ou 4 F até que o volume desejado de café saia para a chávena (intervalo entre apro- ximadamente 30 – 22...
Page 73 - Perigo de queimaduras; cima; Manutenção e; Perigo de choque eléctrico!
69 pt Vapor para aquecer bebidas ¡ Perigo de queimaduras O bocal fica muito quente. Não toque nas partes em metal. A máquina deverá estar pronta a funcionar. ● Empurre a manga no bocal 8 totalmente para cima . ● Pressione o botão de vapor h . A luz irá começar a piscar. i A máquina irá agora aquecer...
Page 74 - Agentes de descalcificação (código
70 pt Bocal 8 para água quente / vapor ● Desenrosque o bocal 8 do tubo de vapor. ● Deverá desmantelar todas as partes (figura D ). ● Limpe com uma solução de limpeza caús- tica e uma escova suave. Limpe a ponta do bocal 8c com uma agulha. ● Enxague e seque minunciosamente todas as partes. Limpar a u...
Page 77 - Resolução de problemas; baixo
73 pt Resolução de problemas Problema Possível causa Solução Não há descarga de água quente ou vapor. Bocal 8 está bloqueado. Limpar bocal 8 . Espuma insuficiente ou muito aguada. Manga b no bocal 8 não está na posição correcta. Empurrar para baixo a manga b no bocal 8 . Leite não apropriado para es...
Page 78 - Указания по безопасности
74 ru Указания по безопасности Внимательно прочтите инструкцию по эксплуатации, соблюдайте ее указания и тщательно храните ее! Передавая прибор другому человеку, дайте ему эту инструкцию. Данный прибор предназначен для домашнего использования, или для использования в некоммерческой, бытовой среде. ¡...
Page 80 - Краткий обзор; Перед первым; Общие сведения
76 ru Краткий обзор Рисунки A-E 1 Сетевой выключатель (вкл/выкл) auto off 2 Клавиша крепости кофе â 3 Клавиша подачи E 4 Клавиша подачи F 5 Клавиша h (нагрев пара) 6 Поворотный регулятор g / h ( горячая вода / пар) 7 Светодиодные индикаторы a залейте воду H b опорожните поддоны I c проведите сервисн...
Page 81 - Элементы управления
77 ru Заполнение системы При первом включении необходимо заполнить водой трубопроводную систему внутри прибора. ● Подставьте чашку под насадку 8 . ● Установите поворотный регулятор 6 в положение g / h ; в чашку выливается немного воды. Как только J начнет мигать, верните поворотный регулятор 6 в пол...
Page 82 - Настройки и визуальная; Установка жесткости воды
78 ru 6 Поворотный регулятор подачи горячей воды/пара При установке поворотного регулятора в положение подачи горячей воды g или пара h производится, соответственно, подача воды или пара. Для подачи пара помимо этого требуется предварительно нажать клавишу нагрева пара h (см. раздел «Пар для вспенив...
Page 86 - Опасность ошпаривания; Уход и ежедневная; Опасность поражения электриче
82 ru ¡ Опасность ошпаривания После установки регулятора 6 в положе - ние g / h возможно образование брызг. Выходящий из насадки 8 пар очень горя - чий, он может вызвать разбрызгивание жидкостей. Не прикасайтесь к насадке 8 и не направляйте ее на людей. ● Завершите процесс возвратом регулятора 6 в п...
Page 88 - перед; Защита от замерзания
84 ru Светится светодиодный индикатор I . ● Опорожните поддон 17 и установите его на прежнее место. Светится светодиодный индикатор h . ● Опорожните емкость для воды 11 , почи - стите ее, заполните водой до отметки «max» и снова установите на место. ● Поставьте под насадку 8 достаточно большой сосуд...
Page 90 - Самостоятельное устранение
86 ru Неисправность Причина Устранение Невозможна подача горя - чей воды или пара. Засорилась насадка 8 . Прочистите насадку 8 . Слишком мало пены, или пена слишком жидкая. Неправильное положение втулки b на насадке 8 . Сдвиньте втулку b на насадке 8 вниз . Неподходящее молоко. Используйте холодное ...
Page 91 - Avvertenze di sicurezza; personale di negozi, uffi ci, aziende agricole o artigianali,; fornite sulla targhetta. Al fi ne di evitare rischi, le riparazioni
87 it Avvertenze di sicurezza Leggere, osservare e conservare le istruzioni con cura! Se l’apparecchio viene ceduto, allegare anche le presenti istruzioni. Questo apparecchio e destinato alla lavorazione di quantità adeguate all’utilizzo domestico, e in generale per usi domestici e non professionali...
Page 92 - Pericolo di soffocamento!; tubo del getto può schizzare.
88 it Non immergere mai l’apparecchio o il cavo di alimentazione in acqua. Utilizzare solo se il cavo e l’apparecchio non presentano danni. In caso di errore, estrarre immediatamente la spina dalla presa di corrente o disinserire la tensione di rete. ¡ Pericolo di soffocamento! Non lasciare che i ba...
Page 94 - Elementi di comando
90 it Elementi di comando 1 Interruttore di rete auto off Con l’interruttore di rete auto off viene atti- vata o disattivata l’erogazione di corrente. Dopo avere accesso l’interruttore di rete l’apparecchio riscalda, esegue il risciacquo ed è pronto per l’uso, entrambi i LED dei tasti di erogazione ...
Page 95 - Regolazione della durezza dell’acqua
91 it Impostazioni e segnalazione ottica Regolazione della durezza dell’acqua La corretta impostazione della durezza dell’acqua è importante affinché l’apparec - chio possa segnalare nei tempi corretti il momento in cui è necessaria la decalcifi - cazione. La durezza dell’acqua impostata all’origine...
Page 96 - Preparazione con; dalla
92 it Spegnimento automatico auto off Il tempo di spegnimento automatico preimpostato di ca. 10 minuti può essere modificato. ● Per fare ciò tenere premuti contemporane - amente il tasto di erogazione 3 E e il tasto 5 h per almeno 5 secondi. I LED 7a , b , c e d ( H , I , S , J ) si accendono ad ind...
Page 97 - Preparazione dell’acqua
93 it Modifica permanente della quantità di caffè Le quantità preimpostate per il tasto di ero- gazione 3 E (ca. 40ml) e per il tasto di ero- gazione 4 F (ca. 125 ml) possono essere modificate. ● Tenere premuto il tasto 3 E o 4 F fino a quando è scesa la quantità desiderata di caffè (a scelta da cir...
Page 98 - Cura e pulizia quotidiana
94 it Vapore per il riscaldamento di bibite. ¡ Pericolo di ustioni Il tubo del getto si riscalda molto. Afferrare solo la parte in resina. L’apparecchio deve essere pronto per l’uso. ● Spingere il tubo del getto 8 verso l’ alto . ● premere il tasto h . Il LED del tasto inizia a lampeggiare. i L’appa...
Page 99 - processo combinato; Decalcificanti specifici (codice di ordi
95 it ● Spegnere l’apparecchio con l’interruttore di rete 1 auto off . ● Aprire lo sportello 21 dell’unità di bollitura 22 . ● Tenere premuto il pulsante rosso 22a e ruotare verso l’alto la maniglia 22b fino a quando si incastra. ● Estrarre l’unità di bollitura 22 afferrando delicatamente la manigli...
Page 102 - Se non è possibile risolvere un problema, chiamare l’assistenza!; Soluzione di piccoli guasti
98 it Guasto Causa Rimedio Impossibile prelevare acqua calda o vapore. Il tubo di getto 8 è otturato. Pulire il tubo di getto 8 . Schiuma troppo scarsa o schiuma troppo liquida. Il tubo b sul tubo di erogazione 8 non è inserito in posizione corretta. Spingere verso il basso il tubo b sul tubo di ero...
Page 103 - Zasady bezpieczeństwa; dla pracowników w sklepach, biurach, gospodarstwach rolnych
99 pl Zasady bezpieczeństwa Należy dokładnie przeczytać instrukcję obsługi, przestrzegać jej i zachować ją! Przekazując urządzenie innej osobie należy dołączyć niniejszą instrukcję. To urządzenie jest przeznaczone do przygotowywania małych ilości produktu na użytek domowy, w warunkach zbliżonych do ...
Page 104 - Niebezpieczeństwo odniesienia obrażeń!
100 pl Dzieciom powyżej 8 lat oraz osobom o zredukowanych zdolnościach fi zycznych, sensorycznych i umysłowych lub nieposiadającym odpowiedniego doświadczenia i/lub wiedzy wolno używać urządzenia tylko pod warunkiem, że znajdują się pod opieką innych osób lub zostały poinstruowane w zakresie bezpiec...
Page 105 - Krótka informacja; Przed pierwszym użyciem; Informacje ogólne
101 pl Krótka informacja Rysunki A-E 1 Przełącznik sieciowy (WŁ/WYŁ) auto off 2 Przycisk intensywność kawy â 3 Przycisk pobierania E 4 Przycisk pobierania F 5 Przycisk h (przygotowywanie pary) 6 Pokrętło regulacji g / h (gorąca woda / para) 7 Wskaźnik diodowy LED a napełnianie wodą H b opróżnianie p...
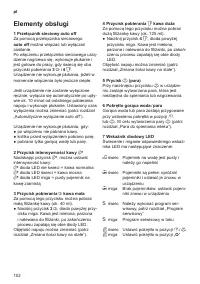
Page 106 - Elementy obsługi
102 pl Elementy obsługi 1 Przełącznik sieciowy auto off Za pomocą przełącznika sieciowego auto off można włączać lub wyłączać zasilanie. Po włączeniu przełącznika sieciowego urzą - dzenie nagrzewa się, wykonuje płukanie i jest gotowe do pracy, gdy świecą się oba przyciski pobierania 3 E i 4 F . Urzą...
Page 107 - Ustawianie stopnia zmielenia
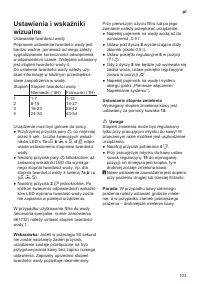
103 pl Ustawienia i wskaźniki wizualne Ustawianie twardości wody Poprawne ustawienie twardości wody jest bardzo ważne, ponieważ od niego zależy sygnalizowanie konieczności odwapnienia w odpowiednim czasie. Wstępnie ustawiony jest stopień twardości wody 4. Do ustalenia twardości wody należy uzy - ska...
Page 108 - Przygotowywanie kawy; od zakończenia
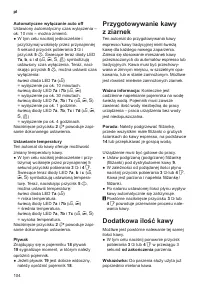
104 pl Automatyczne wyłączanie auto off Ustawiony automatyczny czas wyłączenia – ok. 10 min – można zmienić. ● W tym celu naciśnij jednocześnie i przytrzymaj wciśnięty przez przynajmniej 5 sekund przycisk pobierania 3 E i przycisk 5 h . Świecące teraz diody LED 7a , b , c i d ( H , I , S , J ) symbo...
Page 110 - Niebezpieczeństwo poparzenia!; Konserwacja i utrzymanie; Niebezpieczeństwo porażenia
106 pl Para do przygotowywania napojów ¡ Niebezpieczeństwo poparzenia! Dysza jest bardzo gorąca, dlatego dotykać można tylko jej plastykowego uchwytu. Urządzenie musi być gotowe do pracy. ● Przesuń tuleję na dyszy 8 w górę . ● Naciśnij przycisk h . Wskaźnik LED przycisku zaczyna migać. i Urządzenie ...
Page 111 - kombinowany proces; Specjalnie przygotowany środek odwap
107 pl Czyszczenie jednostki zaparzania Jednostka zaparzania może być wyjmo - wana w celu jej czyszczenia (rysunek E ). ● Wyłącz urządzenie przełącznikiem sieciowym 1 auto off . ● Otwórz drzwiczki 21 do jednostki zaparzania 22 . ● Przytrzymując czerwony przycisk 22а obróć uchwyt 22b w górę do słysza...
Page 112 - albo
108 pl Wskaźnik LED S zaczyna migać, a urzą - dzenie wykonuje 2krotne płukanie poprzez dystrybutor kawy. ● Opróżnij pojemnik 17 i ustaw go znowu w urządzeniu. Świecą diody LED przycisku h i H „ napełnianie wodą”. ● Włóż do dozownika 13 jedną tabletkę czyszczącą. ● Napełnij pojemnik na wodę letnią w...
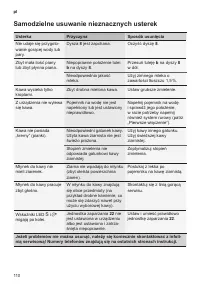
Page 114 - Samodzielne usuwanie nieznacznych usterek; Usterka
110 pl Samodzielne usuwanie nieznacznych usterek Usterka Przyczyna Sposób usunięcia Nie udaje się przygoto - wanie gorącej wody lub pary. Dysza 8 jest zapchana. Oczyść dyszę 8 . Zbyt mała ilość piany lub zbyt płynna piana. Niepoprawne położenie tulei b na dyszy 8 . Przesuń tuleję b na dyszy 8 w dół....
Page 118 - Garantiebedingungen; Siemens Info Line
www.siemens-home.com AE 04 803 0501 AL 066 206 47 94 AT 0810 700 400 AU 1300 368 339 BA 033 213 513 BE 070 222 142 BG 02 931 50 62 CH 043 455 4095 Lankapuhelimesta 8,28 snt/puhelu + 7 snt/min (alv 24%) Call rates depend on the network used Matkapuhelimesta 8,28 snt/puhelu + 17 snt/min (alv 24%) Çağr...