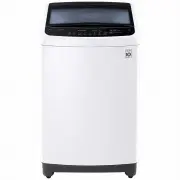
Page 3 - TABLE OF CONTENTS
TABLE OF CONTENTS This manual may contain images or content that may be different from the model you purchased.This manual is subject to revision by the manufacturer. SAFETY INSTRUCTIONS ......................................................... 4 READ ALL INSTRUCTIONS BEFORE USE .......................
Page 4 - SAFETY INSTRUCTIONS; READ ALL INSTRUCTIONS BEFORE USE; Safety Messages; WARNING; WARNING
4 SAFETY INSTRUCTIONS EN SAFETY INSTRUCTIONS READ ALL INSTRUCTIONS BEFORE USE The following safety guidelines are intended to prevent unforeseen risks or damage from unsafe or incorrect operation of the appliance. The guidelines are separated into ‘WARNING’ and ‘CAUTION’ as described below. Safety M...
Page 5 - Installation
5 SAFETY INSTRUCTIONS EN • Children should be supervised to ensure that they do not play with the appliance. • If the power cord is damaged, it must be replaced by the manufacturer, its service agent or similarly qualified persons in order to avoid a hazard. • Use a new hose or hose-set supplied wit...
Page 6 - Operation
6 SAFETY INSTRUCTIONS EN • Do not plug the appliance into multiple outlet sockets, power boards, or an extension power cable. • Do not modify the power plug provided with the appliance. If it does not fit the power outlet, have a proper outlet installed by a qualified electrician. • This appliance m...
Page 8 - Maintenance
8 SAFETY INSTRUCTIONS EN • If, during spinning, opening the door does not stop the drum within about 10 seconds, immediately discontinue operating the appliance and contact your dealer or LG Electronics service centre. • When the air temperature is high and the water temperature is low, condensation...
Page 9 - • Dispose of all packaging materials (such as plastic bags and
9 SAFETY INSTRUCTIONS EN • Dispose of all packaging materials (such as plastic bags and styrofoam) away from children. The packaging materials can cause suffocation. • Remove the door before disposing of or discarding this appliance to avoid the danger of children or small animals getting trapped in...
Page 10 - INSTALLATION; Parts and Specifications; NOTE; Front View
10 INSTALLATION EN INSTALLATION Parts and Specifications NOTE • Appearance and specifications may change without notice to improve the quality of the appliance. Front View * This feature is only available on some models. a Door b Tempered Glass c Detergent Dispenser Drawer d Fabric Softener Dispense...
Page 12 - Installation Location; Ventilation
12 INSTALLATION EN Installation Place Requirements Before installing the appliance, check the following information in order to install the appliance in a correct place. Installation Location • Install the appliance on a flat floor of hard material that is strong enough to support a fully loaded app...
Page 14 - Installing the Drain Hose; Installing the Drain Hose with; Levelling the Appliance; Checking the Level
14 INSTALLATION EN guide plate before inserting the tap into the adaptor. Installing the Drain Hose Before connecting the drain hose, check your drain hose model and choose the correct instruction. Installing the Drain Hose with the Elbow Bracket The drain hose must not be placed higher than 120 cm ...
Page 15 - OPERATION; Operation Overview; Using the Appliance; Preparing Laundry; Sorting the Clothes
15 OPERATION EN OPERATION Operation Overview Using the Appliance Before the first wash, select the Cotton Wash programme and add a half amount of detergent. Start the appliance without laundry.• This will remove residue and water from the drum that may have been left during manufacturing. 1 Sort lau...
Page 16 - Checking the Fabric Care Label; Checking the Laundry before; CAUTION
16 OPERATION EN Checking the Fabric Care Label This will tell you about the fabric content of your clothes and how it should be washed. Symbols on the Care Labels NOTE • The dashes under the symbol give you information about the type of fabric and the maximum allowance of mechanical stress. Checking...
Page 17 - Softeners and Bleaches; Detergent Dosage; Adding Detergents
17 OPERATION EN Adding Detergents, Softeners and Bleaches Detergent Dosage • Detergent should be selected according to fabric type, colour, soil level and washing temperature and should be used according to the detergent manufacturer’s instructions. • Too much detergent results in excessive suds whi...
Page 18 - Adding Fabric Softeners; Adding Liquid Bleaches
18 OPERATION EN Adding Fabric Softeners • Softener should be used according to the softener manufacturer’s instructions. • Pour the measured amount of fabric softener directly into the softener dispenser a . • If the softener is concentrated, then it should be diluted. • Do not leave the fabric soft...
Page 19 - Control Panel; Control Panel Features
19 OPERATION EN Control Panel Control Panel Features For Non-Vapour Mode Models a POWER Button • Press the POWER button to turn on or off the appliance. • The appliance automatically turns off once a certain time has passed after the wash has completed. b START/PAUSE Button • Press the START/PAUSE b...
Page 21 - Programme; Duvet; Silent
21 OPERATION EN Programme Wash programmes are designed for the best wash performance for different types of clothes.• Press the Program button to select the desired programme. • When you select a wash programme, the light for the corresponding wash programme will turn on. Cotton Wash Use this progra...
Page 22 - Quick Wash; Eco Cotton; Information for Energy Test; Tub Clean; Extra Options and; Soil Level
22 OPERATION EN • This programme has a longer washing time than the Cotton Wash programme. • To reduce noise in spinning, this programme uses a slow spin to prevent the clothes from being damaged, so the laundry has more moisture than normal. Pre Wash+Cotton Use this programme to pretreat immediate ...
Page 25 - Manual Washing
25 OPERATION EN Manual Washing When you need a rinse and spin, spin only, rinse only or wash only cycle, these can be set manually. NOTE • When you set a washing cycle manually such as rinse only, wash only or wash and rinse, the water will not be drained out after the wash is completed. If you wish...
Page 26 - SMART FUNCTIONS; Using Smart Diagnosis; Smart Diagnosis Through the
26 SMART FUNCTIONS EN SMART FUNCTIONS Using Smart Diagnosis Smart Diagnosis Through the Customer Information Centre Use this function if you need an accurate diagnosis by an LG Electronics customer information centre when the appliance malfunctions or fails. Use this function only to contact the ser...
Page 27 - MAINTENANCE; What to Clean; Cleaning the Exterior; Cleaning the Appliance
27 MAINTENANCE EN MAINTENANCE WARNING • Unplug the appliance before cleaning to avoid the risk of electric shock. Failure to follow this warning may result in serious injury, fire, electric shock, or death. • Never use harsh chemicals, abrasive cleaners, or solvents to clean the appliance. They may ...
Page 28 - Cleaning the Water Inlet Filter; Cleaning the Lint Filter
28 MAINTENANCE EN 7 After the cycle is complete, leave the door open in order to allow the appliance door opening, flexible gasket and door glass to dry. WARNING • Leave the door open to dry the drum interior but only if it is safe and any children are supervised. NOTE • Do not add any detergent to ...
Page 29 - Cleaning the Drain Pump Filter
29 MAINTENANCE EN 1 Push down on the release tabs on both sides of the filter cover and pull forward. 2 Open the lid and remove the lint. 3 Wash the filter. 4 Close the lid and then insert the lower part of the filter into the wash drum. Press the top of the filter until you hear a click sound. Clea...
Page 30 - Caution on Freezing During
30 MAINTENANCE EN 7 Insert the filter along the guide ribs inside the pump casing and turn the cap clockwise to refit the cap.• Securely turn the cap clockwise until it is tight. 8 Turn on the power and check for leaks before repositioning the appliance. CAUTION • Be careful when draining, as any re...
Page 31 - TROUBLESHOOTING; Before Calling for Service; Error Messages
31 TROUBLESHOOTING EN TROUBLESHOOTING Before Calling for Service Operation of the appliance can lead to errors and malfunctions. The following tables contain possible causes and notes for resolving an error message or malfunction. You can remedy most of the problems by yourself, consequently save ti...
Page 33 - Noises
33 TROUBLESHOOTING EN Noises E3 CLOTHES SENSING ERROR Sensor for clothes-sensing is defective. • Manually redistribute the laundry if laundry have become tangled. Motor’s revolution is too low.Contact-point of Connector is defective. • Unplug the appliance and wait 60 seconds. Reconnect power and tr...
Page 36 - Performance
36 TROUBLESHOOTING EN Performance Appliance is not filling properly. Filter is clogged. • Make sure the inlet filters on the fill valves are not clogged. Supply hoses may be kinked. • Check that supply hoses are not kinked or clogged. Insufficient water supply. • Make sure that both hot and cold wat...
Page 38 - Memo