Page 3 - TABLE OF CONTENTS
TABLE OF CONTENTS This manual may contain images or content different from the model you purchased.This manual is subject to revision by the manufacturer. SAFETY INSTRUCTIONS .......................................................4 IMPORTANT SAFETY INSTRUCTIONS .........................................
Page 4 - SAFETY INSTRUCTIONS; The following safety guidelines are intended to prevent; Children in the Household; This appliance is not intended for use by persons (including
4 SAFETY INSTRUCTIONS The following safety guidelines are intended to prevent unforeseen risks or damage from unsafe or incorrect operation of the appliance. The guidelines are separated into ‘WARNING’ and ‘CAUTION’ as described below. This symbol is displayed to indicate matters and operations that...
Page 5 - Installation
5 EN Installation • Never attempt to operate the appliance if it is damaged, malfunctioning, partially disassembled, or has missing or broken parts, including a damaged cord or plug. • This appliance should only be transported by two or more people holding the appliance securely. • Tighten the drain...
Page 6 - Operation
6 EN • Improper connection of the equipment-grounding conductor can result in risk of electric shock. Check with a qualified electrician or service personnel if you are in doubt as to whether the appliance is properly grounded. • Do not modify the power cord provided with the appliance. Operation • ...
Page 8 - Maintenance
8 EN • Do not use a plug socket and wiring equipment for more than their rated capacity. • When the air temperature is high and the water temperature is low, condensation may occur and thus wet the floor. • Wipe off dirt or dust on the contacts of the power plug. • Under certain conditions hydrogen ...
Page 10 - INSTALLATION; Parts
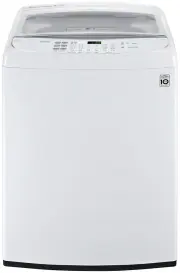
10 INSTALLATION Parts Door Tempered Glass Dispenser Drawer Bleach Dispenser Drum Leveling Feet Drain hose Water Supply Hose 1 2 3 4 5 6 7 8 Accessories or or or 2 water supply hoses (Hot + Cold) Drain hose Anti-rat cover (some countries only) Screw for Anti-rat cover (some countries only) Tie strap ...
Page 11 - Specifications
11 EN Specifications Model WTG1032VFWTG1030SF WTG1032WF Power Supply 220 - 240 V~, 50 Hz Rate Input 700 W Size 686 mm (W) x 721 mm (D) x 1026 mm (H) Product Weight 63.5 kg Degree of Protection IPX4 Allowable water pressure 30 - 600 kPa Country of Origin MADE IN THAILAND Max. capacity 10.0 kg • Appea...
Page 12 - Connecting the Supply Hose
12 EN Installation Place Requirements Location 10 cm 2 cm 2 cm Level floor : Allowable slope under the entire appliance is 1°. Power outlet : Must be within 1.5 meters of either side of the location of the appliance. • Do not overload the outlet with more than one appliance. Additional Clearance : F...
Page 13 - Checking the Rubber Seal on the
13 EN Connecting the Supply Hose • Before connecting the water supply hose to the water tap, check the hose type and then choose the correct instruction. • The water supply hose supplied may vary from country to country. Make sure to connect the blue supply hose to the COLD water tap, and the orange...
Page 15 - Connecting Hose to Appliance; Installing the Drain Hose; Pump Model (Australia and other
15 EN Connecting Hose to Appliance Attach the hot water line to the hot water inlet on the back of the washing machine. Attach the cold water line to the cold water inlet on the back of the washing machine. NOTE • After completing connection, if water leaks from the hose, repeat the same steps. Use ...
Page 17 - Leveling the Appliance; Assembling the Anti-Rat
17 EN Leveling the Appliance If the floor is uneven, turn the adjustable feet as required (Do not insert pieces of wood etc. under the feet). Make sure that all four feet are stable and resting on the floor and then check that the appliance is perfectly level. Diagonal Check • When pushing down the ...
Page 18 - OPERATION; Using the Appliance
18 OPERATION EN Using the Appliance Before the first wash, select a washing programme (Cotton Wash, add a half load of detergent), allow the washing machine to wash without clothing. This will remove residue and water from the drum that may have been left during manufacturing. 1 Sort laundry and loa...
Page 19 - Sorting Laundry
19 EN Sorting Laundry 1 Look for the care label on your clothes. • This will tell you about the fabric content of your garment and how it should be washed. • Symbols on the care labels. [Wash temperature] [Normal machine wash] [Permanent press] [Delicate] [Hand wash] [Do not wash] 2 Sorting laundry....
Page 20 - Adding Cleaning Products; Detergent Dosage; Adding Detergent
20 EN Adding Cleaning Products Detergent Dosage • Detergent should be used according to the instruction of the detergent manufacturer and selected according to type, colour, soiling of the fabric and washing temperature. • If too much detergent is used, too many suds can occur and this will result i...
Page 21 - Adding Fabric Softener; Adding Liquid Bleach
21 EN Adding Fabric Softener • Do not exceed the maximum fill line. Overfilling can cause early dispensing of the fabric softener, which may stain clothes. Close the dispenser drawer slowly. If the softener consistency is thick, then it should be diluted. • Do not leave the fabric softener in the de...
Page 22 - Control Panel
22 EN Control Panel 5 4 1 2 3 Power Button • Press the Power button to turn the washing machine on, or off if washing hasn't commenced. • The power goes off automatically about 30 seconds after the wash is finished. Start/Pause Button • Press the Start/Pause button to start the wash cycle or pause t...
Page 23 - Washing Programme; Cotton Wash; Quick Wash
23 EN Washing Programme Wash cycles are designed for the best wash performance for each type of load. Select the programme that best matches the load contents for maximum wash performance and fabric care. Press the Program button to select the desired programme. When you select a wash programme, the...
Page 24 - Delicates; Towels; Quiet Wash
24 EN Delicates Use this programme to wash delicate fabrics such as lingerie and woolens. Before washing, check the care label for the washing instructions. • This programme uses a slow spin to extract water from laundry, so the laundry has more moisture than normal. • Only cold water will be used f...
Page 25 - Option Programme; Water Level
25 EN Option Programme Water Level • Press the Water Level button to adjust water level. This may be required to avoid linting and unbalanced errors when the load is bulky but lightweight. • It can be changed during operation. • This machine detects the quantity of laundry automatically, then sets W...
Page 26 - Time Delay; Intensive Wash
26 EN Time Delay • You can set a time delay so that the washing machine will start automatically and finish after a specified time interval. 1 Press the Power button. 2 Select a washing programme. 3 Press the Time Delay button to set the required Delay ending time. 4 Press the Start/Pause button. NO...
Page 27 - Manual Washing
27 EN Manual Washing When you need a Rinse/Spin, Spin, Rinse, or Wash cycle only, these can be set manually. Rinse, Spin Spin only Rinse only Wash only 1 or Press the Power button. 2 Press the Rinse button. Press the Spin button. Press the Rinse button. Press the Wash button. 3 Rinse and Spin are au...
Page 28 - Special Functions; Child Lock
28 EN Special Functions Child Lock Use this option to disable the controls. This feature can prevent children from changing programmes or operating the appliance. Locking the Control Panel 1 Press and hold the Rinse and Hot Wash button for 3 seconds. 2 ' ' and the remaining time are alternatively sh...
Page 29 - SMART FUNCTIONS; Using LG SmartThinQ; Things to check before using LG
29 SMART FUNCTIONS EN Using LG SmartThinQ Application Things to check before using LG SmartThinQ • For appliances with the or logo 1 Check the distance between the appliance and the wireless router (Wi-Fi network). • If the distance between the appliance and the wireless router is too far, the signa...
Page 30 - Installing LG SmartThinQ
30 EN Installing LG SmartThinQ Search for the LG SmartThinQ application from the Google Play Store or Apple App Store on a smart phone. Follow instructions to download and install the application. NOTE • If you choose the simple login to access the LG SmartThinQ application, you must go through the ...
Page 31 - Using the Washer Remotely; Smart DiagnosisTM Using a Smart
31 EN Using the Washer Remotely Remote Start Use a smart phone to control your appliance remotely. You can also monitor your cycle operation so you know how much time is left in the cycle. To Use Remote Start: 1 Press the Power button. 2 Put the laundry into the drum. 3 Press and hold Remote Start b...
Page 32 - Using Smart DiagnosisTM; Smart DiagnosisTM Through the
32 EN Using Smart Diagnosis™ Smart Diagnosis™ Through the Customer Information Centre Use this function if you need an accurate diagnosis by an LG Electronics customer information centre when the appliance malfunctions or fails. Use this function only to contact the service representative, not durin...
Page 33 - MAINTENANCE; Cleaning Your Washing; Care After Wash; Quick Tub Clean (some models
33 MAINTENANCE EN WARNING • Unplug the washing machine before cleaning to avoid the risk of electric shock. Failure to follow this warning may result in serious injury, fire, electric shock, or death. • Never use harsh chemicals, abrasive cleaners, or solvents to clean the washing machine. They may ...
Page 35 - How to Keep the Product from; How to Handle Freezing
35 EN Caution on Freezing During Winter • When frozen, the product does not operate normally. Make sure to install the product where it will not freeze during winter. • In case the product must be installed outside on a porch or in other outdoor conditions, make sure to check the following. How to K...
Page 36 - TROUBLESHOOTING; Diagnosing Problems
36 TROUBLESHOOTING EN The appliance is equipped with an automatic error-monitoring system to detect and diagnose problems at an early stage. If the appliance does not function properly or does not function at all, check the following before you call for service: Diagnosing Problems Symptoms Reason S...
Page 41 - Error Messages
41 EN Error Messages Symptoms Reason Solution The door is not closed properly. • Close the door completely. If the error code is not released, call for service. Door lock switch error. • Check nothing is caught under the door, including shipping materials or lothing. • Close the door completely. If ...
Page 43 - Memo