Fanimation TW40WH - User Manual
Fanimation TW40WH Remote Control – User Manual, read for free online in PDF format. We hope this helps you resolve any issues you may have. If you have further questions, please contact us through the contact form.


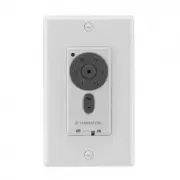
TW40 Wall Control
SPECIFICATION and INSTRUCTION SHEET
FAN MODEL USED:
See Catalog or visit our website
www.fanimation.com
for more
information
How to Wire and Operate Your TW40 Wall Control
DESCRIPTION:
One DC Motor Ceiling Fan and Light, 6 Speed, Reversing Remote Control
3.
To make fan operational, remove the top panel then install
23A/12V battery (included) in wall control, with fan power off.
Then follow the remote code setting process. (If not used for
long periods of time, remove battery to prevent damage to
transmitter). Store the remote away from excessive heat or
humidly (Figure 3).
NOTE: If fan or supply wires are different colors than indicated,
have this unit installed by a qualified electrician.
WARNING
To avoid possible electrical shock, be sure electricity is
turned off at the main fuse box before wiring.
NOTE: If you are not sure if the outlet box is grounded,
contact a licensed electrician for advise, as it must be
grounded for safe operation.
BARE
WARNING
Check to see that all connections are tight, including ground,
and that no bare wire is visible at the wire connectors,
except for the ground wire. Do not operate fan until the
blades is in place. Noise and fan damage could result.
Figure 3
AC120V 60HZ
INPUT
WHITE (AC IN N)
AC SUPPLY
BLACK (AC IN L)
BLACK
BLACK
WHITE
NE
E
R
G
L
O
RT
N
O
C
LL
A
W
BLACK (TO MOTOR L)
K
C
AL
B
K
C
AL
B
)L
NI
C
A(
K
C
AL
B
E
RI
W
D
N
U
O
R
G
Figure 1
Figure 2
1. Installing Wall Control
(Figure 1):
• With electrical power still disconnected, remove the
existing wall plate and switch.
• Make wiring connections with wire nuts as shown in
Figure 1.
– One black wire from wall control unit to black
(TO MOTOR L).
– One black wire from wall control unit to black wire
leading to ceiling outlet box.
– One green wire from wall control unit to ground wire
leading to ceiling outlet box.
• Attach wall control unit to outlet box using the two
#6-32-19mm screws provided. (Figure 2)
• Restore electrical power.
• Attach wall plate to the switch control and using the two
#6-32-9mm screws provided.
NOTE:
If you want to change the blades: turn
the off→ change the blades →turn the power
on →replay the power setting process.
4.
Remote Control Setting and Speed (RPM) Setting
Process :
1. When powering on your fan, do not press any button(s)
before pressing the “SET” button, otherwise it will fail the
learn procedure. If you press a button before the “Set”
button, please turn the power off then on again, and start
the process again.
2. After installing the unit and restoring power to your fan,
press and hold the “SET” button 1~5 seconds. You must
press the “SET” button within 60 seconds of restoring
power to the fan.
3. The fan will start to run and begin the control setting
process.
4. DO NOT press any button(s) after pressing the SET
button and while the fan is programming or it will fail to
program. The fan will run in both directions for a total of
approximately 5 minutes.
5. When the fan stops after approximately 5 minutes the
control and speed setting process is complete.
"Loading the manual" means you need to wait until the file loads and becomes available for online reading. Some manuals are very large, and the time they take to appear depends on your internet speed.